Polyurethane foam is important when foaming seams, cracks, holes, thermal insulation, as well as when sealing various surfaces. Foam is not used with surfaces made of polypropylene and polyethylene. In order to understand how to use polyurethane foam, you need to know several rules.
There is a wide range of options available for purchase now!
Polyurethane foam falls from the ceiling, how to foam the seams between the floor slabs so that the foam does not fall?
There are quite a few options, but you need proper preparation in the beginning.
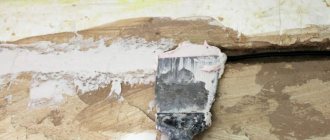
We remove the remaining mortar from those same seams.
Next, you need to turn on the vacuum cleaner and thoroughly remove dust from the seams.
Then, to choose from, we either moisten the surface (seams) with water from a spray bottle, but be careful, you need to moisten it, but so that there are no “hanging” drops, or prime the seam with a brush (it is better to moisten it with water).
If necessary, the seam can be degreased (until moistened).
Next, in order for the polyurethane foam to come out of the cylinder with constant pressure, the cylinder must be held upside down relative to the ceiling.
This is not always convenient, even if you use professional mounting foam with a “gun”.
I usually extend either the adapter tube or the length of the “nose” of the gun using a PVC tube like this
(or you can use heat shrink tubing of the required length).
Then we shake the foam container and begin to blow it into the seam.
Try not to immediately fill the entire seam to its full depth and width; fill it half, or even a third, the foam increases in volume after drying.
The foam is applied with smooth movements, that is, do not “stagnate” for a long time on one place, move the balloon evenly along the seam.
The tip of the tube or gun must always be inside the foam when foaming; periodically clean the tip with a rag + solvent.
If this doesn’t work and foam continues to fall from the ceiling, then there is a more drastic method.
After the preparatory work, seal the seam with masking tape.
We make holes in the tape and fill the seam with foam through these holes, removing the tape a little later.
If the seam is very wide, then you can divide it into 2 parts, for example, with a strip of fiberboard or plywood, and first foam one side of the seam, then the other, but at the beginning, that very strip must be held in place to fix it with foam.
You can foam in small areas and immediately glue strips of masking tape.
The option with adhesive tape works, but once you achieve a certain skill (get the hang of it), it is not needed; if the seam is filled correctly and the foam is properly prepared, the foam should not fall from the ceiling.
It is better to work with protective glasses and gloves.
Checking quality is worth your time and money!
Your foam should be flexible and adhere well to the surface. The fact that after shrinking and completely frozen, it will not crumble will also speak about its quality. Do not add additional work to yourself - you cannot touch or process the polyurethane foam before it has completely hardened, so as not to change the structure of the material itself and not to interfere with the polymerization process.
If the material meets existing standards, then you will be satisfied with the quality. This means that you won’t need to redo the work done. Just keep in mind that different manufacturers offer cans with different foam output volumes. Sometimes it is cheaper to buy an expensive can of aerosol that will cover all your joints than to buy two cheaper ones.
foam with polyurethane foam and seal around the pipe
The formation of a defect in a concrete ceiling is not uncommon in apartments and private houses. A large crack may appear at the junction with the wall, or a hole may form after repairing heating pipes. Sometimes the neighbors above pour so much water that the plaster and cement from the concrete floor slabs fall off. Let's look at how to repair a hole in a concrete ceiling, what you will need to carry out the work, and how to do it yourself.
Technique for sealing holes in concrete ceilings
To eliminate defects, various compositions and materials are used. First, the type of violation, its area and location are determined. After this, the material for embedding is selected.
Advice! Mixtures based on various components and polyurethane foam are useful for repairs. Finishing putties are needed to level the surface; they are not suitable as a mixture for sealing deep defects.
What to seal:
- Gypsum mixtures. They are distinguished by their plasticity and are well suited for work that requires laying out a thick layer. If the question is how to fix a large hole in the ceiling in the hall, plaster is perfect. In the bathroom or kitchen, a different composition should be used - gypsum is afraid of moisture.
- Cement mortar. Suitable for eliminating defects indoors and outdoors. The durable composition resists moisture, but the pot life is short. The work must be carried out quickly; after sealing, the defect area must be puttied.
- A mixture based on acrylic components. A universal composition for finishing sealing; it does not fill deep cavities. Acrylic putty is applied with a thickness of no more than 0.5 cm, suitable for filling cracks in joints. It is not afraid of moisture and does not crack over time.
- Polyurethane foam is an option for sealing through holes. One-component mixtures are used - they are sold ready-made, two-component mixtures - they must be mixed. When applied, the foam expands to fill the hole and cure firmly. After finishing, you just need to cut off the excess, then sand the repair area.
- Repair composition. Used to seal cracks of any size. It is good to use the mixture when plaster has fallen off. The substance is plastic, tolerates temperature fluctuations and retains its characteristics in the cold.
On a note! Repair mixtures are sold including antiseptic components. Such compositions are convenient to use in kitchens, bathrooms – rooms with high humidity.
Tools are selected according to the type of defect and materials used. If you need to cover up a gap, spatulas will suffice; for deep or through holes, screwdrivers and a hammer will be useful.
The standard master's kit includes the following devices:
- repair composition, foam or putty;
- set of spatulas;
- screwdriver;
- hammer;
- perforator;
- roller;
- deep penetration primer;
- silicone sealant;
- vacuum cleaner;
- sandpaper;
- primer;
- knife;
- sickle tape;
- brush;
- finishing putty for leveling.
Personal protective equipment and a stepladder will also not be superfluous.
Advice! The Betonokontakt mixture is suitable for working with concrete - a universal deep penetration impregnation. It is better to treat surfaces with Concrete Contact with antiseptic components.
Now let's look at what to do if a hole has formed in the ceiling, a large gap or a network of deep cracks.
Recommended reading:
At the junction of ceiling and wall
The plaster composition often dries out, falls out and leads to the formation of a deep gap at the joint.
What to do:
- Use a screwdriver or knife to widen the gap to 10 mm. It is good to remove any remaining debris with a brush or vacuum cleaner.
- Prime the gap with a flat surface. Dry.
- Dilute thick gypsum putty, apply with a spatula, fill the entire depth of the crack.
- Cut off the serpyanka, press the tape into the wet solution so that the middle of the tape lies exactly along the joint. Make a right angle between the planes of the wall and the ceiling, align the serpyanka at a right angle.
- Place a thin layer of putty on top of the tape. Flatten.
Wait for the composition to dry, sand the repair area, and cover with decor.
Falling plaster
This is a large repair area that needs preparation and finishing touches.
The operating algorithm is as follows:
- clean the local defect area;
- clean the area so that the boundaries extend 10 cm onto the durable layer of plaster;
- if mold or mildew is visible, clean it with a stiff brush;
- treat the area with a primer in 2 layers, first dry the first layer, then apply the second;
- apply a primer into the hole and next to it to strengthen the materials and prevent cracking;
- putty the hole and the defect area in several layers, dry each layer before applying the next.
It is better to treat dried layers with Concrete Contact to ensure strong adhesion of the mixture.
Advice! If you don’t have an antiseptic on hand to treat the mold area, you can replace it with bleach or bleach.
After repairing the defect, sand the area, prime it and decorate it.
Recommended reading:
Cracks at panel joints
Let's look at how to cover up a hole in the ceiling that has formed in the interpanel joints:
- Knock down the entire seal with a hammer and spatula. Break up the cement pieces and remove them in parts.
- Clean the gap from debris, remove dust and prime. Apply the primer generously to saturate the slabs with the composition as much as possible.
- Seal the hole with cement or plaster, lay the serpyanka exactly along the seam - the middle of the tape should lie on the seam. Press the sickle into the mixture and smooth it out.
- Cover the tape with another layer of the composition without waiting for the mixture to dry. Flatten.
- Wait for the mixture to dry, sand the surface well and decorate.
Sometimes the gap is deep, but narrow. In this case, remove the plaster, prime the seam extending 10 cm onto the edges of the slabs with Betonokontakt. Lay a thin layer of a mixture of concrete or gypsum, with serpyanka on top and immersion in the composition. Then another thin layer of putty, dry and sand.
Holes in the riser laying area
Let's figure out how to repair a hole in the ceiling near the pipe. The easiest option is to take a piece of cotton cloth, soak it in cement mortar and plug the hole. The material will dry and tightly plug the hole. After drying the material, the surface is puttied and sealed with decor.
On a note! The material in the cement mixture retains its plasticity. Therefore, during the heating process of the pipe, the repair area will not crack. There is room for the metal to expand.
The through hole can be sealed with polyurethane foam or silicone sealant. The latter is used for small defects and is characterized by plasticity and resistance to heating and cooling. Sealant is not suitable for large holes.
How to foam a hole in the ceiling with foam:
- reinforce the hole with wooden slats or metal mesh;
- apply foam in portions, waiting for the composition to expand;
- spread the foam until it fills the entire hole;
- wait for the foam to dry;
- cut off excess composition flush with the plane of the ceiling or 0.5 cm higher;
- putty the repair area.
After the putty has dried, clean the surface and decorate.
On a note! If the putty composition does not apply to the repair area, prime the ceiling and dry it, but not completely. Apply putty to a damp surface, stretching the layer over the entire area to be sealed.
Technology for repairing holes in concrete ceilings
A small hole in the ceiling does not interfere with the installation of a suspended or suspended ceiling structure. But even when installing such coverings, holes and cracks in the base must be sealed, because through them the room loses heat. If a tension fabric is installed, air is forced through the holes into the ceiling space, which causes the tension surface to bulge.
When choosing a mixture for filling holes, take into account the size of the defect, its depth and location. Usually these defects are eliminated with a cement-sand mixture, polyurethane foam or starting putty. The latter solution is used most often.
All putties are divided into the following types according to their composition:
- Cement compositions are suitable for repairing defects in concrete floors from the inside or outside. These putties are very durable and can withstand moisture, but they have a long drying period. The repaired area often cracks due to the low ductility of the mortar. Therefore, after applying cement putty, the area is covered with a finishing mixture.
- If you don’t know how to repair a large hole in the ceiling, then a gypsum compound is suitable for this. It is characterized by plasticity, so it does not crack even when applied in a layer of considerable thickness. However, this composition can only be used in a room with heating and a normal microclimate.
- Acrylic putties can withstand high humidity conditions and provide a smooth and even finish. They are not suitable for filling deep holes because they are applied only in a thin layer and are used for finishing leveling.
Important! Minor defects are eliminated with acrylic putty mixtures, and deep holes are repaired with compositions based on cement and gypsum.
Through holes are sealed with polyurethane foam, because putty will not provide the required tightness. You can use either one- or two-component foam, but the latter is used only in conjunction with a mixing gun. The foam gives good adhesion to the concrete base, expands greatly, and therefore seals all holes and cracks well. Polyurethane foam is suitable for filling deep and narrow holes because it is supplied from a pressurized container. However, over time it shrinks.
A mixture of cement and sand is also suitable for repairing concrete ceilings. The solution is suitable for use in unheated areas, it is very strong, durable and does not shrink. If you add antiseptic substances to such a solution, the surface will be reliably protected from mold.
What tools and materials will be needed
For work you will need the following devices, tools and materials:
- silicone sealant;
- ladder;
- brush;
- paint brush;
- primer;
- serpyanka;
- a small piece of cotton fabric;
- polyethylene film;
- vacuum cleaner;
- sandpaper;
- sander;
- screwdriver;
- kitchen knife or nail;
- deep penetrating primer.
Depending on the size of the defect and location, select the necessary tools and materials from the list above. Now let's talk about how to cover up a hole in the ceiling.
Joint of two surfaces
If there are voids at the junction of the ceiling and walls, they are eliminated with plaster or cement-based mortar. But even after repairs, cracks will form because the mortar slowly breaks down and spills out of the seam.
Holes at the junction of two surfaces are sealed as follows:
- Using a screwdriver, a kitchen knife or a long nail, we widen the seam where the defect appears. Its width should be within 0.5-1 cm.
- We clean the seam from dust using a brush with stiff bristles or a vacuum cleaner.
- Using a paint brush with a flat working surface, we treat the walls in the hole with a deep penetration solution, for example, the Betonkontakt category.
- Depending on the depth of the gap, we fill it with acrylic or gypsum putty. Next, the serpyanka is pressed into the uncured mortar so that an even joint between the wall and the ceiling is formed. Another thin layer of mortar is laid on top of the reinforcing tape.
- After the putty mixture has dried, the repair area is sanded with sandpaper.
Areas with fallen plaster
To repair a section of ceiling with fallen plaster, use the following technology:
- Often the plaster peels off due to mold damage to the base, so first the adjacent areas of the plaster that have been affected by mold must also be knocked down. Since the fungus does not immediately grow on the surface, but is present in the structure of the material for some time, areas of clean plaster are removed within a radius of 15 cm around the affected area.
- After this, the concrete ceiling is impregnated two or three times with an antiseptic solution. You can use chlorine bleach instead.
- Then the defect site and adjacent areas are covered with a primer. It will strengthen the structure of the material and provide better adhesion to the solution.
- The hole in the plaster layer is filled with putty layer by layer. In this case, the previous layer must dry before applying the next one.
- After the putty mixture has dried, the area is sanded and treated twice with a strengthening solution.
How to foam the seams between floor slabs so that the foam does not fall from the ceiling to the floor
Polyurethane foam is important when foaming seams, cracks, holes, thermal insulation, as well as when sealing various surfaces. Foam is not used with surfaces made of polypropylene and polyethylene. In order to understand how to use polyurethane foam, you need to know several rules.
There is a wide range of options available for purchase now!
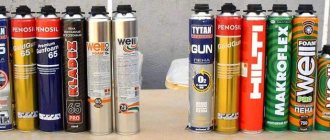
How to choose the right polyurethane foam
There are usually two types of polyurethane foam - semi-professional and professional. Depending on the conditions of use, winter, summer or all-season foam is distinguished.
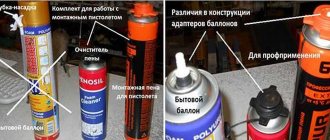
For small and simple jobs, use more inexpensive household polyurethane foam. It comes immediately with a plastic tube and is needed for one-time use, since after opening the package the foam hardens literally within a day.
More expensive professional foam is used in conjunction with a special gun. It is needed to reuse the foam canister and adjust the foam supply. High quality pistols are metal and easy to disassemble.
The principle of operation of a special gun for polyurethane foam
This aspect is also important because the ideal size of one applied layer after hardening is approximately three centimeters. But if larger volume seams are foamed, then the foam is applied in 2-3 layers with pauses for each layer to dry.
Take into account the fact that professional foam shrinks less than household foam.
In order for the use of polyurethane foam to give the desired result, preliminary preparation is done, which includes:
- Before foaming, the seams are cleaned of dirt and debris. If necessary, they are degreased by applying an acetone solution.
- For better interaction of the foam with the seams, the latter is heavily moistened, but at the same time make sure that no moisture appears on the surface.
- The temperature of the foam is adjusted in accordance with the temperature of the apartment in which installation takes place. If the foam was cold, it is placed in hot water for two hours.
- Before use, the foam is shaken vigorously 15-20 times to mix the components included in the foam. Next, remove the protective cap and screw the tube onto it, and if it is professional foam, screw in a special gun. Make sure that during the work the tube or nozzle of the special gun is not pointed at people.
- Wear protective clothing and safety glasses.
Preparatory measures for working with foam
When using professional foam, which is used in conjunction with a gun, before starting installation, you need to regulate its supply. The flow of household foam is adjusted during use.
The hardening of the foam begins in the temperature range from +7 to +30°C, air humidity is at least 80%. When installed in cold conditions, hardening begins when special additives are present in the foam. In this case, the foam hardens at temperature ranges from -8 to -10°C.
Foaming the seams between floor slabs is a fairly simple process, but there are nuances that were discussed earlier. How do you foam the seams so that the foam does not fall out of the ceiling? Write about your experience in the comments.
Portal about construction
Polyurethane foam is a popular building material. All types of work require a stage where this material is used. For example, this is the installation of plastic windows or doors, installation of partitions, and so on.
Polyurethane foam has a lot of positive properties - it glues surfaces and adheres to most other materials. Due to expansion, even a small volume fills any hole, gap or crack. With its help, a high-quality fastening is created and the element is fixed at the desired point.
Polyurethane foam is also relevant for working with penoplex.
How to work with polyurethane foam
Today I will show you how to work with polyurethane foam. This is a very important and useful skill in repairs that you definitely need to acquire. I’ll say right away that the video below contains INACCURACY - I want to test your powers of observation. At the end of the article I will tell you about it.
How to work with polyurethane foam correctly
We will learn from the example of filling up a long hole in the corner of a room, which was formed as a result of preparing the walls, when old wallpaper was removed, dried glue and putty were peeled off, crumbling plaster and pieces of cement were knocked off. You can read about such holes and other chips on the walls in my article How to repair holes in the wall.
Polyurethane foam can be applied in two ways: with or without a special gun. It all depends on the type of foam container you purchase in the store and on the nature of the foaming.
- If you need to foam holes on the ceiling or under the ceiling, then you cannot do without a gun, because in this case you will have to hold the balloon incorrectly, and the foam will not come out of it, or will come out in jerks, wasting away irrationally.
- A gun costs money, and if you decide to do repairs professionally, then it is advisable to buy the one that is more expensive so that it serves you for a long time and faithfully. But that is not all. You will need to additionally buy a special liquid with which you will wash the gun immediately after use, otherwise you can throw it away.
- If you need to foam a hole in the wall, you can do without a gun. The main advantage here is cost savings. They foamed it up and threw away the empty bottle without worrying about anything else.
Now watch how you can foam a long hole with Makroflex polyurethane foam in 1 minute and solve the issue of the junction of two walls, remembering the CATCH in the video.
| By reading my blog, you are probably making repairs. this page to your bookmarks . This is where all the useful home improvement stores are located. |
After foaming is complete, you need to wait 24 hours and carefully cut off the foam. (You can see how to do this in the article How to cut polyurethane foam).
And now the basic rules for working with polyurethane foam:
- Before starting work, the surface to be foamed must be moistened with water.
- You need to foam evenly, constantly pressing the trigger of the cylinder (or gun).
- Do not touch the foam until it dries.
- Foam must be laid from bottom to top, and not vice versa. This is the intentional INACCURACY in the video (there was a competition where you had to find the mistake).
That's all. Now you know how to work with polyurethane foam. Some people claim that the foam can be cut off after just a few hours. Is it true?
Rules for use in case of fixing penoplex and blowing seams
The crucial moment is the choice of foam. The presence of toluene in it will lead to damage to the building material and the need to purchase a new batch - and this is a serious expense. Therefore, it is better to spend a little more time in the store to choose the right option.
Before starting work, perform some manipulations with the cylinder.
Heat it up, no matter what season - winter or summer.
To heat, take a small container and fill it with warm water. Do not use hot under any circumstances. The cylinder is placed in a container - a low saucepan or a small ladle, so that the warm liquid reaches no more than the middle. This heating is sufficient for 5-10 minutes.
Then the same amount of time is needed to thoroughly shake the contents of the container. In this case, it is guaranteed that all the material is used. Moreover, this procedure is relevant not only for professional cylinders, but also for ordinary household ones.
The next stage is a small check. More often, a special substance is used in the cylinder, which is squeezed out before starting work. If everything is fine, start using it.
The new cylinder gives greater efficiency at the beginning of work, it decreases as the material is consumed (pressure drops). Therefore, at the beginning of a new cylinder, the substance is consumed sparingly and in small doses.
If you take a break, rinse the tube through which the mixture is supplied, or the nose of the gun, to remove any remaining substance so that it does not harden. Otherwise, the nozzle will have to be cleaned, and this is a waste of time that is avoided.
How to foam a ceiling so that the foam does not fall
How to use polyurethane foam: advice from professionals
Polyurethane-based polyurethane foam is indispensable for sealing cracks, holes, joints, heat and sound insulation, as well as gluing various surfaces. It is not used when working with surfaces made of polypropylene, polyethylene, Teflon, silicone and wax. To understand how to use polyurethane foam, it is enough to understand the rules.
An assortment to choose from
Which foam to choose
Two types of polyurethane foam - semi-professional (household) and professional (pistol). Depending on the temperature conditions, winter, summer or off-season foam is selected.
For a small amount of simple work, a relatively cheap household one is suitable. It is sold together with a plastic tube, the output volume is smaller and is intended for one-time use, since after opening the container its contents dry out within 24 hours.
More expensive professional mounting foam is used in conjunction with a special gun. It is designed for reusable use and precisely regulates the supplied volume of sealant. High-quality pistols are made of metal and are completely dismountable. By rotating the adjusting screw located on the handle clockwise, the thickness of the supplied jet is reduced, and counterclockwise, it is increased.
Design of a special gun for polyurethane foam
This point is important because the optimal diameter of one applied layer after hardening is around 3 cm. If a larger space is filled, then the sealant is applied in two or three layers with breaks for each of the applied layers to dry.
Take into account the fact that professional sealant shrinks less than household sealant.
Preparatory stage
In order for the use of polyurethane foam to have an effect, preliminary preparation is carried out, which includes the following:
- Before applying sealant, surfaces are cleaned of dust and debris. If necessary, degrease with acetone or solvent.
- For good interaction of the foam with the surface, the latter is moistened abundantly, but at the same time, care is taken to ensure that no drops of moisture form on the surface being treated.
- Adjust the temperature of the cylinder in accordance with the temperature of the room in which the work is being carried out. To speed up this process, if the balloon is brought from the cold, place it in warm water for an hour and a half.
- Before use, shake the container vigorously 20-30 times to mix the components of the sealant. Then remove the protective cap and screw the tube onto it, and if it is professional foam, screw the container to the gun. Make sure that during installation the tube or nozzle of the gun is not facing towards people nearby.
- Wear a work suit, protective gloves and goggles.
Preparing to work with polyurethane foam
When working with professional foam, which is used in conjunction with a gun, before starting sealing, regulate the supply of foam. The stream of household sealant is adjusted during use by changing the force of pressing on the cap at the base of the tube.
Hardening of polyurethane foam sealant occurs at temperatures from +5 to +35°C, air humidity of at least 60%. When working in the cold or in a dry space, hardening occurs when there are special additives in the foam. In this case, the sealant will harden at an air temperature of -10, or in conditions where air humidity reaches only 35%.
Rules and practices
To understand how to use polyurethane foam correctly, remember the rules.
The polyurethane foam is applied with measured, smooth movements from left to right and from bottom to top. The openings are not filled completely, but approximately half or one third, depending on the degree of shrinkage.
The length of one applied strip does not exceed 10 centimeters. When working, the cylinder is held vertically with the bottom up. In cases where work is being done on the ceiling, which makes it difficult to comply with the last rule, buy a special sealant that works in any position. Another solution to this problem is to extend the nozzle of the gun or the main tube using flexible tubes so that the inverted cylinder does not rest against the ceiling during operation. If you need to work with the ceiling, it is better to start there, since in this case the pressure in the cylinder is the maximum possible.
Sealing cracks with a gun
When hardening, polyurethane foam begins to exert pressure on adjacent surfaces, which causes their deformation. Therefore, if it is necessary to fill cracks on both sides, as when installing doors and windows, polyurethane foam is used on one side. The other gap is filled with silicone sealant.
When applying polyurethane foam to the surfaces to be treated, make sure that the tip of the tube or gun is always inside the foam itself. Periodically remove sealant stuck to the gun nozzle using a cloth soaked in acetone or solvent. During a long period of operation, the container is shaken periodically. Extension adapters are used to process deep seams.
Reasons for choosing polyurethane sealant
When purchasing foam, it is once again checked for the presence of toluene, a substance that leads to permanent damage to the penoplex.
Even if it is not indicated on the cylinder whether it is present in the composition, they give preference to another option, where the composition is detailed and you can make sure that there is no toluene in it.
The best solution and choice is polyurethane sealant. This type of foam is better combined with penoplex and does not harm it in any way.
The advantages include high-quality sealing of gaps and cracks that invariably arise during the cutting of penoplex slabs.
The same substance will not lead to even partial damage to the foam boards, and gluing with its help is easy and simple. It will be more expensive than if you use specialized glue.
It is not worth saving on the purchase of foam, which is used to seal cracks, otherwise it will not lead to positive results. If the first sealed seam does not give the desired results, the foam is changed. They choose well-known and well-established brands - cylinders from popular manufacturers, whose quality you cannot doubt. In this case, calculate:
- For good adhesion between various materials, including foam boards;
- For high levels of thermal insulation and sound insulation;
- Using a gun, applying foam is convenient and precise, which will lead to less consumption of the substance.
Product Features
Typically, polyurethane foam is stored in aerosol cans of various capacities, because it is a mixture of polyurethane and gas under pressure (ratio of substances 3 to 1). Foam in this proportion easily fills any potholes, cracks and voids.
The ability of construction foam to provide tightness, thermal insulation, and resistance to various types of influences of any structure increases if we take into account the property of the material to deteriorate under the influence of the sun. Among the many advantages of polyurethane foam, its low cost is highlighted. The product is used with almost all building materials - glass, concrete, brick, plastic and wood. The exceptions are polyethylene, Teflon, plastic and silicone. If you still apply foam to these materials, their surface must be pre-treated with acetone. Time and labor costs when working with foam are minimal due to its rapid polymerization.
Among the disadvantages of construction foam, its chemical base is especially distinguished. During work, you have to ventilate living spaces and use protective equipment - respirators, gloves. In addition, the product is not resistant to natural precipitation (snow, rain) and ultraviolet rays. Therefore, cracks filled with foam must be covered with sealant, paint or covered with platband.
Let us also add that the cost of a gun for a cylinder with polyurethane foam significantly exceeds the cost of the cylinder itself, but due to its repeated use, it pays for itself in a short time.
There are one- and two-component polyurethane foam. During the spraying process of a one-component type of product, a chemical reaction occurs to release polyurethane foam, which in an environment with 35 percent humidity can transform into a solid consistency. The volume of this consistency increases by as much as 250 percent. If we talk about the ambient temperature, it should ideally vary from +5 to +35 degrees Celsius. The product shows maximum results at an air humidity of 60-80% and an air temperature of +20 degrees.
Interestingly, on the market today you can find specialized foam that is also used in the cold season. The only condition for use is sufficient air humidity, otherwise the construction foam will not harden.
