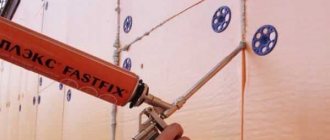
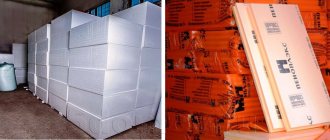
Polystyrene foam (expanded polystyrene) is an economical and convenient construction insulation material. The heat-saving properties of this material are such that, for example, a wall made of polystyrene foam with a thickness of only 12 centimeters is similar in its thermal characteristics to a brick wall 2 meters thick!
In addition, it also turned out to be a successful basis for facing with ceramic tiles. No matter how strange it sounds. After all, the main “enemies” of ceramic cladding are temperature changes throughout the year and freezing of water on the surface and in the seams. To confirm this, the table below is given. This is the technical characteristics of Mapei tile adhesive
The main figure that is worth paying attention to is that after 25 cycles, the fastening strength is halved! This can happen in one season. This figure is given for high-strength adhesive. We can guess what this indicator is then for inexpensive mixtures.
The main reason for the decrease in strength is the deformation of the base during temperature fluctuations. Ceramic tiles and the base on which they are mounted have different linear extensions. When temperatures change, the adhesive layer experiences stress from these expansions. The cheaper the glue (the fewer adhesive additives it contains), the lower the ability to withstand deformation, and the faster the tiles fall off.
Polystyrene foam has an insignificant coefficient of linear expansion and, in addition, protects the wall on which it is attached from sudden temperature fluctuations. Due to the elasticity of the material, foam compensates for deformations.
Expanded polystyrene has a thermal expansion coefficient in the range of 5-10 to 7-10, which corresponds to a change range from 0.05 to 0.07 mm. at 1m and 1 degree Celsius. For example, when the temperature changes by 17 degrees, there is a change in length equal to 1%, i.e. 1mm/m.
It is also necessary to take into account the reduction in size (compression) of polystyrene foam at low temperatures. If we take 20 degrees as a reference temperature, and assume that during use the material is cooled to -20 degrees, then in this case, an element 40 cm long is shortened by approximately 1 mm.
Along with its positive properties, polystyrene foam also has its vulnerabilities. These are solar radiation and rodents. With prolonged exposure to UV radiation, polystyrene foam becomes brittle, the surface turns yellow, which further leads to erosion from rain or wind.
For rodents, unprotected foam is a great temptation. It is not food, but when it gets cold, they make burrows in it. And most importantly, when searching for food, the foam lining is the first thing they encounter on their way. If it is enough to cover the insulation with structural plaster from ultraviolet radiation, then ceramic tiles most reliably protect polystyrene from rats and mice.
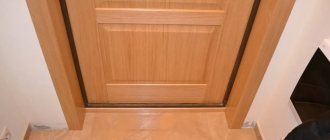
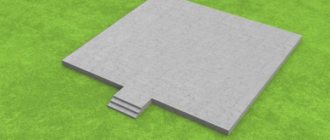
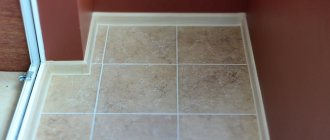
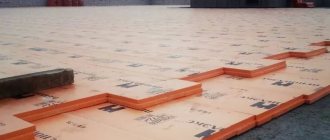
There are specific examples to confirm the successful union of polystyrene foam and ceramic tiles. The cladding was installed on this plinth 5 years ago. The tiles are glued to PSB35 foam plastic. The foam was, as usual, covered with fiberglass mesh and a layer of glue along the mesh. Then, to level and create a plane, ordinary cement-sand plaster was applied to the beacons with a thickness, in some places, up to 2 cm. Previously, before applying the plaster layer, glue grooves were applied using a No. 10 notched trowel. The glue used for this was “Ceresit CM117”. The work was carried out in late autumn. The tiles have not fallen off anywhere.
A closer inspection revealed a cracked grout seam in two adjacent places, one meter apart. The tile around the crack is held firmly to the foam. When pressed, the layer of tiles with foam springs back. This speaks, rather, of torn foam. This happens if a crack occurs in the foundation due to shrinkage or expansion. Without removing the tile, it is difficult to determine the cause of the crack.
The foam itself, as a base, is weak. If desired, with some force, you can tear out the glued tile, along with the foam layer. But spontaneously, due to temperature fluctuations, strong glue does not tear off from a weak base.
Polystyrene foam is a relatively new material and the correct technology for its cladding has not yet been developed. There are “pitfalls”, ignorance of which leads to marriage. The first danger is carrying out work in the summer, at elevated temperatures. Even at an air temperature of 20 degrees, the dark surface of the foam (covered with a mesh with glue) heats up to 40-50 degrees. Similarly, when heating an uninsulated concrete wall, the heat is distributed throughout the entire volume and no significant heating occurs. On polystyrene foam, all the heat accumulates on the surface and is used to heat the glue or leveling mixture. The glue quickly loses water and does not gain strength (part of the cement does not have time to react with water). Such a case is recorded in the photograph.
In the fall, the wall of the house was lined with extruded polystyrene foam and covered with fiberglass with glue. We used this particular material rather than using ordinary expanded polystyrene foam due to the fact that ceramic tiles were planned as the final finishing layer - and this is a serious load on the base. The foam that was available was suspicious due to its density.
Work continued in the spring, when the night temperature was above 5 degrees. To level the surface of the wall under the tiles, the “Ceresit CT29” mixture was used. Alignment was carried out using beacons made from the same mixture. The thickness of the beacons (and the applied layer) was from 5mm to 1mm.
A month later, when it was supposed to begin tiling the walls, it turned out that the plaster had cracks, weak strength and was crumbling in layers in places. Moreover, in some sections of the wall, the leveling mixture held up well and had sufficient strength.
It turned out that it all depends on the outside temperature during installation. Where the work was done in early spring or on the north side of the house, the plaster held up well. There were problems only on the southern and southwestern walls.
It is difficult to make high-quality wall cladding with ceramic tiles without leveling plaster. Foam boards do not have a flat, common plane, even if they are mounted on plaster made using beacons. “Parachutes” stick out in places. If you put a tile on such a plane, it will also stick out in places, especially in the sun. Replacing conventional polystyrene foam with extruded one is the second mistake when insulating walls.
Review of prices and popular brands
The cost of adhesives varies significantly and ranges from 65 to 500 rubles per unit. containers regardless of packaging (ml, kg). Dry mixtures will cost much less than ready-made polyurethane glue.
Popular brands are Ceresit, Knauf, Isofix. External insulation with UNIS brand adhesives is a guarantee of quality and reliability. A budget option is a gypsum adhesive composition for dry rooms.
This is due to a number of factors:
- improved adhesion of foam compositions;
- instant results due to quick setting;
- no need to prepare the mixture.
Another factor that determines the high price category of polyurethane adhesives is its versatility: it is used for working on metal, concrete, and wood.
The most popular is Insta-Stic polymer glue (RUB 500/unit). The analogues Tytan STYRO 753 and Teplofom are slightly inferior in properties. The cheapest is Moment composite adhesive (65 rubles/unit). Ceresit (CT83) and Sarmat products are popular among mineral mixtures.
If you plan to work with different surfaces, it is better to use a universal material, a prime example is Ceresit CT83, ALLFIX. It is used in working on concrete, wood, and metal. To waterproof the surface, special compounds should be used, for example, “T-Avangard-K”.
Tips at work
Before you start gluing foam boards, you should clean the surface you plan to work with as thoroughly as possible. Moreover, it is not enough to wipe off the dust; it is also recommended to wet the wall or floor (depending on where the insulation will be installed). The absence of dirt and dust will ensure improved adhesion of materials. Before installing the slabs, it is recommended to wait until the surface has dried thoroughly.
If you glue slabs onto polymer compounds, you need to take into account a fairly short hardening time. Within 3-5 minutes they firmly adhere to the insulation.
There are three ways to apply adhesive to penoplex:
- continuous, with the glue covering a significant part of the surface of the slab;
- spot – involves applying the composition in separate points, the recommended distance between which is 30 m;
- method of interrupted strips, in this case the glue is applied in separate areas in narrow strips.
The principle of laying the material is the same for all surfaces: when working on concrete, wood or metal. After the composition has been applied to the insulation, it must be pressed tightly against the wall. You can release the Penoplex after a while and take the next slab.
Using polyurethane foam as an alternative to glue is possible. But it is not applicable to all surfaces and work.
During work, it is not always possible to ensure tight joining of the material, which is usually caused by an uneven surface. But this is not critical, since all cracks, depending on their size, are filled either with polyurethane foam of a special composition or with foam cuttings. Considering the “capricious nature” of such insulation, the foam for filling leaks should not contain aggressive substances from the list above.
If you do not pay attention to the task of choosing an adhesive for laying penoplex, as a result, the insulation may collapse under the influence of an aggressive environment, which is formed due to the reactions occurring between the components of the adhesive mixture and the thermal insulation. During the installation process, an important step is high-quality cleaning of the surface of the floor, walls or ceiling, which affects the adhesion of materials.
Characteristics
- Adhesive mineral mixture with additives of cement ingredients. The dry granular substance, when combined with water, forms a ready-made mixture for bonding the foam material to various surfaces: concrete, sandstone, aerated concrete. Sold in paper bags of 25 kg each.
- Polyurethane-based adhesive - used for attaching foam boards to a cleaned surface, in the form of brickwork or boards. In most cases it is used for internal fastening of material. The main form of release is aerosol cans with a capacity of 750 ml.
- Polymer adhesive - designed for quick fastening of modified foam with the ability to adjust the level of joining in the first 15-30 minutes, but with further hardening. As a rule, it is produced in 5 liter buckets.
- Gypsum fastener is the simplest option for combining surfaces with each other. The principle is identical to fixing drywall using a point method.
- Waterproofing mixture is a special type of glue that guarantees excellent adhesion to the foundation area of the house where it is planned to protect the base of the building.
- Cement mineral mixture – 4.5 kg/m².
- Polyurethane - 1 cylinder per 13-14 m².
- Polymer – 1 bucket per 20-25 m².
- Gypsum - about 5 kg/m².
Method of insulating the base under heated floors
To put penoplex under a warm floor, you will need to go through a number of steps:
- The concrete base is pre-cleaned, dust-free and primed. The zero level of the flooring is marked on the walls. If necessary, the floor surface is additionally leveled with cement screed. If the surface is perfectly flat, then you can begin insulating the concrete floor with penoplex without screed.
- Penoplex boards, lubricated with glue, are laid on the prepared surface and pressed. After this, the horizontality of the slab and adjacent slabs is checked with a level. Laying is carried out staggered, the seams are spaced from each other by half the width of the insulation board.
- Protection from moisture is provided by a layer of film, the joints of which are sealed with tape. The edges of the waterproofing are placed on the walls, where the damper tape is attached.
- Equipment for heated floors is placed on top of the film, after which the screed is poured to the marking line. Once the subfloor is dry, you can begin laying the finishing coating.
Insulation on floor slabs
You will need to acquire the following tools and materials:
- building level;
- polymer putty;
- primer;
- moisture-repellent film;
- insulation;
- polyurethane glue;
- self-leveling composition.
The sequence of work is as follows:
- First of all, the floor slabs are checked for flaws. Any protrusions, cracks, or depressions must be eliminated. The protrusions can be knocked down using a hammer drill, and the cracks and holes can be covered with polymer putty. If there are a lot of flaws, the base will have to be leveled with a self-leveling mixture. If the slabs are in normal condition and free from damage, you can limit yourself to removing debris and removing dust.
- If a floor no lower than the second floor is subject to insulation, then the penoplex is spread directly onto the floor, which has been pre-treated with a primer mixture. If the ceiling is part of the basement or first floor, then it is advisable to cover the floor with a water-repellent film. It turns out that, based on the location of the ceiling, it is either primed or covered with a protective layer of moisture insulation. In the latter case, the joints of the film must be taped.
- You need to apply a layer of glue to the underside of the insulation, then apply it to the floor and press down firmly. The position of each individual slab is checked with a building level, while simultaneously controlling the horizontality of adjacent pieces of insulation so that the surface is perfectly flat. Each subsequent row of slabs is laid with an offset of half the width of the segment so that the seams do not coincide.
- A layer of polyethylene film is laid on top of the insulation for waterproofing.
- A classic cement screed up to 5 cm thick, or a self-leveling compound can be poured onto the waterproofing layer. Once the screed is completely dry, you can begin laying the finished floor.
Using penoplex directly on the ground
Firstly, it is necessary to level the ground that will be used as a base, and the distance to the floor should be at least fifty centimeters.
The second step is to fill the space with expanded clay, sand or gravel to a height of up to forty centimeters. In this case, you should make sure that the horizontal position is maintained.
The third step is laying penoplex, but at the beginning, you should check the thermal insulation material for unevenness and chips; if found, they should be removed. The material must be at least five centimeters thick. When laying the sheets, press them tightly against each other, without creating a gap; the joints are glued with special tape so that moisture does not get into them.
The edges of the building are fenced with sheets of roofing material or polyethylene, the top of the foam is also covered with these materials, then a layer of cement and metal mesh is mounted on them to strengthen it, while the thickness of the screed should be five centimeters.
Important! Remember that the screed must be strictly horizontal, otherwise you may encounter serious difficulties when laying the flooring. What type of floor can be used:
What type of floor can be used:
- parquet board;
- laminate;
- linoleum;
- any type of ceramic tile;
- polymer coating;
- wooden boards;
Installing a floor in a bathhouse has its own specific features. So it is necessary to insulate the walls from the side flush with the floor, the concrete screed is installed at a certain angle, this is necessary for the unhindered flow of water, while the drain must also be isolated from air from the outside. Sanded boards are used as flooring in the baths; they are installed on logs in increments of fifty centimeters. When installing the floor in a bathhouse, the boards are laid with a gap of 5 millimeters to allow water to drain.
How are tiles glued to polystyrene foam and what can be used to fix the material?
Synthetic-based materials have good aspects: sound insulation, thermal insulation, light weight, good cost and easy installation. Extruded polystyrene is made by extrusion from foam plastic. Although it appeared not so long ago, it has become a common heat insulator. Very often, extruded polystyrene is replaced with expanded polystyrene.
Tiles glued to a heat insulator
Best answers
Novosibirsk:
The tiles must be laid on a RIGID base, which is a screed. Moisture-resistant plasterboard, even 12.5 mm thick, is a wall material. If you don’t want to bother with wet work, do a dry screed using the Knauf system. But a rigid base under the tiles is a prerequisite.
Alexander:
))))))))) no, of course, it’s soft, all the seams will crack immediately
Nikolay Sorokin:
Screed is required! It is a load redistributing element and a base leveling element at the same time.
Michael:
if the drywall doesn’t play or jump, then it’s possible, but it’s better in two layers and twisted or glued together, apart, or even better, gypsum fiber
Sequence of installation of Hauberk facade tiles.
To eliminate color imbalance, tiles from different packages should be mixed.
The tiles are installed in rows from the corners of the building (with a 5 mm indentation) from bottom to top with an overlap for a better appearance and greater surface tightness.
Before use, the tiles are freed from the protective film.
The tiles intended for the first (lowest) row have their petals pre-cut.
The tiles are fixed using a hammer and galvanized nails.
One tile 1000 mm long should have 16 nails: 8 for fastening its upper part and 8 for the lower part, and the lower nails fix not only the lower part of the tile being nailed, but also the upper part of the tile of the row below.
Yandex.RTB RA-1479455-8
Benefits of penoplex
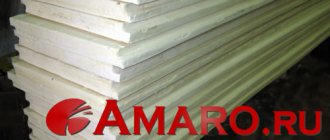
This insulation is available in the form of slabs of various thicknesses. The standard slab width is 600 mm, length – 1200 mm and 2400 mm. The minimum sheet thickness is 20 mm, the maximum is 100 mm. Depending on the thickness, the package can contain from 4 to 20 sheets of penoplex.
PENOPLEXCOMFORT is a unique brand of thermal insulation boards, which is ideal for thermal insulation of country houses or city apartments
The main advantages of this insulation include:
- zero water absorption;
- low thermal conductivity and vapor permeability;
- absence of harmful fumes;
- resistance to microorganisms;
- high strength.
Properly installed insulation will reliably protect the room from cold, noise, moisture penetration, and will create comfortable conditions even in the most severe frosts. Unfortunately, penoplex is not resistant to solvents and high temperatures, and also has a fairly high cost. But, despite this, it is used very widely for floor insulation, gradually replacing mineral wool and foam plastic.
Calculation table of thermal insulation in different regions
Table of penoplex parameters
Penoplex. Installation instructions from the manufacturer
Styrofoam
Usually this word refers to foamed polystyrene and extruded polystyrene (penoplex). In terms of chemical composition and thermal insulation properties, these materials are practically the same, however, penoplex has much greater bending strength and resistance to crumbling than traditional polystyrene foam. For this reason, recently most consumers are abandoning foamed polystyrene (foam) in favor of extruded polystyrene (penoplex).
Styrofoam
The advantage of this type of thermal insulation is its low price, ease of installation and moisture resistance. The disadvantages include the flammability of this material, and when polystyrene burns, a large amount of toxic substances is released.
Polystyrene slabs are produced in thicknesses from 5 mm to 50 mm; a special chamfer is made on the edges of the slabs so that during installation, gaps and, consequently, “cold paths” do not appear at the joints.
Expanded polystyrene
If a layer thickness of more than 50 mm is required, then two or even three layers of polystyrene are laid, with each new layer being laid offset relative to the previous one so that the joints of the slabs of the upper row fall on the centers of the slabs of the lower one.
Screed diagram with foam plastic
When insulating a floor located directly above the ground, the foam layer must be at least 300 mm for a house with a wooden floor, and 200 mm for a house with self-leveling concrete floors. You should lay at least 4 layers of the thickest foam panels, offset from each other.
If there is a cold basement under the floor, then the foam layer can be reduced by 50mm.
To insulate floors between floors of a private house, 150 mm of foam is sufficient for wooden floors and 100 mm for concrete floors.
If you are insulating floors in an apartment building, then for all floors except the first it is enough to lay one layer of foam plastic 50 mm thick. On the ground floor the thickness can be increased to 80-100 mm.
| Index | Polyspen | Polyspen Standard | Polyspen 45 | Control method |
| Density, kg/m3 | 30-38 | 30-38 | 38,1-45 | 5.6 each |
| Bending strength, MPa, not less | 0,4 | 0,4 | 0,4 | 5.8 each |
| Water absorption in 24 hours, % by volume, no more | 0,4 | 0,4 | 0,4 | 5.9 each |
| Thermal conductivity at 25+-5 degrees Celsius, W/m * °C, no more | 0,028 | 0,028 | 0,030 | at 5.10 |
| Toxicity, Hcl 50, g/m3 | T2 moderately hazardous | T2 moderately hazardous | T2 moderately hazardous | at 5.11 |
| Flammability group | G-3 normal-flammable | G-4 highly flammable | G-4 highly flammable | at 5.12 |
| Flammability group | B-2 moderately flammable | B-3 flammable | B-3 flammable | at 5.13 |
| Smoke coefficient | High smoke generating ability | High smoke generating ability | High smoke generating ability | at 5.14 |
| Compressive strength at 10% linear deformation, MPa, not less | 0,2 | 0,2 | 0,3 | 5.7 each |
Calculated thicknesses of Penoplex thermal insulation
Features of floor insulation work with penoplex
Penoplex is a unique building material with the properties of foam and plastic. It is a product with a closed cellular structure that retains heat well.
The product differs from other floor insulators in its high density and rigidity. It is convenient to lay it to create a frameless floor covering. Often used in the following cases:
For laying on the ground if there is no basement underneath;
In high-rise buildings on interfloor ceilings or above basements on concrete; When creating self-leveling and heated floors of small thickness (film or in the form of mats); On balconies and loggias; For forming a floor on the ground during the construction of a bathhouse.
It is not necessary to place penoplex on the joists, because in this case its advantages in the form of density and moisture resistance do not play a role, and it is better to use cheaper products for thermal insulation.
The insulator goes on sale in the form of slabs 0.6x1.2 m. The thickness of penoplex for insulating the floor in a house is 3-10 cm, depending on the climatic zones. If thermal insulation is carried out at the stage of building a house, the thickness of the samples is 3-5 cm, if not - 5-10 cm. The product goes on sale packaged in film, 10 pieces each. included.
For floor insulation it is recommended to use the following types of material:
- Penoplex "Foundation" (or penoplex 35)
. It is not impregnated with pyrine, so it should be used in cases where fire protection is not needed. The slabs are quite rigid, but are not designed for heavy loads.
Penoplex "Comfort" (or penoplex 31C)
. The insulation is considered universal and is intended for any type of room. It resists mechanical stress well.
Penoplex 45
. The blocks made from it are very strong and can withstand significant weight.
The technology for laying panels depends on the type of base and the operating characteristics of the floor coverings. The design of the floor and the need for waterproofing is determined for each case separately.
Insulation of residential buildings
It is necessary to insulate any residential premises, from dachas and cottages to apartment buildings and private houses. After all, insulating the floor in a private house with penoplex will not only reduce costs, but also preserve the health of your loved ones, as well as the structure of the whole house. And you won't have to wear wool socks 6 months a year, and the kids will be able to play right on the floor without getting sick. And if the house has a basement, insulating the basement floor with penoplex is also an integral part of heat preservation.
Before you do such an important job as insulating the floor in an apartment with penoplex, you need to calculate how much material you have to purchase. And since the slabs come in standard sizes, this is easy to do. But it’s better to take it with a reserve. In general, the best option is to use 40 mm penoplex insulation for the floor.
How to insulate a floor using penoplex
Modern floor insulation with penoplex is the optimal solution to this problem. You can install penoplex yourself. You won't need to spend a lot of money.
Reliable penoplex insulation is produced in sheets with a thickness of 2 to 10 cm. The sheet width is standard, 60 cm. The sheet length can be 1200 or 2400 mm. Such dimensions significantly facilitate the process of insulating the floor with penoplex. Each package contains from 4 to 20 sheets, depending on their thickness. The required amount of material can be calculated in advance, taking into account a small increase.
Penoplex insulation sheets
Penoplex has the following advantages:
- moisture resistance;
- low thermal conductivity;
- vapor tightness;
- soundproofing;
- inaccessibility to microorganisms;
- good thermal insulation performance;
- long term.
All of these advantages fully compensate for the instability of this material to high temperatures and various solvents.
TechnoNIKOL facade tiles hauberk - Installation, video instructions.
The main advantages of TECHNONICOL HAUBERK facade tiles.
- — Tightness of the coating. Guarantees durability of the structure.
- — The color does not fade in the sun. Has the highest color fastness.
- — Resistance to mechanical stress. Including natural ones, such as hail.
- — Gives architectural expressiveness. Expressiveness is not only in color, but also in the design of the tile.
- — In 3 days you can renew the façade of your house. High laying speed.
- - No professional knowledge or skills required. Only the simplest tools.
Facade tiles HAUBERK. Color solutions for 2022.
| Red brick. |
| Marble brick. |
| Beige brick. |
| Antique brick. |
| Sand brick. |
| Terracotta brick. |
| Burnt brick. |
Accessories for HAUBERK facade tiles.
| External metal corner (polyester). Brown, Dark grey, Grey. |
| Internal metal corner (polyester). Brown, Dark grey, Grey. |
| Metal window casing. Brown, Dark grey, Grey. |
| TECHNONICOL nails, rough, galvanized SHINGLAS, 30x3.5 mm, 5 kg |
| External metal corner. Red, Marble, Beige, Antique, Sand, Terracotta, Burnt. |
| Internal metal corner. Red, Marble, Beige, Antique, Sand, Terracotta, Burnt. |
| Metal window casing. Red, Marble, Beige, Antique, Sand, Terracotta, Burnt. |
Technical characteristics of Hauberk tiles.
| Facade tiles. | |
| Height | 250±3.0 mm |
| Width | 1000±3.0 mm |
| Thickness | 3.0±0.2 mm |
| Top coating | natural basalt granules |
| Bottom cover | quartz sand |
| Heat resistance | 110°C |
| Package. | |
| Quantity per package | 20 pcs. = 2 m² |
| Package weight | 23.6 kg |
| Weight 1 m2 | 12.8 kg |
| Nail consumption | 200 g/m² |
Estimated cost of Hauberk facade tiles and components.
| Name | Price |
| Facade tiles Hauberk, per pack 2m2 | 892rub |
| External metal corner (polyester). 50*100*1250mm, per piece. | 140r |
| Internal metal corner (polyester). 50*100*1250mm, per piece. | 140r |
| TECHNONICOL nails, 30x3.5 mm, 5 kg, per pack | 843rub |
| External metal corner. 50*100*1250mm, per piece. | 470rub |
| Internal metal corner. 50*100*1250mm, per piece. | 470rub |
| Metal window casing. 50*100*1250mm, per piece. | 705r |
Advantages and disadvantages of floor insulation with penoplex
The insulation has no competitors among sheet materials used for thermal insulation of floors, as it has the following advantages:
The degree of liquid absorption is close to zero, which allows it to be used for its intended purpose in damp rooms. After a long stay in water, the insulator absorbs only 0.5% of its weight in moisture.
Floor insulation with penoplex can be done at the stage of building a house and during its operation. The material consists of chemically inert components that resist rotting well. Thanks to these properties, its service life exceeds 50 years. The insulation cells are very small (0.05-0.12 mm) and provide greater mechanical strength to the product. Despite their high density, the slabs are easy to process. Extruded polystyrene foam can be laid on any base, even on the ground. The sheets are of a convenient shape, the dimensions are maintained with great accuracy, which facilitates installation work. This is an environmentally friendly material that does not have a negative impact on humans.
The negative properties include the following:
- The product is afraid of sunlight, so it is stored in a dark place.
It is expensive compared to other insulators. The material does not burn, but actively melts, so it is not recommended to use it in fire hazardous areas.
Preparation of adhesive glue.
The tile manufacturer supplies two liquid components for its installation, the mixing of which forms an adhesive glue intended for gluing tiles that are poorly fixed to the base.
Yandex.RTB RA-1479455-3
The glue is prepared as follows.
Both components are mixed in a separate container, after which they are thoroughly mixed with a construction mixer for about 5-10 minutes.
The glue is then given a 10-15 minute rest period, after which the glue is ready and should be used within about 40 minutes. after cooking.
Insulation on top of the ground
To carry out the work we will need:
- gravel or small crushed stone;
- sand and cement;
- building level and rule;
- tamping device;
- reinforcing mesh;
- metallized tape;
- moisture-proofing material;
- metal beacons;
- alabaster;
- penoplex.
The work is performed in the following sequence:
If you plan to insulate the floor in a garage or other similar room that experiences heavy loads on the floor, a moisture-repellent material, a mesh of reinforcement is laid on the sand cushion and a concrete screed is made. In this case, the thickness of the screed will be greater and is usually 5-10 cm. Then the penoplex is laid, but only after the concrete base has completely dried. Consequently, a penoplex screed, the construction technology of which is similar to that for residential premises, will differ only in the thickness of the layer.
Use of extruded polystyrene
To keep the house warm without unnecessary expenses, consumers are interested in whether it is possible to stick
tiles in the house using
extruded polystyrene ? The question is difficult even for professionals, which is why opinions differ. Under any circumstances, it is prohibited to lay cladding directly on top of the insulation material. If you are gluing porcelain stoneware or brick-like facade tiles to the facade, then you need to cover the extruded polystyrene with plaster with reinforcing mesh. A plate of extruded polystyrene holds the tile 30? 30 cm.
Walls thermally insulated inside with extruded polystyrene slabs
If you need to glue the material indoors onto foam polystyrene, no additional surface coating will be required. But if you plan to insulate the floor, then lay a layer of cement-based screed on the heat insulator, then lay the tiles.
To choose an adhesive that is suitable for extruded polystyrene, take into account the following aspects:
- base composition;
- external environment: moisture and temperature;
- how quickly the mixture dries.
Main! In order for the insulation to last a long time, you need to take the installation process seriously, get to know all the details and invisible points in advance.
Answers from experts
Stas Shabanov:
Once, one client had to insulate the entrance from the entrance. And just glue 3cm extruded polystyrene foam. for glue and dowels. Next is the special grid. plaster and tiles on top. You will have to sacrifice distance and buy a smaller bathtub.
Evgeniy Sidorov:
Glue the bestyashka cloth and foam rubber on the other side, with glitter inside the bathtub, and then put moisture-resistant drywall on the dowels and then stick the tiles, this is the most optimal option, in which the bathtub will shrink a little, but nothing else
Vadim Sadovnichy:
Representative ( s otvet.mail /profile/id208881240/answers/all/) of the Astartek company, all reviews and links to the website avanta161 - southern administrative district They wrote a lie about Akterm liquid thermal insulation (supposedly worse adhesion) - an unconfirmed fact
AKTERM has never had bad adhesion! Adhesion is at a high level, to concrete 0.37
Aleksandr Kuznetsov:
There are more than enough fungi
Andrey Sidorenko:
If you are going to glue something very heavy onto polystyrene foam, then it is better to glue it! and if not, then mushrooms will suffice!
Andrey Volkov:
Be sure to glue it and nail it with “fungi” And instead of penoplex, it’s better to take facade foam - the mesh and putty will stick to it better. Penoplex doesn’t go under putty - it’s very smooth
Kim:
There should be no space between the insulated surface and the insulation that communicates with the outside air. Or this space should be isolated from outside air.
Vladimir Petrov:
There are exactly 5 mushrooms per sheet along the edges and in the center. And if there are any cracks, foam them. And for plaster, attach a mesh; the plaster adheres well
Stas Shabanov:
I would glue it and plant it on the “fungi”. And if the penoplex has no grooves, then the foam went through the seams.
Sergey:
For fungi and foam. You mainly have to glue to pick out the unevenness of the wall - creating “tablets” of glue in the corners.
Joseph Schweik:
It is necessary to glue and glue it with high quality. And fungi are just insurance against x... in the work done and, in principle, you can do without them. I insulated the base made of rubble stone with smooth penoplex (I simply glued it with the “Master” compound without any fungi). Penoplex was treated on both sides with coarse sandpaper to give it roughness. On top I applied a reinforcing layer from the same “Master” over a mesh and glued porcelain tiles. After 3 winters everything remains dead and not a single tile has fallen off...
Can tiles be glued to expanded polystyrene or extruded polystyrene?
When installing heat-insulating boards with glue, make sure that they are glued without gaps. Can be pasted
heat insulator yourself, without calling in specialists.
Apply the slab adhesive composition first along the perimeter, then in the very center. Apply tile adhesive to the slab, then lean the material against the surface and press for a couple of minutes until it is fixed to the wall surface.
Expanded polystyrene can be effective insulation and a base for ceramics on the surface of walls. But the material practically does not tolerate temperature changes and the action of water, which freezes on the tiles and in the seams.
Laying extruded polystyrene slabs with glue
Expanded polystyrene has these properties:
- slight linear expansion;
- heat resistant material
; - Due to its elasticity, the heat insulator compensates for deformations.
Since every heat insulator has its drawbacks, polystyrene foam for walls is no exception. Vulnerable to sunlight and rodents. If it is exposed to UV radiation for a long time, it becomes fragile. The surface changes color to yellow, which subsequently leads to erosion.
Wall insulation with extruded polystyrene
Powerless polystyrene foam is a temptation for mice - when it’s cold outside, they make holes in it. To prevent this from happening, professional builders protect the heat insulator with tiles.
Basic rules for laying penoplex
Reliable floor insulation with penoplex works, regardless of the base on which the material is laid. This can be a wooden or concrete floor, as well as a sand and gravel base. The main thing is to remember that the subfloor on which the penoplex is supposed to be laid must be perfectly level.
Insulation of a wooden floor
Insulation of a wooden floor with penoplex is carried out on top of the boards. The boards must be in good condition. You need to prepare the following tools in advance:
- screwdriver;
- hammer;
- self-tapping screws;
- construction level;
- grinding attachment.
Materials you will need:
- vapor barrier;
- plywood or chipboard;
- antiseptic primer.
First, the baseboards and finishing boards are dismantled. Then the lags are checked. Damaged sections of joists must be replaced. Next, the boards are laid. Their horizontalness is checked with a building level.
Insulation of a wooden floor with penoplex
After this, the floor surface needs to be leveled: sand the protrusions and cover all the recesses, grooves and cracks with wood putty. Then the boards are primed and dried. For porous boards, priming is carried out at least 2 times.
Penoplex boards, pre-coated with special glue, are laid on the dried boards. The laying technology is simple: it is carried out staggered, the horizontalness is checked by a level. All voids between the plates are filled with polyurethane foam. The main thing is that it does not contain additives that destroy penoplex. For example, toluene.
Vapor barrier sheets are laid overlapping on top of the penoplex. The edges must be placed on the walls so that they can be carefully trimmed. The vapor barrier is covered with a layer of chipboard, plywood, etc. This material must be laid end-to-end, the seams offset. The horizontalness of the installation is checked with a level, and any unevenness is removed. The last layer is the final floor covering.
To fill the space between the beams and joists of a wooden floor, it is better to use mineral wool or polystyrene foam.
Insulation of concrete floor
In order to insulate a concrete floor, you first need to remove the coating, dust and debris. Then you need to level the concrete surface. To do this, if necessary, a screed of cement and sand is made on top of the concrete. After the screed has completely dried, the foam boards are laid and covered with polyethylene or other waterproofing material.
Insulation of a concrete floor with penoplex
If there is a basement or basement under a concrete floor, waterproofing should be laid on top of the screed, and then polystyrene foam should be laid. One more screed is made on top of the waterproofing material: self-leveling or sand-cement.
Insulation of the loggia floor with penoplex is carried out in a similar way, since the concrete floor is most often its base. So that the screed can dry properly and gain the necessary strength, it is better to carry out all work in the warm season. This will allow you to do without additional heating of the loggia in order to speed up the drying of the screed. In the following video you can see everything clearly (video 1 Insulating the floor with penoplex)
The tiles come in a variety of colors and can imitate a variety of surfaces.
What do we need?
- Screwdriver and galvanized self-tapping screws for fastening the base, trim, corners, etc.
- Galvanized nails and hammer for fixing tiles.
- Packages of facade tiles TechnoNIKOL Hauberk.
- Tape measure and pencil for marking the surface of the building for tiling.
- Special adhesive adhesive from the tile manufacturer for better sealing of seams and fastening of the tile itself.
- Special external and internal corners, as well as window casings from the tile manufacturer.
- Scissors for cutting tiles and a spatula for applying adhesive to the surface of the tile.
Answers from experts
Andrey ▒▒▒▒▒▒▒:
You can put it on the walls, but it will crack on the floor. GVL, plywood or screed with mesh should be placed on top of the penoplex. And so that the joints do not match.
Vladimir Ivanov:
Your tiles will then dance.
Vladimir Vladimirovich:
You can put it in if you don’t mind
Bella Vesna ✿:
It is forbidden. Penoplex cannot withstand this and the tiles will crack.
Count de Wall:
Will crack immediately. The base is shaky and weak.
NOT OLD YET:
Sergey recommends almost correctly. Waterproofing is always carried out from the wet side - from the floor, in order to protect against capillary penetration of moisture into the screed and interfloor ceiling. Waterproofing - dry mixtures - is applied to the wet screed - wet on wet - with a spatula, then dried, the tiles are primed and glued. If you waterproof the floor and then tie it, then there will always be moisture in the screed - the smell of dampness and, over time, the destruction of the body of the screed. Well, if necessary, you can heat and soundproof a bathroom by laying foam plastic on the ceiling up to the screed.
Michael:
For what? of course it is possible
Sasha Novikov:
you can, treat it, but not necessarily, the screed is at least 3 centimeters. better than 5, be sure to put a net
Sergey Koltsov:
It all depends on the situation. Waterproofing, screed with mesh primer and tiles. Believe me, I have 8 years of experience in this work.
Rost:
This is what it is designed for, unlike polystyrene foam! There is no need to treat it with anything, you lay it on the floor, and then you can pour a screed directly on top of it; if the screed is thin, then it is better to reinforce the metal. mesh, and then make any floor! As for waterproofing, it depends on the room! If there is a bathtub, then waterproofing is needed, along the slab, i.e., under the penoplex, and then under the tile, i.e., along the screed. Or just on the screed. If it’s a kitchen, then see for yourself, in principle, it’s not necessary to do waterproofing.
Design of door, window openings and cornices.
To decorate door and window openings, special trims supplied by the tile manufacturer are used.
The general installation principle is as follows.
The bottom and side trims are installed on the already nailed tiles from the bottom up, overlapping and fixed with self-tapping screws.
The last thing to attach is the outlet using metal self-tapping screws.
The top trim is installed under the tile, not on top of it.
The very last (top) row of tiles should be pressed down with wooden slats with cuts previously made in them for the rafters.
Another possible mounting option is to use corners.
Prohibited components in the adhesive composition for penoplex
When using adhesive to attach this type of thermal insulation, you must first pay attention to the composition of the mixture. The fact is that some components can provoke the destruction of penoplex, which in turn contributes to the formation of cold bridges through which heat flows out
To safely glue such material, you should avoid compositions containing the following components:
- harmful compounds: formaldehyde, as well as derivatives (for example, an aqueous solution of formaldehyde);
- solvent in any form;
- polyester and coal tars;
- flammable substances: kerosene, gasoline, etc.;
- benzene, toluene.
Despite a fairly large number of restrictions when using adhesives, penoplex can still be glued without risk to the material, but for this it is recommended to choose special mixtures.
Adhesive for penoplex: the best manufacturers and characteristics
One of the varieties of foam plastic is penoplex. This material differs from its original base in increased density and strength, which determine its growing demand among home owners who want to insulate wall surfaces.
Various adhesives and devices are used for fastening.
Types of glue:
- Mineral dry cement mixture.
- Based on polyurethane.
- Plaster.
- Polymer composite.
- Waterproofing.
Advantages and disadvantages:
- Possibility of mounting with different wall surfaces.
- Quick and easy installation.
- Durability.
- Ecological cleanliness.
- Relatively cheap cost.
- Low flammability (attenuation).
- Does not contribute to the formation of fungal deposits.
- Minimal water absorption and heat transfer.
Insulation on the ground with penoplex
Penoplex is laid on the ground in the absence of a basement and foundation slab. In this case, the ground level is made 0.5 m below the expected final floor covering.
To work you will need:
- crushed stone (fine) or gravel;
- sand;
- cement;
- reinforcing mesh;
- waterproofing;
- metallized tape;
- alabaster.
From the tools you need to prepare a building level, usually aluminum beacons.
A vapor barrier needs to be laid under the penoplex layer.
The soil needs to be leveled, compacted and dried. Gravel (crushed stone) is poured into a layer 0.3-0.4 m thick, leveled and compacted. Medium-grained sand or fine granite screenings are placed and leveled on top of the resulting cushion. The height of this layer is 0.1 m.
Penoplex slabs, aligning the joining grooves, are laid on top of the sand cushion. The joints are glued together with metallized tape. When laying, you should move from the doorway deep into the room. Waterproofing is laid on top of the penoplex. Its strips are laid with an overlap of 10-12 cm. The joints of the strips are covered with tape.
The next layer is the reinforcing mesh. It is placed at a height of no more than 25 mm. When laying, they retreat from the walls of the room by 2-3 cm. When insulating the floor with penoplex under the screed, it is better to use a mixture of sand and cement. It is leveled using beacons and rules. The finished floor is laid on top of the dried screed.
Let's reveal the secret of which side to attach Penoplex?
Expanded polystyrene slabs have been purchased, they are packed together in packs of thick film and are waiting for work to begin. Even examining the sheets in detail, one cannot find an answer as to which side to lay extruded polystyrene foam and whether Penoplex has a front side.
Here are the answers to frequently asked questions about which side to attach Penoplex.
Which side should I glue Penoplex on?
The structure of polystyrene foam boards is the same on both sides, therefore there is no strictly defined side for laying. The sequence itself
Where is the front or back side of polystyrene foam?
This question never confuses professionals, since Penoplex has no front or back side. Therefore, when working with extrusion, no unnecessary questions arise in this regard. It is much more important to ensure that the L-edges match and the seams overlap in the case of a two-layer insulation system.
On what surfaces can Penoplex be placed? Expanded polystyrene thermal insulation is universal and is perfect for most structures. The slabs are widely used for insulating brick buildings, walls made of foam and gas blocks, reinforced concrete foundations and slabs. In this case, there is absolutely no difference which side to place Penoplex 50 mm on the floor, to the wall or attach to the ceiling. It is convenient to sheathe vertical and horizontal bases with insulation. Sheets can hide small protrusions on the base and height differences.
Insulation with Penoplex slabs is carried out on the outside and inside of walls and surfaces in the building. Let's figure out what are the nuances of installing external and internal thermal insulation.
Insulation of balcony floors using heat insulators
A set of works related to thermal insulation can be done with your own hands.
- The floor surface is cleaned, cracks in the concrete, if any, are filled with sealant.
- Some kind of waterproofing material is laid on the entire surface of the floor: glassine, special film, penofol. The latter itself is a heat-insulating material. You can also use liquid rubber. It is recommended to lay entire sheets of waterproofing material, cutting them to size on site, since a large number of joints leads to loss of insulation.
- Logs are made from wooden beams with a cross section of 50*50 mm and treated with an antifungal compound.
- The beams are installed across the balcony in increments of 50–60 cm and secured with self-tapping screws. The outermost logs are placed at a distance of 5–10 cm from the wall. The photo shows the installed logs.
- Insulation boards, about 50 mm thick, fit tightly between the joists. The cracks are filled with polyurethane foam.
- The baseboard is being installed.
- DPS boards or slabs are laid on the floor, as well as a layer of waterproofing if ceramic tiles are to be used as the facing material.
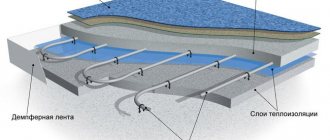
Insulation using a “warm floor” system
The installation process of a heating system is more complex and time-consuming. The system does not imply any restrictions on the facing material: wood, tiles, cork - you can use anything.
- Cleaning the floor. In this case, the stage includes removing the old screed if it has become unusable.
- A layer of insulation - styrodur, penofol - is laid on the floor surface and fixed with glue. There is a layer of foil on top to ensure heat reflection. If the insulation is foil, you can do without a layer of reflective material.
- A metal mesh is placed on a layer of the same glue.
- Heating cables are placed on the floor surface in 10 cm increments. To ensure uniform placement, it is recommended to use mounting tape. The instructions supplied with the heating system should be strictly followed. The photo shows a floor with heating cables.
- Between the turns of the cable there is a temperature sensor in the corrugation. The ends of the cable will be connected to the thermostat, just like the temperature sensor.
- A concrete screed 4–5 cm thick is poured.
- Cladding work, as well as operation of the heating system, can only begin after the screed has completely dried.
Design of internal and external corners of the building.
To design the internal and external corners of the building, the manufacturer supplies special internal and external corners, which are installed with a 50 mm overlap from bottom to top and fixed with galvanized self-tapping screws.
For decorative purposes, the screw heads are then covered with basalt chips set on glue.