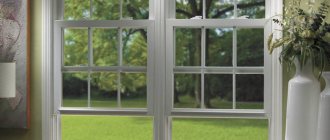
Curtain lighting is an indispensable part of the interior of modern apartments. This is one of the best, non-trivial and bright ways to improve the design of an apartment or private house. The method is often used in administrative centers, sports or shopping areas.
An additional light source that consumes minimal electricity visually enlarges the room. Cozy and comfortable rooms in small spaces will become much more spacious and brighter thanks to LED lighting.
2nd and 3rd generation - differences
The laces themselves, in addition to colors, differ in both diameter and design.
The most popular size is 2.3mm. He belongs to the second generation.
This also includes diameters: 1.4mm-2.3mm-3.2mm-5mm.
Moreover, buying a larger size does not always make sense. The thicker the brighter rule doesn’t work here. It is mainly the central part of the cord that glows.
A thicker shell will not give you more exposure. It will only diffuse the central light. Thickness here has a greater effect on strength.
According to the degree of brightness decrease, the following pattern is observed here:
- 3.2mm - the brightest and then in descending order
In addition, a larger diameter will have a smaller bending radius and you will not be able to bend a 5mm cord in the same way as a 2mm one.
Third generation neon is available in 2.6mm size.
El cords are:
- with a separate skirt or protrusion (skirt thickness 0.6-0.8mm; width - 4-5mm)
Both types scatter light in all directions 360 degrees. LEDs have a worse dispersion angle in this regard. Only 120 degrees.
How to attach round neon? You don’t need to invent anything here, just stick it on any surface.
A drop of superglue or transparent silicone is enough. With such points you can easily secure the entire backlight.
Some people use thin strips of transparent tape or fishing line, but the appearance of such fasteners deteriorates a little when illuminated.
Models with a skirt are widely used to illuminate the floor. No glue, tape, etc. is required here at all. The backlight is easy to dismantle and change without any harm to the baseboard.
In addition, they are also used to illuminate instrument panels in cars.
The protrusion skirt is neatly hidden in the gaps and can also be easily dismantled if necessary.
It can also be pierced without harming the backlight itself, or completely cut off in those places where it interferes.
This is interesting: Shelving in the room (108 photos): zoning and interior decoration
Tools and materials
In order for the window to sparkle with light in the dark, you will need the following materials:
- LED Strip Light;
- power unit;
- controller (in case of multi-color LEDs);
- aluminum profile with diffuser screen;
- self-tapping screws
There are 12 and 24 V varieties of backlight strips on sale. Professionals usually prefer more powerful ones; a novice electrician will only need to pay attention to the price and color.
The tape cannot be plugged straight into an outlet, as it is designed for direct current. A power supply is required. If the LEDs light up in different colors, then a controller will also be needed. It is recommended to mount powerful current sources in an aluminum rail profile for cooling.
Tools you will need:
- screwdriver;
- bits and drills;
- a hacksaw or grinder for cutting profiles;
- electrical screwdriver;
- wire stripper.
Where can I use it?
Usually, the imagination of those who want to decorate their home with such a detail is limited to living spaces or the kitchen, if it does not have windows. However, an imitation window on a backlit wall can be an excellent source of light in a large bathroom or hallway. These parts of the house usually have a lack of natural light, and such decor will solve this problem.
If you use false windows in ordinary rooms, then the best place to install them will be the children's room. Here, a non-standard design is most often created, and a window with built-in lamps can greatly transform a standard room. In addition, children do not always fall asleep well in complete darkness. Such a decorative lamp will completely relieve the problem of children's fears, allowing the child to calm down and fall asleep much faster.
An unusual solution would be to use similar parts on the ceiling. Everyone is accustomed to the standard arrangement of window openings on the walls, but those mounted on the ceiling and similar structures can give the impression that above you is not an ordinary, but a glass ceiling. The solution is very effective and beautiful, but it is not suitable for every interior.
Installation instructions
If you managed to buy an assembled LED strip with connected wires, then the task is simplified. Otherwise, the order of work will be as follows:
- Cut the desired length from the skein with scissors or a stationery knife. Make the cut strictly along the dotted line in the permitted place.
- Solder the wires to the contact tracks. Polarity must be observed. To do this, it is better to solder a red wire to the positive pad, and a black one to the negative pad.
- Connect the cable from the LED strip to the power supply. Press the stripped harness using a clamping nut.
- Also fix the 220 V power wires.
- Mark the metal profile according to the size of the window and cut it with a grinder or a hacksaw.
- Drill holes in it for countersunk holes in increments of 60–80 cm.
- Attach the profile with self-tapping screws to the slope or directly to the frame of the matello-plastic window.
- Remove the protective film from the adhesive base of the LED strip, and then install it into the aluminum circuit, pressing lightly with your fingers. Cover the top with a plastic diffuser.
It is better to provide an inconspicuous corner for the power supply, hide it behind a curtain or furniture.
If everything was done correctly, after connecting to the network you will be able to enjoy soft diffused light in the area of the window opening.
Interior lighting: tools for implementing ideas
If the design idea has already matured, it’s time to choose ways to implement it. Let's talk about lighting devices that will help you achieve your goal.
Decorative lamps
This category includes open sconces and miniature spotlights. The former are suitable for lighting walls, the latter - for furniture. Mini-luminaires can be built into the facades of kitchen units, cabinets, and wardrobe systems.
Sconces for decorative lighting
Mini lamps for decorative lighting
Fairy lights
With the help of garlands you can decorate interior items, furniture, walls, windows. Multi-colored light bulbs will enliven a familiar environment and create a romantic atmosphere.
You can create original wall compositions from long garlands. Another fun idea is to place light bulbs in a transparent container. Soft shimmers of light in a glass bulb will give you a feeling of celebration and magic.
Decorative wall lighting using garland
Advice! Curtain garlands are ideal for decorating curtains. The shiny “mesh” on the windows is a bright touch of a unique design.
Garland curtain on curtains
Edison lamps
Vintage lamps in glass cases look stunning in both classic and modern interiors. The products look equally organic both individually and in a “bouquet”.
Edison lamps are hung on special cords. The lower the decor is located, the more interesting the effect. Thanks to the unique design of the product, even when turned off, they create a special ambience.
Decorative lighting with Edison lamps
Neon signs
Neon signs are also often used as colorful lighting for a room. Compositions made from thin tubes filled with gas look original on the walls. This design is an excellent option for modern interiors.
Neon figures are ideal for decorating a bedroom, kitchen, or nursery. They look especially beautiful against the background of dark walls and interior items. You can choose decor in the form of a thematic inscription that will lift your spirits.
Decorative figurine made of neon for illumination
Decorative neon sign with inscription
Idea! Products can become an expressive accent in holiday decoration
LED strips
LED strips are the most popular option for creating lighting. A huge advantage of the products is the ability to install them on any surface and object. Designers are actively introducing such devices into different interior styles. With their help it is easy to realize even the most unexpected ideas.
Decorative lighting with LED strip
Specifications
- The use of flexible neon allows significant energy savings. One meter of neon cord consumes only 4 watts.
- Operating life 10 thousand hours.
- The LED cable (tube) is available with 240V and 24V power supply.
- The electroluminescent cord is powered by an inverter. Inverter types: 12V; with sound sensor (for light and music); powered by two AA batteries; for USB output; at 220V. To connect multiple cords to the inverter, you can use tees with connectors. Inverters also differ in load - the maximum permissible length of the connected cord. The length of flexible neon can be increased by about 20%. A longer length will reduce the brightness of the glow.
- The diameter can be from 0.9 mm to 5 mm. A thick cord, due to a denser layer of polyvinyl chloride coating, bends worse and has a less bright glow. Suitable for use outdoors and in aggressive environments (bathhouse, sauna).
Thin ones bend better and have a bright glow. It is used to decorate costumes, tuning cars and bicycles, and lighting furniture.
- The smallest bending radius of flexible neon is 4 mm, which allows the production of any shape (for example, letters).
- Dimensions – 14.6 by 27.5 mm; 11 by 24 mm (mini-neon), 20 by 26 mm (RGB).
- The degree of moisture protection is IP 44, and is not afraid of aggressive environmental influences.
- Three types of connectors are used to connect pieces of flexible neon: T-shaped, X-shaped and L-shaped.
Varieties and features
Flexible neon is divided into several varieties:
- classical
- professional
- low voltage
- mini
- round
- "chameleon"
- economy
Classic – characterized by simplicity and wide application. Suitable for architectural lighting design, interior design.
Professional – has high-quality LEDs with a longer service life. Most often used by professional designers for complex lighting projects.
Low voltage - easily cut into pieces, suitable for creating small design shapes. Also suitable for areas with low voltage equipment.
Mini neon – with small cross-sectional dimensions, brightly colored. Used for advertising purposes.
Mini neon for sign lighting
Round – has a dense coating and a long service life (up to 11 years). Suitable for outdoor design.
"Chameleon" - distinguished by a multi-colored glow. Ideal for decorating bars, clubs, restaurants.
Economy is a cheaper version of neon, with low quality diodes.
Today, flexible neon of the second and third generations is produced. Their main difference is brightness.
The second generation has a brightness of 100 cd/m2 and a service life of 10 thousand hours. Flexible neon 3rd generation - brightness up to 290 cd/m2 and a slightly shorter service life - 6 thousand hours of operation.
This is interesting: Washable wallpaper: how to choose canvases for different rooms (25 photos)
Useful video on the topic
DIY New Year's picture on a window made of neon and LEDs - in the video.
Leave a comment Cancel reply
Related posts
5 interesting ways to illuminate an area for the New Year Lighting in the bathroom - making it beautiful, safe and reliable. Video. A luminous ceiling as the main lighting of any room: all the nuances and installation sequence Lighting in a bathhouse - proper organization and installation
LED strip peels off
It would seem, why come up with something else if there are already such simple methods provided by the manufacturers. However, as practice shows, after not a very long time, the backlight fixed by this method begins to fall off and peel off.
There are most often two reasons:
- poorly prepared surface for installation
- poor quality tape
- clear
- wipe dry
- degrease
The second point is the quality of the adhesive tape. Choose copies that have a ZM icon on the reverse side.
This is the most famous world brand that produces not only adhesive tape. Even the Scotch brand itself is just a small part of the company.
At the same time, the presence of such a sign does not guarantee that you will get a quality product. Forging and writing just two letters is not very difficult for Chinese craftsmen.
Also, always pay attention to the date of manufacture. Even high-quality copies from famous brands (Philips), after lying in cold rooms for several years, can easily lose their original properties.
And you will rack your brains, it seems like “ZM”, but for some reason it doesn’t stick well.
What should the average user do and is there a more reliable way to attach LED strips? Of course there is, and most installers and electricians have been using it for a long time.
Wall lighting in the interior: ideas for decorating different rooms
With the help of decorative lighting you can change the visual perception of space and emphasize the decoration of the walls. Surfaces can be decorated with garlands, neon compositions, and LED strips.
There is a worthy alternative to these methods - lamps with built-in LED lamps. They emit warm, diffused light that softly “spreads” along the wall.
It is very important to find an advantageous area for decoration. Let's discuss the nuances of placing light elements in different rooms.
Kitchen
In the kitchen, you can highlight the work area with decorative lighting. The easiest way to do this is with miniature lamps. Neon decor and compositions made of diode threads are best placed above the dining table.
Lighting in the work area in the kitchen
Wall lighting in the kitchen
Living room
All lighting design options are suitable for the living room. Neon figures and inscriptions, lamps, sconces, and LED strips are appropriate here. If there are decorative elements on the walls, you can highlight them.
Spectacular lighting in the living room
Creative wall lighting in the living room
Bedroom
The optimal area for placing light compositions is the wall above the head of the bed. The space can be decorated with colored neon lettering. To enhance the effect, it is advisable to symmetrically arrange beautiful sconces.
Decorative wall lighting in the bedroom
Decorative lighting in the bedroom
Application areas of flexible neon
Due to its cost-effectiveness and reliability, flexible neon is used in a wide variety of fields.
- Contour lighting of architectural structures is performed with an LED cord or tube. Either the contours of the building or its individual parts are highlighted. You can find out more about this here. LED strips can change color - flicker. By installing one such tape you can get an interesting flickering effect. Before starting work, a sketch is made and the length of the LEDs is calculated. The power source is located in a place protected from bad weather. A switch or timer is used to control the backlight.
Contour neon lighting of buildings
- Using flexible neon you can create a spectacular landscape design. Decorate trees, illuminate a fountain, mark the steps of a staircase with an LED cord, entwine lantern poles - there are a lot of ideas. Electrical cables are laid using holes and trenches.
- Modern outdoor advertising (banners, illuminated signs) is impossible without the use of flexible neon. Shop windows are illuminated - a bright neon cord is laid along the perimeter, buildings with glass facades - with the help of flexible neon you can create any composition. One of the options is neon volumetric letters, which are described in this article.
- Ceiling lighting is performed with flexible LED neon by placing it behind the cornice (on the wall) or in a niche in the ceiling structure. Suitable as additional lighting. When installing, you need to take into account the width of the cord and the dimensions of the transformer (inverter box). They should fit behind the ceiling cornice. For attaching neon, Moment sealant or glue is best suited. Read more about this here.
- Floor lighting is carried out using a flexible neon strip. In addition to the tape, you will need a power supply (inverter), which is selected taking into account the length of the tape used. Installation is carried out in a specially prepared niche (for example, a polyurethane cornice). The floor can also be illuminated by installing a neon strip under the front of the furniture or under transparent high-strength glass tiles covering part of the floor. In general, neon lighting is used in many lighting solutions for the living room, kitchen, bedroom, etc.
The LED tube is plugged into the outlet directly using a plug.
- Decorative lighting of retail premises helps to attract the attention of buyers. You can create original design designs from LED tubes. Another important point is that LEDs do not emit heat. This allows you to place LED strips near frozen products without worrying about the temperature conditions of their storage.
Neon advertising
Hide flaws
A “false window” can serve as a lifesaver in the event of an unsuccessful design of a building or room. So how to implement this design technique, how to make a false window?
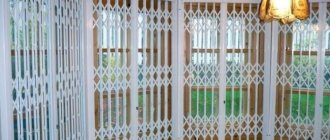
You can often see windows close to each other, when the partition between them becomes non-functional and inappropriate. Such building defects are hidden behind a common curtain for two windows. But if the wall is designed in the form of a colorful “false window,” the room will be filled with additional light and space.
Note!
In the case of a pier, the space will expand even more if the false window is mirrored.
Another case of defects in the planning or redevelopment of premises is the emergence of peculiar nooks into which neither sunlight nor artificial lighting penetrates. These places are usually equipped with a workplace, library, niche or other work areas. But if you create a through false window in such a place, the common room will receive additional lighting. Under the transparent glass of such a “false window” a picture on any topic can be depicted. If instead of transparent glass you use stained glass, patterned or frosted glass, under which you install several spotlights, then this part of the room will attract the attention of anyone who enters with its originality.
Note!
A feeling of additional openness of space and extraordinary realism from a false window can be obtained if a fan is built into it.
The second function of the fan in the design of a false window - to create air movement in a remote and cramped place in the room - is also very relevant and important.
It has been noticed that the more unexpected the location of the false window, the more emotions and reactions it causes from others.
Installation recommendations
To create high-quality lighting that will not spoil the overall interior of the room, follow the following rules:
- Lighting is selected in accordance with the curtains used. You create a colorful effect rather than highlighting the ribbon. Therefore, the person who looks at the curtain should not see the tape. Ideally, it should be hidden inside the box.
- Do not block the path of light flow with other structural elements.
- It is advisable to direct the light along a tangent line relative to the curtain.
- Install the lighting device as far as possible from flammable objects and surfaces.
- Try to create smooth lighting, and no curtains or curtains should interfere with the light.
- Avoid installing overly bright LEDs or buying cheap Chinese products (both strips and power supplies).
- Make sure the insulation is intact to prevent a short circuit.
PSU power calculation
Before purchasing a tape, you need to calculate its power and, in accordance with the result obtained, select a power supply. As an example, we will consider a flexible SMD 5060 board, the length of which is three meters. The total power is 14.4 W, and there are about 60 LED diodes per meter. The power for one linear meter can be obtained from the sales consultant.
The total consumption of a 3 m board will be 14.4 * 3 = 43.2 W. But the power supply should be taken with a power reserve, so about 20% should be added to the obtained value. As a result, after rounding we get a derivative equal to 52 W. You can buy a power supply of a different power, but not lower than the received value.
The table below shows the dependence of the wire cross-section on the power of the lighting strip:
| Power, W | Current, A | Cable diameter, mm | Cable cross-section, sq. mm |
| 12 | 1 | 0,75 | 0,44 |
| 24 | 2 | 1,0 | 0,79 |
| 48 | 4 | 1,5 | 1,77 |
| 72 | 6 | 2,0 | 3,17 |
| 100 | 9 | 2,5 | 4,91 |
Fastening the tape
We said above that the tape is most often hidden inside a special niche. After the transformer and electrical wiring are installed, the flexible curtain board should be installed. We described recommendations for its mounting above at the beginning of the “Installation Recommendations” section.
Once installation is complete, perform a lighting inspection to ensure that it meets all of the listed guidelines.
Connection
LED strip connection diagram:
- Cut the cord to a length that is a multiple of the smallest tape size.
- Install a connecting pin into the cut end and secure with sealant.
- Based on polarity, connect the connector to the output of the rectifier.
- Cover the reverse side of the cut cord with a plug.
- Make sure the lamp is tight and the connections are good.
The rectifier used to connect the LED has a diode bridge. The rectifier power is 700 W, which is enough for 40 meters of high-power tape, and 100 meters of standard tape.
Installing LED strip on wood
Installation is carried out in the following sequence:
- Calculate the required length of the tape.
- We connect all the components to each other.
- We isolate all connections.
- We attach the LED to the tree with clamps.
- We connect the system.
Installing tape on the wall of a building
In this case, clamps will not help; other solutions will be needed. Installation can be done in two ways:
- Small holes are drilled in the wall covered with plastic and the tape is fixed with their help.
- In the case of a brick wall, the task becomes more complicated. First, install the tape at the corners of the building and stretch it to the maximum extent possible, being careful. Then small holes are drilled in the wall and the tape is fixed. One fastening is created for each meter of wall.
Safety precautions
When installing and operating the tape, do not forget about safety precautions:
- The block must have a safety margin in terms of power. Despite their resistance to mechanical damage, the safety margin of diode lamps is not infinite. They must be protected from impacts with hard objects.
- For every five meters of tape there must be a power supply.
- When installing LEDs, polarity must be observed.
If you have no installation experience, it is better to seek help from specialists. Installing the tape is not a very difficult task, but it requires compliance with certain rules.
Source
Examples of ready-made solutions
In addition to the top and bottom lighting of curtains, LED strips are often used to illuminate the side parts of a window opening. In this case, install the box (with the tape placed inside) along the perimeter of the window. This lighting method will look especially bright and unique with curtains decorated with embroidery or beads.
Using LED lighting to illuminate curtains and window openings is an excellent way to create a unique design and visually enlarge residential and administrative premises. In recent years, the cost of such products has decreased significantly, making them accessible to almost all segments of the population.
False window
Interesting decorative windows that you make yourself are gaining popularity; they can also be decorated with lighting.
To create an artificial window you will need polystyrene foam, nails, wooden slats, and corners for shelves. The frame should be tinted, glued with leftover wallpaper, and curtains hung. Finally, combine the false window with lighting.
Advantages and disadvantages
Advantages of flexible neon:
- Environmental friendliness. Cold light does not contain ultraviolet radiation.
- Economical. Low power consumption.
- Resistant to moisture penetration. Not afraid of aggressive environments. Can be used both outdoors and indoors with high humidity.
- Easy to use.
- Reliability and safety. Does not contain glass or small parts. Does not heat up, there is no risk of fire.
- Durability. Designed for several years of work.
Flaws:
- Without skills, lighting cannot be done independently.
- Indoors, you have to deal with dust settling on the lighting strip or tube.
- Cannot be used as main lighting.
- High price compared to incandescent lamps.
But, despite all the “disadvantages,” there is still no alternative to using flexible neon in design.
When purchasing a neon strip or tube, you need to pay attention to quality. You should avoid cheap Chinese manufacturers. And if difficulties arise with the installation of flexible neon, and you cannot figure out how to connect it, it is better to contact specialists. The money spent will be repaid by the long service life of the lighting and the quality of the design.
Neon lighting: benefits of use
You can light up your windows on New Year's Eve using neon bulbs. This will make the room mysterious, original, cozy.
At night, neon lights complement the New Year's atmosphere, attract attention, and create a beautiful view from the street.
The backlight does not make noise during operation, it is safe to use, and the glow does not cause fatigue, such light is not harmful to the eyes.
Neon lighting is an option for creative window decoration ideas for the New Year. With it you can create the desired inscription or even some simple drawing, symbol, or ornament.
Each room with windows can have different lighting. In the kitchen or children's room, neon bulbs will create a fabulous atmosphere, complement the interior, and fill the room with unusual light. In the bedroom, neon will look romantic and enchanting. Even false windows with diodes will look stylish.
When installing neon lighting on a window, it is better to turn to professionals, since its installation involves high voltage and a set of special tools.
Neon lighting can be either one color or different colors that change within a short time.
General technical data
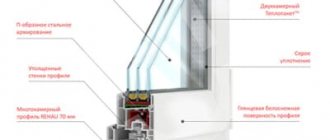
Let's start with something simple. An LED strip is essentially a single printed circuit board on a flexible basis. At the same time, the LEDs themselves are fixed on it at a certain interval. The width and thickness of the tape can vary depending on the brand of the product, and the required length is determined by the consumer himself. During production, the tape is usually rolled into rolls in multiples of five meters.
Flexible neon in its essence and functionality is quite close to tape, but differs in design. For its manufacture, a polymer channel-tube is used (for example, from a type of PVC), which, due to its optical properties, implements two functions at once. On the one hand, the transparency of the tube ensures the passage of the required amount of light, and on the other hand, the polymer slightly conceals the effect of the spot placement of LEDs, which gives a more uniform glow. This kind of neon is also called “flex”. Reels with LED neon usually have a length of 100 linear meters.
Both LED strip and flexible neon can have a monochrome glow (one color) or multi-colored RGB, from which you can create almost any desired shade. Color temperature can also vary, typically ranging from 2700K to 10000K.
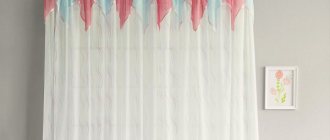
Curtain lighting options
The garland for curtains has a couple of types of glow:
- end;
- lateral.
Diodes are placed either at the top or bottom. Most often, the lighting is mounted at the top, pointing down towards the fabric. A box is placed close to the edge of the curtain, and a strip that supplies light is placed there.
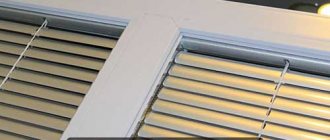
It is also possible to illuminate the blinds, then you should choose lighting with very close placement of the diodes to each other.
Dimmer LED lamps look good on transparent fabrics, making curtains light and airy. Kisey, organza with lighting will add comfort and softness.
And heavier curtains require high-power diodes; dense textiles almost do not transmit light.
Advantages of neon over LED strip
The main advantage of flexible neon over LED strip can be considered the uniformity of the glow. It is due to the fact that the polymer with which the LEDs are filled slightly conceals the glow of the LEDs and makes it less dazzling.
We advise you to study: “Installation and connection of flexible neon.”
In the case of an LED strip, uniform illumination can only be achieved by using an aluminum profile with a matte screen. But even in this case, it is not possible to make the glow as uniform as in the case of flexible neon. Also, because of the brightness of the LED strip, it has to be hidden further from smooth surfaces, which reflect their light and have a blinding effect.
The advantages of LED neon over LED strip include the following:
- rational design that reduces light attenuation and reduces heat generation;
- wider application possibilities;
- does not require sealing, since it is already protected from moisture and dust;
- allows cuts anywhere, whereas with LED strip this is only possible in specially marked places;
- possibility of connection in serial and parallel way.
We advise you to study: “All the possibilities of using flexible neon.”
For flexible neon, only the cutting area needs to be sealed. For this, special glue and an insulating tube are used. It is equally important that to achieve the brightness of neon it is necessary to install several LED strips nearby. In such a situation, one of the advantages of LED strip is completely crossed out - low cost.
It is also noted that flexible neon LEDs do not lose their properties for a very long time, unlike LED strip diodes, which undergo degradation after time. It leads to a decrease in the brightness of the glow.
When choosing between neon or LED, it is important to consider that the tape can only be bent in one direction. For this reason, it is used mainly in the interior. A flexible cord bends better, so it can be used to create elements with more complex geometries.
How the window will fit into the design
Harmony in the interior is an important factor. It should be taken into account when creating a false window with your own hands. The window should be in harmony with the main accent in the interior. For example, if the room is decorated in a minimalist style, it is better to make a window with a view of the metropolis. A thin plastic panel or molding baguettes are suitable as a frame. The element can be made large; the window will significantly enliven the interior of the room with a small amount of furniture.
A room made in the Art Nouveau style can be decorated with a small window with a thick frame made of natural wood or molding, but the panel should have a classic look.
It’s easy to make a frame from molding yourself. The window can be decorated with real curtains for greater realism. As a landscape, you can choose a poster with a romantic image, for example, a flowering meadow, an ancient street or a landscape with the mirror surface of a lake.
Related article: Installation of low tide on a plastic window
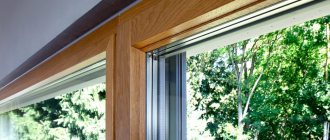
Features of LED backlight installation
In order to illuminate a window with an LED strip, you do not need to put in a lot of effort. The process of installing this type of lighting begins with measuring the room. Windows and spans are measured. Window sills and wall height are measured. Then the optimal illumination points are selected.
In order for the presentation of the color scheme to be of high quality, it is necessary to correctly select the places for illumination. The points for wiring are marked. Then the mounting locations for the tape and power supply are selected. Radiators are mounted under the LED strips. They help remove the heat emitted by the belts during operation. Then the opening is closed from the inside. If this is not done, the output color stream may appear excessively dull.
The backlight program can be absolutely anything. It is selected based on individual preferences. You can easily select a program that will best suit a specific design.
LED lighting is especially popular in winter. This method of decoration is relevant on the eve of the New Year holidays. You can even decorate your home yourself. However, if you are not confident in your abilities, then it is better to use the services of professionals.
Types of false windows
There are several options for creating “false windows”.
- Window in frame. A realistic picture of the view from the window is framed in a frame made of wood or polyurethane molding, a real window sill is nailed in, on which there can be fresh flowers in pots, a real cornice with a curtain is attached, identical to the one that is already hanging on the real second window in this room.
- Window on the ceiling. Recently, it has gained even wider popularity than a false window on the wall, despite the labor-intensive process of its creation. To begin with, a suspended ceiling is mounted on the ceiling. In its frame (frame, molding) there will be a picture, which can be created by gluing wallpaper with a pattern, or attaching mirror tiles, or painting by an artist (fresco). On a false ceiling window, photographic canvas (stretch) and flickering lighting are often used. A false window on the ceiling creates the effect of a transparent roof.
- Window in the bathroom. In the bathroom, creating a false window is somewhat more difficult. But your efforts will be rewarded, because the bathroom most often needs a visual expansion of space. For a false window here you will need a niche in the wall. Lamps with soft bright light should be installed on its side panels to create the illusion of a sunny day; the middle of the niche is decorated with views of nature from any corner of the globe. If glass is used for a fake window in a bathroom, it should be frosted due to the high humidity in this room with the formation of condensation. The illumination, like a night light, is hidden under frosted glass. A window sill attached to a false window can serve as an additional shelf. Stained glass is very practical and looks good in the bathroom, which can also create an imitation of a window.
- Window in the kitchen. In order to hint at the possibility of looking into the living room from the kitchen, you can create a complex design of small false windows on a blank kitchen wall. The windows can be of different sizes, can exist in a frame separately from each other, can overlap each other and be supplemented with photographs of family members in the same frames.
Imitating a window opening will help bring novelty to a familiar space, add color, change the space without resorting to labor-intensive redevelopment. Therefore, it is pleasant and useful to believe in such an illusion.
Installation technology
It is necessary to design future lighting for curtains before installing the curtain rod, since power is supplied to the flexible board first. Hide the transformer in a box along with the tape, and use dowels inside the mounting niche. At the same time, it is necessary to guarantee free access to the wires, as well as quick dismantling, which may be required in the event of a device failure.
To install you will need:
- electric drill (hammer);
- nails;
- screwdriver;
- power supply for LED;
- RGB strip;
- tool for removing insulation from the ends of the wire;
- soldering iron;
- glue.
Before starting the process, turn off the power supply, and then connect the wires according to the “phase to phase, zero to zero” principle. The V+ and V– pins are used to power the LED board.
Step-by-step instructions for installing the tape:
- choosing a wire of a suitable length;
- stripping ends (removing insulation);
- tinning of wire ends;
- selection of drilling points for installing the power supply (PSU) and attaching it to the wall or ceiling;
- connection of a 220 V phase voltage with a switch;
- connecting the ground wire and zero to the power supply;
- soldering all wires.
Application of window imitation in the interior
It is always more pleasant to see a sunny landscape or a city landmark from your window than a series of gray panel houses. But to do this, each of us would have to move to a picturesque area, which is not very feasible.
This is why imitation windows in apartment interiors have gained such popularity. You can choose any image that you will look at with pleasure, or place a mirror outside the “window”.
Another option for using false windows is in basements or attics. Naturally, we are not talking about a residential building, but some kind of cafe or shop, the interior of which should evoke only positive emotions in visitors. And such an unusual design as a false window will help make the establishment memorable.
If you are organizing a play area in the shape of a castle or hobbit house in your children's room, you will definitely need imitation doors and windows! In this case, this technique will help develop the child’s imagination and attract him to exciting games.
In the same way, various interior styles are played out, where the windows are initially designed in a special way - for example, Provence or country.
Aluminum tape
If your tape is, as they say, on the border between low-power and powerful, and besides, there is nowhere to place the overall profile, try using aluminum or foil tape.
First, glue this tape to the surface, and then apply the LED strip to it. At the same time, again, it won’t hurt to use superglue spot-on.
It will hold quite securely, and the aluminum will play the role of a small reflector and heat sink.
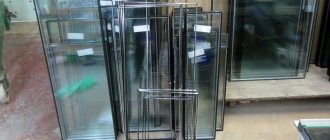
Installation of tape in a showcase
At this stage, I was humming Vyacheslav Butusov’s song “On the Bank of a Nameless River”:
Your movements will very soon become smooth, Your gait and gestures will be careful and easy...
It is important to constantly remember that there is glass around, which is very easy to break. In addition, when installing the tape, a sudden movement can cause the tape to catch on the edge of the glass, and a pair of diodes can be torn off the tape. I made a display case before, removed the shelves, but in this case I decided to try it without removing it.
Installed tape near the shelf
The showcase is assembled from standard profiles, but it is not quite suitable for the tape. The tape is not glued entirely, but only on 1/2 or 2/3 of its area. The reason for this is the fastening of the shelves; there is no escape from these holders; you have to go around them, making sure that the tape does not bend too much.
And here is the output of the tape “on the roof” of the display case:
Installed output tape
The wires do not go straight into the slot; they have to be bent a little.
Aluminum profile
It can be of three types:
- overhead
- mortise
- angular
The tape itself is also glued to the profile with adhesive tape. Here, thanks to the perfectly flat surface, it will be held much more securely than on a wall or wooden base.
However, be especially careful about one important point.
When you remove the protective layer from the back side, in certain places, conductive paths may be exposed.
1 of 2
And if you directly apply them to an aluminum surface, you will short-circuit them with each other. At the first test switch-on, a short circuit will occur with all the ensuing consequences.
To avoid this, in these places (and only in them), you can apply a layer of insulating hot-melt adhesive to the surface, or make an insulating backing from simple electrical tape.
It is also very convenient to use hot-melt glue to place joints and joints where special plastic connectors are used.
The profile can also be equipped with a device such as a diffuser. A bright ribbon will not hit your eyes, but will evenly illuminate the space.
Where aesthetics are not important and the lighting is either hidden or temporary, use plastic clamps or nylon ties.
True, you won’t be able to attach them directly to the wall; you’ll have to look for a suitable profile again.
How to make it yourself
Despite the fact that such compositions look quite difficult, assembling them yourself is not so difficult. You will need to order a photo print of an image that will imitate what you want to see through your decorative window. Printing must be ordered on a translucent film and this can be done in companies that deal with stretch ceilings. Despite the fact that photo printing itself is very expensive, the image size will not be too large and will not put a big dent in your pocket.
When the desired picture is printed, the window frame is assembled. It can be assembled from any available materials, the main thing is that the end result is a composition that has maximum resemblance to a real window opening. A film with an image is stretched inside the assembled frame, and an LED backlight is mounted behind it. When everything is put together, all that remains is to find a suitable place for the composition and mount it on the wall.
You can replace a canvas with rather expensive photo printing with ordinary photo wallpaper. They cost an order of magnitude cheaper, but the design will have to be changed - the light will not pass through the wallpaper material. In this case, you will have to limit yourself to an LED strip installed around the perimeter of the frame, illuminating the image from the outside. This composition looks no worse and its only drawback is its low realism.