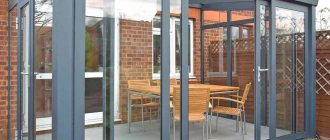
We call a window not only an opening in the wall, but an entire structure in a room, consisting of a glazed frame and an adjacent window sill and three edges of the opening: the top and two sides.
All this is perceived as a single whole; as a rule, the frame is replaced by an invited experienced specialist, and the installation of the window sill and edges, for the sake of economy, is carried out independently. This is quite a feasible task, but you need to remember that the correct rotation of the window slope can significantly improve the illumination of the entire room, and its absence will steal the sun's rays.
How to calculate the angle of dawn
The angle of rotation between the window opening and the slope must be greater than 900. The most light will enter the room when this angle is 450. On all windows, the rotation of the opening is the same.
To correctly calculate the angle, you need to know that its value directly depends on the width of the slopes. For 10 cm of wall width, experts advise making 1 cm of dawn. If the wall is 25 cm thick, then the turn is made by 2.5 cm.
All window slopes should be at the same dawn angle. In some cases, it is not possible to maintain the same turn on vertical and horizontal slopes. The top angle of the dawn may differ slightly from the angle relative to the side slopes, it is not so noticeable. But the side slopes should always be the same.
SNiPs, GOSTs and other standards
There are no clear instructions and regulatory requirements for the size of the design angle in the regulatory documents. The standard map of the labor process for finishing window openings contains information about permissible and maximum deviations and errors.
Therefore, if there is no preliminary agreement with the installation company and specified conditions for the angle of rotation, then claims cannot be made to the hired construction specialist. Unless the slopes will be frankly crooked!
The correct rotation of the window slope should be recorded in the building glazing project or when drawing up design projects taking into account the requirements for insolation of premises. There are standards and calculations for insolation that limit the densification of urban areas. But this socio-legal problem is no longer connected only with the topic of our article.
U-turn marking technology
To obtain the same angle of dawn you will need a square. Perpendicular lines are drawn from the corners of the window along the window sill. The distance between them is equal to the width of the window. To obtain the required bevel, one centimeter is measured from the edge of the window on both sides to the center and a dot is placed. Using a long ruler, draw the axis of the wall along the window sill. At the intersection of the wall axis with a perpendicular in the opposite direction from the center of the window, an indent is measured and a point is placed. To calculate the indentation, 1 centimeter is taken for every 10 centimeters of wall thickness. If the wall thickness is 30 centimeters, then 3 cm is taken for the indentation, as a result the window opening will increase by 6 cm. The points on the window and on the axis of the wall are connected by a straight line. The slope will run along this line.
On the upper slope, markings are done in the same way. You can check whether the obtained lower and upper points coincide using a plumb line.
For marking, you can use a special Pivanov square. The square is placed on the box, the plate is moved along a ruler with divisions and is fixed at the level of the wall axis. Using the divisions of the plate, the amount of rotation of the slope is noted, where 1 cm of rotation is given per 10 cm of slope width.
How to properly rotate a plastic window slope
Plastic is the most popular and durable material for decorating window slopes. The size of the dawn directly depends on the size of the gap between the window frame and the window opening.
In a panel house, you should not turn the slope more than 2 cm. This can lead to the starting strip bending away from the window and creating a gap.
The work is carried out in several stages:
- Along the perimeter of the window, wooden slats are placed flush with the wall. It is necessary to strictly observe the vertical position of the slats; for this you can use wooden blocks. The slats are attached to the wall with self-tapping screws 95 mm long.
- Using a level, vertical and horizontal lines are drawn along the edge of the window, onto which the starting line is then stamped.
- An F-shaped profile is attached along the outer perimeter.
- The plastic panel is installed in the starting profile, then a layer of insulation is laid, after which the plastic is inserted into the F-shaped profile. It is necessary to accurately measure the plastic slope, taking into account its rotation.
To correctly calculate the dimensions of the panels for slopes, you need to make several measurements:
- the width of the side and top slopes is measured in three places;
- To obtain the required length, two measurements are taken: for the rear edge of the panel, which is inserted into the starting profile, and the front edge of the panel. The leading edge must be longer, otherwise the slope will turn out backwards.
Plastic corners for slopes: types, characteristics, gluing
To achieve the perfect transformation of the interior during renovation work, you need to carefully select every detail. Installing a plastic corner for slopes will be the final piece of finishing of window and door openings. Correct installation of this product will help hide some imperfections and emphasize the clarity of the lines.
What is a PVC corner?
Corners for slopes are part of the fittings that are used to decorate various openings. Of course, this does not limit the scope of application of these products. They are actively used for other work when there is a need to hide corner joints of materials.
The production technology makes the element very durable. A fragment bent at a certain angle keeps its shape without changing parameters. This is the main difference between plastic material and MDF products.
- For cladding window slopes located inside houses and apartments.
- As protection for corner sections of walls that have been covered with wallpaper.
- During the installation of products from plastic panels, for finishing internal and external joints.
For finishing objects outside buildings, in order to prevent destruction of assembly seams and add aesthetics.
Thus, plastic corners are installed on slopes to protect the joints and create a beautiful decorative coating.
Installation of plastic corners on slopes allows you to create a complete composition
Advantages and disadvantages
Of course, plastic corners have their pros and cons. It is worth taking a closer look at the advantages of these products:
- They perfectly hide the corner junctions of materials that are located on adjacent sections of the walls.
- They smooth out small surface imperfections well, creating an angle of ninety degrees.
- The service life is tens of years.
- Installation does not require special skills, you just need to ensure that the trim is calculated correctly.
- Wide choice of colors.
- Low cost, which distinguishes the products favorably from aluminum options.
Installation of corners allows you to hide unevenness and resulting joints.
We must not forget about the existing shortcomings:
- Possibility of damaging the material when cutting. The fact is that plastic is quite fragile; using the wrong technique or tools is a guarantee that the fragment will become unusable.
- Release of substances harmful to human health during combustion. In this regard, the material is not suitable for finishing evacuation areas.
Naturally, negative parameters depend on the specific use case.
Plastic corners are quite fragile material, so trimming must be done very carefully
Various types of products
There are different types of corners, which are divided according to their size and scope of application. The following varieties are distinguished:
- Standard. They differ in the same size of the sides. Used to give strength to slopes. There are two main sizes: 2*2 and 5*5 cm.
- Non-standard. Their sides are asymmetrical. They are used for work with slopes that are installed on curved or arched openings. The most common size is 10*20 mm.
- F or T - shaped. They hide the spaces that are formed when the slopes and wall material meet.
- On the latch. They are distinguished by a removable design, which allows work to be carried out much faster.
Types of plastic corners
Installation of plastic corners on slopes
Installation of corners is carried out by gluing (with the exception of snap-on options). This method is simple, but has one significant drawback - it is impossible to dismantle the element.
Important! Work is carried out only after all finishing processes have been completely completed.
Glue selection
Before gluing corners to slopes, you should carefully select the composition for gluing. The polyurethane option has proven itself to be excellent. Although it is better to choose special products that are designed to work with PVC products.
On a note! There is often advice that recommends installing corners on slopes using silicone sealant. But it must be borne in mind that this composition is not a universal adhesive. Therefore, there is a high probability that the product will simply come off and become covered with a greasy layer that will be very difficult to remove.
In order not to make a mistake, you should choose a composition called “liquid nails”. This option will be the most universal.
How to properly turn a plasterboard slope
When cutting a plasterboard sheet, it is better to make a margin of 1-1.5 cm, which can then be cut off. Drywall can be attached with glue or using a profile. The profile corner is attached along the entire perimeter of the window and along the outer perimeter of the slopes with self-tapping screws. When installing the profiles, the rotation angle must be observed.
When attaching drywall to the adhesive mixture, the surface is cleaned and primed. The mixture is applied in small piles with a distance of 10 cm. Pre-prepared strips of drywall are pressed down with a block along the turning line.
How to form a dawn for plaster slopes
First of all, to obtain a strong window slope, you should not skimp on cement. At least one share of cement is taken for three parts of sand. Otherwise, the bevels may crack and crumble. Washed river sand is best. To finish the inside of the wall, you can add alabaster to the solution, which will make the work much easier. This is especially true for the upper slope.
You should start from the top slope. Here difficulties may arise when plastering uneven areas on the lintel. In this case, the work is carried out in several stages. The next approach begins only after the thick layer has completely hardened. You can plaster the lintel using a pre-fixed masonry mesh.
The finished solution is applied to the falcon and thrown onto the slope with a trowel. Then, at a given angle of dawn, a strip is applied to the wall so that when the square moves, the plate continuously slides along it. To install the slats, a level and plumb line are used. At the top of the window slopes, a rule is hung horizontally and secured with nails or plaster. Plastering is carried out from the top. Then, after completing work on the upper slope, the rule is hung vertically on the sides. The mortar on the bevels is smoothed with a wide spatula in the direction from the box to the rule.
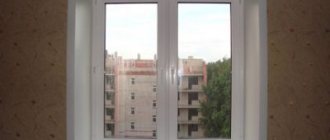
A correctly made reversal of a window opening has not only an aesthetic function. At dawn, the window looks more voluminous, while more light enters the room. This is ensured by the reflection of sunlight from the deployed slopes. In addition, on windows with the correct dawn, it will be easier to make adjustments in the future.
Background
In the old days, buildings were built with very thick brick walls and the windows resembled tunnels or narrow loopholes, like in fortress walls or towers. But in temples, to enhance illumination, the side walls were “pushed apart,” making the opening in the wall look like a megaphone.
The expansion angle reached 145. It came to be called the dawn angle, apparently from the first rays of sunlight entering the room.
The use of finishing technology taking into account the angle of dawn has become a tradition to increase the efficiency of using natural light.