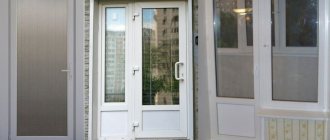
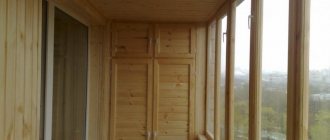
Sooner or later you have to change your interior doors. The procedure is not so complicated that it is necessary to hire a specialist. If you have at least some skills in handling a saw, a level and a plumb line, you can tighten a few self-tapping screws - you can do it yourself. When replacing, before installing the interior door, the old one must be dismantled. And here too there are peculiarities. About all the subtleties - in photos and videos with detailed instructions.
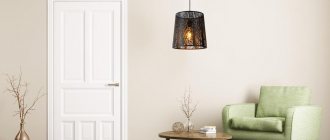
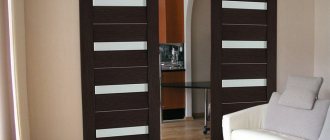
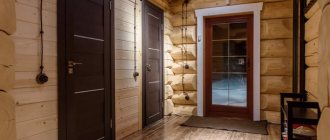
Interior doors are different not only in design, but they are also made from different materials
Interior doors are made from different materials. Moreover, the material of both the door leaf and frame is different. The door leaf is:
- From fiberboard. These are the cheapest doors. They are a wooden frame to which laminated fiberboard is attached. They have low sound insulation, are susceptible to high humidity, and are easily damaged.
- From MDF. They cost much more, but the quality characteristics are much higher. They have better sound insulation, are not afraid of moisture, are stronger and more durable.
- Wood. The most expensive doors. They are made from different types of wood - from pine to oak or more exotic species.
Door frames are also made from the same materials. The worst choice is that fiberboard boxes bend even under their own weight, and hanging the door leaf on them is a real pain. So try to take either MDF or wood. There is another material: laminated wood. It is good because it does not need to be processed or painted, but the service life depends on the quality of the film.
Door frame assembly.
To accurately assemble the frame, we will assemble it directly along the door leaf. To do this, you need to assemble the elements of the box on the floor together with the door leaf.
There will be 3 such elements in total. Two vertical strips and one horizontal top. Modern interior doors do not have a lower bar.
We assemble the box along with the canvas.
We lay the door leaf on the frame parts.
Before assembly, you need to decide on which side of the door the hinges will be installed, as well as which side will be the front and which the back. The design of some doors may contain glass inserts that are glossy on one side and matte on the other. Therefore, it is important to decide which side will be glossy and which side will be matte.
Between the box and the canvas you need to set gaps of 3mm and 4mm. MDF plates that come with the door leaf are suitable for this. These plates are 3mm thick and are mainly nailed with metal brackets on the top and bottom of the door leaf. The plates are installed at the manufacturer to protect the ends.
MDF plate 3mm thick.
On the side where the handle will be installed, it is better to set the gap a little larger, about 4mm. This increased gap is necessary to compensate for the expansion of the door when it swells due to increased humidity in the room. Achieving such a gap is quite easy. To do this, you need to stick masking tape onto the MDF plate; it will give the required thickness.
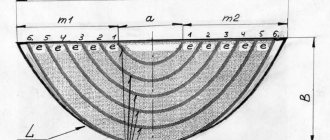
Assembly diagram.
Now we mark on the top horizontal bar the places where we will make the cuts. Then we saw and use a utility knife to remove the excess parts.
We make markings on the top bar of the box.
We make a cut on the top strip of the door frame using a hacksaw. For an even cut, use a miter box.
Use a utility knife or chisel to cut off part of the material.
This way the vertical and horizontal parts of the door frame are joined.
We reassemble the box together with the canvas, setting all the necessary gaps.
We install the hinges in place. They are installed at a distance of 20-25cm from the edge of the door leaf. It is convenient to use overhead loops in the form of a butterfly. Such hinges do not require special mounting cutouts.
Overhead loops.
Mark with a pencil on the door leaf and on the frame the location of the hinges.
Now you can determine the length of the vertical slats of the box. They should protrude from the bottom edge of the door leaf by 10-20mm. In an installed door, this will be the gap between the door and the floor. This gap will depend on what kind of floor covering will be in place of the threshold. If you plan to lay laminate in this place, then the gap can be chosen to be 20mm, but if there is linoleum, then it is better to make the gap smaller.
The gap between the door leaf and the floor.
We disassemble the structure and cut the vertical posts to the required size.
We mark on the canvas and the box where the screws for attaching the hinges will be installed. To do this, place a loop along the mark that was made earlier and use a pencil to outline the holes in the loop.
We mark the places where the screws are attached.
At this stage, you need to pay attention to which part of the loop is attached where. The loop consists of two parts. When folded, the outer and inner parts are clearly visible. The outer part is attached to the frame, and the inner part is attached to the door leaf.
In the previously marked places we drill holes for self-tapping screws. Holes should be drilled with a diameter of 1.5-2mm. If this is not done, then when tightening the screw, the part into which it is screwed may burst.
You can drill without preliminary marking directly along the loop.
After the holes for the hinges are drilled, you can begin assembling the door frame.
We connect the parts, drill holes with a diameter of 1.5-2 mm and tighten the screws.
Drill holes with a diameter of 1.5-2mm
We twist the parts with self-tapping screws.
Let's move on to the next stage.
Installing handles, latch or lock on the door.
The handle is most often installed exactly in the middle of the door. Since the height of the door is 2 m, the handle is placed at a height of 1 m. But for ease of use, especially for small children, the height of the handle can be reduced, for example to a height of 95 cm.
Accordingly, the lock is installed at the same height.
Installation of a mortise lock.
To install the lock accurately, you need to know a little trick.
We attach the lock as shown in the photo below. Be sure to drill holes before screwing in the screws.
We fasten the lock.
Using a utility knife, cut out the laminated covering around the lock. This action should be done carefully and slowly, pressing the knife blade well against the lock. As a result, we get a perfect cutout for the front lock bar.
Using a knife, cut along the contour of the lock.
We tear off the laminated coating.
We mark the place for installing the inside of the lock.
The photo shows the marked location for the interior of the castle.
We drill out a place for the lock.
Use a chisel to remove excess material.
Now you need to mark the place for the lock handle. To do this, we place the lock on the side of the door so that the front plate of the lock is flush with the end plane of the door. Mark with a pencil the location of the handle. Markings for the handle must be done on both sides of the door.
Mark the location for installing the handle shaft.
We drill holes according to the markings on both sides of the door. First on one side, then on the other. Under no circumstances should you drill through the door, as the drill may tear out a lot of material at the exit. Therefore, we install a plywood backing in the opening for the lock to prevent the hole from breaking where the drill exits.
Drill a hole for the handle shaft.
We put the lock in place and fasten it with the screws included in the kit.
Latch insert into the door.
The latch is a little easier to install than the lock. First of all, we drill a hole from the end of the door with a feather drill with a diameter of 24 mm. The latch is installed in such a hole quite tightly, and the front strip of the latch completely covers the hole.
Install the latch.
We install the latch in place and make an incision around its face plate with a stationery knife. Then we take out the latch and, using a chisel and a hammer, make a recess under the front strip of the latch.
Using a chisel, select a recess.
All that remains is to drill a hole for the handle shaft. To make such a hole, we will do the same as when inserting a lock. We place the latch on the side of the door so that its front panel is flush with the end of the door.
Mark the hole for the handle shaft.
Now use a pencil to mark the center of the hole. On the other side of the door we do the same and drill holes on both sides.
We install the latch in place and fasten it with self-tapping screws. Before screwing in the screws, do not forget to drill holes for them with a diameter of 1.5-2mm.
Installing the door frame.
The interior door frame can be installed in two ways: using fastening metal plates or using self-tapping screws with a dowel. The figure below shows these 2 methods at once.
Fastening the door frame with mounting plates.
The use of fastening plates, which are used when installing drywall, is only possible if the walls have not yet been finished. It will be necessary to hollow out small recesses in the wall for the plates, which will then be covered with putty.
Fastening with mounting plates.
The plates are screwed onto the back side of the box using 3x13 self-tapping screws with a press washer.
As you can see in the picture above, the plates are attached in the places where the hinges are installed, opposite the hinges and one plate on top approximately in the middle of the box.
Fastening the door frame with self-tapping screws and dowels.
The fastening method using a self-tapping screw with a dowel involves through-drilling the sides of the box. But so that the heads of the screws are not visible, they are installed in certain places. Two self-tapping screws are installed under the hinges, and one self-tapping screw is installed in the place where the strike plate will be located under the latch tongue.
To hide the screws under the hinges, you need to drill holes with a diameter of 3 mm in advance at the place where the hinges are installed, and then drill them out a little to form a small recess for the head of the screw.
Drill holes for the mounting screw.
In the place where the latch tongue will be located, we simply drill a hole with a diameter of 3 mm. There is no need to make a recess under the screw head. At this point, securing the box with a self-tapping screw will be temporary. After fixing the box with foam, this screw will need to be unscrewed. Then the latch striker will cut in here. In this place, one polyurethane foam is enough to fix the frame, and on the side of the hinges, where the door frame will be loaded with the weight of the door, the fastening will be reinforced with self-tapping screws.
Door frame installation.
- We install the box in the opening.
- Make sure that the inside of the box (towards which the door will open) is flush with the wall.
Align the door frame with the wall.
- We wedge the top strip in the door opening and check its horizontalness with a building level. You can use any scraps of boards or door frame posts as wedges.
The top strip is wedged in the doorway.
- We fasten the vertical stand with self-tapping screws from the hinge side.
- We wedge the stand from the hinge side and check the level in two planes (we apply the level inside the box and on its side).
- We fasten the second rack with one self-tapping screw. We check it with a building level. We also make sure that the distance between the posts at the top is equal to the distance between the posts at the bottom.
- We wedge the second rack.
- We hang the door on the frame. The hinges must first be screwed onto the door. It is convenient to hang the door open and place some kind of lining under its edge.
We install a lining under the edge of the door and hang it on the door frame.
First screw on the top loop, then the bottom.
- We check the installation is correct. An open door in any position should not budge. This indicates that it is installed correctly.
- We close the door and install 3mm thick pads between the door leaf and the frame posts. We also install linings at the top of the door. At this stage, the box stand, which was fastened with one self-tapping screw, may be out of place. The gap between the blade and the stand may be too small or large. In this case, we move the stand to the desired position by unscrewing and tightening the screw and wedge the stand again.
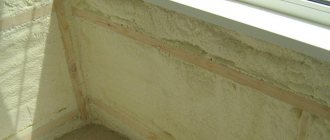
- We fill the gaps between the box and the opening with polyurethane foam.
We use polyurethane foam.
Problem of choice
Before installing an interior door, you must first select it. When choosing, there are 2 main criteria - the size of the structure and the material from which the doors and the frame to them are actually made.
Material selection
It is not so important to install an interior door in a wooden house or in a room in a city high-rise building; the design must not only be beautiful, but also reliable, and this primarily depends on the material.
Fiberboard is perhaps the most common option. The structure is a hollow box covered on both sides with thin fiberboard sheets and based on a frame made of wooden blocks.
There is no need to rush to install such a door; it is, of course, light and cheap, and it may look quite decent, but the reliability is not all right; such a structure can even be broken with your fist, plus there is a high probability that in a couple of years it will begin to delaminate.
MDF is the golden mean between cheap fiberboard and good wooden construction. The array is dense, durable, and most importantly completely environmentally friendly. Self-installation of interior laminated MDF panels at home is an excellent solution if you don’t have the funds for installers, but want a beautiful door.
The MDF canvas must be laminated with high quality, then it will not be visually different from wood.
Natural wood - it is traditionally believed that installing wooden doors is the best option, but this is wrong, here you need to look at the quality and company of the manufacturer. Believe me, sometimes it is better to install interior doors made of good MDF laminate than to take damp pine, which will wear out in six months.
When purchasing wooden panels, you need to carefully evaluate the quality of the wood.
If you decide to change interior doors and you have a high-quality wooden panel, then you don’t have to touch it, you can only replace the panel. In this case, the technology for installing interior doors will be much simpler.
GOSTs, tolerances and unclear issues
The size of the doorway for installation is perhaps the most important of the initial parameters. To this day, all such designs are made according to Soviet GOST standards; by the way, the Chinese also focus on these dimensions, but in Europe, despite the supposedly uniform standard, many countries do it their own way.
So if our minimum blade width starts from 600 mm and then in increments of 100 mm, it reaches 900 mm, then France produces blades starting from 690 mm, but the graduation also occurs in increments of 100 mm.
Germany, Spain and Italy, as well as all countries of the former socialist camp, in this regard are guided by almost the same standards as our manufacturers.
Interior doors have clear standards that need to be checked before installing an interior door yourself.
As for tolerances, a gap of 3 mm is left on the sides and top between the box and the canvas itself. According to the rules, there must be at least 20 mm between the floor and the canvas. This gap is needed for normal ventilation in the apartment.
Along the perimeter of the frame in block buildings, you can leave any gap, up to several millimeters, the main thing is that the frame is level, but if we cut doors in a wooden house with our own hands, then we set the tolerance to at least 15 mm, it is needed in case the house fails shrinkage
When choosing an interior door, installation is the last stage, before this you need to read the description in detail, because the price can be indicated depending on the configuration, there are 3 options:
- Only the door leaf is sold - this option is good if the door is planned to be installed on an old frame;
- The canvas is sold together with the box, but the box comes disassembled; here, even before installing the interior door with your own hands, you will have to cut it to size and assemble the box, which in most cases is even good;
- Fully assembled blocks with a finished frame, canvas, locks and hinges are installed only if preparation of the opening is not required. There it is enough to cut the racks to the height and install the interior door yourself.
Do not forget that it is not enough just to install interior doors into the opening; the complete installation of an interior door involves the arrangement of trim, extensions (if necessary) and fittings, so it is also advisable to take them right away, otherwise the shade may not be suitable later.
Installation of interior doors will not be complete without platbands and fittings.
There is another important question - when to install interior doors during renovation? So, the instructions for installing interior doors say that such structures are installed at the very end of the renovation, after finishing the walls, floor and ceiling, but before installing the floor skirting boards.
Insertion of the latch response into the door frame.
This work should be performed after installing the door frame, when the foam has hardened.
- Close the door and mark the edges of the latch tab on the frame post.
We draw marks.
- Now we determine at what distance the tongue is from the edge of the box. To do this, you can use a small sheet of cardboard. We insert the cardboard into the gap between the door leaf and the frame until it rests against the latch tongue. Then mark the edge of the box on the cardboard.
- Open the door, place the cardboard on the post of the box so that the mark on the cardboard coincides with the edge of the post. Mark with a pencil the place where the edge of the tongue will be located.
- We attach the mating part of the latch to the rack according to the previously applied marks. This part must be applied in reverse, as shown in the photo below.
We outline the mating part of the latch.
- We mark with a pencil the installation locations of the screws and outline the inside of the part.
- We drill several holes inside the marked outline and knock out excess material using a chisel and hammer.
We use a chisel.
- We drill holes with a diameter of 1.5 mm in the places where the screws will be installed.
- We mount the mating part of the latch.
- We check how the door closes.
Foaming
The seemingly simple stage of foaming must be approached responsibly. All efforts will be in vain if you overdo it with polyurethane foam, because... the box may become warped, and the process will have to start all over again. The polymerization time of the foam is indicated on the can, after which the door leaf is hung. Did you follow the instructions and everything worked out for you? So, start finishing and decorating.
Installation of door extensions.
Extensions are installed only if the wall thickness is much greater than the thickness of the door frame. If the wall thickness is 2-3 cm greater, then you can do without additional additions, but you will need telescopic platbands. They are made in the form of a corner and allow you to cover part of the wall. In addition, the box must be adapted for this type of platbands; it must have the necessary grooves.
So, let's set the extras:
- Let's start with the top panel. We measure the doorway from the side where the extension will be installed.
We take measurements.
- Cut the additional strip to the required size.
- We install the extension in place and note how much it needs to be trimmed so that it is flush with the wall.
We make markings on the board.
- Cut the extension to the required size.
We're sawing more.
- We install the extension into the doorway and wedge it.
The extension is installed in the opening and secured with wedges.
- We do the same with the side panels: measure, cut and install in the opening.
The side and top panels are installed.
- We apply foam between the doorway and the extensions. At the junction of the extension and the box, we apply a continuous layer of foam. Thus, when the foam expands, it will tightly press the extension to the box. In all other places, foam should be applied pointwise, in small quantities. This volume of foam will be enough to firmly glue the extensions. If you apply a lot of foam, the foam will squeeze the extensions into the inside of the opening.
We foam the space between the extension and the doorway.
Dimensions and equipment
Depending on the opening method, doors can be folding, sliding or swinging. The latter are the most popular because they are structurally simplest and fairly easy to install. They are presented in a large number of modifications. According to the opening method, the following are distinguished:
- double-leaf and single-leaf;
- left- and right-sided.
The most common sizes of interior doors are 710, 810, 910 and 1010 mm. Double doors - 1340, 1540 and 1840 mm. The standard height of a doorway is 2055-2060 mm, but in fact it may differ upward.
The basic materials you will need are a door leaf, frame and trim.
The fittings include hinges, a handle, a rotary lock and a built-in locking mechanism. If the opening is deep (in a load-bearing wall), then additional additions may be required.