Often, replacing a plastic window entails installing a new window sill board. There may be several reasons, but basically the part no longer corresponds to its previous parameters and aesthetic indicators. There are a variety of sizes of plastic window sills on the market, and they vary widely. Products are produced in different thicknesses, lengths, widths, standard sizes are provided, but at the request of the customer, not only the parameters of the element, but also the shape and configuration can be changed.
Window sill in private houses
Private houses can be located in different parts of the country, so there are a huge number of possibilities for placing windows. Nowadays, some people get rid of walls altogether and install windows instead, getting a stunning view.
If the structure of the house or finances do not allow you to formalize this idea, you can try placing the window sill at the same level as the floor.
A good idea for private houses would be to install windows that will be located on two floors at once. If your house is located in places with a cold climate, building a balcony or veranda would be a good solution. To learn how to install the window sill to the desired height, watch this video:
For an attic or second floor, the landing should be about 90-100 cm. This height will provide a good view from the window and will keep the room warm.
The optimal location dimensions are presented in the following table:
In general, there are no standards for window placement. The location of the window sill board largely depends on the type of room and its functions.
What should be the installation of a window sill according to GOST: video
Video about the rules for measuring and installing window sill boards.
The geometric parameters of window sills are calculated based on the minimum requirements specified by regulatory documents (GOSTs, SNiPs and SP). In general, the sizes of window sill boards are not regulated, so it is always possible to order window sill boards of the desired dimensions and shapes.
Correct installation of window sills
Installing window sills during a major renovation of an apartment is an inevitable operation. Even if your new apartment has window sills from the developer, then with a high degree of probability these window sills will still have to be replaced: careless installation, the window sill itself is of poor quality, damage during the renting out of the apartment.
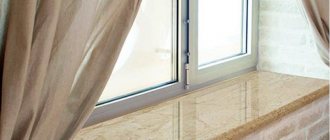
In most cases, the customer gives preference to inexpensive PVC (plastic) window sills in white matte color, which are unpretentious in operation. This option is acceptable for budget renovations if your windows do not face the sunny side or you plan to have blind curtains. Otherwise, under the influence of sunlight, a budget window sill will quickly lose its presentation: temperature deformations, fading of plastic (yellowing, etc.). Such installation of a window sill is not always financially justified.
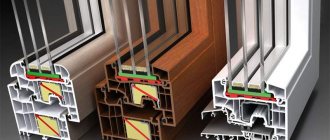
When making high-quality apartment renovations for yourself in the long term, it is better to give your preference to higher-quality window sills (Moeller, Danke, Werzalit). This is no longer just plastic colored in the mass, but window sills made on the basis of wood-polymer mass from environmentally friendly materials with various acrylic coatings, imitating the textures of wood or marble of various colors, allowing to please the refined tastes of any client for the implementation of his design project. In addition to decorative qualities, such a window sill has great torsional rigidity, durability and wear resistance, and high-quality geometry. When installing a window sill, you must be guided by certain technologies.
When purchasing a window sill, you need to take the dimensions in advance and understand how it will be positioned. Since the store will cut you the required length for ease of transportation, and the width of the window sills are produced in multiples of 5 cm (20,25,30 cm, etc.). When installing the window sills correctly, it is necessary to agree with the customer on the overhang of the window sill relative to the wall. The “flush” option (flush with the wall) is shown in Fig. 1; this option for installing a window sill is preferred by those who plan to hang curtains and tulle to the floor so that the protruding window sill does not interfere. Those who plan to use the window sill functionally (storing decorative items, flower pots or making a window sill-tabletop) prefer a large window sill overhang (Fig. 2).
It is necessary to take into account that the large protrusion of the window sill in further operation will interfere with the convection of hot air from the heating radiator upward in order to create a barrier to cold air that penetrates into the apartment through the double-glazed windows. To improve convection in the protruding part of the window sill, it is necessary to make ventilation holes or install a ventilation grill (Fig. 3), which will not interfere with the rise of hot air.
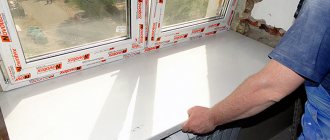
To install the window sill correctly, it is necessary to make a groove in the slope (if it is already made) into which the ends of the window sill will be placed to create additional rigidity of the structure in the coupling. On the side edges of the part that will fit into the groove of the slope, cut off the window sill (Fig. 4). At the end of installation, special end caps will be installed on the remaining part of the end (sold separately from the window sill).
The window sill can be installed on mounting or plaster mortar. For better adhesion with the adhesive, small length (25mm) self-tapping screws (25mm) should be screwed into the smooth back side of the window sill (not the front) in a checkerboard pattern (Figure 5.6), which after the solution (or foam) has hardened, will ensure reliable fastening
When installing, blowing out the polyurethane foam on the window sill should be done with good foam, giving preference to proven brands. In this case, you can be sure that the foam will not inflate and make your recently installed window sill “humpbacked.” Using a professional foam gun will allow you to use 2-3 cylinders to install window sills throughout the apartment.
The window sill should be flush or stick out.
| Page 1 of 2 | 1 | 2 | > |
Good day to everyone, dear ones. I don’t know if it’s correct, but I decided to write the question here:
Should the window sill extend beyond the battery, or is it not necessary? Are there any standards or just engineering thoughts on this?
The customer is simply not satisfied with the width of the purchased window sills. and the question turned from absurd to very important and pressing.
| Kosyak |
| View profile |
| Find more posts by Kosyak |
| Yuura |
| View profile |
| Find more posts by yuura |
| Kosyak |
| View profile |
| Find more posts by Kosyak |
| Vladimir. |
| View profile |
| Find more messages from Vladimir. |
| Kosyak |
| View profile |
| Find more posts by Kosyak |
Thượng Tá Quân Đội Nhân Dân Việt Nam
| ShaggyDoc |
| View profile |
| Visit ShaggyDoc home page |
| Find more posts by ShaggyDoc |
I agree, there will be minimal impact, of course. those. is this a question for thermal engineers?
Administrative office building.
. I rummaged around, but in the heating SNiP, I didn’t find anything like that (
And in general, I rummaged through a bunch of things. Nothing(
| Kosyak |
| View profile |
| Find more posts by Kosyak |
| Ilnur |
| View profile |
| Find more posts by Ilnur |
| Vladimir. |
| View profile |
| Find more messages from Vladimir. |
| twilight |
| View profile |
| Find more posts by twilight |
| Ilnur |
| View profile |
| Find more posts by Ilnur |
Quite harmful, however!
Attachments
| Window sill.rar (2.07 Mb, ) |
| Grumpy |
| View profile |
| Find more posts by Grumpy |
Thượng Tá Quân Đội Nhân Dân Việt Nam
| But that's why Shaggy doesn't know this. |
| Should the window sill extend beyond the battery, or is it not necessary? |
So I answer: The window sill can be anything
. At least let him be appointed by the “industrial architect”, or even the owner of the apartment. Although why should an apartment owner who is “not satisfied with the width of the purchased window sills” be some vagabond architect?
And I answer - “any” (even according to the series, even according to GOST, even according to “as I see”), because the question is related to the effect on heating. The design of the window sill is primary. The heating is already adapted for it by introducing appropriate correction factors for the cover when calculating heating devices. I won’t reveal the coefficients themselves, you never know who hangs around here and reads them.
And if you want to grumble, then please, about the old woman’s word “battery” in #1. And also about
| so that water does not flow down the wallpaper onto the battery |
| ShaggyDoc |
| View profile |
| Visit ShaggyDoc home page |
| Find more posts by ShaggyDoc |
when I was a window designer, I saw an inscription stating that under no circumstances should the window sill completely block the heating radiator by a maximum of 2/3 (or half, I don’t remember) but if a decorative grille is installed, then in the window sill the cracks are made to allow incoming cold air heat it up right away
More precisely, ask the window workers, they can probably explain with references to the standards
| BoogeyMan |
| View profile |
| Find more posts by BoogeyMan |
There was a case, at one of my previous jobs, the office was on the 1st floor of a high-rise building - redevelopment from a 4-square-meter apartment into an office, well, the partitions were removed, the radiators remained in place, nothing was added, nothing was removed, the old wooden floors with insulation were removed, and the new floor had no insulation in the project))). They probably thought that the basement was very warm))) screed, porcelain tiles and that’s it. All repairs were completed by the end of the heating season, the new finish is chic and shiny! everyone was happy, well, they “opened up”, it was cool all summer, it was just wonderful. even at +35, but the winter has set accents. I personally was trying to buy a 12V car mat for my feet, because chillavek starts to freeze from the feet (mostly), but the director thought it was expensive, and some kind of engineering pride didn’t allow me to pay “for a fool.” ))) in the end I bought myself a 10mm isolon mat, it completely insulated from the floor “from below”, but from the side it did not. my director (well, that is, the customer of this unfortunate project) instead of replaceable leather boots changed into fur felt boots)))) bug, he looked like an unshaven hobbit in a suit and with these “endings” of the limbs, BUT! Every cheerful, fresh working morning began with the fact that he walked from his “refrigeration compartment” into ours and looked at the digital thermometer installed outside. on the desktop - the device consistently showed +18, and by lunchtime +20, and with such a guilty look it convinced us, they say, “it’s warm. what are you doing? warm. “Then there were fan heaters that warmed the legs “from the sides.” Then it turned out that the batteries, sewn with plasterboard just under the window sill, drove air exclusively inside the “box”, a very small part came out of the grille, obviously the windows were plastic and there were no serious problems with cutting off the cold flow, so there you go. We decided to embed grilles in the window sill, directly above the radiators, so that the air would circulate in the room along a more familiar path. I apologize for the long-winded story.
Window sill installation
Before installing the window sill, you must complete step 14. Installing a vapor barrier sealing tape.
When installing a window sill, you must perform the following steps:
1.
Check the window sill for consistency in size, color and absence of scratches or other damage, having first removed the protective film.
In the case when it is necessary to trim the window sill depending on the size of the opening, marking is done first, and then the window sill is trimmed. The marking is made with a construction pencil relative to the center of the structure. Trimming is done with a jigsaw or a plastic hacksaw included in the installation kit. 2.
Check that the connection between the window sill and the frame of the window unit is tight, airtight and resistant to deformation.
3.
The gap between the end of the window sill and the load-bearing walls on the sides should not exceed 3-4 mm.
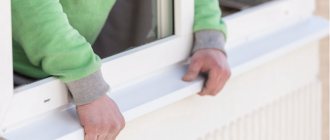
Additionally, it is recommended to install a spring bracket for a tighter connection of the window sill to the frame profile. The bracket is attached to the stand profile using a self-tapping screw. The brackets are installed by attaching them to the stand profile at a distance of 20-25 cm from each other, after which the window sill is simply snapped into the brackets and does not require additional installation.
The recommended overhang of the window sill beyond the inner surface of the wall should be ½ the width of the heating radiator, but not more than 100 mm (without brackets). If the overhang exceeds the specified value, it is necessary to use standard brackets, the distance between which should not be more than 500 mm, the distances from the edge of the window sill should be no more than 250 mm. Check the accuracy of the installation of the window sill using a level in the longitudinal and transverse directions. Be sure to foam the support pads for fixation. Along the entire length of the window sill, where there will be contact with the frame, it is recommended to apply a strip of white silicone or PVC glue. Installation of the threshold under the box of the balcony block carried out in the same way as installing a window sill. The projection of the threshold beyond the inner plane of the wall is from 30 to 40 mm.
. NO GAP IS ALLOWED BETWEEN THE BOX AND THE WINDOW SILL.
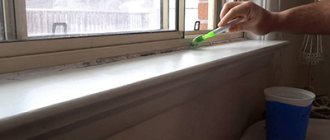
In order to avoid scratches on the surface and chips at the cutting site, you must be careful and cut without putting too much pressure on the window sill.
Based on thermal expansion, the maximum length of the installed PVC window sill is limited to 3000 mm.
When installing a window sill from the inside and outside under the window of a balcony block, the window sill must extend beyond the frame of the balcony door and at the same time overlap the corner of the lower quarter (wall panel) and protrude no more than 15 mm, unless otherwise agreed with the Customer.
The window sill must extend under the bottom surface of the frame by at least 5 mm and be pressed tightly against it along the entire length of the junction.
If the distance from the stand profile to the edge of the wall under the window sill is more than 150 mm, it is necessary to provide measures to prevent the window sill from deflecting under load in the area adjacent to the frame and along the plane of the window sill (threshold). For these purposes, additional support blocks and fragmentary foaming are used.
If the opening under the window sill is small, then it foams. Structurally, a new window sill is always about 2-4 cm higher than the old one, so it is usually impossible to preserve wallpaper under the window sill. Sealing under the window sill is done with a building mixture, for further wallpapering or plastering.
Chipboard or wooden window sills are installed in the same way.
Installation using holding brackets is also possible: using fasteners (two holding brackets are screwed in one after the other with cylindrical screws measuring 3.9*16 or screws with a half head 4.5*16) in a layer of mortar, 2 pieces each. at a distance of 60 cm – for window sills with a maximum length of up to 2 m.
2in1 window sill countertop: correct kitchen ergonomics
A kitchen window sill can be used in different ways: arrange a small winter garden or vegetable garden on it, a small cozy corner with a soft surface where you can sit, leave an empty space so that you can use it as needed (put a vase with a bouquet, install a Christmas tree and so on), decorate it as a decorative detail of the interior (place textile dolls, ceramics, etc.). But you can install a countertop and turn the window sill into a work surface or dining table.
Tabletop on the windowsill
There is an opinion that this option is forced, as a rule, due to the small size of the kitchen. It's not like that at all. A table top-window sill can be mounted for several reasons:
- if the housewife needs the kitchen work surface to be well lit and always with natural light;
- in a spacious kitchen, when the window sill is combined with an island or it is a corner kitchen with a bar counter for a convenient kitchen layout ;
- to visually balance the kitchen space and prevent all the furniture from being placed in one direction;
- when achieving certain goals in kitchen design, when all the furniture is arranged in a circle;
- in a small kitchen where there is no room for a full-fledged dining table and work surface.
Usually the tabletop is installed if the window opening is deep enough, at least 40 cm.
Then, by adding a small protruding part, you can get a full-fledged table, which will have the following design:
- can stand on legs;
- fold;
- fit on a cabinet;
- attach to fittings brackets;
- present one surface with all kitchen furniture;
- a countertop under the sink can be mounted in it;
- have one surface with the bar counter;
- be perpendicular to the window or run parallel to it;
- be of any shape, even the most bizarre.
Advantages and disadvantages
The main advantage of this option is that in this case the kitchen will not seem like an enclosed space . There are more possibilities for design solutions: a window sill that smoothly turns into a tabletop fits perfectly into interiors of many styles, from classic to ultra-modern. And the housewife gets the opportunity when cooking not to stare at the wall, but to look at the landscape outside the window. This arrangement of the working surface makes it possible not to turn on electric lighting during the day .
The disadvantages are that it is not so easy to dismantle the stone surface of the tabletop if necessary; such a table cannot be moved to another place. It is better to choose curtains for windows from water-repellent material.
How to install
Countertops made from different materials are installed differently.
Large tiles visually reduce the size of the countertop-window sill.
Installing a countertop decorated with ceramic tiles or porcelain stoneware:
- first you need to think about what dimensions of the tabletop are needed : the tabletop should be deep enough, but not excessively, otherwise it will be inconvenient to get objects right next to the window if necessary, wipe the table and open the doors;
- you need to make a base for the tabletop: it can rest on cabinets or legs; if you don’t have skills in making furniture, it’s better to order cabinets from a workshop;
- install cabinets , aligning them plane with the window sill and vertically;
- then make a base for the tabletop : this can be a piece of moisture-resistant plywood of sufficient thickness; the base of the appropriate shape is cut out according to the drawing of the tabletop;
- if there are batteries under the window sill, then slots are made in the tabletop blank;
- the finished tabletop must be secured to the windowsill;
- then create a countertop from ceramic or porcelain tiles ; tile adhesive is taken thicker than for wall cladding;
- the glue is evenly distributed over the surface of the base, for this you can use a regular grater, then the tiles are laid so that the gaps remain minimal;
- a grille is installed on the hole above the radiator;
- the tiles are cleaned, the seams are rubbed;
- a ceramic corner or molding is installed at the ends of the tabletop;
- ceramic or silicone plinth is glued to the walls and window openings.
Installing a stone countertop:
- a stone slab is ordered according to a ready-made drawing;
- the wider the support, the better; it must be installed in such a way that the tabletop fits tightly to it;
- if necessary, the stone can be filed and sharpened with a diamond tool;
- the dimensions are measured so that the joints of the plates are least noticeable; during installation, they are filled with a sealer; for this, the edges of both slabs are smeared with a sealer mixed with a hardener in a ratio of 1:2; the slabs quickly move because this composition hardens within two minutes; after hardening, the seam is polished so that it becomes practically invisible;
- cabinets that will serve as a support are leveled and secured using clamps and screws, and a rack for accessories is installed;
- Cement is applied to the window sill, the countertop is laid in it , and it is checked how tightly it fits both on the window sill and on the cabinets.
Grout is not as resistant to temperature and mechanical influences as tiles.
Tabletop window sill in the room, watch the video with ideas:
Pitfalls you will have to face
When installing a countertop, you need to take into account several nuances.
The tabletop is attached under the window frame. Condensation that forms on the window can flow down, and the end attached to the window sill will constantly get wet. The tabletop must be made of a waterproof material, for example, glass or stone, or the outer end must be waterproofed. You can install an additional ventilation valve on plastic windows; companies that install double-glazed windows have this option.
Once the countertop is installed, opening the window will become much more difficult. Therefore, the window sashes are fixed in the “ventilation” position, so as not to remove the dishes from the table every time you need to open the frame.
The window sill may not have the desired height: it may be higher or lower. The problem is easier to solve if the window sill is higher: then you can combine it with the bar counter by placing chairs of the required height. If the window sill is low, you can build a multi-level table on its base .
Convection
Heating devices are almost always installed under the windowsill. To allow warm air to circulate freely, make large enough holes in the countertop. The easiest way to do this is on countertops made of any stone or wood. As an option, you can close the opening with false panels.
If possible, the battery should be moved to another location.
The holes in the countertop for air exchange must be at least 10 cm in diameter.
Sustainability
The most stable structure rests on furniture cabinets. The stability of the structure is also necessary for safe window cleaning when you have to stand on the countertop, so the calculation should be based on the average weight of a person.
If the tabletop rests on legs, then it is better to provide an additional bar support.
Splash protection
When using a countertop as a work surface during food preparation, splashes cannot be avoided. To protect the window from splashes, use curtains made of water-repellent material or special structures made of plastic like blinds , which are retracted if there is work to be done during which the window may be splashed.
Heat resistance
Countertops made from any type of stone, concrete, ceramic and porcelain stoneware can withstand temperatures up to 150 degrees without leaving marks. The heat-resistant glass of the Ikea tabletop also withstands high temperatures. Wooden countertops are the most vulnerable to high temperatures. Even coated with special varnishes, they still remain susceptible to high temperatures; this must be taken into account when using such countertops and using various stands.
How to choose material
The same requirements apply to a countertop on a windowsill as to a regular one:
- it should not emit hazardous substances;
- must be moisture resistant ;
- dirt should not penetrate the pores;
- be resistant to all kinds of damage;
- be heat resistant ;
- easy to wash.
There are several types of materials from which such a tabletop can be made:
- PVC : this is not the best material in this case, but it can be used if the countertop is not intended for cooking, but is used only as a dining table or a small bar counter;
- Chipboard and MDF : such boards are used only laminated, or they are taken as the basis for stainless steel countertops and tiles;
- artificial stone (Corian): this is a lightweight, convenient material that allows you to cut a tabletop of any configuration;
- marble : this material looks good and is hygienic, but it is heavy, so you often have to limit the size of such a countertop;
- countertops made of granite chips : an ideal option for decoration in this case;
- glass : tempered shockproof glass can be an excellent surface for a tabletop, but in this case you need to decide what will be its basis; glass is a transparent material;
- wood : countertops made from pine, beech, oak and many other types of wood look very good, but have a number of disadvantages related to heat resistance and moisture resistance.
Do-it-yourself concrete tabletop, video master class:
Repair, restoration, care
Care:
- if there is a joining seam on the countertop, it must be regularly rubbed down so that microorganisms do not settle on it;
- it is enough to wipe a smooth surface with a damp cloth , while embossed and textured surfaces need to be cleaned with a brush;
- In case of severe contamination, you can use detergents , having first tested them on an inconspicuous part of the countertop.
Restoration and repair:
- when restoring a wooden tabletop, it is covered with liquid plastic , thus not only removing chips and scratches, but also increasing water resistance;
- minor scratches and stains on an artificial stone countertop can be eliminated using polyester liquids ;
- If the integrity of the tabletop is damaged, it can be restored by covering the crack with polyester resin and then sanding it after the resin has completely hardened.
How to install a window sill yourself, video instructions:
A tabletop-window sill is an interesting option for many interior styles: minimalism, Scandinavian style, and chalet style. This countertop looks great in a small white kitchen.
What is the standard distance between the window sill and the floor?
The size of windows in multi-story buildings corresponds to the size of the room and the location itself. Naturally, the project is not able to consider all aspects of life. It is best to use some standards.
So, what is the standard window sill height?
- If the apartment has standard ceiling heights, then the windows are located oriented towards the upper part of the internal door opening with a height of 2 meters. Thanks to this, a convenient gap remains between the ceiling and the window, allowing it to be used for attaching curtains and curtains. With high ceilings, the windows will also be higher to fill the space proportionally.
- The window opening starts at 90 cm in height. It is this distance that allows you to conveniently arrange furniture and correctly perceive the horizon in the room, especially since heating radiators are located under the window opening.
Sill panel dimensions
Without exception, all PVC windows (for residential and office premises, balconies, loggias) are made to individual sizes, and more often to order . This is due to different parameters of the area under the window. Even in the same panel or brick house, window openings in different apartments may have deviations of 10 cm in both width and length.
How are the sizes of window sills for plastic windows determined? If there will be no problems with the length when purchasing a window sill board, since it has a sufficient margin of 6000 mm, then you should be careful when choosing the width.
Standard indicators
To make a plastic window sill, a standard PVC board with the following dimensions is used:
- Length - from 4050 to 6000 mm.
- Width - from 100 to 600 mm in increments of 50 mm. Wide window sill - from 600 to 1000 mm in increments of 100 mm.
- Thickness - from 18 to 22 mm.
In modern interiors, a wide window sill looks original; it is installed in the room, kitchen, balcony and loggia. This model not only creates comfort, but also increases the functional features of the window sill board.
Ventilation grill installation
You will need:
- ventilation grates
- silicone
- milling machine
- construction tape
Window sills with ventilation grilles are glued using silicone. To make a grille to your size, you will need a milling machine. During installation, it is necessary to take into account the distance between the installation of consoles - in the area of the grille, consoles should be installed up to 30 mm to the edge of the window sill.
Before installing the grille, you need to choose a color. Ventilation grilles installed in the window sill (can be made of stainless steel, brass or plastic) may well blend in with it, or, conversely, stand out strongly. Clients sometimes like this contrast more than the usual color combination, and fits perfectly into the interior of the room.
How to calculate panel dimensions
In order to make the correct calculation, it is necessary to take into account the operating conditions and all the requirements that will be imposed on the window sill board: planned load, room (kitchen, room, balcony), aesthetic side.
Width
The width of the window sill depends on the installation depth of the window profile, and therefore can vary significantly. The depth of the internal opening is measured:
- from the stand profile;
- to the edge of the wall.
An additional 5-10 cm must be added to the actual width so that the window sill board extends beyond the site and hangs down a little. This is done in order to improve the performance and aesthetic performance of the panel. Considering this feature, it is better to entrust the measurements to a specialist who will take into account all the nuances and measure the parameters of the board as accurately as possible.
Calculation example. If the actual width of the window opening is 38 cm and a minimum of 5 cm and 1 cm under the profile are added to it, then the total width will be 38+5+1=44 cm. The resulting number is rounded up - 45 cm.
Length
It is necessary to add 6-10 cm to the actual length of the window opening. This is done so that on each side the panel cuts into the slopes by at least 3 cm. If the measurement is 100 cm, you need to cut the board with parameters of 106-110 cm. A window sill is on sale PVC, the sizes of which are designed for different applications. The maximum length is 6000 mm, which is enough for both a room and a balcony. In rare cases, panels are required that do not correspond to standard sizes, and a custom order will be the solution to this situation.
The service life of the element and its harmony with the interior depend on how correctly the basic dimensions are calculated. Therefore, you should decide in advance what dimensions the PVC window sill will have - basic and additional for the ledge and on the slopes. After taking measurements, you can cut the board yourself, but if you don’t have the skills, it’s better to contact specialists who will take measurements along the window opening and carefully cut out the product using a special tool, as required by the standard and regulations.
Why windows fog up and how to fix it
Usually, owners encounter the problem of condensation on the inner glass of a metal-plastic window early in the morning. The problem occurs in cold weather (winter and autumn), when water accumulates on the windowsill. The explanation for this process is as follows: after installing windows, the ventilation mode in the room changes, air exchange is disrupted (previously air passed through cracks and frames), there are fewer drafts and the humidity in the room increases.
When the microclimate changes sharply, the temperature outside becomes low and the temperature in the room becomes high, and the likelihood of condensation increases. In order to avoid such differences, in order to cope with the ventilation process, an additional part of the window structure is installed. This anti-condensation grille is a series of straight, fixed flaps that redirect air flows.
Important Tips
- If the window sill is too wide, when it completely covers the radiator, the heat exchange in the room is disrupted. Try to install the window sill so that it covers only half of your radiator. If you want to leave wide window sills, be sure to install decorative grilles.
- If you have a single-chamber double-glazed window and the windows fog up, then you better call a specialist who will eliminate the violations that occurred during the installation of the window structure.
- You will also encounter condensation if there is poor air circulation in the room. The solution is to clean or replace the ventilation grilles.
- Flowers may also be involved in condensation. With constant watering, these processes are inevitable. Alternatively, you can leave only a few pots of flowers on your windowsill and ventilate the room more often.
- Problems can also arise due to improper installation of windows. It is better to plaster the cracks yourself or, in case of large deviations from the correct position, reinstall the double-glazed window.
- If the windows in the kitchen sweat due to frequent cooking, then the experts will advise you to ventilate the room more often.
- The following will help fix the problem: a working hood, good thermal insulation of the house, no leaks from the roof of the house, eliminating the source of dampness and more frequent ventilation.
- We wish those who decided to independently begin the process of installing and manufacturing the grille good luck. If you are not confident in your abilities, then it is better to contact specialists in this profile who install ventilation grilles. Because if you incorrectly calculate your strength or the size of the product, you risk being left without window sills.
Happy renovation!
You may be interested in: Ceiling ventilation grilles eksno.ru/reshetki-vent.
How to choose the length and width of a PVC window sill
The length of a window sill made of a polyvinyl chloride profile for internal installation can reach 6 meters, but today it is difficult to find such openings, so measurements of the lower slope are simply taken with a small margin. As a rule, the profile of the window sill board fits into the side planes of the opening by several centimeters. This allowance on each side must be added to the total length of the profile. Sometimes, by replacing an old wooden or concrete window sill with a new plastic one, you can fill the recesses in the sides of the window opening with cement and install a PVC profile flush with the vertical slopes.
In general, there are rarely any difficulties with the length of the polyvinyl chloride blank, since it can be adjusted with millimeter precision right on the spot. In this way, plastic profiles compare favorably with acrylic, as well as marble and granite profiles, the dimensions of which are specified during manufacture. Another thing is the width of the window sill; the plastic block can be selected in predetermined sizes, which, however, can always be changed downward by sawing off a strip from the edge that goes under the frame. The protrusion of the profile above the heating radiator should not be more than 5-7 centimeters. In this case, the wall along with the finishing is taken as the starting point, even if the plaster and paneling are still only in the plans, they need to be taken into account.
It should be taken into account that a special lining profile is usually installed under the frame, which is significantly narrower than the double-glazed window. It is against this gasket that the window sill rests during installation, when it goes 2-5 centimeters under the frame box. The degree of overhang of a double-glazed window over the window sill depends on the number of chambers formed by the glass (do not confuse with chambers in the frame profiles)
. It is advisable to pre-treat all joints with silicone sealant to avoid future penetration of moisture between the double-glazed window frame and the window sill.
If you want a spacious window sill, but the support area for it is too small and is only one third of the width of the profile, you need to install brackets when the extension is more than 10 centimeters. You can also increase the support using a wooden beam. Another option is to support the window sill profile with aluminum or forged posts with a crossbar. But perhaps the most attractive way to strengthen the PVC profile used as a window sill board is to install something like a fireplace portal, hiding the heating radiator behind a decorative grille. The profile panel will look like a fireplace mantel.
Window sill location
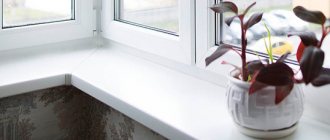
The window sill board is one of the functional parts of the window structure. It is placed under the window frame or flush with its bottom. The purpose of the window sill is to increase the layer of warm air in the space near the window and near the adjacent wall.
When condensation occurs, it removes moisture from the window and protects the wall underneath from moisture. In addition, it serves as a decorative element that allows you to connect the space outside the window with the interior content of the room.
According to SNiP, the height of the window sill depends on the location of the heating devices. The distance from the floor to the battery should be at least 10 cm, a standard battery - about 50 cm, from the battery to the window sill - at least 8 cm.
Thus, its height will be approximately 70-80 cm. In this case, it is necessary to maintain a tilt of the window sill of at least 1 °, directed towards the room.
Since central heating radiators are not placed on balconies, when choosing an installation height, you should adhere to safety standards, maintaining a height of at least a meter. It must be insulated on the bottom side so that the cold cannot penetrate into the room.
A window sill on a balcony can perform various functions. Quite often, pots with plants are placed on it, creating the atmosphere of a winter garden. It can act as the top of cabinets located against the wall.
Decorative elements or books can be placed on it, like on a shelf. A relaxation corner can be organized on the balcony, where the window sill acts as a coffee table. Depending on the goals, choose the required width and strength of the material.
What thickness?
The thickness of window sill boards is, first of all, determined by their functional use and directly depends on the chosen material of manufacture. For example, wooden window sills are usually assembled from glued panels and have a thickness of at least 28 mm, hollow plastic ones - 20-25 mm (and together with the “nose” protrusion - 30-40 mm), and concrete ones - 30-70 mm (depending on the length of the product).
The LOBAS company produces window sill boards from high-strength reinforced fiber concrete of any size. Standard sizes of window sills: 800x300x70 mm, 1300x450x45 mm, 1450x450x45 mm, 1500x330x40 mm, 1500x600x60 mm, 1600x450x45 mm, 1800x600x60 mm, 1900x200x45 mm, 2000x 530x55 mm, 2200x450x45 mm, etc.
To order window sills, call 8 (800) 333-16-86. Our managers are always ready to help with the selection of concrete products, focusing on the client’s wishes.
Standardized distances for installing heating devices
SNiP number 3.05.01-85 states at what height from the floor to hang heating radiators in a private house, and also lists other standards for the installation of heating devices.
When installing the heating device, observe the following standards:
All heating devices are mounted strictly under the window opening in the room
It is important to install the radiator exactly in the center of the existing window in the room, that is, so that both central axes coincide. It is important to consider the dimensions of the window opening and battery. The width of the device should be 70% of the same window size. The regulatory documents indicate that the height of the battery from the floor is 100-120 mm
When installed at a greater distance, the lower part of the room does not warm up well. And when mounted lower, a lot of dust accumulates under the device. The minimum distance from the window sill to the radiator is 50 mm. If this gap is smaller, then warm air masses will not be able to circulate normally due to the barrier from above. As for the distance from the battery to the wall, it is 2-5 cm. If it is made smaller, the battery will heat the wall and not the air in the room. There is no point in making a gap anymore, because the heating device will protrude strongly from the wall into the center of the room and spoil the interior.
When choosing the optimal gap between the radiator and the wall surface, the material of the walls and the dimensions of the window sill board are taken into account. So, if the window sill board is short, then you do not need to install the unit from the wall at a distance of more than 20 mm, otherwise it will protrude greatly. But the gap is not made smaller due to deterioration in heat transfer.
The reflective screen is attached to the wall so that the foil surface is turned inward. In this case, the width of the screen should be 5 cm on each side greater than the width of the battery. Insulation with foil is attached to the wall from the bottom of the window sill to the floor.
What document regulates the installation of window sill slabs?
At the moment, there is no specially developed document regulating the installation of window sills, but state standards and codes of practice (GOSTs and SP), as well as regulatory documents (SNiPs) indicate the minimum requirements that the installed window sills must meet. Specific parameters are specified in the design documentation or determined by the customer.
GOST
In accordance with GOST 30971-2012, the window sill must:
- hermetically adjacent to the window block;
- be resistant to loads and deformations;
- have a deflection of no more than 2 mm per 1 m of length.
GOST 30673-2013, which replaced GOST 30673-99, describes the technical requirements for PVC plastic window sills: their standard sizes, protrusions and other geometric parameters. In addition, the above regulatory document discusses all the main methods for testing polyvinyl chloride profiles - for strength, impact resistance, durability, etc.
SNiP
SNiP 3.03.01-87 “Load-bearing and enclosing structures” was used before the introduction of SP 70.13330. It indicates the basic techniques for installing window sill boards in the design position. Currently, the updated document is SP 70.13330.2012, which completely replaces SNiP 3.03.01-87.
JV
SP 70.13330.2012 “Load-bearing and enclosing structures” specifies standards for the installation height of the window sill and for installation in general. The document also discusses methods for air-insulating joints using air-protective tapes under the window sill.
Is it possible to finish slopes and window sills without plastic?
Good afternoon We reinstalled the windows in our new building, where renovations are in full swing. Now we need to finish the slopes, but I really don’t want to make plastic sandwich panels with terrible plastic corners. I spoke with the workers, for plastering you need to cut a lot off the sides of the window openings (the walls are made of foam blocks from the developer, uneven, with protruding reinforcement and, most importantly, with cracks! It blows from there!). Is it possible to independently plaster the slopes with a thin layer so that the air from the cracks between the blocks stops blowing? How to do this, will you have to apply silicone sealant? and the second question follows from the first - is it possible to make the window sills flush with the wall, without the window sill protruding by the required 5 cm? I don't like it purely visually. I remember about the battery and the movement of air masses, but how critical is this? I really want to put something inexpensive on the windowsill and a mosaic on top, it’s just a dream)) but at the same time I want the window sill to stick out. Are these 5 cm worth such torment or is there a technological need for protruding the window sill?
How to install a PVC window sill?
Today, PVC window sills are gaining more and more popularity, the advantage of which is moisture resistance and a coating that does not need to be painted. Moreover, the width of such window sills is up to 1000 mm. both colored and white, with a matte and glossy surface, this makes it possible to install PVC window sills on any window.
As for the installation process, there is nothing complicated here, but you still need to read the detailed instructions before installation.
Useful tips and tricks
For high-quality installation and operation of parapets, you should follow some recommendations when installing them.
Install the panels before finishing the slopes. It doesn’t matter whether they are plastered or sewn. They are mounted with a slope of up to 3% in the direction of the room. This will allow water spilled onto the surface to be drained away from the window frame.
For additional strength, it is better to embed the edges into the wall. This way the panel can easily support the weight of flower pots or other items. Plugs should be installed on the sides.
Window sill plug
The gaps between the window profile and the window sill board are sealed with silicone sealant.
In apartments of panel houses, material 20-30 cm wide is used, in brick houses - 50-60 cm. Plastic boards are used for bar counters and table tops.
What is good about a plastic window sill?
Each finishing material has its own advantages. Products made of stone or marble are too expensive and heavy for a balcony. Wood reacts rather poorly to high humidity and temperature fluctuations, which will always be on the balcony, because the window is located on the border between the street and the room.
Plastic products have many advantages:
- are not afraid of dampness, moisture, condensation;
- temperature changes do not deform the material;
- are resistant to ultraviolet radiation;
- The products are easy to care for and wash;
- look attractive;
- are inexpensive;
- they are easy to install.
Products are produced smooth or rough, they have different colors and textures. Also, elements made of polymer materials are produced in different widths and thicknesses. Therefore, they can be selected for any balcony.
Plastic window sills are easy to install yourself. You can save on calling a specialist.
Types of window sills on the balcony
Building materials have disadvantages and advantages for use in specific conditions. Before making a window sill on the loggia, a material that satisfies all the requirements is determined.
- window add-on functionality;
- combination with other materials and compliance with the design solution;
- personal preferences of the owner.
A modern loggia is not used as a winter storage room, so its design is approached as in a full-fledged room in an apartment. Innovative methods of insulation and filling of openings have appeared, and new types of window sills are appearing.
Most often, installations are made of wood, plastic, or artificial stone.
The product can bend and have a rounded shape, so the material should allow it to be made into any shape. Sometimes non-standard solutions are used in the form of ceramics, porcelain stoneware, thick glass, and monolithic concrete boards are made.
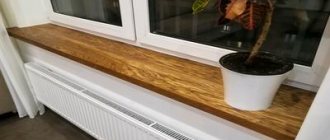
Wood
Natural material looks beautiful, retains heat and creates comfort in the loggia.
For wood, the main indicators are the species and the degree of humidity. For window sills, hard types of wood are used: beech, oak.
The texture is distinguished by wax impregnation, oil compositions will protect the surface from the development of microorganisms and fungus. Maple, larch, and pine are used for glued solids from individual lamellas. The parts are connected with spikes, and special compounds are used. Glued panels can be used to make designs for various window sills without restrictions, since the strength of panel materials is almost twice that of natural materials.
Wooden surfaces require special care and respect. The surface should not be washed with heavily moistened sponges, cleaned with abrasive powders, or used with solvents to remove stains. Heavy objects cause dents on the surface. Every 3 years, a wooden window sill is painted or varnished.
Plastic
Such products go well with frames made of metal-plastic and powder-coated aluminum.
Popular products are in demand due to their relative cheapness and high consumer qualities. The surface is laminated with a durable film with various patterns, textures and colors. Plastic is produced with imitation of expensive wood and natural stone, so the products can be installed on balconies with different interiors. Features of PVC window sills:
- retain their original appearance for a long time;
- do not rot and resist UV rays;
- tolerate frost and extreme heat without problems;
- do not require repairs or regular painting;
- Stiffening ribs inside provide strength;
- do not absorb moisture.
The disadvantages include the possibility of scratches and dents on the surface from mechanical stress. PVC products can be fixed with your own hands, without the use of special devices and tools. If a plastic product has become unusable, it cannot be repaired; it will have to be replaced with a new one.
Made from artificial stone
The massif is made on the basis of mineral fillers, which are bonded together with polymer mastics. Pigments are added to the composition during production, and a material of different shades and patterns is obtained. Artificial stone is cheaper than natural material, but its appearance is no different.
What do they depend on?
When installing window sills on plastic windows, measurements are taken in advance. The board is installed under the window frame. It often still comes into contact with the load-bearing wall. Therefore, the dimensions depend on the depth of the window opening, which may have deviations from the standard.
Important. To make a board in full accordance with the existing parameters, you must take the correct measurements and cut the workpiece from the selected material.
Standard indicators in the table
| Material | Length (L), mm | Width (B), mm | Thickness (S), mm |
| Tree | from 700 to 3000 | from 200 to 1000 | from 30 to 50 |
| Stone | up to 2500 | up to 600 | up to 25 |
| MDF | from 1000 to 5000 | from 150 to 800 | from 22 to 30 |
| PVC | from 4000 to 6000 | from 100 to 1000 | from 18 to 22 |
Some sizing details:
Experts believe that wood should not be used for a balcony . Concrete and stone are difficult to work with and expensive. Therefore, for plastic windows on the balcony you need to choose chipboard and PVC window sills with impact-resistant and heat-resistant coating.
Standard parameters often do not satisfy buyers, because private construction has long moved to a new level.
Non-standard
Such options arise when design decisions deviate from accepted parameters. For example, building codes require the installation of window sills under the window. In this case, the height from the floor to the window sill plays an important role. According to the rules, a radiator or other heating device is installed under the window and the required headroom is from :
You should also maintain the protrusion of the heating device beyond the window sill. Often home owners plan low window sills or panoramic windows. However, do not forget that under the window you need a heat source that will prevent condensation from occurring.
The second nuance is a large countertop or window sill. If you replace a standard window sill with a larger one, it will have to be mounted close to the window. Then the flow of warm air from the radiator will be blocked, and constant condensation will appear on the walls and windows, then mold.
Important! This situation is very detrimental to wooden products.
To make and install a custom window sill, you need to turn to professionals. It is not recommended to do the installation yourself.
The second method is installation on special clamps or mounting strips
This method is similar to the first, but is more reliable. Thanks to special fastenings, it is possible to achieve an ideal position of the structure and a good connection to the frame. Using this method, silicone sealant may not be needed.
Do-it-yourself step-by-step installation:
We clean the surface from dust and debris. If there are foam residues left after installing the window frame, it must be cut off
It is important to achieve the tightest possible fit of the window sill made of wood or plastic to the surface. We attach the brackets to the structure at a distance of 15-20 cm. The material of the brackets can be either plastic or metal.
We apply foam to the surface, put the window sill in place and snap it into the clamps or profile until it stops.
If the elements are perfectly adjacent to each other, then everything is ready; if not, then additional adjustment is needed.
After complete drying, excess foam must be cut off.
Window sills made of artificial stone
The basis of the material is mineral fillers, bound into a monolith with polymer resins and tinted with dye in the desired shade. Artificial stone is cheaper, but looks rich, just like natural stone. Window sills made from it are durable, not afraid of shock loads, and resistant to chemical influences. A small minus is poor resistance to abrasive cleaning. It is recommended to use special polishes for them.
Necessary materials
Before starting the installation and installation of the structure, you need to make sure that you have all the necessary materials and equipment. Once construction work begins, it will no longer be convenient to run to the store, and at some stages, delay is unacceptable.
Stock up on all of the following materials from the list below:
- the tabletop itself, adjusted to size;
- polyurethane foam and a gun for it are necessary for high-quality closure of all seams and joints, because tightness is one of the most important conditions for a modern balcony;
- plugs for plastic, if you chose PVC material;
- level – so that there are no surprises after installation;
- tape measure, pencil or marker - you can’t do without measurements and notes during installation;
- a square for builders - also necessary for installing a level structure;
- a rubber hammer will allow you to gently adjust the level of the window sill;
- self-tapping screws, screws, screwdriver - for fixing and securing the structure;
- liquid Nails;
- profiles - to create a base for the tabletop;
- supports - will allow you to install a structure wider than 20 cm.
This is a standard list of required materials. Installation and installation of countertops with unusual shapes and textures may need to be expanded.
Return to content
Features of measuring a balcony window
The structure on which the window will be installed in this case will be the balcony fencing, so the width of the window will be equal to its length. Since the combination of the side and front parts of the structure will be carried out by installing a corner profile in the required place, their width should be subtracted from the length of the fence - this will be the width of the new window.
The height of the product is the distance from the top of the fence to the balcony slab of the above floor. From this value you need to subtract 3 cm for making the installation seam.
Calculation
Calculating the board parameters for a plastic window will be correct only if you take into account the operating conditions of the structure and all the requirements that apply to it - type of room, load (planned), decorativeness.
Important. When buying a window sill board with a length size, there will be no problems (it has a sufficient supply), but you need to be careful when choosing the width of the board. The quality and service life of the entire window structure depend on the correct calculation.
For window
Window structures use standard PVC boards with:
The width is calculated like this:
Example:
The width of the window opening is B = 100 cm. The width of the window sill is B + 10 cm = 100 cm + 10 cm = 110 cm. Of the 10 cm increase, 2 cm is spent on turning the slopes and 8 cm on the side allowances.
Measurements must be taken on both sides of the window. If the indicators are not the same, then you will have to make an oblique cut.
Important! The window sill should not cover more than 1/3 of the heating device.
Length calculation:
Example:
L = 2000 mm. The length of the window sill is 2000 mm + 100 mm = 2100 mm.
Difficulties may arise when calculating the canvas for non-standard structures , for example, for kitchen countertops or rounded walls. In this case, you need to create an uneven width of the product by first making a template.
For the balcony
Due to the limited area of the balcony, narrow panels are used to make the strip.
Their width does not exceed 200 mm. Maximum parameters (1000 mm) are only possible if there is space.
To install a wide balcony board, you need additional fasteners - special corners or cabinets to support the window sill.
What will we choose?
A wooden window sill has been time-tested and is well suited for living spaces. It is done both with wooden frames and in the case of installing plastic double-glazed windows. In order for it to last longer, it is necessary to protect the wood from moisture and rot by treating it with water-repellent and antiseptic agents.
The plastic window sill is durable, moisture-resistant, and immune to the effects of microorganisms. It is easy to care for. This is the most economical option. There is a wide range of colors and patterns that can be selected to suit every taste.
A window sill made of artificial stone looks solid and elegant. There are no stains or scratches left on it, pathogenic microbes, fungus and mold do not live on it. It will last a long time. A variety of textures and colors will satisfy any need. However, it must be remembered that such a tabletop is significantly heavier than a plastic or wooden one, and is not always suitable for a balcony window.
Featured
When installing window structures, accurate calculations of all elements are required . All parameters of not only the window unit, but also the window sill are taken into account. Despite the fact that the dimensions of the board are adjusted according to the fact, the design features, installation and dimensions of the window sills should be known in advance. Structures are standardized in all sizes.
By thickness
The thickness of the window sill is very important. It affects its service life and strength, determines the permissible load. The thickness of the product is determined by a number of factors :
Important! The thickness of the PVC board is always the same and equal to 20 mm.
The standard thickness of a wooden window sill for a plastic window is 30 mm.
You can increase the size to 40 mm or 50 mm, no more. The thickness of modern plastic window frames is no more than 60 mm .
If the frame is thinner, then you need to select the appropriate thickness of the window sill.
In this case, it must be mounted deeper than with the standard thickness.
By depth
The depth is measured from the substitution profile into which the window sill rests. The second nuance is that the board is installed with a slight slope of 1-2º, so experts add 1-2 mm.
If you take a standard width (from 100 mm to 600 mm), then it will make it possible to install the element with different thicknesses of load-bearing walls. This will also allow you to change its installation depth without affecting its performance characteristics.
The width of the board depends on the installation depth of the window profile. This value is different for each window. To determine the required width of the window sill, you should measure the distance from the edge of the wall to the support profile. Then add 5-10 cm to the result obtained for the window sill exit above the heating device. If the value is fractional, round it up.
How to do it yourself?
Wood is easy to process, so it’s possible to make it yourself. To do this, you need to select the material and familiarize yourself with the details of the process.
Materials and designs
The location of the window sill implies regular exposure to sunlight, moisture, and high temperatures from the battery during the heating season. Therefore, you need to choose more durable materials: glued, tongue-and-groove or milled wood. Designs can be of the following type:
- Solid - one wooden board is used, which is processed to obtain the required shape.
- Milled - consists of solid elements with grooves on one side and ridges on the other. There are several grooves on the underside of the board to prevent the material from deforming in the future.
- Tongue-and-groove - has tongue-and-groove joints. There are holes in the bottom for air circulation.
- Glued lamella - different-sized pieces of wood are glued together under high pressure.
The highest quality materials for manufacturing are oak, beech, and pine.
The most economical option is to use blocks made of sanded chipboard and MDF. These are pressed wood materials that are covered with a polymer film.
From a cut tree
For manufacturing, you need to choose well-dried boards that are free of knots or other defects. Manufacturing stages:
- The board must be planed on all sides, then sanded and polished so that the original material is even and smooth.
- Then it must be coated with an antiseptic to prevent the appearance of fungus, bacteria, and pests.
- Small grooves up to 10 mm wide are cut out at the bottom of the board, and you need to step back from the front part by 10-20 mm.
- The board must be given a shape and a suitable length.
If not a solid tree is used, but component parts, then they are glued together, connected with dowels or dowels.
Attention The length of the wooden window sill must be 10–15 cm greater than the width of the window opening, and the length of the part protruding into the room must be at least 6–7 cm.