You see it every day, but you hardly pay attention to it. You pass nearby, but don’t even think about why he’s standing there. It's time to fix this and find out what the window sill at the window on the street side is called. Why is this thing outside the window needed and what are its main functions? Is it possible to do without a street window sill and what are the consequences?
The so-called slope at the window on the street side has a simple and logical name - drainage or simply - ebb . It is fixed almost at the very end of window installation. Installed to prevent water from accumulating in the recess between the wall and the window. Mounted at an angle.
The dimensions of the so-called external window sills are always individual. When placing an order or during self-installation, clear measurements are taken, down to millimeters. At the same time, a reliable foundation is strengthened under the ebb itself. Having found out what the iron window sill is called on the window side, we will try to reveal the meaning of the installation and mainly from what material it is made.
The need to install drainage from the street
Many people think that the low tide serves to allow rain to “drum” on it all night, to entertain the birds, or simply for beauty. Obviously this is not the case. It must be installed on each window to prevent moisture from getting onto the wall of the house and the windows themselves. Thus, saving from the formation of dampness and mold indoors.
The most important task is to prevent water from getting into the so-called gap between the frame and the wall. Definitely, an external window sill is a must when installing windows.
What material are drainage pipes made of – which one is more durable?
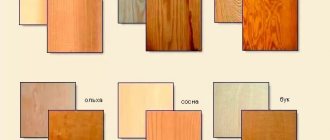
There are two main types of window sills on the street side: iron and plastic. Each has its own advantages and disadvantages. So metal and plastic:
What is the name of the window sill from the outside?
The Svetlitsa window factory cooperates with the largest manufacturers of PVC window sills:
Window sills for plastic windows come in 3 main colors:
White Golden Oak Mahogany
You can also order a window sill in any other color from us. The color range is formed from the RENOLIT film catalog (More than 100 colors).
• UV resistant;
• have excellent heat-insulating properties;
• practically not subject to mechanical damage;
• resistant to chemical damage;
• easy to install;
• do not require special care.
Window sills for plastic windows can have a different appearance, for example, natural stone with a characteristic pattern applied or natural wood. However, most often they use plain models with a glossy finish.
or varnish coating, such as, for example, produced by the Svetlitsa window factory. These window sills are more wear-resistant, since in addition to being decorative, the varnish coating performs additional protective functions.
Proper installation of the window sill of plastic windows ensures the longest possible service life of this important element, both from an aesthetic point of view and from a practicality point of view. Attaching the window sill to a plastic window is carried out in the following ways:
• with special glue, with spacers and weights;
• on polyurethane foam with special spacers;
• on special brackets.
Preparatory work
Usually, drip tides are installed together with new metal-plastic windows, then the installation is carried out by the same team, and this is already included in the cost of the contract. But the need for installation may be due to several factors, such as replacing an old, damaged sill, installing a metal window sill on a previously installed window (it can be either wooden or metal).
In any case, to independently install an external drip sill, the first thing you need to do is make or buy one. To purchase, you can contact specialized stores if your sizes are typical.
If you are unable to take measurements yourself or require a product of complex shape, then it is best to contact specialists who will competently take the necessary measurements and take into account all the nuances at the installation site.
Immediately before installation you will need:
- ready-made and available low tide; hammer drill or impact drill; hammer and chisel, sharp construction knife; broom or soft brush; sandpaper and a hacksaw for metal; building level, plastic pads.
Add a comment Cancel reply
You must be logged in to post a comment.
- home
- Questions to the expert
- CONSTRUCTIONS and MATERIALS
- Windows, stained glass
I’m going to order plastic windows, but the companies bombarded me with counter questions and advice with many professional terms. Please give the name and description of all elements and parts of the window in order to correctly formulate your order.
Window opening design options
Decorative window framing consists of various structural elements. They not only give the façade solemnity and endow it with individuality; many parts simultaneously perform a technical function. In modern architecture of private construction, the following elements of window decoration are used:
- Cornice . A horizontal part protruding above the plane of the facade. Helps to insulate the window opening and covers its inside. The slope serves to protect the opening from precipitation.
- Sandrik . A type of cornice that protrudes above the surface of the wall. Located above the window, it is intended to accommodate stucco decoration. In past centuries, the decoration of the sandrik was the coat of arms of the owner of the house or mascaron - the head of a person or animal.
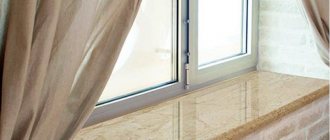
- Windowsill . The lower part of the window portal protruding above the plane of the wall. It is often supplemented with a low tide and drip, which helps drain rainwater from the facade.
Main elements of window framing Source dekor-fasada.ru
- Platbands and slopes . Decorative details that play an important role in insulating the window and protecting it from temperature fluctuations and precipitation. In addition, platbands can help visually lengthen or widen the window opening.
- Arch . Frame in the upper part of the window, semicircular casing. A brass window is a type of arch, a semicircular window inscribed in a rectangle. Appeared in the 16th century, named after the Italian architect Donato Bramante.
- Panel and bracket (or console) . Decorative details help to visually lengthen the window and give it a more proportional shape.
- Keystone . Top element of window decoration; previously used to secure arched masonry. In modern architecture, this is rather a decorative technique that gives the facade charm and originality.
- Rust . Overlay panels imitating stones tightly fitted to each other with a smooth or roughly processed front surface.
Keystone - a decorative detail of modern windows Source decorsystem.pl
HEAT SAVING SCHEME IN ENERGY-SAVING GLASS UNITS
Energy-efficient double-glazed windows with low-e coating allow light and solar heat into the home, but do not release much of the radiant heat out. This effect is achieved due to the ability of the low-emissivity coating on the glass to reflect long infrared heat waves emitted by all heated internal surfaces in the room back into the room. Due to this effect, the house is warmer in winter and cooler in summer.
Diagram of radiant energy flows through an energy-saving double-glazed window with low-emissivity coating
Functions of the window sill[edit | edit code]
Thanks to the presence of a window sill, the thickness of the warm air layer near the window and the section of the wall adjacent to the window sill increases.
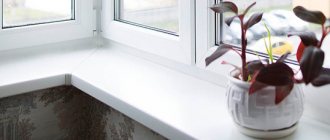
The window sill protects the part of the wall underneath from the penetration of rain moisture when it enters an open window. Serves decorative purposes, organizing a visual transition from the interior space of the room to the window, covering the window niche on top, where the battery is usually installed. Often used as a stand for pots of house flowers.
The window sill simplifies the window maintenance process (for example, if necessary, wash the glass or hang curtains, etc.)
With the development of technologies in construction and design, the window sill acquires new functions. A wide window sill visually enlarges the room and its usable area; it is used as a seating area, a bookcase, a storage space, or a countertop in the kitchen.
Types of cornices by number of rows
Another important classification of curtain rods is based on the number of rows for placing curtains. Three categories of designs:
- Single-row: round, string, profile. Designed for fastening one blade.
- Double-row: tire, baguette, round. Suitable for double curtains.
- Three-row: tire structures with grooves for fastenings. The range also includes wall-mounted round cornices with extended brackets for fixing the crossbars. With the help of such systems, you can place several canvases and textile decor, for example, lambrequins.
Single row curtain rod
Double row curtain rod
Three-row rail curtain rod
When is repair needed?
Most often, repairs are needed when there is a significant change in color, traces of paint and tape, scratches, holes or cracks. Most of these defects can be corrected using:
polishing;- chemicals, for example, Domestos or regular bleach;
- You can erase traces of tape with an eraser or sunflower oil, and paint with solvent;
- cracks can be sealed with putty, sealant or liquid plastic;
- in some cases, the surface of the window sill simply needs to be sealed with laminated film.
More information about window sill repairs can be found here.
When is dismantling and replacement necessary?
Dismantling and replacement may be required when:
- severe deformation or destruction of the old slab (for example, an old wooden panel that has begun to rot);
- dismantling may be required if you need to insulate the window sill;
- replacement with a newer stove or due to a change in the design of the room;
- when reinstalling windows to others;
- for carrying out construction or restoration work for a window opening.
You can read more about dismantling and replacing window sills in the article.
Causes of cold despite insulation
In some cases, the window sill may be cold even with insulation. Most often this happens due to incorrect installation.
The stove may also be cold due to:
- blowing through the installation seam, which could have worn out over time or due to improper installation of the window;
- insufficient heating, for example, due to improper operation of radiators or low power;
- incorrectly selected material for the window sill. Most often, such a stove will be cold if it is made of metal or stone.
Other reasons for cold window sills are discussed here.
Self-installation: tools, materials
The cost of installation by a master consists of:
- complexity of the product shape;
- type of ceiling;
- cornice shapes;
- material of manufacture;
- number of rows;
- availability of additional functions (for example, installation of an electric drive).
As a result, the cost turns out to be relatively high, so to save money, install the cornice yourself; for this you will need:
- the curtain itself;
- a narrow, sharp hacksaw (a special one designed for cutting knots is suitable);
- metal tape measure;
- long metal profile or ruler;
- square;
- plumb line;
- stationery knife with a double-sided blade;
- roughing plane, for processing the edges of drywall;
- a simple pencil for marking;
- perforator;
- rubber spatula;
- paint and brush;
- reinforcing corners;
- putty, primer;
- stepladder.
Installation of plasterboard box
Plasterboard sheets are light in weight, making them ideal for creating all kinds of ceiling structures, including niches for built-in cornices. Plasterboard sheets are cut into strips 15-20 cm wide. There are several cutting options (straight, double-sided, uneven, round holes), but the usual one is preferable - straight.
The required size is marked on both sides of the sheet, a ruler (steel profile) is applied, and the top layer is carefully cut through it. Next, the material is placed edgewise, tapped on it where there is no cut, the gypsum core breaks, the second, cardboard side is cut with a knife or sawn.
To install the box, purchase:
- a sufficient amount of drywall;
- steel ceiling profile, dimensions of which are 2.7 by 6.0 by 300 cm;
- curtain rails for the ceiling - wooden or aluminum, measuring 2.8 by 2.7 by 300 cm;
- electric drill;
- screws, dowels or staples.
The work is carried out in the following order:
- the distance from the window sill, wall with a window, protruding radiator is measured;
- an allowance of ten cm is added to the resulting number so that the curtains move freely in the niche;
- then a line is drawn, it is drawn parallel to the wall, which will be the edge of the future niche;
- guides are attached in accordance with the line, the distance between the dowels is 60-75 cm;
- to assemble the sidewalls of the box, strips of plasterboard are screwed to the guides, the step between the fixing elements is 10-15 cm;
- the perimeter is marked at the ends of the box, screws are secured, placing the profiles in the direction of the walls of the room;
- use a hacksaw to cut off the plasterboard strips - the sides of the niche, and process the ends with a plane;
- using ceiling profiles, the lathing is assembled, the interval is 40-50 cm;
- Next, the bottom of the box is sewn up, in accordance with the size of the niche; the sides can be made of glass or transparent plastic.
Designers propose making the edges of the box not straight, but wavy, broken.
Covering a plasterboard niche
Depending on its location in space, a plasterboard niche can be:
- on a separate, lowest tier near the window, if the ceiling is multi-level;
- in the form of a box along all the walls - this creates the effect of a two-level ceiling;
- like a special box near the window.
When working on the sheathing, all screws and other fasteners must be “recessed” into the drywall - the caps should not protrude. After the hole with fasteners, the joints of the plasterboard sheets are puttied, and sometimes the entire box is completely coated with primer. The inner corners are processed using a rubber spatula - to simplify finishing, corners made of aluminum or plastic can be placed in them. The corners must be pressed into the putty layer.
When the putty dries, all corners are carefully sanded with fine sandpaper, the dust is removed, and the niche is painted in a suitable color. To diversify the interior, even before installing the cornice, neon tubes, halogen lamps, and LED strips are installed in the niche. With such details, the room will become more comfortable, and curtains, especially plain ones, will “float” in the air. Advice: before starting the sheathing, the place where the cornice will be located must be marked, mortgages and dowels installed under it.
Attaching the cornice
The main disadvantage of plasterboard is its low strength if the load falls on one point, therefore it is permissible to hang only light objects directly on the plasterboard surface. Fastening here is done with Molly bolts, specially designed for hollow structures. If you plan to hang heavier products, under the plasterboard, an embedded beam is mounted directly on the ceiling, onto which the cornice is later screwed. This should be done before the plasterboard structure is assembled.
Therefore, the cornice is usually mounted in a niche, on self-tapping screws and dowels, pendants, and brackets. The standard ceiling is made of concrete; the place for the cornice is marked in advance and the middle is indicated. When the cornice is tire, there are usually holes already made in it, but if not, they need to be drilled. For three-four-row tires, holes are made in two rows, the ceiling is also drilled, the middle of the cornice is fastened with a dowel-nail, and the edges are fastened in the same way. When installing on wooden ceilings, self-tapping screws are used instead of dowel-nails.
Features of using hidden cornices in the interior
The ceiling cornice is designed to support and fix the curtains, while fitting well into the existing or newly created interior. A hidden cornice allows you to completely cover the entire wall with curtains. It seems as if the curtains are “flowing” straight from the middle of the ceiling, the junction of the wall and the ceiling.
This design does not split the space vertically, which is especially useful when the room is low. The product is also suitable for high, multi-level ceilings. The structure does not have to be mounted only along the wall with a window - it will become an excellent dividing element (in a studio apartment, a room with a bay window, a niche), if necessary, it can be removed with a slight movement of the hand.