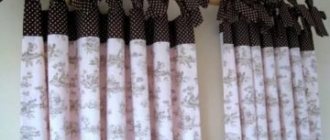
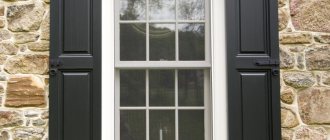
Homemade decorative cornices
Those products that are made by professional woodcarvers or blacksmiths can also be called self-made, that is, accessories of high class artistic performance, but made by hand. The cost of such cornices is often several times higher than the price of highly decorative models of industrial production, but at the same time mass-produced. We will consider technologies that do not require professional skills and expensive materials, but allow us to assemble a product of a sufficient level of aesthetics.
Cornice moldings made of metal pipes or rods
The most readily available metal suitable for making cornices in everyday life is water pipes with a diameter of ½ and ¾ inches, both galvanized and black. Most paints adhere even better to zinc coating.
First of all, depending on the size of the span, choose the diameter of the pipe and the number of brackets. For a cornice for a narrow window or door (less than 0.8 m), you can use a half-inch pipe; for a larger span, it is better to take material with a diameter of ¾. If the width of the window opening is more than 1.5 m, then the curtain rod device must be mounted on 3 brackets - at the edges and in the middle.
Cornices made of steel water pipes with connecting fittings
Having retreated 15-20 cm to the sides from the side slopes of the window opening, the total length of the cornice is obtained and the required piece of pipe is cut off. If there are 3 fasteners, then the cut fragment is cut in half. Then, at all ends of the two resulting pieces, threads are cut with a tool (3-4 turns), having first chamfered their outer edges and lubricated with grease.
From the same pipe, pipes 10-15 cm long are cut according to the number of fasteners, and a thread is also cut on one side of each. Then you need to purchase or cut yourself with a grinder from sheet steel 3-5 mm thick, supporting “spots” according to the number of pipes and drill holes in them with a countersink for self-tapping screws. Branch pipes are welded to the snouts strictly perpendicular to their plane - at the end without threads, the welding seam is polished with a grinder, and the cornice can be completely assembled using threaded connections: 2 pipes are connected to the rod with pipe bends of the appropriate diameter, and the third - with a tee.
Option for a homemade cornice made of steel pipes and bends
Important! If a pipe without zinc coating is used to make a cornice, then once the components are ready (before assembly), one of the ways can be to bluing them (blackening), which will give the surface a dark tint and protect it from corrosion.
As a finishing touch, you can use painting in a suitable color - nitro paint from a can or auto enamel using a brush. It is not advisable to use oil paint - the rings do not glide well on such a paint layer.
Watch this video to help describe it:
To make a small span cornice (up to 1.5 m), you can also use a steel rod with a square section of 12x12 mm, which is quite suitable as a cornice rod. To make a barbell decorative, a rod cut to size is marked along the length into several sections, after which, on a lathe or using hand-held mechanical devices, they are twisted through one by an equal number of revolutions. The hexagon rod can also be twisted around its axis, both in sections and over its entire length.
Manual mechanical devices for twisting metal rods
The rod for the cornice can also be made from a round steel rod with a diameter of 15-20 mm. If such an element is subjected to hot forging along its entire length, followed by bluing, then the accessory takes on the appearance of an antique interior element. If the ends of the rod are spilled, they become limiters for the rings, but they can also be decorated with wooden decorative knobs.
Site-mounted curtain rods on wood and metal brackets
For both types of rods, it is not difficult to make brackets - they can be made of wood or metal - forged, bent, turned. You can also find ready-made components of simple designs on sale.
Metal bracket options
There are no questions about fastening the brackets - they are usually mounted with self-tapping screws in holes sealed with nylon holes at the same height from the floor.
Cornices made of polypropylene tubes
PP pipes can also be used to make homemade curtain rod fixtures. The design of the finished baguette will differ from an accessory made from metal pipes only in the assembly method, strength and weight.
The product is assembled from the same components as in the case of metal pipes - a PP pipe with a diameter of 3/4 inch, identical bends and a tee, and support blocks.
Components and components of a homemade cornice made of PP pipes
The assembly of elements is carried out using a special device - an iron, the skills of working with which are acquired after two or three trial connections.
After assembly, the cornice is painted with paint from a spray bottle or can.
Red copper and brass painted PP pipe cornices
The products are durable, resistant to most types of household impact, but due to the flexibility of polypropylene, they are not suitable for placing heavy curtains, and even for light curtains, the distance between the brackets should not be more than 1 m.
Wooden curtain rod devices
Cornice moldings made of wood, like metal ones, are available in various types.
If we consider rod-type devices, their design is no different from metal ones - the same rod with brackets, only made of wood. The rod is turned on a lathe from a block of the required length. The wood can be of any common type, but without knots. After finishing the turning work, the crossbar is sanded with sandpaper, varnished and installed on the wall or ceiling using brackets.
Various designs of wooden curtain rods
The second type of wooden cornice - with a decorative strip - can also be made with your own hands, and it is not necessary to master the art of artistic carving. You need to familiarize yourself with the design of such cornices and make a copy of the accessory, but to decorate the decorative strip, use ready-made carved decor, available for sale in furniture fittings stores.
Important! To decorate the cornice strip, instead of wooden elements of carved decor, you can use a ceiling plinth made of polystyrene, which is glued to the base and decorated in an artistic way - with water-based paints.
A smoothly planed board with processed edges 2-2.5 cm thick is taken, and brackets are mounted to it. Carved decorative elements are attached to the front side of the plank using PVA glue, after which they wait for the adhesive to dry and decorate the decorative strip in an artistic way - cover it with stain and varnish.
A cornice with a decorative strip can have a hidden rod or string-cable for fastening rings in its design.
The second version of this accessory is a design one - installing a strip with brackets (or without them) on the base on top of a string-type cornice device pre-installed there.
Wooden cornices: on the left - with guides in the structure, on the right - overhead placement, without a rod
Bamboo rod curtain rods
Bamboo does not grow in Russia, but currently not only furniture and crafts made from it are imported from China, but also bamboo trunks and rods themselves, both fresh and dry. An original cornice can also be made from an old bamboo shelf or wall shelf, if the length and diameter of the rods allows.
Bamboo stems for curtain rod: fresh and dry annealed
Important! The bending strength of a bamboo rod can be increased if the top layer of bark containing the cambium, a membrane that gives flexibility to the trunk, is removed from the rod.
If you plan to use rings to place curtains, then the transverse thickenings on the bamboo rod are processed with a file, making them streamlined, but it is important not to grind off the excess, so as not to weaken the rod significantly in this place.
Homemade bamboo cornices: double-row and single-row
If, instead of rings, loops made of braid are used that do not move along the bar, then the transverse ring thickenings on the bamboo can be left unchanged and even made more prominent using automotive putty, and then the crossbar can be painted the color of a living trunk - juicy green.
To decorate the rod of bamboo curtain rods, you can also anneal it with a blowtorch and then coat it with colorless varnish.
Homemade rod curtain rods made from dry annealed and painted bamboo
There can be many options for additional decoration of bamboo cornices, depending on the status of the room and the class of its finishing.
Cornice devices made from tree branches
To place curtains, you can also use a natural fragment of a branch that has the required dimensions and original shape. It is only necessary that the wood is dead and does not contain parasitic insects.
The selected branch is cut to size and everything that is peeling and damaged is removed from it. Then the workpiece is dried, protruding knots are removed from it, treated with sandpaper and coated with varnish - preferably semi-matte, which preserves the naturalness of the product.
Depending on the configuration of the accessory, brackets are selected for it and secured in place, after which the curtains are placed on the branch - on rings or loops made of braid.
Homemade cornices from natural tree branches
Important! In wooden houses, it is especially important to treat the branch with an antiseptic against insect-boring insects, for example, “Antizhuk”, which will protect the structure from infestation.
Rope curtain rods
Original devices for placing curtains can be made from high-quality rope, but it should not be impregnated, such as hemp, otherwise there will be an oil smell in the room.
Such a cornice does not have a universal design and can be decorated in a wide variety of ways, but at its ends, naturally, there must be brackets for fastening to the wall or ceiling.
Curtain rods
If desired, you can weave decorative elements into the rope, or paint it in a brighter color.
Combinations of sports equipment
To place curtains, you can use an oar or old golf or hockey sticks, but restored and covered with a protective layer of paint or varnish. This version of cornices is especially appropriate for decorating rooms intended for teenage children.
Rowing oar as a curtain rod
The paddle can be additionally decorated with artificial seaweed. The brackets are made, naturally, in relation to the accessory used.
Cornices made of paired clubs: for golf and hockey
Such a device is distinguished not only by its originality, but also by its durability, moreover, it can be mounted on the wall without damaging equipment, and subsequently dismantled and used for its intended purpose.
If the room has expensive finishing, and the interior is designed in a certain style, then unless you are a master in making cornices, it is unlikely that you will be able to do something worthy. But you can safely try yourself in this role, for example, at the dacha, since it is quite possible to make a decent curtain rod for a room without any special frills.
Work order
All of the above options for curtain hangers will be assembled in approximately the same order. Therefore, below we present a general order of work for everyone, which, with minor differences, may be suitable for any option.
- First, the window opening is measured. The assembled structure should be 30-50 centimeters wider than the window. This size allows you to completely darken the room by covering the window with thick curtains.
- According to the obtained size, blanks for the guides on which the curtains will be hung are cut.
- Fasteners for the guides are being prepared. In the case of a wooden or steel round rod, it can be a wooden piece, with a hole for the rod and another hole through which it will be attached to the wall, or a simple metal corner of a suitable size. For string systems, it is necessary to prepare steel angles, two for each string. The tire is attached with dowels or screws directly to the ceiling.
- Next, the points where the rod holders will be attached are outlined and they are installed. If a decorative strip is to be mounted, then it will also need to be marked for fastenings.
- The next operation will be the installation of the curtain rails themselves. If this is a string system, then a string is stretched between the corners fixed to the plane of the wall or ceiling. The tension can be adjusted with bolts inserted into the corners. For tires, no special operations are required - just a plastic part is attached.
- The last to be fixed is the decorative strip, if provided for by the design. It can be secured using small metal corners. Making this part is a simple process. You just need to saw off one or more rectangular blanks of the required size. The part of the trim that will cover the curtain rod at the front should be slightly longer than the curtain rails, and the end parts should reach the wall.
The process is described only approximately, since each curtain assembled with your own hands will be individual. The manufacturing process also varies depending on the materials used and the type of construction chosen.
Decorative cornices for the bedroom, living room, kitchen or bathrooms can be made from a variety of materials. You can make cornices yourself from the following materials:
- Tree.
- Strings.
- Sport equipment.
- Ropes.
- Tree branches.
- Wooden rod structures.
- Water pipes.
- Metal rods.
- Bamboo rods and much more.
The choice of material for the manufacture of a future installation depends on the possibilities, both financial and physical, as well as on imagination.
Baguettes made of metal pipes or rods
For baguettes made of metal pipes, it is better to choose galvanized coating. This is explained by the fact that paint adheres better to it, which means it will be possible to give the structure a more beautiful and neat look. The number of brackets for fastening is determined by the length of the cornice: if it exceeds 1.5 m, a fastening must also be made in the center. The diameter of the pipe is selected depending on the severity of the curtains. It should be remembered that the larger the window and the longer the curtains, the more powerful the cornice should be.
How to make a curtain rod from polypropylene tubes with your own hands
You can assemble a baguette from polypropylene pipes in the same way as from metal ones. The only difference is that instead of threading you need to do soldering. However, having the skills to work with a special iron, it is not difficult to carry out these operations. A do-it-yourself cornice made from polypropylene pipes after assembly can be painted with a spray can, golden or any other pearlescent paint. Products made from such pipes are quite durable. One of the main disadvantages is flexibility, so they are suitable for attaching curtains weighing no more than 1 kg.
Wooden structures
The crossbar for a wooden structure can be of different types, but the most common is the rod type. This part is machined from timber, giving it the required length and shape. You can make a design with carvings, it will be more beautiful and elegant. To rid the product of knots, it must be sanded and then coated with a special varnish. This design is mounted on the wall using brackets for fastening the cornice.
MAKING A WOODEN CORNICE
Remember I showed how to make a simple country curtain rod with your own hands? Today I will talk about how to make a stylish wooden curtain rod that you won’t be embarrassed to hang in a decent room.
In principle, there was nothing complicated there, and the technology is very similar to that cornice for my bathhouse. But this time we were talking about a cornice for our room with a fireplace... And then you understand - I want to reach a different level of “homemade”.
For those who are reading about my dacha for the first time, it’s brief: far, far away on the shore of a lake, we build it ourselves, very inexpensively, but beautifully.
So, the cornice... Which one did I want? Of course, a strict stick of a dark color (like our wooden floor) and always with balls at the ends. Well, I like these kind of cornices... Simple, no frills, but with balls.
This time the standard of beauty was a cornice from Restoration Hardware. I saw it there in a discount furniture showroom, looked at it, noted it and... forgot...
And this summer, when we brought “chic” curtains from Leroy Merlin to the dacha, which perfectly match the vintage wallpaper on the attic floor... it became clear what kind of curtain rods we needed.
No sooner said than done!
It took me three days of work, a couple of hours each. We have three windows in the room, so three curtain rods were needed. For three cornices you need three sticks and six console holders.
Step one: we had a selection of sticks. I found them in my barn - ordinary metal sticks from a Soviet cornice had lain in the garage for 30 years, according to my dad. They looked very creepy, but the main thing for me was that they were not curved and were the right length.
I measured the required length (read about the correct length of the cornice) and my husband shortened them with a grinder, and also slightly sanded the resulting sharp cut.
Step two: select a board that is suitable in width and thickness. This time I had a board 30 mm thick and 150 mm wide
Step three: draw a template on paper, transfer it to the board, carefully cut out all six parts. As in the previous story, I still have blanks for consoles - also six pieces. Don't throw them away! Will definitely come in handy for some shelf!
Step four: take a router, a special edging attachment and make a beautiful flute along the outer perimeter of our blanks. I forgot to take a photo of the process. But the point is clear. The edge of the holders is clearly visible here.
This is the kind of milling cutter we have.
This is the kind of attachment you need.
Step five: sand everything very well. Just be careful about your decorative finishes! If you apply bad force, you can sand away all the beauty of the decorative border without leaving a trace. You can sand it by hand, or you can use a machine, just be very careful.
Step six: Make a hole for the pipe rod. I measured 2 cm from the edge and we used a jigsaw to cut out “seats” for our pipes according to their diameter. Here I’ll make a lyrical digression: why didn’t we use a crown - the crown produced “holes” of the wrong depth, and I really didn’t want my curtain to fall on my head while closing along with the stick... In general, I played it safe. in fact, it was possible to take a 30 mm crown and cut holes with it, probably.
Step seven: PAINT EVERYTHING! Everything is wooden blanks and metal pipes. I painted the wooden blanks with the same composition as the floor - wood impregnation “Ebony” plus “Oak” in a 1:1 ratio from the Pinotex company.
I just painted it with a brush, in two layers. Pinotex dries quickly and disappears in about a couple of days.
But I painted the metal pipes with special metal paint in aerosol cans. I chose a color as close as possible to the impregnation.
Step eight: everything is dry, you can attach the holders to the wall. Everything here is quite simple - measure the required height and go ahead. We choose the mounting method according to your walls. We screw a special furniture plate like this to the wooden holder and... one, two, three... everything is attached.
Step nine: If you remember, I wanted balls... But how to make them - if the cornice is not purchased. You can’t cut them out of wood.. Although.. if I bought a lathe, I think it wouldn’t be difficult :))) So, what did I do. I went to Ikea :)) and saw these balls for sale...
2 pieces cost 200 rubles. I had to fork out and buy three packs. They are intended for curtain rods like these in Ikea, and they cost... 1999 rubles. There was no way I could spend 6 thousand on the dacha where I save.
But at that moment they were only white. While I gave my husband the task of figuring out how to attach them to our cornices, I went to paint them myself with the same paint for metal (in fact, it was also mentioned about plastic). The ball is difficult to paint. To get it evenly, carefully apply four layers, constantly turning the ball around its axis.
Step ten: screw the balls to the pipe. So, what did we come up with with screwing the ball on... But actually, nothing special. The IKEA cornice has a metal rod with a thread for this purpose, since the pipes that they sell have a counter part with a thread - everything is simple there... Our pipe is old, and we couldn’t come up with any counter part in the village.
Therefore, they took champagne corks, cut them to fit the diameter of the pipe, coated them with super glue and pushed them in as hard as they could. And already the ball was easily screwed into the traffic jam (well, with the help of incredible manly strength). Just in case, we dropped some super glue on top. Touched it up again... and voila. Everything is ready, everything is beautiful.
The beautiful rings also lay around for a hundred years in my mother’s pantry. She assumes that she got it from her aunt, but no one could say for sure. And what difference does it make - if they are ready, in the right brown color :))
We put the “sticks” on the holders and hung the curtains. We pulled it and made sure that nothing was jumping anywhere, and with that my heart calmed down :)
Here's a mini Master class we got - HOW TO MAKE A CURTAIN POLE. If you liked the master class, please share it with your friends, this is very important for the development of the blog!
If you have done something similar and want to share it with the world, be sure to write me a letter. I am collecting ideas for the new issue of RUKI.RU magazine - I just need your ideas like air!
How to make a curtain out of wood with your own hands
- Date: 04/07/2015
Curtains that cover a window or doorway are usually made of fabric. Beautiful and expensive curtains definitely give the room solidity, but if imagination and the need to decorate the house with your own hands requires a change in the boring environment, you can devote part of your free time to diversify it. Making wooden curtains with your own hands is not difficult; this exciting activity will certainly interest other family members, allowing you to spend your evenings doing a fun and interesting activity.
Curtains with wooden elements are suitable for interior design in a rustic, oriental or African style.
Curtains made of wooden elements complement any interior well with their appearance.
This design technique is especially appropriate when decorating an apartment in a rustic, oriental or African style. This combines two fashion trends at once - the use of natural materials and the idea of hand-made, that is, making things with your own hands. The original decoration of the house makes its atmosphere cozy and original, and gives the owner the opportunity to express herself in this creative activity.
Wooden curtains can be made from a wide variety of elements. To do this, use beads, rings or other small wood objects. If one of the family members has experience cutting wood with a jigsaw, then his contribution to the curtain making process will be invaluable.
Thanks to this tool, the components will become much more diverse and elegant. The curtain will become completely unique, impressing guests with flowers, stars or other wooden figures hanging on threads, well sanded and varnished. Curtains made from bamboo sticks, which are also considered a wood material, look good.
Tools
To make carved platbands with your own hands, you will need the following minimum set:
- drill with a set of drills;
- electric jigsaw with soft start and a bunch of different wood saws;
- chisels;
- sandpaper with grains of different sizes;
- flap disc made of sandpaper for wood on a drill.
You can make these carved window frames with your own hands.
To reduce the time it takes to create carved patterns and polish, it is better to have a router and a grinding machine.
Making wooden curtains with your own hands
To make wooden curtains you will need wooden beads.
Everything necessary for the work must be prepared in advance, and the tools you will need are very simple, available on everyone’s farm:
- a plank or strip made of wood; a drill for drilling holes; a thick nylon line or cord; a needle with a large eye; wooden elements for stringing; scissors; crimps.
First, you will need to think about what elements the curtain will be assembled from and the exact layout of their location on the threads.
The basis for the assembly will be a wooden plank, the size of which should be slightly larger than the width of the door or window opening. Holes are made in it to secure vertical threads, the number of which is calculated according to a pre-created sketch.
Usually the parts are strung on a thick nylon fishing line, but depending on the idea being embodied, it may be appropriate to use a bright ribbon or colored rope. If the design of the curtain requires free gaps between the parts, special clamps are used for fastening, which do not allow the elements to move. They are called “crimps” and are clamped in the right places using pliers.
It is better to secure the collected threads using another fishing line along the bottom of the curtain to prevent the possibility of them getting tangled.
You can care for wooden curtains using a vacuum cleaner or a soft bristle brush. Sometimes you can wipe the parts with a damp sponge, but it is not recommended to use large amounts of water for cleaning. The impression of wooden curtains can be complemented by additionally made pendants placed on the lampshade of a chandelier or sconce, wooden figurines, boxes or other interior items.
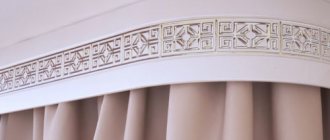
Today, beautiful wooden cornices are gaining popularity.
With the help of curtain rods we attach curtains to the walls or ceiling.
This is the main method of fastening and the most convenient. This method was used in ancient times in Egypt, which is why cornices similar to ancient Egyptian ones are now highly valued. Convenient because with the help of rings threaded into the rod, you can easily move aside tulle or curtains.
There is no need at all, like in the good old days, to pull them with all your might so that they come off. It is important that it matches your interior more in style than in color. First, let's look at their types: profile, baguette, round, forged and string.
Classification
Wooden cornices are grouped according to several parameters:
- type of material;
- methods of attachment to the surface;
- appearance;
- number of guides.
Wall-mounted wooden curtain rods: selection criteria
The most popular type are wall cornices.
As a rule, rods of this type are made from coniferous and deciduous trees, but exotic species, such as mahogany or rosewood and others, are considered the most expensive. It cannot be said that any type of wood is the most durable. Everyone has different density, color, sensitivity to weather conditions.
It is better to choose according to the criteria that are most sensitive to your home. Such cornices have a practical and decorative function. The practical one is a clamp on a wooden sword. In this case, you will have to focus specifically on the curtains. The decorative factor includes decorations on the tips of swords.
By the way, the buyer can choose the shape of the tip himself. Most often they are universal, for example, plants, animal figures, sculptures or something according to your sketch. All this is thanks to wood carving, since wood is the most convenient material for such work. This is a very powerful fastening, because it can withstand even the heaviest fabrics.
Ceiling cornices made of wood: what to look for
Such cornices have more of a decorative function than a practical one, since they are much more noticeable than wall ones. This element of decor can no longer be hidden, and indeed it is not necessary. With the right choice of wood and color, it will complement the curtains perfectly.
For this type of carving, wavy lines are considered universal carvings. They are often confused with profiles. Unlike wall cornices, functional mechanisms are completely hidden in ceiling cornices.
There are also other advantages over wall-mounted ones, for example, the following: fasteners can be three-row, the choice of design for such fastenings is huge. However, they can hardly be called budget.
The high cost is due to the exquisite carving and massive material. This design is most likely suitable for draped curtains, as well as heavy dark fabrics. If you want to emphasize your high income, then it is better to choose mahogany ceiling cornices.
Products made from oak are considered more restrained. If, on the contrary, you need to save money, then it is better to choose products made from pine or alder. In some cases, they even emit a pleasant forest smell.
Materials
If earlier the frames were only wooden, now the choice of material base is wider, and not just any wood is suitable for openwork.
- Wooden - the complexity of manufacturing depends on the type of wood, as does durability. If it is difficult to carve from oak and beech, but they will last for decades, then linden is easier to process, but will also deteriorate faster. Larch, alder, maple or birch are also used.
- Metal - most often cut out of sheet metal, then processed and painted, they will not fit on a wooden facade, but with metal siding or fiber cement they will make a successful tandem.
- From MDF boards - various variations of wood fiber boards are attractive due to their ease of cutting, you can create an arbitrarily complex pattern, but they are susceptible to moisture, but inside the room, the openwork door frame and the interior will liven up and last a long time.
- Plastic (PVC) is the best option for ordinary plastic windows, durable and strong, but they are sold only in sets and you cannot make them yourself. Consequently, an identical set may well be found in a neighbor’s house, which will negate the whole point of using them.
Tips for choosing carved wood cornices
When choosing carved wooden cornices, you should pay attention not only to the design and design of the accessory itself, but also not to forget about the overall design of the room: it is not quite easy to choose a wooden cornice for every interior style.
Here are some tips for choosing carved cornices:
Cornices must necessarily match the overall design of the room.
There is no need to buy an expensive, luxurious cornice for a modest room. It will look stupid. Or the choice will be considered unsuccessful when the room has a modern style, and cornices with exquisite carvings made of dark wood, which are suitable only for the Baroque style. The weight of the fabric is of great importance.
When purchasing, it is better to check the durability of the fabric in advance, since now it is more fashionable to choose heavy, opaque fabrics. If you miss this nuance, then the cornice may simply collapse and break, sometimes without even a chance of repair. It is best to choose double rows. You will hang tulle on the first row, and a curtain on the second.
There is no need to hang both fabrics on the same row, because of this the textiles often tear and the elements of its fastening break off. In addition, it will be inconvenient to open and close the curtains. If you don’t like the fact that you have a small window, then you can choose long rods that will cover part of the partitions. This visually enlarges the windows.
You can also hang ceiling cornices, they also enlarge the window. With such methods, your guests most likely will not notice this secret. If there are a lot of elements on the cornice, then it is better to play it safe and buy a lot of fasteners. A small number of fasteners may cause you to accidentally injure yourself.
Guided by simple criteria and selection tips, you can choose a worthy accessory for the interior of your room.
DIY wooden cornice: do it step by step
For a capricious owner, it is best when he makes the cornice himself with his own hands. Especially if you have not only an idea, but also good materials, and most importantly a little patience.
On the Internet you can look at photos from which you will build. To create a practical cornice you will need less materials and physical effort. For a practical frame, you only need a barbell, rings, fasteners and tips.
Below are the approximate stages of creating a decorative wooden cornice, but they are individual for everyone:
- Make the sidewalls of any shape you like; Drill holes in the sidewalls; Attach hangers (it is best to take metal ones); Use a jigsaw to cut out the bottom shape to your liking; Sand the remaining parts of the cornice; Coat with varnish in the color you like (if the wood has an uneven color, or you can coat it with a product to protect the wood); It is best to leave everything to dry well in the sun for 24 hours; First, fix the decorative parts; Then attach them to the ceiling or wall using self-tapping screws.
If you want to hide the fasteners, paint them over or attach a decorative piece.
Florons
A decorative detail whose name means flower in Old French. They became widespread in Gothic lancet architecture. Manufacturers of cornices use them as decorative decorations.
The form may be:
- round;
- square;
- rectangular;
- with pointed tips.
In children's rooms, it is quite possible to place images of fairy-tale characters on the cornices.
Important! Florons immediately attract attention, so they must be selected in strict accordance with the interior of the room.
Pros and cons
Before making a curtain for the door, we suggest you familiarize yourself with some of the advantages of such a solution:
Using curtains, you can visually adjust the size of the room - reduce or enlarge it. You can achieve this effect using the appropriate color of the product. Possibility of using different materials.
It can be textiles, wood or threads. Curtains bring a certain lightness to the interior. Saving usable space, which is especially important in small apartments. On average, a swing door requires 1 m2 of space, and when installing curtains, this problem is eliminated. Save money on purchasing a high-quality interior door. Even the most expensive curtains are cheaper than doors.
Like everything else, curtains installed on a doorway have their drawbacks. Among them, it is especially worth noting the insufficient heat and sound insulation. In view of this, the choice is between beauty and practicality.
Some people install a door, on the opening of which they then hang curtains. Some designers fully justify this option, especially in cases where the room has an old door that is not in harmony with the overall concept of the interior. This combination is quite logical when arranging a balcony doorway.
Products made from threads
Most often, colored threads or fishing line are used for the base of such curtains, on which glass balls, wooden tubes or beads are strung. First think about how the finished product should look and what cornice to use for it. To make curtains in an oriental style you will need: Fishing line or threads. Beads, wooden tubes or glass balls for decoration. Needle for attaching beads. Glue. Self-tapping screws. Screwdriver /drill.So, let's start the workflow.
We mark the doorway for the cornice. This design is best secured 5 cm above the edge of the doorway. As fasteners, you can use a wooden strip, which should first be painted in the color of the curtain. On this bar you need to mark in advance the points through which you will pull the threads. Their number depends only on your ideas about beauty.
Depending on the thickness of the threads, the curtain will be either thick or translucent. Then you need to string the beads onto a thread and attach them to the cornice. Calculation of the height of the threads: measure the distance from the cornice to the floor (or other desired height from the floor level), add to this figure 5 cm for fasteners and multiply the resulting amount by 2. This length necessary in order to string beads with a crossover.
In this case, it is important to draw up a diagram first or use a ready-made one. To make the fastening of the threads more reliable, use a loop, and not just knots. To prevent curtains from fluttering in a draft, weight the curtains at the bottom with large, heavy beads that are secured with a loop and knot. To make the fixation more reliable, glue the bottom bead with polymer glue.
Made of wood
To make curtains from wooden elements, you will need to purchase them from a specialized store.
They can be of different shapes: diamonds, circles, squares or leaves. You can also use plastic that imitates wood. You will need: a strong thread/line; a cornice with rings; special clips for holding the decor, called crimps. Making such a curtain is practically no different from its counterpart made of beads. You need to prepare sections of thread, string the decor, while securing each element with crimps or simple knots.
Attach it to the cornice and install it above the opening. Using curtains on or above the door, you can beautifully complement the interior in the opening. Thus, the room can be decorated in a classic style, retro, modern, Provence, minimalism and hi-tech. It is quite possible to make interior curtains yourself, and for this you will have enough information described in this article. If you have experience in making such curtains, then share it with our readers in the comments to the article.
>Video
For some more ideas for making curtains over the door, watch this video:
>Photo
Popular posts
- Hallway solid wood Characteristics of different species A variety of wood species are used for the manufacture of furniture and interior decoration. Hallway…
- Wooden ceilings Advantages and disadvantages A ceiling structure based on wooden slats has a number of advantages: excellent thermal insulation…
- Solid wood bedrooms Bedroom design in a wooden house Rooms in a wooden house are particularly environmentally friendly. Bedroom interior in…
- Profile for curtains Profile cornices can easily be called the most popular in the entire product line of curtain mounts. Durable,…
Dimensions
Before purchasing a curtain rod, decide on the style of curtains, the structure of the material from which they are made, and the overall design of the room, so as not to make a mistake with the length of the structure.
Designers advise considering the following points:
- in small rooms, narrow light-colored cornices look natural;
- Wide, carved items are suitable for a classic-style interior;
- placing the cornice ten to fifteen centimeters above the window visually increases the height of the walls;
- The length of the product is determined using a simple formula - up to 30 centimeters of allowance is added to the width of the window.
Important! If there is a large window in the room, the decoration of which requires a cornice length of more than two meters and 60 centimeters, it will be necessary to install additional fasteners.