How to assemble a plasterboard niche in the wall for curtains and for a TV. A detailed description of the stages of work on installing the structure in the wall.
A niche in the wall serves as a multifunctional department in the interior of a living space. How to make a niche from plasterboard with your own hands? It's very simple. It takes a little effort and patience, and the designer's modern approach will last a long time in its functionality.
This is what a backlit niche looks like
Functions and types of plasterboard niches
Niches come in various sizes and non-standard shapes. It has a shallow depth for a painting or photo, or a deeper niche for a TV made of gypsum board. A niche in an apartment can be:
- To divide a room into zones;
- Installation of a TV or music center;
- Shelf for books or collections;
- In order to place furniture;
- For custom design.
You can make a plasterboard niche in any room of the living space. Will it be a living room or a bathroom. In every room this niche will perform very important functions.
In residential areas you can see decorative niches made of plasterboard. They are located in the living room, in the bedroom and above the window. Their direct function is the originality of the design approach, as well as the division of the room into zones. Vases are placed on gypsum board shelves, and paintings are hung on plasterboard walls. Basically, such niches are illuminated using spotlights.
A plasterboard niche performs direct functions, mainly located in the bathroom for hygiene products; in the bedroom, such a niche is used to make a wardrobe.
This is what a wardrobe built into a niche looks like
A niche made of plasterboard can increase the space, visually, of course. If the niche is made in a horizontal design, the wall becomes wide. In the case of a vertical project, the wall increases upward.
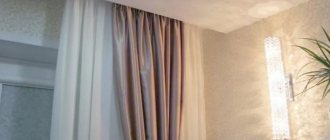
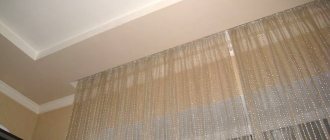
The room looks like an interesting interior if the upper part of the curtains is hidden and lighting is installed. Most people are interested in the question: how to make a niche for curtains from plasterboard? This is also done simply; a box for lighting is created in the plasterboard ceiling.
Appearance of a niche for curtains
How to make a niche for a cornice? This design comes in various sizes and shapes. The easiest way is to make a box on the ceiling for lighting near the window. Its walls will serve as a niche for curtains.
An interesting fact is that niches for plasterboard cornices can be made with your own hands.
If there is no opportunity or time, then how to make a niche in the wall from plasterboard? Call a team of craftsmen and describe your desires and preferences. The craftsmen will initially create sketches and drawings, which are adjusted, and clarify the details of frame installation.
RULE! Before working on creating a niche, you need to decide what it is needed for.
The procedure for constructing a niche
Nothing complicated - the compiled drawing is projected onto it (taking into account the scale).
Preparing the base
There is no need to talk about its thoroughness, since the niche will cover all the flaws. But in order to evaluate the convenience of fastening in this particular place, you should attach the profile rail to the wall and see how tightly it fits and whether there are any significant distortions. If necessary, at least partial leveling will have to be done. The technique is selected depending on the size of the defect.
It’s easy to knock down the bulge (chisel + hammer) and seal the recess with mortar. In some cases, to give the profile the correct position, you can use wedges, linings, etc. during its fastening.
Frame assembly
The specifics of the work depend on the dimensions of the future niche.
What to consider - when assembling the skeleton of the box, one building level is not enough. To check the correct geometry of the niche frame, it is advisable to use a square. It is not difficult to make it yourself, and the length of the “rays” of this device should be commensurate with the smallest side of the mounted volumetric form. Then the total amount of inevitable measurement errors will be reduced to a minimum.
A niche of impressive dimensions is assembled in parts, like any prefabricated structure. According to the markings made, the supporting profiles are attached. They also serve as guides. The appearance of the niche and its stability under load depend on how accurately (in accordance with the drawing) and securely they are fixed on the wall.
Recommendation - if the niche is designed so that it reaches the floor, then you should not limit yourself to wall mounting of the slats. At the bottom they should all be “fastened” (if possible) to the floorboards as well. This installation will give the entire assembly additional stability.
All that remains is to assemble the niche frame from individual parts (pieces of metal profile) and check its geometry and resistance to deformation.
Sheathing with plasterboard
Fragments of the required dimensions and geometry are prepared in advance. Immediately after cutting, you should try on each one at the place where it will be installed. If necessary, adjust to the required size. At the same stage, holes for self-tapping screws are drilled.
What to consider when covering
- The heads of the niche fasteners must be recessed into the plasterboard sheet. Therefore, chamfers must be made with a larger diameter drill.
- How the niche will be finished. Based on this, the need and method for sealing sheet joints at the corners is determined. There are several options for this work. Since it’s unlikely that you’ll be able to make a perfect cut with your own hands, you can remove part of the plaster along the edges (in the form of a chamfer). After joining the gypsum plasterboard fragments, the seams formed on the surface of the niche can be easily filled with putty, leveled and sanded. Additionally, it is recommended to stick sickle tape on top and paint it with a thin layer.
Niche finishing
There is no point in giving recommendations on this point - everyone decides for themselves, depending on the circumstances. But some preliminary measures are worth pointing out.
If the niche is to be painted to match the walls, then its surface should be prepared. Firstly, the paint will not adhere well to “clean” drywall, and secondly, it will be partially absorbed into the plaster and the sheet will swell. Therefore, it is advisable to first treat the entire box with finishing putty. Its difference from analogues is that all solid fractions in the mixture are microscopic. After leveling such a coating, it is sanded with the finest sandpaper.
Useful tips
If it is necessary to equip a separate compartment of a niche with lighting, then it is more advisable to use LED strips (cords). Installing spotlights is a more complex process. First, you will have to drill out the drywall. Secondly, calculate the optimal power of the light bulbs. In addition, the tapes can be rearranged at any time, changing the lighting and design of the room. You won’t be able to experiment like this with lamps, unless you turn off one or more of them.
When arranging a niche with your own hands, you don’t need to be afraid to experiment. There is no standard for such prefabricated structures. If desired, you can make swinging or sliding doors in separate compartments.
The recommendations and photographs in this article are just tips that the author hopes will help the reader transform his home in a way that seems more convenient and beautiful to him. Good luck!
Preparatory work
In order to begin preparatory work, you need to establish yourself with the design of the niche. It will be very good if you make a sketch of this component of the room.
- After the sketch, you can start drawing.
- To do this, you need to prepare the room (free up space to create a niche).
- Take all measurements. TV niche dimensions
- It is necessary to clarify how deep the niche will be (this depends on its functionality).
- If the niche will be made for installing equipment, the depth should be increased (for air ventilation and wire drainage). Otherwise, the same TV may heat up and burn out.
- A TV or other electrical equipment should not “stick out” from the niche. The facade of the equipment is flush with the edges of the niche.
- In the drawing you should write the weight of the object installed on the niche shelf. If it's not a wardrobe.
- You should also immediately decide on the wiring under the drywall. This is especially true if there is backlighting.
Conducting wires in a niche
is RULE! All measurements and numerical data should be recorded. This will make it possible to easily calculate the amount of material required.
Installation of shelves, cladding, design
After you have made the frame voluminous and rigid, you need to make shelves.
The technology for making shelves in a wardrobe and a decorative niche is the same and takes place in several steps: the first step is to set the plane of the shelf using a level and self-tapping screws.
Photo:
After the correct location, you need to strengthen the shelf with the help of load-bearing profiles (this is especially true if you are making a wardrobe, where the load on the shelves will be slightly higher).
We cover the frame with plasterboard at the same time as its manufacture - it is more convenient and faster to work with your own hands in this way.
Before starting installation, the entire inside of the niche must be sheathed with plasterboard - it is easiest to do this with one continuous sheet than sheathing cut materials, keep this in mind.
In addition, a structure covered with solid plasterboard will be more rigid.
The fewer joints in your frame, the easier it will be to cover it with plasterboard - this applies to all products made from this material: decorative niches, devices for wardrobes, boxes for curtains on the ceiling, etc.
If you want to make sound insulation, then you need to put mineral wool into the voids of the frame.
The location of the lamps may differ, depending on the type of structure: decorative niches are most often sheathed around the perimeter, shelf lighting can be installed in the wardrobe, and the curtain box can be trimmed with lamps on top.
You can reflect the lighting system in advance in the diagram, so that later it will be easier to install it yourself.
Video:
https://youtube.com/watch?v=virkMWb8RIk
Sound insulation is an optional step, but if it is not done, then you need to be prepared for the fact that at the slightest contact with objects, the drywall will emit a hum - this is not too noticeable if it is decorative or for curtains.
However, if you are doing it, for example, under shelves in a toilet or a wardrobe, then sound insulation is still desirable.
Covering the frame of a niche with plasterboard occurs in several stages: first you need to join the individual parts of the plasterboard.
If this is not done, then over time the material will crack, even if the seams are properly sealed. Lack of jointing also leads to cracks.
To avoid them, where the sheets of drywall are connected, you need to chamfer. After this, you need to install self-tapping screws measuring 150-200 mm.
The last stage is decoration and finishing. In order for the paint or other coating that you have chosen to finish the niche to adhere well, the surface must initially be treated with putty.
You can refuse it only if you are going to veneer the plasterboard with stone or tiles. Often, puttying the surface is a more labor-intensive step than assembling, installing and covering the frame.
Video:
It is necessary to carefully process the corners and joints, and also to seal even the smallest irregularities in the drywall with putty.
Drywall can be finished with almost any material. The most common option is to simply paint the surface in the color you want.
Niches for curtains can be made contrasting, and shelves in the toilet, on the contrary, can be made to match the color of the finish. A sliding wardrobe is most often painted to resemble wood, and the inside can be covered with wallpaper to match the color of the room.
In this case, the wall can be left as is, especially if the room is decorated in a loft style or similar, and the niche can be painted to match the color of the wall, or painted with patterns.
Working with drywall is easy not only in creating niches, but also in finishing the material, so doing the decoration yourself should not be difficult.
Photo:
Using plasterboard, you can give your apartment a unique design by creating niches in different rooms for curtains, under windows, wardrobes, shelves in the toilet or hallway, decorative niches for TV and other equipment, etc.
There are a lot of possibilities for working with drywall, and its simplicity makes it an ideal material for creating structures with your own hands.
Required material and tools
For the assigned work you need the following materials and tools:
- Profile: guide and rack.
- Small size self-tapping screws.
- Screwdrivers – flat and figured.
- Drill.
- Dowels.
- Construction level and a simple pencil.
- Roulette.
- Plumb.
- Hacksaw.
- Build a knife with a set of blades.
- Pliers.
- Hammer.
- Scissors for cutting metal.
- Putty for drywall “Start”, “Finish”.
- Drywall.
- Glue for drywall.
- Dye.
- Needle roller.
- Spatula.
- Everything you need for wiring (wires, terminals, lamps, switches and sockets in drywall).
RULE! There is no need to ignore the level and plumb line, doing everything “by eye”. This is fraught with unevenness, which cannot be called a design invention.
What to think about before starting work
When creating an element such as a niche in a plasterboard wall, you can use the entire wall or only part of it. You can create elements of various depths, shapes and widths - the properties of plasterboard allow all this.
The most correct decision before starting work would be:
- Develop a drawing indicating the placement and dimensions, the planned structure, you can indicate the order of work;
- Work out the look and shape of the wall, think about the functionality when using it. These initial manipulations are necessary in order to correctly calculate the amount of material and its costs.
Option for the kitchen
Plasterboard walls with niches are constructed with the obligatory use of a metal profile. If it is planned that the shelves will take any load (for example, in the kitchen from household appliances or from heavy interior items), this must be taken into account.
For this purpose, a more durable frame for drywall is provided. This applies mainly to horizontal surfaces, because it must be taken into account that drywall is a fragile material. Once you have decided on the basic parameters of the building, you can draw the markings directly on the wall.
Main stages of work with step-by-step instructions
Initially, you should not only draw up a drawing and collect everything you need, but also select the material from which the niche will be made. It can be wood or a metal profile. Wood has some disadvantages: when the temperature changes, it can dry out or swell, which ultimately leads to deformation of the structure.
Profiles for drywall can be made from different materials. Aluminum is best. It is easy to use and inexpensive.
Aluminum profile for niche frame
Artificial stone in the interior
Decorative stone in an interior that has organically absorbed the rustic style is found when decorating small vertical surfaces: columns, the base of a bar counter, a kitchen island. Classical masonry looks impressive, finishing the arches with wide radial masonry, reproducing the natural chaotic arrangement of wild stone. If the dimensions of the bathroom allow, then use stone masonry, large format slabs for styles embodying the 20th and 21st centuries, or columns with capitals, relief inserts, sculptures that transform the room into ancient baths are quite justified. The third option is depressed seams that limit the protruding fragments with their depth. It is used when using a material like “wild stone” to highlight the masonry and emphasize the complex stone texture.
Another interesting, but time-consuming technique for decorating a hallway is the installation of shallow channels with built-in lamps at the base of the floor. These channels are filled with artificial “pebbles” or laid out with decorative stones like cobblestones or pavement. It is easy to decorate the interior space of a niche with large candles, matched to match or contrast with the overall decoration, and install an electric analogue of the hearth or a bio-fireplace there.
By conceiving a similar element of interior decor for the sleeping area, you will provide yourself with cozy evenings and the safe, warm light of a live fire.
Additional information on the topic:
- Profile for drywall or what to attach drywall to
- How to cover walls with plasterboard if the ceiling is already covered
- How does drywall affect human health from a medical point of view?
- Installation of gypsum tiles under brick on drywall
- Finishing the inside of the house with plasterboard and imitation timber
How to treat the surface → Room decoration → How to choose the right paint → Surface treatment technologies → Leveling and finishing the walls → Selecting and applying a primer → Removal from the surface → Stretch ceilings and technologies → Reviews and testimonials
Drywall
There are three types of plasterboard on the construction markets: ceiling, wall, moisture-resistant (green). You need to decide which one you need? It depends on the location of the niche. If the niche is planned to be made of plasterboard in the bathroom, then you should choose “green” gypsum board. Well, if you want to divide the room into zones, then you need to look at the thickness of the drywall sheet.
Laying decorative stone on drywall
At the beginning of work, you need to make sure that you have all the necessary tools for the job, so that you don’t have to look for it later at the most crucial moment, when the glue is almost dry and you can’t quickly find the grout. So, you will need:
- PVA;
- Acrylic;
- Cement dry mixes;
- "Liquid Nails";
- Bustilat;
- Tiled;
- Assembly polymer sealant;
- Thickened paint;
- KMC;
- Mastic;
- Putty.
- Drywall is strong, but cannot withstand a huge load, so only light grades of stone are used.
- If the drywall is located outside, in the open air, the cladding with decorative stone will not last long, the possibility of completely replacing it every 3-4 months (at best) is being considered, which is irrational.
- A moisture-resistant plasterboard sheet must be treated with a primer; after drying, it is ready for further finishing.
There are many manufacturers on the market, consumables are quickly selected. Moreover, in any store the differences between them are explained and selected by a consultant based on the price/quality ratio. How long the finish will last depends on the correct choice of glue.
It depends on the base of the stone - gypsum or cement. The following types are suitable for work:
Installation of a metal profile frame
The installation principle will consist of what niche should be. If a small-sized structure is intended, then it will be better if the frame is assembled first and then attached.
If the niche is large, then it is assembled step by step. The supporting profiles are attached to the wall according to the markings. These fasteners play a big role in the design (appearance and consistency under equipment or books).
Metal frame for a niche for a TV
RULE! If the structure reaches the floor, then there are few wall profiles; the profiles should also be fixed to the floor. This will give stability.
For a more accurate understanding of how the frame is installed, you can watch the video.
We recommend you watch: how to make a metal niche frame for a TV.
Installation of plasterboard sheets
Now you need to start cutting drywall fragments, taking into account the required dimensions. At this stage, it is very important to observe all the necessary dimensions so that two adjacent fragments form an even line. Edges and protrusions are not allowed.
Installation of drywall sheets
After this, the cut pieces of material should be secured to the profiles installed on the wall. To create a three-dimensional effect and to increase the strength of the structure, it is necessary to install additional profiles along the edges of the niche, the size of which must correspond to the size of the guide profiles.
Before installing all the plasterboard fragments, it is better to carry out the necessary communication networks in advance:
- cable for connecting a TV;
- if you plan to install the backlight, then the cable for its power also needs to be laid in advance;
- Particular attention should be paid to sockets, which should be located in convenient places, since you will need to connect several devices at once.
After laying all the cables and wires, you can begin installing fragments of drywall, which need to cover the entire front panel of the structure, after which you can begin cladding.
Return to content
Installation of shelves and stiffeners
To make a large niche, strong and wide profiles are required.
When creating a frame for shelves, you need to make a frame of the required size from the profile and attach it to the base. In order to bend the profile, the side part should be cut.
Attaching the profile to the base
If the frame is long in size, then it must be secured using jumpers. They are installed at intervals of 400 mm. If you use 2 of these frames, it is possible to make a hanging cabinet.
By attaching the frame to the floor using profiles, you get a base for making a niche in the wall.
Attaching a frame to the floor for the base of a niche
In order to make an original curved structure, you need to use a flexible profile and a regular one. Some profiles have certain “locks”, which is very convenient when creating structures.
Pros and cons of options
It is advisable to use one or more narrow structures located asymmetrically. In order to create an interesting interior, you can use not only decorative, but also completely functional recesses used for storing things. If you beautifully arrange cute little things on the shelves, stacks of neatly folded clothes, several books, trinkets, the room will look atmospheric. But the abundance of closets, solid shelves filled to the brim with things, looks tasteless and sloppy.
Pros of placing cabinets and shelves:
- Possibility of obtaining storage space.
- Economical use of usable space.
- A special flavor in the interior of the room.
Minuses:
- Built-in modules are limited by the dimensions of the recess.
- The need for frequent cleaning due to dust settling on open surfaces.
An empty wall in the bedroom can be decorated with a shallow design. It will be not only convenient, but also original. This is a fashionable, but not hackneyed option for creating an interior. Typically, recesses are made at the head of the bed. Additionally, there are convenient shelves and built-in lamps. If everything is put together correctly from a design point of view, the sleeping area will take on a truly magical look.
Niche in the work area Source design-homes.ru
Advantages of an alcove bed:
- Visual zoning of space.
- Getting a cozy private corner.
- Additional darkening.
Technology of covering a niche with plasterboard
Before you start covering with drywall, you should protect yourself by wearing a face mask or glasses.
You can cut a sheet of drywall with a construction knife, as well as with an electric jigsaw. Each part must be attached to the frame so that it is not smaller or larger than the required size.
In order to cut a plasterboard sheet into strips, you need to correctly measure the length and height. GCR is very easy to cut; to do this, draw along the marked line with the edge of a drywall knife and with a slight blow the sheet breaks.
Each piece of drywall must be attached in accordance with the sketch. The caps of screws or other fasteners should be pressed tightly against the sheet so that they do not “stick out” above the surface. But you shouldn’t overdo it either, as the leaf may burst. If there is a small part, then the self-tapping screw is screwed in approximately in the middle so that the drywall does not break.
When lining a curved frame for an arch made of gypsum plasterboard, the drywall needs to be bent to the required radius. To do this, the edges of the sheet are cut, and after installation they are puttied. There is also the option of bending the sheet into a semicircle using water. Here you should run a needle roller over the plasterboard part, then sprinkle it with water and leave it to dry in a special form. After 12 hours, the drywall sheet takes on the desired shape.
Curving drywall to the desired shape
If cracks appear during bending, they need to be puttied using reinforced mesh.
How to do it yourself?
Step-by-step instructions for making a plasterboard niche always begin with preparation and collection of the necessary material part.
Home DIYers will need:
- several guides (made of wood or metal);
- plasterboard sheets;
- construction level;
- screwdriver and drill;
- dowels and screws;
- putty;
- putty knife.
The installation of the frame must comply with the drawings; The guides are fastened to the walls using dowels; they can be tightened together with self-tapping screws. However, structures included in a metal profile can also be connected with a riveter. This option allows you to avoid cracking of the drywall or not fitting it tightly enough to the guides.
The sheets placed on the frame are covered with plasterboard and puttied. The options for subsequent finishing are quite varied. This includes painting, wallpapering, decorative stone, and cladding with ceramic tiles. Shelves installed in addition to niches can be wooden or glass. The decision must be made in accordance with the dominant style in the room. All that remains is to place the desired interior items there and enjoy the result.
Preparing a niche for installing a TV with your own hands is quite possible. For work you will need aluminum profiles (ceiling-wall, guides and flexible). You will definitely need a number of hangers, connecting components, angles and extensions. The gypsum board and profile are secured with self-tapping screws, sometimes dowels are used. In most cases, you can get by with standard sheets of drywall, but there may be situations where arched material is required.
The gypsum board will need to be puttyed and primed, and all seams and joints will be sealed using serpyanka tape.
Before the production of a plasterboard niche begins, it is necessary to clearly determine whether it will protrude outward or recessed inward. The second method will require covering a significant part of the wall with sheets of material, but such a solution makes the space more expressive.
It is equally important to select the configuration of the element being created:
- rectangular (horizontally or vertically);
- square;
- oval;
- curved shape;
- original design.
The principles are well known to everyone - if the line is extended upward, it will help raise the ceiling, and if directed horizontally, it will expand too narrow walls. Atypical geometry is justified only if the room itself has a shape different from the standard one. But with the usual straight walls, various experiments are not always compatible, and if they can be carried out, then only on the instructions of an experienced designer.
To improve the area around the TV, you can make a number of shelves for sound equipment and decorative elements. Often they create racks or cabinets that, together with a niche, form an integral ensemble. Important: always leave 50-70 mm from the back wall of the TV to the niche so that you can safely place cables and provide ventilation. Free space should also be left around the perimeter of the screen.
When installing guide profiles, dowels can be placed a maximum of 0.4 m apart from each other. Then comes the turn of the vertical parts (ceiling and floor). The frame is covered with plasterboard gradually, and first of all they work with the most complex elements. The screws are placed at a distance of 25-30 cm.
In addition to primer, putty and serpyanka, you need to use a metal corner with perforation (they cover the outer edges).
Finishing a plasterboard niche
First of all, you should putty the places where the fasteners enter. The surface should be flat and the areas should not be visible. The boundaries of drywall joints should be cut (chamfered) at an angle of 25 degrees, and then sealed using a sickle mesh, which is glued to glue or a thin layer of putty. It is pressed well at the border area, and the surface is brought to a perfectly flat surface. If you do not make cuts at the joints, then when puttying a bump will appear, and it will take a lot of material and effort to level it.
It is necessary to putty the places where fasteners enter
Corners in a niche. In this case, a chamfer is made on the drywall using a drywall plane. The chamfer angle is 45 degrees. After this, the chamfer must be sanded with a rasp.
As a result, everything is puttied with “Finish” and treated to remove small pebbles and stripes. After drying, you should apply a primer in order to wallpaper or paint the structure.
View of the finished structure
Decorative stone in the interior
Just a hundred years ago, only wealthy owners could afford stone houses - the rest were content with clay and wooden huts. Even now, despite the huge variety of building materials, the use of natural sandstone, granite, and marble in the interior is a sign of elitism. The energy of stone, even decorative, brings to the house a feeling of a certain stability, tranquility and peace. Perhaps, on a subconscious level, it is associated with the reliable walls of a fortress that protects from enemies or the constancy of one’s home. Thus, cement, sand, gypsum and clay are not inferior to natural stone, freely allowing air and moisture to pass through, but acrylic resins are safe only at low temperatures - place They are not recommended near the fireplace, oven or other heating appliances. If even at +30°C a synthetic countertop, bathtub or sink emits an unpleasant odor, it is better to avoid purchasing them, since this is often a sign of low-quality ingredients that are toxic to health. This material is indispensable when facing an existing fireplace, since it best transfers the heat of the flame to the surrounding space.
In apartments where it is not possible to arrange such romantic heating, electric imitations or simply niches with candles are often installed. In this case, both the portal itself and the wall can be lined with stone - completely or partially. In one form or another, decorative stone can be seen anywhere: they decorate houses, apartments, offices, cafes, train stations and administrative buildings.
In dry rooms, relief artificial sandstone, shell rock, cobblestone, slate are more common, and in humid and crowded rooms - smooth “polished granite, marble, glazed brick tiles.
Niche decoration options
To make the niche individual and look beautiful, you can use various finishing materials: mirror, wallpaper, paint, fabric.
There are some decorating rules:
- The colors should be light. If the tone is dark, it will visually shrink and darken the room.
- Basically, the niche is made in the same tone as the wall. Less often, 2 shades darker than the main color.
- If mirrors are inserted, they make the space larger.
Examples of niches in residential premises.
Lighting
Proper lighting is considered a real art, and the niche in this matter is no exception. It is the lighting created around the perimeter that gives the niche a unique effect.
The play of light will visually enlarge the room, highlight the interior elements of the niche, focusing special attention on it.
To illuminate the eaves niche, you can create an original illumination of the curtains by laying an LED strip under the ceiling surface.
Before installing lighting, plan the location of the wiring, as well as switches. An exclusive niche with well-designed lighting can successfully highlight the excellent taste of the owners, giving the living space uniqueness and charm.
Bedroom
A niche looks great for lighting or for placing photo frames or paintings there. You can also make a niche for necessary things, such as a phone, a book to read at night.
In the photo you can see various options for decorating a plasterboard niche.
Possible design of a niche in the bedroom
How to make a niche in a plasterboard wall? Just. By following the rules, having some money and patience, and most importantly, desire, you can transform a room.
Using the color or shape of a plasterboard niche with your own hands, you can completely transform a room, make it lighter or more voluminous. The most daring ideas can be realized using a niche.
Decorative finishing
Drywall can be covered with wallpaper, painted with water-based emulsion, or applied with decorative plaster such as bark beetle. Wet wallpaper is also suitable. If, according to the design concept, a niche needs to be highlighted, it is usually painted with water-based paint, and a different type of finish is used for the remaining part of the walls.
Some tips for decorating a niche:
- The inner surface of the recess can be lined with a mirror. This decoration will visually expand the room.
- The color of the niche should match the color filling of the room.
- Painting a niche in a darker tone in comparison with the wall is possible only if it is well lit.
- Light, calm shades in niche decor always look beautiful, so if in any doubt, it is better to stick to them.
Niches in drywall are used for any purpose. In the living room they put TVs, arrange bookshelves and even have small aquariums. In the bedroom, decorative openings are arranged at the head of the beds and photographs, vases, and other small things are placed in them. In the kitchen, beautiful kitchenware is installed on the interior shelves.
source: //mrgipsokarton.ru/arki-nishi/nisha-v-stene
Covering walls and ceilings with plasterboard allows you to save both money and time on leveling surfaces. However, the main disadvantage of using this material is some loss of space. Plasterboard niches, which are not at all difficult to make with your own hands, can partially compensate for this disadvantage. And besides, they can greatly enliven the interior and give it individuality. And you can save a little on furniture.
A selection of photos of decorating a plasterboard niche in the wall
Useful tips
If the room is designed in a classic style, symmetrical shelves and recesses will look best. This will help the whole composition look more static. Asymmetry will be appropriate in minimalism and hi-tech. Here you can hang the TV not in the center of the wall
This option is more often used in rooms divided into zones. It is important to decide before starting work whether the TV will stand on a stand or hang on the wall. The size of the niche will depend on this. Play with color - if light colors predominate in the room, then the niche should be several tones darker, and vice versa.
- If you have a lot of time and a desire to make your niche original and unique, then a mosaic pattern will be the ideal solution. Such work may take more than one week, but the result will definitely exceed all expectations.
- Less complex, but no less beautiful decorative elements will be flowering shrubs around the perimeter.
- When drawing up a drawing and work plan, for convenience, you can divide the wall equally with a pencil, outlining the contours of the future niche in advance.
- There are several types of drywall. For any niche, first of all you need to choose a moisture-resistant option. You should choose the desired thickness based on the shape and dimensions of the niche, as well as the weight of the items for decorating the shelves.
- Some of the wiring can be laid under the baseboard. Modern plastic models just assume such use.
- It is often more convenient to completely assemble the frame first, and then attach it to the wall.
- If the niche goes all the way to the floor, then there probably won’t be enough wall slats for mounting. All parts of the structure should also be secured from below.
- If the finishing includes wallpapering, it would be advisable to treat the entire niche with a primer for better adhesion.
- It is better not to use a wall with a window to build a niche, as this can disrupt the lighting in the room.
- Even at the planning stage, it is necessary to take into account the location of all sockets, and also think about which of them will be used and where the electrical wires will run.
- When calculating the dimensions of a niche, remember that over time you may purchase another plasma of a larger size. But even if the new technology does not fit into the existing “framework,” this will only be another reason to start a small construction project again and show imagination and ingenuity in a new style.
- Don't be afraid to use wood for finishing. This will take more time than just painting or putty, but will add warmth and coziness to the overall picture.
- If you use pieces of glass or mirror to decorate a niche, you must follow all safety precautions. It is best to use a thick fabric bag (or better yet, several) and a hammer for crushing. Make sure that small fragments do not spread across the floor after finishing work. It is better not to allow pets into the room during finishing work.
Advantages and disadvantages
Plasterboard sheets are a durable material that is easy to use. It has strengths and weaknesses. The advantages include:
- does not rot or collapse over time when used correctly;
- it is easy to work with;
- weight, work can be carried out by one person;
- environmentally friendly and safe, can be used in children's rooms;
- When installed correctly, the material regulates the microclimate in the room;
- odorless, does not cause allergies;
- excellent thermal insulation and sound insulation properties;
- flexible sheets are used to make arches and figured walls;
- fire safety, vapor permeability;
- functionality, behind them are hidden various communications (cables, pipes);
- drywall lends itself to a variety of decorative finishing (wallpaper, putty, painting, artificial stone, etc.);
- affordability.
Despite the fact that the material has many positive characteristics, there are also disadvantages:
- fragility;
- cannot withstand heavy loads;
- does not like contact with water;
- not used for installation on timber floors without a frame.
Functionality
Decorative niches provide a lot of possibilities in the living room interior:
Plasterboard structures can visually lengthen walls or increase the height of ceilings; this technique is often used in non-standard rooms.
- Walls with niches and windows allow you to zone the room. Every household member, whether a teenager or an elderly person, needs a personal living space where he can retire. A plasterboard module, even in a tiny room, can create a recreation area: a sleeping place, an aquarium, a section with a TV.
- Niches allow you to hide defects in walls and ceiling space; they themselves create the necessary stylistic accents in the interior, making it more original and exclusive.
- The owners are provided with a place to store accessories, figurines and memorabilia dear to their hearts. Depending on the size of the niches, they perfectly accommodate household appliances and electronics, furniture and other household items (beds and armchairs, stereo systems, fireplaces, TVs).
- Plasterboard structures not only serve as an element of room decor, but also allow you to save money that would have been spent on leveling the walls and purchasing cabinets, shelves, chests of drawers and other storage systems.
Thanks to the built-in LED lighting, you can use the niche as a night light. Stepped transitions made of plasterboard allow you to create an interesting design of the ceiling space and simplify the installation of spotlights. Plasterboard modules do not take up as much living space as cabinet furniture, which is important for miniature rooms.
Color solution
The most common way is to paint it the same color as the wall, although sometimes lighter shades of color are used. Many people start experimenting with colors, falling into the trap: dark colors create the impression of a “hole” on a light wall. Designers recommend sticking to light shades of paint and looking for your own color scheme, avoiding overly dark colors. It is best to paint a small niche several tones lighter than the wall. Then the objects in it will look more refined and elegant.
A niche for television equipment or an aquarium requires the same color as the wall as a whole. Fortunately, the reflection that will be inevitable will allow the niche to play with new colors.
Decorative niches in the same color scheme as the wall
If you want to decorate your kitchen with niche shelves, try making them like picture frames. It will look very impressive, but at the same time warm and cozy. For the kitchen, you should also make a more durable structure, since the housewife may need space for heavy kitchen utensils: frying pans, casserole dishes, pots, and so on.
Functional niches in the kitchen