Can you imagine ordinary doors without a handle? It would seem like such a simple design, but in fact it is a very important attribute. Installing a door handle on an interior door is a task that consumers face when purchasing and installing a new door leaf. It is quite possible to solve the problem on your own. It is only important not to make a mistake with the choice of design.
Types of handles used on interior doors
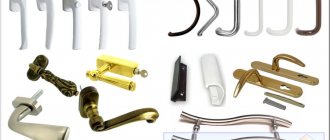
Thanks to the many varieties of handles for installation in doors between rooms offered by manufacturers, you can choose the best option suitable for each house or apartment. When choosing the type of handle, the type of doors between rooms, the material they are made of, personal preferences, and financial capabilities play a role.
However, when making a choice, you should also take into account the design features of the mechanism and the method of their installation on the interior door leaf. Differences in the installation of different types of door handles can sometimes be quite significant, and the installation method depends on the specific locking mechanism.
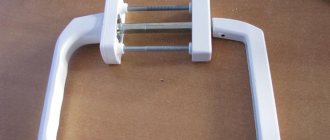
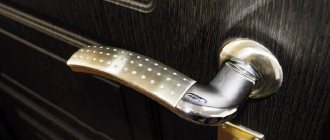
Overhead handle
Differences in installation method
So, door handles, which are used for installation in doors between rooms, are divided into two main types:
- overheads that do not require much effort during installation. The simplicity of the design means that it is quite possible to handle their installation even on your own. After all, their installation consists of fixing them on the surface of the interior door;
- mortise Here things are more complicated. Because a preliminary process of drilling a hole will be required. It will be needed to install the lock and handle and will be located in the canvas.
Mortise handle
Both of these types of handles are convenient to use. However, their installation is fundamentally different. There is a classification for mortise handles. It looks like this:
- knobs, otherwise called rotary knobs. This type has the most convenient shape of different sizes. The scheme of their operation is as follows: the door opens not by pressing on the door leaf, but by turning the holder. There may be a lock inside the structure itself that will block the tongue inside the lock;
- Latch handles, also called push handles. They are the most common today. As the name implies, they are activated by pressing on the handle lever.
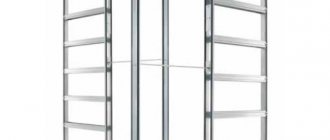
For wardrobes and doors with a similar operating pattern, convenient and practical open-type handles are used. They allow you to open sliding doors as efficiently as possible without damaging the wallpaper and walls.
Knob handle
When choosing door fittings and handles, in particular, you should pay attention to the material from which they are made. Handles should match the overall design of the room and the door leaf.
Latch handle
Types of door structural elements
There are two types of installation methods:
- Invoices are the simplest. Installing the handle on an interior door takes little time: it is simply fixed to the surface of the door.
- Mortise - mounted in a hole pre-drilled in the door leaf.
There are two types of mortise structures:
- Rotary or knob handles . The mechanism of action is simple: the door opens by turning the holder without pressing the handle. The decision to install a round handle is correct, as they are very convenient. There are rotary handles with a lock that locks the lock tongue to close the door from the back.
- Push or latch handles . The principle of their operation is pressing on the lever.
Depending on the material of the product there are:
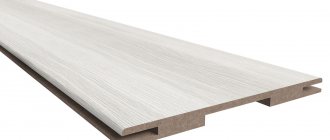
- wooden (from different varieties);
- plastic - such handles are used for rarely used doors (for a closet or niche);
- glass - made from Bohemian or Murmansk glass;
- stone - the most expensive in terms of cost, but with a long service life.
When choosing fittings for a door leaf, adhere to the basic rule: the material, color and shape must match the characteristics of the door itself and the interior. It is better to take more durable and expensive products that will not require replacement after 2-3 months of operation.
Tip: Hidden handles are suitable for sliding doors, which will not interfere or spoil the walls and wallpaper.
What to pay attention to
When installing, you should correctly calculate the installation height of the handle. The degree of ease of use of interior doors largely depends on this. There are no clear regulations regarding such a height anywhere. The generally accepted indicator is 1 m from the level of the floor covering.
This figure is based on adults and children. In many ways, this indicator may depend on the height of the people living in the house or apartment. It is also necessary to pay attention to the height at which the handles are installed in other doors: they should all be installed the same. Thus, the interior of the room will acquire harmony and completeness.
General selection rules
The average person usually buys accessories solely based on external features, in other words, whether they like it or not. But to choose the right door handle, you need to consider several factors.
- The first and perhaps the main point is the material from which the fittings are made. If the handle is wooden, then you need to pay attention to the type of wood; pine, linden or spruce are not suitable; high-quality handles are made from oak, beech or species of similar strength.
- Those who prefer metal should take handles made of steel, copper or brass. The price for models made of alloys will pleasantly please you, plus they look quite decent, but such fittings last no more than a year.
Advice! You can distinguish a low-quality alloy from real metal by weight. Steel, brass and copper will be orders of magnitude heavier than any cheap alloy.
- The next point you should pay attention to is the type of door leaf. Handles can be attached using through pins or self-tapping screws. You can install any fittings on metal and solid wooden doors, but for hollow frame doors it is advisable to use handles with through fixation on studs; self-tapping screws in a thin wall of the door won’t last long.
Choosing a handle on a socket is much easier, because most models differ only in appearance, the device and main dimensions are the same
- Most mistakes are made when choosing a handle for an already embedded lock. If the handle is based on a socket, then there are no problems with it, but models with a solid bar need to be selected carefully; the most important parameter here is the distance from the keyhole to the handle shaft; if it does not match, you will have to buy a new handle.
When choosing a handle on a bar, the main parameter is the distance from the central shaft of the handle to the keyhole
Types of door handles
Products differ in the material of manufacture, design, and working mechanism. The fittings are selected to match the style of the room, taking into account ease of use. By type of fastening there are:
- Invoices. The fittings are simply screwed with self-tapping screws to the surface of the canvas.
- Mortise. They often come complete with a lock or latch. Installation of fittings involves cutting a groove and drilling a through hole in the body of the door leaf.
All mortise models are divided into two types:
- Knobs. The fittings are equipped with a rotating mechanism that moves the latch. Usually the handle itself is made of a spherical or disk shape.
- Push models. The mechanism operates on a similar principle, only the handle must be pressed to activate it. Fittings complete with a lock are in demand for interior and entrance doors.
Push models, in turn, are divided into two types:
- Mechanism with handle and latch assembly . Such models are inexpensive, but not durable. They quickly become loose and fail.
- The handle, latch, screw and the mechanism itself (with a tongue or magnetic) are selected separately depending on preferences. Such products are of higher quality and more reliable than the first option.
Common materials for the production of fittings are metal alloys or aluminum. Overhead models can be made of wood. For expensive paintings, handles are made of stone and glass. The cheapest option is plastic. Metal elements are chrome plated or plated with nickel.
Products differ according to the type of lock . The simplest locking element is a latch. The lock can be locked with a key on one or both sides. In the first option, a latch replaces the key on the inside of the room.
Some installation tricks
In order to accurately maintain the immersion depth of the drill when drilling a groove for the lock, it is necessary to secure an insulating tape to the drill. It will become an indicator that will let you know when to stop.
To accurately mark the position of the tongue on the door frame, the door must be closed. Then forcefully lift the handle lever several times so that the latch leaves a mark on the loot. This way you can find the middle of the hole. You can also use an awl. When the door is closed and the tongue rests against the frame, use an awl to mark the top and bottom edges.
Door handle-latch device
So, you are thinking about how to install and disassemble a door handle latch. Knowledge of the device and circuit will help you easily remove the old handle and replace it with a new one. We will look at the most popular knob type models - with push and turn handles . They are similar in design, differing only in the shape of the handle and the method of opening the latch. The push button is convenient because it is easy to operate - just pull the handle down and the latch will open. However, some users find this model quite inconvenient: it happens that they hit it or get caught by clothes. The rotary handle is more ergonomic in this regard, and it looks much more aesthetically pleasing. But it also has its drawback - it is not always possible to turn the latch the first time to open the door. For example, it is not easy to do this with slippery hands, and children cannot handle such a handle at all. When purchasing, consider these nuances and make the right choice.
The product consists of two interconnected handles (3) and a latch mechanism (1), which is inserted into the door leaf. A strike plate (6) is installed in the door slope. The fastening screws (8) are hidden by a decorative flange (5), in which there is a technical hole (4) for pressing the handle and removing it. To do this, use a special key (7). And several keys (9) are included in the delivery set for models with a keyhole.
If you decide to install a door handle with your own hands, remember the main thing: the mechanism will work properly only if you take into account all the nuances during installation. To make it easier to cope with this task, we offer step-by-step instructions.
Hole for handle
The first step is to insert the handle, and then the latches into the interior door. This is done because when drilling a hole for the latch, the master will know where he needs to stop, and the second advantage is that all the chips from drilling will simply fall down and will not need to be blown out with a vacuum cleaner.
In order to make a hole for the handle, you need to take a wood crown with a diameter of 50-54 mm and start drilling in the place where it was originally marked with a pencil. Drilling should occur in small jerks; you should not try to do everything in one go, because in this case the crown will become heavily clogged with sawdust and heat up from friction with the wood. Having passed 4 mm, you should stop, clean the crown and then continue further. When cleaning the instrument, you must be careful because it can be very hot.
Since the depth of the crown does not allow it to pass through the canvas, then it is necessary to drill from both sides. When you reach the middle of the door leaf, you shouldn’t put too much pressure on the crown so as not to hit the door leaf sharply with the drill.
Installation process
Let's say you installed a new interior door. Now you need to cut the handle into it. Its functioning depends on the quality of the operating mechanisms and correct installation. Before talking about the installation process, we suggest you familiarize yourself with its components.
Knob-type door handle-latch diagram
1 – internal rotary handle; 2 – technological hole; 3 – spring clamp; 4 – lock button; 5 – handle shank; 6 – decorative flange; 7 – mounting plate; 8 – locking mechanism cylinder; 9 – decorative flange; 10 – external rotary handle; 11 – latch mechanism; 12 – plate for fastening at the end of the door; 13 – striker for the door frame.
Making holes in the door leaf
First you need to make a through cylindrical hole. To do this, use a tape measure to measure a distance of 1 - 1.2 m from the floor. Make a mark with a pencil. From the end of the door, measure a distance equal to the length of the latch mechanism. You can measure the mechanism using a ruler or look at its parameters in the manufacturer's instructions (all the drawings should be there). The resulting intersection point will be the center of the hole. First, use a drill to make a hole with a diameter of 5–6 mm. Then install a bit on the drill, the diameter of which is equal to the diameter of the hole for the internal mechanism of the handle - as a rule, it is indicated in the instructions.
Helpful advice! To make a neat through hole in the door leaf using a crown, first make a shallow cut on one side of the door - 5 or 10 mm. After this, a through hole is made on the other side of the door, centering the crown along the hole from the drill. Thus, when the crown comes out from the back side, the decorative coating will not peel off along the edges.
At the end of the door, according to the markings, you need to prepare a hole for the latch. To do this, a drill with a feather drill is used to make a hole. If it is too small, you can widen it with a chisel. Using the same hand tool, a small recess is made under the groove of the plate, which will be screwed from the end.
Installing the Latch Handle
First, you need to insert the latch mechanism through the hole in the end and screw the plate with self-tapping screws.
Then the part of the handle with the cylinder is inserted into the groove of the latch mechanism. On the reverse side, a mounting plate is put on the cylinder protruding from the door leaf and screwed with self-tapping screws. Then a decorative flange is put on. It is important that the small groove on the edge of the flange is at the bottom - for aesthetics. And the technological hole must coincide with the internal spring clamp. Otherwise, if you need to dismantle the handle, it will be difficult to disassemble it. Having aligned all the parts of the latch handle in accordance with the diagram, install the handle by pressing - the internal pin will fix it.
Installation of the strike plate
Close the door and mark on the end of the door frame the place where the latch tongue rests. Using a feather drill, make a hole for it. A chisel will help you choose the required depth. Attach the mounting strip and screw it with self-tapping screws.
Ready! On average, installing a latch handle yourself takes 20–30 minutes. The main thing is to take your time, study the manufacturer’s instructions and the dimensions indicated there. Then everything will work out perfectly the first time!
It is worth mentioning separately about the installation of the so-called handle on the socket. Its internal mechanism is impressive in size. A nest is made for it at the end of the door - first drilled, then expanded with a chisel to the required size. The mechanism is placed inside the door leaf for fitting. Make recesses for the lining on the end part. Next, the location of the hole and handle square is marked on the surface of the door leaf - holes are drilled. The latch mechanism is inserted inside and secured with self-tapping screws. After this, handles are attached to both sides of the door. The strike plate is attached according to the same principle as when installing a knob-type latch handle.
Step-by-step installation instructions
If you have not encountered a similar question before, do not be afraid. Even those who are not involved in construction can handle the installation of the handle. You just need to follow the detailed diagram step by step.
Marking the canvas
The installation of the handle begins with marking the door.
Marking is where the whole process begins. Having calculated at what height the handle will be located, place marks on the door in the places where the holes will be made.
Use a simple pencil, a tape measure and a corner and draw a horizontal line on the flat surface of the canvas. Then transfer it to the end and opposite side of the sash.
Place a mark on the end of the product in the center of the drawn line. It points to the place intended for the recess under the tongue. From the edge of the door at a distance of 0.6 cm, draw a point on both surfaces of the door. This place is intended for the handle.
Drilling holes for handle and lock
It doesn’t matter at all in what order you make the holes: first for the handle, and then for the lock, or vice versa. Just remember that things don’t like to be rushed.
For the handle, the opening is drilled with a drill and a crown. To make it smooth and neat, you need to drill from the inside and outside of the door to a depth equal to ½ the thickness of the leaf .
For greater accuracy, craftsmen advise marking this depth on the crown with a felt-tip pen. By adhering to this rule, you will definitely not damage the product. To ensure a straight hole, keep the drill straight and do not allow it to deviate to either side.
When drilling a hole for the handle, the drill must be held level
To install a latch into an interior door with your own hands, arm yourself with a drill and a pen. In this case, you need to be extremely careful, since the gap between the pen drill and the end angle is small.
Lock installation
The mechanism must be inserted into the hole drilled under it. Press the overlay to the end of the product and outline it with a pencil on all sides.
Marking the lining
Then use a chisel to clear the top layer of the canvas and make a depression the size of the thickness of the overlay. This is done in order to press it into the doors.
Recess for lining
The cover is fixed with screws. Recesses for them are made even before the fastening is carried out.
The lining is fixed with self-tapping screws
Handle insert
Products with screws located outward do not require disassembly. When installing one component of the structure in place, you must try to get into the latch hole with 2 guides equipped with threads for bolts.
Door handle installation diagram
After this, the second component of the device is inserted and tightened with bolts. Screwing must be done evenly in order for the handle to function properly.
Products with hidden screws must be disassembled. There will be instructions and a special key to help you. The handle can be removed without problems by pressing the stopper with a key. The handle is installed in place after the collapsible part is bolted.
Marking the loot
After installing the handle, make a recess in the tray for the tongue. To do this, you need to take the measurements correctly. Precisely executed markings guarantee good operation of the lock and the door itself.
To make marks, cover the canvas and mark the distance from the top to the bottom of the tongue on the loot. Use a square to find the middle of the castle and put a “cross” in the loot. At the marking site, we will drill a recess with tools and get rid of excess material with a chisel.
Cutting a groove in the loot
Before screwing the cover, watch how the canvas closes. If there is no friction or other problems, this means that the groove for the tongue was made correctly.
Close the door and try to tug it slightly. If it wobbles, then this indicates the presence of a slight backlash. Don't be alarmed, this is normal. When a counter plate is added to the groove, everything will fall into place.
The answer is attached flush with the loot. Just like when installing a lock, it should be sunk into the hole .
The strike plate is attached flush with the loot
Sometimes, after installing the trim, the play does not disappear and the doors continue to wobble. This defect can be corrected by using a screwdriver to bend the tab with a small hole on the answer.
How to disassemble and remove the handle?
Above we described how to install a latch handle in a new door leaf. But it happens that you need to replace the existing handle, and to do this you need to remove it. It's simple, because you know its structure. The procedure will be as follows.
- Loosen the decorative flange. It has a small groove on the edge - pry the flange behind it with a knife and carefully pull it out. You will see that there are fastening elements hidden under it, which cannot yet be reached with a screwdriver, since the handle is in the way.
- The handle is secured with a spring-loaded locking pin. How to find it? At push handles it protrudes on a decorative flange. Press it in with a key (if it is included in the kit) or a screwdriver. If the handle is rotary, the pin is hidden inside the housing. To access it, there is a technological hole on the flange into which you need to insert a key or an awl. While pressing the pin, pull out the handle at the same time - you're done!
- Now you can unscrew the fastener. Remove the handle and decorative flange. This way, you will separate the inside of the handle from the outside and can remove them from the door.
- To replace the latch mechanism, unscrew the screws that secure it to the end of the door, remove the bar and remove the mechanism from the door leaf.
Attention! Sometimes, due to improper installation of the latch handle, it is not possible to feel the pin. The fact is that the technological hole does not coincide with it. To fix this, you need to turn the flange until it aligns with the pin.
As you can see, disassembling the latch handle with your own hands is not difficult. This means you can quickly deal with this and move on to installing a new handle. The main thing is that it is reliable, and you do not have to replace it after a few months due to low-quality components. We offer you to buy reliable latch handles in our online store. Here you will find branded products that will last trouble-free for many years. The kit contains everything necessary for installation and instructions with a drawing for making holes in the door leaf. By the way, you can also purchase a tool for installing the latch handle yourself from us.
Subtleties of self-installation of different models
If you don’t go into the design features of any specific models, then the installation of most of these devices is similar, but before we cut in this or that handle, let’s figure out where to install it.
A few words about the installation location
If we are talking about a private house or apartment, then where the handle should be installed, you have the right to decide for yourself, the main thing is that it is convenient for you and your household. But when choosing a place, experts recommend focusing on 2 things:
The location of the handle should suit all family members.
- First of all, you need to measure at what height all the other handles in your house are. After all, when one handle falls out of the overall ensemble, it is very noticeable and spoils the interior;
- If you choose a place to install all the handles in your home, then you need to focus on your arm bent at 90º at the elbow. Naturally, it is worth taking into account the height of all family members and choosing something in between.
The installation height of the door handle according to GOST is a completely different matter. The documents state that such structures are installed at a height of 1 m, plus or minus 100 mm. This information should be well remembered by office owners and business workers in administrative buildings. Otherwise, the fire inspector will have another reason to find fault.
The average installation height of the handle is 1 m.
Entrance door handle
High-quality handles on entrance doors from good manufacturers break extremely rarely; this misunderstanding mainly happens with goods from the friendly Chinese people. Fortunately, it’s easy to find a replacement in the store; the average price of such a kit fluctuates around 500 rubles.
Finding a suitable handle for a metal door is not difficult.
When purchasing a new set of handles, it is advisable to remove the old trim completely and take it with you to the market.
Removing an old handle from a metal door is not difficult. In this case, it is not necessary to completely disassemble the entire mechanism; it is enough to unscrew the 2 mounting bolts that are located on the inside.
Mounting bolts on the inside.
So, the handles have been purchased, now all that remains is to insert them. The inner lining has been removed, so there is practically nothing holding the outer lining in place. If you pull the handle a little harder it will come out along with the square pivot pin and connecting pins.
When buying a handle, it is better to choose models with an internal armored lining; they cost more, but the protection against burglary is much higher.
The armor plate increases the level of protection of the lock by an order of magnitude.
Next, screw 2 connecting pins onto the outer part of the new set of handles. Separate armor plates may be provided on the keyhole; if they fit the holes in the new set, then decide for yourself whether to change them or not.
Screw in the connecting pins.
Now we insert the square rotary pin into the core of the handle and mount the outer trim in its place. Keep in mind – the square pivot pin should almost reach the bottom of the hole on both handles. Otherwise, there is a high probability that the handles will break again.
The installed square pin should reach the bottom of the hole in the handle.
When everything is inserted and screwed, the gasket is installed last inside the structure. Gaskets can be rubber or plastic, so try to take rubber ones, such as in the photo below.
Rubber gaskets for door handles.
The outer cover with the pivot pin and studs is inserted first. Then the inner lining is combined with it and all this is fixed with a pair of bolts from the inside.
Installing a trim with a handle in metal doors.
Handle with latch for interior door
Often, several types of handles can be installed on a lock embedded in an interior door. This is especially true for lightweight latches; any rotary handles generally fit there. The main thing is that the turning mechanism works using a square pin.
The technique of inserting a light latch and a solid lock into an interior door is shown in detail with photos and videos “HERE” , and we will only analyze the installation of the handle.
The handle mechanism is screwed to the doors with self-tapping screws, but so that the fastening washer does not spoil the appearance, it is covered with a decorative overlay, after which the handle is installed.
When installing the handle, the locking washer is screwed on first.
In round knob handles, both the handle itself and the decorative overlay are secured using a discreet inner tongue. This tongue needs to be pushed down using the special key included in the kit. The tongue itself is equipped with a spring and after removing or installing the handle, it returns to its original position.
To disassemble the knob, the side tongue is recessed inside.
In rotary handles, the system is slightly different; after installing the handle, you need to fix it with a small screw on the side, and then screw it on or simply put a decorative cover on the latches (depending on the model).
Instructions for installing a rotary handle on an interior door.
The screw that secures the rotary handle can be either a Phillips screwdriver or a hexagon. In the latter case, the hexagon must come with the handle.
Fixing screw.
Installation of handles for compartment doors
Before you put the handle on the interior compartment door, you need to prepare an electric drill, a Phillips screwdriver and a chisel. Handles for this type of door opening are made in the form of a plastic insert in the shape of an elongated oval and a decorative lining-latch in the plastic part.
The size of the plastic insert is marked on the canvas with a simple pencil. Using a feather drill and a chisel, a recess along the height and length of the liner is knocked out in the solid part of the canvas. A tab is inserted into the prepared groove and secured at the top and bottom with hardware. The decorative part of the product is simply snapped inside the plastic component.
A similar procedure is carried out with the second part of the handle on the reverse side of the canvas.
Conclusions and useful video on the topic
Video instructions for installing the latch:
In our article, we reviewed detailed instructions for installing a latch handle on an interior door. With its help, you can do it yourself without any problems. The task is simple even for people without special skills and practice.
Do you have any questions about installing the latch? Or would you like to share your personal experience of installing a latch handle? Write your recommendations, ask questions to our experts, add a photo of the finished work - the feedback block is located below.
Installing a door handle with a magnetic lock
Handles for indoor doors with a magnetic lock can have different handle shapes, and the locking mechanism itself is shaped like a regular mortise lock and is mounted in the same way as it. To ensure that the sash closes smoothly, you will need to install the handle striker as accurately as possible. On the door in the closed position, the markings of the upper and lower edges of the lock are carefully transferred to the door. A counter strip is placed on the marking and the position of the groove for the magnet is marked, which is then drilled using a feather drill of the required diameter. Afterwards, a magnet is placed in the prepared recess, secured on top by a counter plate with self-tapping screws to the frame. On an interior door, the bar on the frame of a magnetic lock is never placed flush, since over time, in this position, the magnet weakens and ceases to tightly hold the door.
Strike plate and lock recess
The installation of the door handle on the interior door is complete. All that remains is to do the final touch, namely, to embed the mating part of the latch into the hole. The first step is to mark the center of the latch. To do this, close the doors not too tightly and draw a pencil at the required level. You can also close the door tightly and open and close the latch several times to leave marks. Now select a groove in the middle of the loot. There is no need to make it deep. Measure the length of the latch at its largest point and choose 1-2 mm less.
The groove under the lock is selected deeper and larger. Everything depends directly on the castle itself. Sometimes the kit may include a plastic pad in the groove - it needs to be inserted before the strip is secured.
A decorative strip is attached over the groove. There is no need to cut it flush. It is enough to screw it with self-tapping screws or nail it with nails. All that remains is to check if everything is working correctly. At this point, the installation of handles on interior doors is completely completed.
Handles with a lock are installed according to the same principle. The difference will only be in the diameter of the end hole.
Installation of stationary door handles
Stationary handles are divided into two main categories based on the type of fastening: overhead and mortise. The first ones are screwed in a matter of seconds in the right place on the canvas onto hardware of suitable size. Before installing a recessed stationary door handle, holes are drilled through the interior door leaf into which a threaded rod is screwed. Handles are screwed onto the edges of the studs.
Having both basic locksmith skills and the necessary tools allows you to install a door handle on an interior door without much difficulty. The main condition is to accurately mark and not get into possible voids in the door.
Marking
The procedure begins with marking the door leaf.
- Use a pencil to mark the location for drilling. Diagrams are usually included with the product.
- If there are no explanations, you can apply the dimensions yourself. To do this, mark with a pencil a distance of 60 mm from the door edge, the height of the location is from 90 to 1100 mm.
- We mark the central point for drilling on the side edge of the door leaf. Dimensions are drawn along the center line.
Height and distance from the edge of the door
The internal element (latch) is uniform, so it is installed the same for different handles with a latching mechanism. The height from the bottom of the door and the distance from the edge are standard.
For latch handles, there are two options for inserting into the canvas: 60 or 70 millimeters from the edge. The rotary latching mechanism can “move” to the right or left by about 1 cm, and this also needs to be taken into account.
- If the handle has a spherical shape, and the distance from the edge of the door to the decorative element of the door (for example, glazing) exceeds 140 mm, it is better to fix the mechanism 70 mm from the edge. If you install the handle at a distance of 60 mm, when closing the interior door from the inside, you can hit your hand on the door frame.
- When installing a pressure product, the indentation must definitely be 60 mm.
The standard handle installation height (distance from the floor to the center of the latch) is 900–1100 mm. If the door is usually used by one person, the optimal height will be located at the level of his waist.
Installation of the product on an interior door is carried out on the right or left side. For round handle models, you only need to reverse the latch design. The tongue should point towards the closing of the interior door. If the device is asymmetrical, the elements simply need to be swapped, focusing on the opening side.
Useful tips
- It is first necessary to carry out careful calculations and then carry out any actions.
- When creating a through hole, you should be extremely careful and do not drill the door on only one side.
This can cause chips on the back side of the door leaf. As soon as the drill begins to appear, passing through, you need to continue working on the other side. After completing the installation, it is necessary to double-check the tightening force of the bolts or screws used so that poorly fixed parts do not soon damage the handle.
Hole preparation
At this stage we do the following:
- Using a chisel, we hollow out a 3 mm recess under the face plate of the latch, corresponding to its width. It is better to mark the center in advance with an awl so that you do not have to apply the markings again.
- Using a half-centimeter crown, we drill a through hole. It is better to do this on both sides of the door leaf so as not to damage the door coating at the exit of the crown.
- Now let's move on to the side edge. Take a wood drill (about 24 mm in diameter). They need to make a hole in the marked center for the latch. You shouldn’t go too deep, otherwise you can make a hole in the canvas all the way to the panel.
Handle and lock care
The best prevention is timely care of the handle and lock. This means periodic checks of functionality in case of downtime and regular lubrication of the lock. If the fittings become loose, it is necessary to tighten the handle so that the mechanism does not break in the future.
To ensure long service life of the lock, it must be lubricated annually. It is best to use machine grease or silicone grease for this purpose.
Sources:
- https://DomZastroika.ru/dveri/mezhkomnatnye/ustanovka-dvernoj-ruchki.html
- https://vitdoors.ru/dveri/ustanovka-dvernyh-ruchek-raznyh-vidov-poshagovaya-instrukciya-2.html
- https://www.vseinstrumenti.ru/krepezh/skobyanye_izdeliya/dvernaya_furnitura/ruchki/articles/kak_ustanovit_i_razobrat_zaschelku/
- https://o-dveryah.ru/zamki/ustanovka-na-mezhkomnatnye-svoimi-rukami/
- https://ProDverivdome.ru/ustanovka-dvernoj-ruchki-poshagovye-instruktsii-dlya-razlichnyh-konstruktsij/
- 1
Video about installing a handle on an interior door
This video demonstrates how you can embed a lock and door handle into an interior door without expensive professional tools:
Recommendations for inserting a magnetic lock in this video:
The process of installing handles on interior doors yourself requires not only strict adherence to the instructions, but also patience and accuracy. Work carried out in accordance with these recommendations will allow the fittings to perform their function efficiently and serve the owners for a long time.
Sources
- https://okcomfort.com/dveri/ustanovka-ruchki-v-mezhkomnatnye-polotno.html
- https://mr-build.ru/konstruktsii/ustanovka-ruchki-na-mezhkomnatnuyu-dver.html
- https://BestDoor.guru/montazh/ustanovka-dvernoj-ruchki.html
- https://doorchange.ru/montazh/ustanovka-dvernoj-ruchki-na-vhodnuyu-i-mezhkomnatnuyu-dver.html
- https://furni-info.ru/ustanovka-dvernoj-ruchki.html
- https://cozzyroom.com/remont/ustanovka-ruchki-na-mezhkomnatnuyu-dver.html
[collapse]
Tools for inserting locks and latches
Embedding a lock into an interior door is not that difficult, but you will need the following tools for the job:
- Drill with a 25 mm core bit and/or a 22-23 mm drill bit (there are also smaller locking elements, so a 20 mm core bit may be required). This tool is used to cut holes for the lock in the door leaf.
- 16 mm feather drill - to make a recess in the edge of the door and a counter part in the jamb.
It is better to use a crown on a wooden door - Mallet and chisel (preferably inch). With their help, the cover with the latch and the plate on the counter hole are “buried”.
- Drill with a diameter of 1 mm - drill holes for installing self-tapping screws that secure the lock itself and the linings.
- Screwdriver - tighten the screws.
- You will also need a tape measure or a long ruler (more than a meter long), a pencil, a triangle (preferably a carpenter's one, but a regular school one will do).
Not such an expensive and rare instrument. If you don’t have a drill and a crown, you can buy it at any construction supermarket or market. Since we will not be drilling into stone, there is no need to buy too expensive ones - ordinary crowns or wood drills.
Ready-made set for inserting locks into interior doors (on wood): feather drill, holder, crown
A few words about what is better - a crown or a feather drill. Cutting a hole in a door for a lock is easier and faster with a crown, and there are fewer chips. But working at the end with a crown is not so convenient, and the hole is larger than necessary. Drilling with a pen takes a little longer and there are more chips, but it’s easier to control the process. In general, there is no big difference, but most often, the hole in the canvas is made with a crown, and in the end - with a feather. But you can use a pen everywhere.
Can't do without a chisel
Another point: a standard crown has a diameter of 25 mm, and a hole of 22-23 mm is needed for the lock. The extra 2 mm can be easily covered by decorative trims, but with a very narrow door these extra millimeters can become critical.
Main varieties
Handles for sliding doors are made mortise and more like recesses. Such a part can be taken with your fingers to close or open the passage. There are 3 main options for such handles:
independent (for interior doors);
independent (for entering a house or apartment);
mortise designs, complemented by a latch.
In the first case, a lock or latch is not provided. To prevent spontaneous opening or closing of the door, magnets are usually used. But they are not used in individual designs. The advantage of using an independent handle of this type for sliding doors is the simplicity of the device. The absence of mechanisms allows us to ensure:
Full-fledged independent handles are mounted inside the door leaf and do not extend beyond its contour. This allows you to guarantee the opening of the doors even in a small area. But this solution does not allow full use of the cassette sliding door. Her canvas goes 100% into the pencil case located inside the wall. The passage can only be opened by using an additional handle.
A mortise handle complemented by a latch is used on double-leaf sliding doors. Such a device already implies the use of mechanisms that allow you to open the opening if the need arises. Handles with latches are not suitable for swing doors. Most often, in order for the latch to come out of the strike plate, you need to turn the round button. But in some modifications it is replaced by a movable slider.
Types for individual types of doors
The variety of designs and operating principles of handles is largely due to the difference between door models. Most modifications have been made for glass doors. Many of them are equipped with a removable larva. To install such a part, you need to drill the glass. The handle itself is attached to the hole using a fitting nut, and to lock it, you need to rotate the key.
Mortise door handles for interior doors are a push version that looks like a lever. By moving the lever you can open or lock the latch. The doors are sometimes opened by simply pressing the handle. When installing the product, use an overhead strip or socket. But the rotary handle can be used both on its own and from the inside (when there is a push handle on the outside).
The rotating product may look like a sphere or cone. The opening is made with a slight turn - hence the name. But there are also more secure types of devices, which are actually a type of lock. Such pens received the common name “knobs”. Geometrically, they are close to rotary structures, but are equipped with a latch that blocks the lock. As a rule, mortise knobs are used to allow the door to be closed from the inside. That's why you can see them in bathrooms. To manage the lock (and remove it if necessary) you can use:
additional rotating device.
Types of hidden handles
Fundamentally, hidden handles differ from conventional door fittings in the way they control the door leaf: conventional door handles provide the handle grip required to open a swing door.
A variety of models of hidden fittings for sliding doors
Hidden fittings provide a convenient ledge for which you can slide the sliding system sash. Thus, all hidden handles are different modifications of a recess in the door leaf, which you can conveniently grab onto with your fingertips and move the sash along the guides.
Set of hidden fittings for sliding doors
Important! The peculiarity of roller mechanisms is that significant effort is not required to move the blade. Therefore, it is enough to grab the ledge with just your fingertips, and the canvas will roll in the given direction.
Basically, according to the method of execution, hidden handles for interior doors are profile and point. The profiles came from furniture production. Based on the principle of a wardrobe, the door leaf is framed in a metal frame. The transverse parts of the frame play the role of load-bearing elements of the roller system, and the vertical profiles serve as handles. Under such doors, a cassette is mounted on the side of the opening, into which the leaf is hidden when the doorway is opened.
Profile handle for sliding wardrobe type
Such sliding systems with closed profile handles evolved from furniture technology and formed a separate class of fittings for sliding interior doors.
Profile for a sliding wardrobe type system
Point hidden models that are used for sliding interior doors can be divided into the following types:
- Independent mortise;
- Finger end;
- Hidden handles with latch;
- Models with latch and lock.
Independent mortise handles
These models are used only for gripping with your fingers and moving the blade along the guides. They are not associated with closing mechanisms. To fix the sash equipped with such handles in the closed position, magnets or roller guides with closers are used. These additional mechanisms must be installed together with independent mortise handles to ensure that the opening is tightly closed and the leaf is held in the closed or open position.
Their design is simple: it consists of an insert, which is mounted in a prepared recess in the canvas, and a decorative overlay, which acts as a framing edging.
Original square handle with a masking hinged lid
The variety of such models lies in the different shapes of the liner and the different materials from which it can be made. It can be round, square, oval. The most common shape is elongated, with rounded edges.
Designers offer original solutions that make it more convenient to use the hidden handle. In popular “Push” models, the recess is closed with a spring-loaded lid. This model can fully be called hidden, since the surface of the canvas looks absolutely flat. If you need to open the door, just press the lid, it will open slightly, and thus the slightly open lid turns into a convenient handle. When the lid is released, it returns to its previous position and again forms one continuous surface with the canvas.
Plastic models for installation in MDF doors
The material can also be varied. Considering the simplicity of the design, such fittings will have aesthetic value if they are made of nickel-plated metal or polished brass. In some cases, the design idea requires making a hidden handle truly invisible. Then use enameled, plastic or laminated models to match the color of the canvas finish.
Types and distinctive features of handles for sliding doors
From the article you will learn:
Handles designed for installation on sliding doors are slightly different from any other models of similar products - their main feature is the absence of protruding parts. Elements protruding beyond the door leaf, quite often found in any other modifications of handles, in this case prevent the normal closing of the door.
If the homeowner prefers to see sliding doors in his apartment or house, he should select handles that match them. Manufacturers produce many varieties of such products. Each model has its own disadvantages, advantages and installation features.
Product Installation
At this stage we have two holes ready. Then we proceed in the following order:
- We install a snap mechanism into the side hole and fasten it with self-tapping screws.
- Remove the upper part of the handle. There must be a side hole for this.
- Using the key included in the kit (you can take any other thin flat object), press the tongue inside the hole and lift up the handle itself.
- We remove the decorative trim and find the mounting holes underneath it.
- We install the outer part of the product, and then the inner half.
- We tighten both parts with screws that are included in the kit.
- We put on the decorative trim and the body of the handle-latch. In this case, it is necessary to press on the inner tongue with a key or other suitable object.
- Now the door needs to be closed in order to trace the place where the latch tongue touches the door frame. Using this marking, we hollow out a recess for the entrance of the lock.
- We install a decorative plastic pocket covering the wooden groove.
- We screw a metal plate over the hole under the latch tongue. At this stage, the installation of the handle is completed.
If you don't have a drill, all the holes can be cut with a chisel. However, the process of installing a door handle will require some experience and skill and will take more time.
Door handle repair depending on the type of fault
It happens that locks stop working on interior or exterior doors at the most unexpected moment. You can find a way to repair it only by determining the type of malfunction.
If the mechanism is stuck
This problem occurs more often not because the lock core has failed, but because the door itself was incorrectly configured or inserted into the frame incorrectly. You can determine what is preventing the mechanism from closing correctly with the door open by pressing the handle. If in this position the handle and bolt work normally, then the reason is a malfunction of the locking plate. The solution to the problem is as follows:
- tighten all the screws on the bars and the lock itself. Be sure to lubricate them with machine oil;
- if necessary, we adjust the door in the doorway.
Over time, incorrect installation of the handle will certainly lead to breakage of the locking bolt PHOTO: mirzamkov-krasnodar.ru
If the problem is not in the locking plate, then you need to perform the following actions:
- lubricate the latch with WD-40;
- operate the mechanism;
- if this does not help, disassemble the door handle;
- Loosen the locking screw slightly and reinstall the lock.
It happens that the lack of lubricant affects the performance of the door handle. A simple spray of machine oil or other industrial grease will help correct sticking.
If a key is installed on the opposite side of the well, then it is not always possible to open the door PHOTO: psk-remont.ru
The handle falls out of the door socket
The retaining ring, which is a mandatory part of the door lock, tends to pop out. This situation can be observed after hitting the door or slamming it hard.
Too short a lock tongue can also cause a malfunction. PHOTO: leroymerlin-catalog.biz
Such a ring can be inserted into place if it is intact. In case there are cracks or other defects, it is changed. It can be purchased at a hardware store or simply replaced with a washer. If it does not fit the size a little, bend it with pliers so that it presses the core well.
Door handle spring broken
As a rule, such a small part needs replacement. Its breakdown can be caused by careless handling of the door handle. To repair it, you should disassemble the fittings to the core, remove the top washer and look at the condition of the spring.
According to statistics, door handles can withstand greater loads than the structure itself PHOTO: remont-moroz.ru
It happens that it just slips off and does not have any special defects. She is returned to her place. If there is any damage to the structure, it must be replaced. If the spring is difficult to remove from the grooves, it means that it is intact, and the breakdown is something else.
The lever does not return after pressing
If the handle refuses to return, the problem may be due to a dysfunctional door handle return spring. To check this, you need to dismantle the fittings. To do this, remove the core from the socket and remove the spring from the inside.
The absence of a reverse push may be due to too strong pressing PHOTO: 1obl.ru
After that, install the new one in place and fix the stop so that the spring remains inside.
There is no turning of the rod in the door handle
The lock problem can be associated with two factors: a licked milled square or the rod simply jumped out of the core. To eliminate the cause, it is necessary to disassemble the structure. If there is a core defect, it is better to immediately replace it with a new one.
The breakage of the handle may be due to the fact that it protrudes much from the opposite side PHOTO: youla.ru
As for the licked square, you can temporarily wrap electrical tape around the axle. This creates a more efficient engagement between the two parts.
Installation of mortise fittings
Installation in a wooden sheet is carried out by preparing a recess. To do this you will need the following tools:
- Drill-driver.
- Drill.
- Jigsaw.
- Milling machine.
- Plywood or chipboard.
Installation using a crown
The installation of round handles can be done using a hole saw of the appropriate diameter installed in a drill. After the cutter has been deepened to the required depth, the recess is refined using a router with a finger cutter.
Installation of fittings of any shape can be done using a template:
- First, the hidden handle is separated into its component parts.
- To accurately make the recess, you will need to make a template. To do this, draw the contour of the knot liner on a piece of plywood or chipboard and cut a hole in it with a jigsaw.
- To do this, drill a hole along the inner contour, insert a jigsaw file into it and cut a hole along the contour. This template will be the stop for the copy cutter.
- Then, at the installation site, the outline of the liner is marked on the door leaf. In this case, it is necessary to note the same distance from the end of the door leaf.
- After this, a template is placed on the door leaf so that it coincides with the contours of the liner, and it is fixed with clamps.
- After this, the required depth of the cutter is set. As a rule, sampling is performed in 2-3 passes. Each pass is made no more than 8 mm.
- In this way, a sample is made in the canvas for the liner.
Milling a pocket for an insert
After this, the template is disconnected and the liner is inserted into the resulting recess. It is screwed on with self-tapping screws, and a decorative overlay is fixed on top.
Video of installation in canvas:
Hidden handles are a special type of door hardware, which is an important final element in the arrangement of sliding interior doors.
Eyes are afraid, hands are doing: inset
The worst thing is to decide to drill. You understand, if I’m wrong, then the extra hole will definitely not decorate the new door.
It is important to direct the drill so that it goes strictly perpendicular to the blade. A slight tilt and the hole will go to the side
You don't need to drill all the way through. You should only go halfway, and then the second half on the other side. When working, it is important to firmly fix the door so that vibration and movement do not interfere with work. And it’s better to do everything at low speeds.
Then the “ten” drill was used. With his help I widened the hole
When the hole is marked, it’s time for literally jewelry work. You will need a chisel and a hammer.
With light movements of the chisel I select the excess so that the lock sits in its place
All. Now the castle is in its place. Nothing sticks out or catches. You can fix the lock frame with standard screws.
Materials
In the manufacture of handles placed on sliding interior doors, the following can be used:
ferrous and non-ferrous metals;
Metal structures are still the most popular. This is due to their strength and reliability. Mechanisms made of stainless and galvanized steel, bronze and silumin are mainly used. The last option is not recommended, because the attractive appearance will not last very long. In addition, silumin handles are easily destroyed - so the savings when purchasing them are illusory.
All experts recognize stainless steel as the best option. As for the color of the coating, everything is simple - it is selected to match the color of the canvas itself. Brass is widely used for sliding structures.
This alloy helps achieve a very nice appearance. It is also comfortable to the touch.
If the room is decorated in a high-tech spirit, the most appropriate would be handles for compartment doors made of anodized aluminum. At the same time, in rooms of other styles one must approach their use more carefully. Plastic products go well with PVC fabric. Glass and wooden structures are used to a limited extent due to their low practical characteristics. They are needed mainly where a non-standard door is installed and therefore an original approach to decor is required.