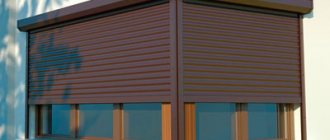
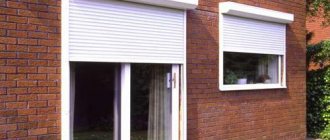
Roller shutters are widely used in private homes, public buildings, and industrial buildings. They are installed outdoors or indoors. The main task of such products is to protect the building from unauthorized entry by unauthorized persons. The design also protects the premises from sunlight, noise, dust, reduces heat loss, and increases sound insulation.
Manufacturers, including our company in Yaroslavl, offer a variety of roller shutter designs to suit any opening structure, room design or facade decoration. They can be installed in any type of opening:
- window;
- door;
- garage;
- furniture and plumbing niches;
- storage rooms.
General structure and operating principle
General components of the device:
- Protective box - hides the canvas in a folded position, protects the material from damage and contamination.
- Octagonal shaft – located in a protective box. The fabric is wound around this part.
- The canvas consists of lamellas (identical profiles) and performs enclosing and decorative functions.
- Side guide rails - mounted vertically on walls or slopes, the curtain moves along them.
- Drive – roller shutter control system, available manual, spring and electronic.
- Locking device - installed on the end profile of the curtain and locks the roller shutters in the deployed position.
Principle of operation
- The slats are connected to each other by hinges, which allow the roller shutter to bend.
- When folded, it is placed in a protective box.
- The drive unfolds (rolls up) the blinds.
- The unfolded structure is fixed at the bottom with a locking mechanism that cannot be opened from the outside.
The standard option is a rectangular vertical system. But products of other shapes are also made. For glass roofs and houses with a second light (where there are no interfloor ceilings), the roller blind is installed at an angle.
Connection diagram of the electric motor to the 220-230W network
The connection of the electric motor to a single-phase voltage source is carried out using a phase-shifting capacitor. Its purpose is to provide a phase shift between the motor windings in order to produce a rotating magnetic field.
The circuit will consist of a thermal relay, limit switches, motor windings, a power switch, a “terminal block” and wires.
Types of lamellas
According to the material of manufacture:
- Steel – durable, prevents access to the premises by unauthorized persons. They have a lot of weight. To prevent corrosion, steel must be galvanized or painted.
- Aluminum – wear-resistant with a long service life. Available in a variety of color finishes. Aluminum is resistant to moisture.
- Plastic - lightweight, good decorative properties. Practical, easy to care for, but highly flammable. Suitable for installation in small niches.
- Wooden ones are natural and will fit perfectly into any interior. They are aesthetic and durable.
- Fabric - various colors and textures, light weight. But the fabric is more difficult to care for and should not be placed near sources of high temperature. When exposed to sunlight, most fabrics quickly lose color.
Aluminum and steel blinds are universal - they can be installed both inside and outside the building. Plastic, wood and fabric slats are used only for indoor installation.
By structure:
- Foam-filled - aluminum profile filled with a foam composition (for example, polyurethane foam). Depending on the density of the composition, the product may be strong enough for commercial purposes or, conversely, lightweight. Foam-filled lamellas have increased sound and heat insulation parameters. They are easier to lift if a manual lifting mechanism is installed.
- Extruded – heavy, durable single or double wall profiles. The latter are hollow and reinforced with stiffening ribs (“cross members” inside the profile). They are made from hot steel or aluminum (the method is called “extrusion,” hence the name). Such walls are thick enough and do not require filler. They are used as part of anti-vandal structures.
Separately, lamellas with perforation can be distinguished. Metal profiles have through holes. Sometimes they are filled with transparent plastic inserts. Such systems are convenient when constant ventilation of the room is necessary; they are aesthetically pleasing and practical to use.
Strength classes
Roller shutters are divided into strength classes from P1 to P8 (GOST 52503-2005). Class is determined by the ability to withstand:
- influence of various instruments (not calculated for P1);
- shock load;
- static load.
To class P1
include foam-filled lamellas, the width of which is 3.7-4.5 cm.
Class P2
– foam-filled parts with a width of 4.5 cm, as well as extruded profiles.
To classes P3 and P4
only extruded products are included.
Classes P5 and higher
elements made of steel, as well as special extruded aluminum parts with a large cross-section, correspond.
A visual indicator is the time required to open (break into) blinds of different strength classes:
For private houses and objects that do not require increased protection against intrusion, class P1 roller shutters are usually used. Where a high level of security is required (banks, jewelry workshops and shops), profiles of a class not lower than P3 are used.
Anti-vandal roller shutters are made in a reinforced version:
- profiles of increased thickness and with additional stiffening ribs;
- guide bars with reinforced structure.
- The box with the shaft is additionally protected from opening.
- The castle is located in an inaccessible place.
Such roller shutters are equipped only with an electronic drive.
Types of roller shutter control
The control can be manual, spring and automatic (electronic).
Types of manual mechanisms:
- Cord (tape);
- Vorotkovy;
- Cordovy.
The spring-inversion mechanism “takes over” part of the load when the curtain is raised. In automatic systems, the web moves due to an electric drive.
Mechanical control
For roller shutters with a mechanical principle of operation, the movement of the canvas is carried out manually. The mechanisms differ little in structure. They are inexpensive, do not require maintenance and do not depend on the availability/stability of electricity in the building.
- Cord (belt) drive
– to fold or unfold, you need to pull the cord or ribbon. This method is used for canvases weighing no more than 15 kg. The low price and simplicity of the mechanism make the belt drive common for light products. But such a drive is short-lived. - Cord drive
– works similarly to the corded one. But instead of a cord there is a strong steel cord (cable). And we don’t pull it, but wind it onto the reel by turning the handle. Due to this scheme, the drive can be used for blades weighing up to 40 kg. The handle is ergonomic and comfortable to rotate. - Knob (cardan) drive
– the blade is wound onto the shaft by transmitting torque from the knob (handle) to the cardan and gearbox.
Systems with spring-inertia mechanism
Suitable for manual control of devices weighing no more than 100 kg. A traction spring is attached to the octagonal shaft. She raises the blinds; they fall under their own weight. After complete unfolding, you need to fix the end profile in the lock.
Electric drive control
Convenient in the following cases:
- roller shutters are located in hard-to-reach places;
- the weight of the system is very large;
- for working with a group of roller shutters;
Automatic control allows you to include roller shutter structures in a security and video surveillance system.
It is carried out using an electric motor. It consists of:
- gearbox;
- electromagnetic brake;
- switches.
The electric drive is located inside the octagonal shaft. When the shaft rotates in different directions, twisting or unwinding occurs. Roller shutters are controlled by a remote control or stationary (keyboard, lock) switches.
Electrically driven roller shutters are additionally equipped with a manual mechanism in case of an emergency (power outage).
Common Installation Tips
Installation and configuration must be carried out in accordance with the connection diagram for electric roller shutters. The following recommendations must be followed:
- Wires must be taken with a cross-section of at least 0.75-2.5 mm2, with 4 cores and double insulation.
- The use of wires with polyethylene insulation is prohibited.
- To connect cables, use distribution boxes and terminal connectors.
- If there are more than one shutter, the wiring must take this into account. The connecting cable must be able to withstand the required power.
- The electric drive needs to provide one contact for each direction of movement.
Recommended Tools
To install and connect the electric roller shutter drive you may need:
- electric drill;
- perforator;
- cutting machine;
- building level;
- multimeter;
- phase indicator;
- wire cutters;
- devices for crimping wires, cable lugs;
- soldering iron;
- tweezers;
- Screwdriver Set.
Safety precautions and electrical installation requirements
Electrically driven roller shutters are connected in accordance with safety regulations. All automation devices must be disconnected from the power supply before starting work.
Automatic protective shutters cannot be installed in places with high humidity. You need to choose a system based on manual control.
It is not advisable to place heating devices near the product (up to 1 m).
All wires must comply with those recommended in the technical documentation.
Roller shutter installation options
There are several of them:
- Overlay – the roller shutter design is fixed on top of the wall.
- Built-in - the protective box and guide elements are located in the opening (on the slopes).
- Combined - requires the construction of a special niche for the box.
Using each of these methods, you can install a roller shutter on the indoor or outdoor side.
Overhead installation method
It is more widespread due to its simplicity. The box with the shaft is mounted to the wall above the window. Guide rails are also mounted on the wall on the sides of the window or door.
The advantages of this installation method:
- the opening is not deformed (for example, for the purpose of creating a niche for a box);
- roller shutters do not reduce the window area;
- Suitable for manual and automatic control.
Overhead roller shutters are installed in already constructed buildings.
Built-in installation method
In this case, the protective box is attached to the upper slope, and the guide rails are attached to the side ones. The advantage is increased resistance to burglary. But you need to take into account that the roller shutter will block part of the gap.
Combined installation
If you provide for the installation of a protective system at the construction stage of the building, then a combined installation will be more reliable. To do this, a special niche for the box is made inside the upper slope; guide rails are placed on the side walls of the openings. Thus, the structure is completely protected from unauthorized access and will not reduce the entry of light into the room.
Setting up the electric drive
The installation instructions do not describe in sufficient detail how to set up automatic roller shutter circuits, limit switches and the control unit.
If the installer does not have the skills to set up electrical equipment, it is better to contact specialists.
The electric roller shutter drive can be replaced and configured. To do this, you need to adhere to the following sequence:
- remove the cover from the protective box;
- disable the mechanism securing the blade to the shaft;
- remove the shaft;
- replace damaged parts.
The motor can be placed inside the shaft of a different type. But in this case you will have to adapt the seat.
How to adjust limit switches
The lower and upper limit switches require adjustment of their position after connecting to the electrical network of the electric drive.
To do this you need:
- Remove the cap from the limit switch keys (for SOMFY electric motors).
- Press and lock both keys - insert them into the groove.
- For the first direction of rotation, set the blade to the end position. Press the “limit switch” button again to release it.
- Set the blade to the second position and repeat the manipulations with the other limit switch.
- The correct installation needs to be checked. To do this, the drive is allowed to rotate freely in both directions until the “limit switches” are activated. Automatic shutdown of the drive occurs due to the activation of thermal protection during continuous rotation for more than 4 minutes. To restart the electric motor, you need to wait about 20-30 minutes. A pause is needed to completely cool the drive elements.
- The final position of the roller shutters can be changed. To do this, you need to press the setting keys in the desired direction of rotation and change the position of the blade to the required one. After completing the adjustment, press the keys again.
- Recheck the electric drive and shutter limit switches.
After both positions are secured, you need to put on the protective caps.
Roller shutter designs for different occasions
| Happening | Canvas material | Control method | Strength class |
| Plumbing or furniture roller shutters | Fabric, plastic, wood, rolled aluminum | Manual | P1 |
| For windows of cottages and residential buildings | Rolled (foam-filled) and extruded aluminum lamellas | Manual Automatic | P1, P2 |
| For garage doors and shops | Extruded aluminum and steel lamellas | Manual Automatic | P1 – P3 |
| For banks, warehouses, jewelry workshops | Anti-vandal steel roller shutters | Auto | P4 – P6 |
| For consulates and embassies, bank vaults | Armored steel systems | Auto | P7 – P8 |
Other articles
