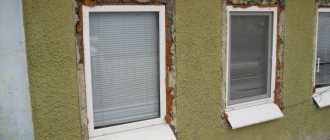
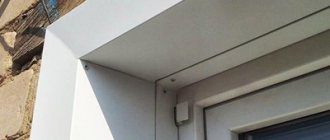
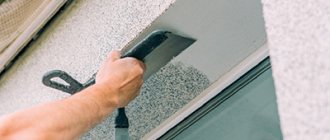
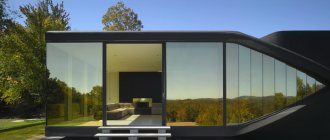
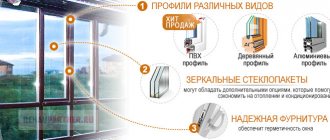
The use of non-standard solutions for decorating the perimeter of window structures indoors, in the form of mirror slopes, is considered a feature of modern design.
The main purpose of mirror slopes: solid or mosaic (several glued connected parts) is to make the window visually larger and protect it from condensation.
It also retains heat, reflects harmful UV rays and gives the entire room its own unique style.
What are the requirements for mirror slopes, their pros and cons, installation features, necessary consumables and tools, as well as other nuances - read more in this article.
Why are they needed?
Adding new volumes and proportions is especially important for secondary housing premises , where small, narrow window openings need to be enlarged.
It is here that it is advisable to install mirrored slopes, which are also suitable for the northern side of the house (apartment), where the illumination during the day is much less than that of the room, where the sun's rays penetrate well during the day.
Slopes are made from standard parts and mirror slabs. They also use sandblasted mirror material, the pattern of which retains sunlight, but at the same time reflects an excess of light waves.
The surface for the slope is made solid or assembled from pieces of square, rectangular, diamond-shaped, triangular shapes with different dimensions. For example, tiles of 10 x 10 (cm) and 30 x 30 (cm) are available for sale.
In addition to using solid mirrors, tiles and mosaics, they also use pasting the prepared (plastered and puttied) surface with self-adhesive mirror film, or plastic with a reflective, smooth mirror surface.
Any material used to create a slope is easy to decorate - apply a drawing, photographs, texture selected according to the style .
Mirror slopes are recommended for metal-plastic, plastic and aluminum windows, but they can also be made with wooden profiles. They look especially good with panoramic (French) designs.
Important. They are installed only indoors, since it is easier to care for surfaces while at the same time observing fire safety rules.
Do-it-yourself mirror slopes for windows:
Coating options
The general name “tile” can hide materials that are very different in properties and appearance. Among them are the most frequently used ones. At the same time, some types of material of this type will be more suitable for such decor, while others - less, since the complexity of processing some options will exceed the advantages that finishing with decorative tiles provides.
- Tile. Its main advantage over other types is that the choice of similar material in construction markets is huge. At the same time, the tile can be easily cleaned of dirt and when using waterproof grout, the coating is not afraid of water. However, decorating such surfaces with ceramic tiles will require you to know how to cut them, since many components will have to be adjusted to size.
- In almost every case, trimming of another type of tile – porcelain stoneware – will be required. The components of the coating, as a rule, are larger than necessary in size and almost all elements will need to be cut. Therefore, finishing with such tiles is suitable mainly for wide door slopes, where a minimum of parts will need to be cut.
- The design of doors and windows with brick tiles looks beautiful. If the interior is decorated in a style that involves the presence of brick surfaces, then such decoration of a window or doorway will be very appropriate.
- Mosaic. Stylish and beautiful material. It is suitable for those who do not yet have skills in processing ceramics or porcelain stoneware, since due to the small size of the individual components, cutting almost never needs to be done. This tiling of slopes looks good in the bathroom.
- The most rare option is finishing slopes with clinker tiles. It is most often used for exterior decoration and is excellent for this. Some types of exterior home design involve framing windows and doors with brick or stone, and clinker is an excellent choice in this case.
Material requirements
As already mentioned above, mirror slopes for window profiles, according to given dimensions, are made from a number of materials (the average price per 1 m2 is indicated in brackets):
- one-piece mirror (from 850 rub.);
- tiles and mosaics (from 170-250 rubles);
- self-adhesive film (from 340 rub.);
- glass with polymer film (from 270 rubles);
- plastic with a reflector (from RUB 204).
Technical requirements for the listed materials can be found in GOST 17716-2014, STO NOSTROY 2.23.62-2012, GOST 32563-2013. For the formation of mirror slopes, the production conditions of the building material, its environmental friendliness, quality, certification and laboratory testing are important.
Requirements include the following:
- Compliance with operational safety classes SM1-SM4.
- Impact resistance – P1A-P5A.
- Protection from UV and electromagnetic radiation.
- Nominal thickness – 2.0-26.0 (mm).
- No deviation from the plane (minimum permissible errors).
- High water-repellent properties.
- Good spectral reflection of light.
- Immunity to temperature changes.
- Presence of antifungal properties.
- No scratches, chips or damage to mirror surfaces.
- Good adhesion of the inner side to any surface of the window opening.
High-quality material has a good structure, is strong, dense and durable. Installation must be carried out only on a prepared surface - leveled, plastered, puttied, sanded and primed.
Important! Verification of compliance with the listed requirements is always carried out experimentally.
Finishing window slopes in different ways
Finishing window slopes is an important element of the interior and appearance of the room. First of all, the material of the window determines this, but there are other options. After installing the window, everyone has to do this. Therefore, this article will help you understand this issue and make the right choice. You will have the opportunity to look at photos on this topic and see the appearance of the product and the possibility of design.
Tools and consumables
To create mirror slopes for windows you will need :
Selected main finishing material (solid mirror surfaces, tiles, mosaics, self-adhesive film or polymer materials).- Glue liquid nails (or a special one designed for glass and mirrors - silicone), double-sided tape.
- Sheets of drywall (with self-tapping screws and a utility knife), plaster, putty (starting, finishing) to level the surface, in cases where this is necessary.
- Sets of spatulas for finishing (wide and narrow), containers for diluting solutions, a construction mixer, clean running water.
- Construction tape, a simple pencil, a level, a plumb line (marking on the surface).
- Primer, roller and brushes (distribution of finishing layers over the surface and priming).
- Screwdriver, set of glass cutters.
- Perforated corners or reinforced mesh under the plaster base.
- Grinder, sandpaper.
- Clean soft rags, construction vacuum cleaner (cleaning and cleaning the surface).
- Spray cleaner for cleaning mirror surfaces.
- Corners for edges (made of plastic, special reflective materials).
The listed set of tools and consumables may differ in each specific case.
Note. There is no need to purchase tools when ordering installation services from official construction companies, and customers purchase consumable materials immediately at the price list.
Slopes made of glossy, matte ceramic tiles
Laying
A thorough preliminary leveling of the base is required. Otherwise, distortions along horizontal and vertical planes cannot be avoided. The masonry process is controlled by the building level.
The process of laying on a plastered, primed slope:
It is necessary to measure the height and width of the slope in order to approximately calculate the amount of material and determine the locations of possible trimmings.
Make an approximate marking of the rows.
In this case, the masonry is made from the corners, so that possible trimming goes closer to the window block.
The glue is applied to the wall with a notched trowel.
Grouting can be done with a rubber spatula after 24 hours.
Corner connection
To obtain high-quality corners, it is necessary to use metal or plastic perforated corners at the stage of plastering the walls. During installation, make sure that the seams are even in all planes.
The process of leveling the corners is identical to laying on a flat surface, the difference is that the tiles need to be trimmed at an angle. The operation can be performed in two ways: either with a tile cutter or with a grinder. Many finishers suggest laying tiles in corner joints tightly to each other so that the seam does not show through.
Corner connection
Installation features
Before starting work, experts recommend insulating the surface of the slope and sealing the installation seams and cracks. Installation of mirror slopes requires compliance with labor protection, accuracy, thoroughness and lack of haste.
Preparation of the window surface for the installation of mirror slopes is the same for all types of materials used:
Old layers are dismantled.- The entire perimeter of the opening is leveled with plaster and thoroughly cleaned.
- If it is necessary to create clearer horizontal and vertical lines, plasterboard sheets are mounted under the plaster layer.
- A layer of putty (starting and finishing) is formed, which is sanded after drying.
- The surface is primed (in 1-2 layers) for better adhesion to the adhesive base.
Then the main work :
- Prepared mirror or glass slabs are attached to a clean surface with silicone sealants, liquid nails, special amalgam glue - for this, the composition is applied in wavy or zigzag movements to the inner surface of the finishing material, pressing it tightly for 15 (s).
- The work also uses double-sided tape or self-adhesive film coatings - the inside of the products is freed from the protective paper and glued with the opposite side from the mirror part on all sides of the perimeter of the window profile, gently smoothing the surface so that bubbles and irregularities do not form.
- The mosaic is glued according to pre-made markings, selecting parts for a successful combination - here it is good to draw up a diagram in advance and indicate the sizes of the matching products to make it easier to glue them together, and seal the assembly seams between them with white silicone-based sealant.
- It is recommended to decorate the edges of mirror slopes with plastic or mirror-coated corners.
As a rule, all surfaces of mirrors and glass are protected by a surface (factory) film, which can be removed with a slight movement of the hand.
After all the installation work has been completed, use a professional glass cleaner with a soft cloth or rag to rub the mirror surfaces until they are clean and shiny. For film products, this is not necessary - just gently walk over them with a clean napkin.
Important! Silicone sealant is considered the best glue for mirror slopes - it is a neutral building material that does not harm the amalgam (inner surface).
Possible difficulties and errors
When preparing the mirror canvas, clear measurements will be required so that there is no need to correct any defects that appear during the process.
Difficulties and errors may arise if low-quality, uncertified materials are used during the installation process, the process is carried out in a hurry, without observing technical safety rules, and also if:
Instead of drywall, when leveling a slope for plaster, sandwich panels are installed (they are thicker, but at the same time they can form cold bridges).- The mounting seams are poorly closed, there is no high-quality sealing (can lead to rapid detachment of the mirror from the surface).
- The preparatory work and leveling of the slope were insufficiently carried out (violation of geometric proportions).
- Glue was saved during installation (it helps the mirror tiles come off over time due to their insufficient adhesion).
When choosing and purchasing consumables, it is advisable to pay attention to expert recommendations and positive user reviews. Products from legal manufacturers are always accompanied by documentation, instructions, and labeling.
Important! It is better to entrust the installation of mirror slopes to professional construction companies that work under a guarantee and an agreement with the client.
What are they for?
On a note ! Before proceeding directly to the description of the methods, we will familiarize ourselves with several reasons for the need to install window slopes.
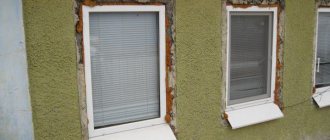
- Decorative . A window without slopes will not look very beautiful, to put it mildly. That’s why it is framed with plaster, drywall, plastic or metal.
- Protection of the opening from precipitation, cold and drafts . High-quality and correctly mounted slopes will prevent moisture penetration and also provide good thermal insulation at the installation seam. They will also increase the sound insulation properties of the windows.
- Protection of polyurethane foam and frame edges from temperature changes and dampness . If you do not take care of the slopes, then over time the installation seam will begin to deteriorate and eventually become unusable.
There are several main types of slopes:
- plastering;
- plasterboard;
- plastic;
- metal.
In the image you can see a detailed diagram of a slope made from a sandwich panel installed along a leveling profile, with insulation and fastening to a decorative corner and polyurethane foam
Advantages and disadvantages
The advantages of mirrored window slopes are:
- Visual enlargement of the window opening.
- The ability to create various design projects, including those with edges.
- Increasing the lighting of a room located on the dark (north side).
- Various options for using mirror coating: whole glass, mosaic, film.
- Easy installation on a prepared surface.
- Good adhesion to the surface of slopes made of cement, wood, plasterboard, wood, brick.
- Creating a smooth and even surface.
- Lack of sensitivity to UV rays.
- Durability and impossibility of deformation.
- Decoration with drawings, photos and textures.
- Easy care with special products designed for glass care.
The materials have few disadvantages:
- Constant maintenance of cleanliness at the installation site is required.
- Higher price compared to other finishing materials.
Note. Since mirror slopes have many more advantages than disadvantages, installing them, if clients want to make their room visually wider, is considered advisable.
Imitation of windows in the bathroom
One of the bathrooms in the country house occupies a room without windows. The architect compensated for their absence with an abundance of mirrors, rhythmically placing them along the perimeter of the room along with wall lamps. When the lights are on, the first impression is that the mirrors are windows.
Authors of the project: architects Tatyana Mironova, Andrey Kontorovsky. Photo: Dmitry Livshits.
Authors of the project: architects Tatyana Mironova, Andrey Kontorovsky. Photo: Dmitry Livshits.
Average prices for work in the Russian Federation
Carrying out installation work with mirror slopes consists of a whole range of services, the cost of which is set by construction companies on their official price lists, per linear meter (1 linear meter).
The average cost (in rubles) for installation services in the Russian Federation was formed from the following factors:
- Complete dismantling of the old coating – from 200.
- Installation of gypsum boards and perforated corners - from 320.
- Plastering works – from 455.
- Putty work (starting, finishing) – from 370.
- Priming (1-2 layers) – from 35.
- Painting under a mirror base – from 185.
- Film gluing – from 350.
- Installation of a solid mirror according to the markings made - from 450.
- Working with mosaics – from 670.
In each case, work with slopes is purely individual, so the cost is calculated by the specialist who takes measurements of the window opening. In addition, the shape and depth of the slopes matter. Some companies set prices depending on the depth of the opening (up to 25 cm and above: 35, 50, 100).
The highest prices for work with mirror slopes were noted in Moscow, Novosibirsk, St. Petersburg and a number of northern regions. The lowest are indicated in the cities of Bryansk, Kursk, Volgograd.
Important! Contract craftsmen charge 2 times less for their work than specialists from legal construction companies. But they may lose in the quality of the service provided, for which they do not provide any guarantee.
Imitation of an opening in a wall
If you need to visually enlarge the space, you can cover the entire wall with a mirror sheet, or you can come up with a more subtle solution, for example, imitating an opening in the wall through which another room is visible. The author of this interior used beveled mirrors and achieved a feeling of realism of the “opening”.
Author of the project: decorator Alla Shumeiko. Photo: Mikhail Stepanov.
Author of the project: decorator Alla Shumeiko. Photo: Mikhail Stepanov.
Mirror volume of the dressing room
In their own apartment, the architects decided to “hide” the wardrobe enclosed in the bedroom using a mirror sheet. And as we can see, they succeeded perfectly: the dressing room seemed to disappear into space.
Authors of the project: architects Michael Miroshkin, Helen Miroshkina. Photo: Alexander Kamachkin.
Authors of the project: architects Michael Miroshkin, Helen Miroshkina. Photo: Alexander Kamachkin.
Floor mirror in the nursery
When decorating the girl’s bedroom, the architect tried to create a romantic mood and deliberately avoided traditional “adult” symmetry. Therefore, instead of a second bedside table, there is a large floor mirror and a table with vintage-style accessories.
Author of the project: architect Vera Gerasimova. Photo: Dmitry Livshits.
Author of the project: architect Vera Gerasimova. Photo: Dmitry Livshits.
Kinds
There are square glass blocks and non-standard shaped products. They differ in color, surface relief, have a pattern inside, frosted or transparent glass. Stained glass products with internal inserts serve as an excellent interior decoration.
The blocks differ in the degree of transparency and surface topography:
- corrugated, through which it is impossible to see what is outside;
- There are light-guided, colorless and light-scattering glasses;
- transparent ones transmit light best, objects are seen dimly through them;
- products with transparent and frosted glass transmit 50% of light;
- glass with a corrugated surface scatters or directs light to a specific place;
- there are inserts with images, figures or stained glass windows;
- Matte ones are characterized by low transparency and scatter the least amount of light in the room.
Semi-frosted glass is used for masonry in wide openings.
Based on areas of application, blocks are divided into:
- decorative;
- interior;
- industrial.
Standard sizes of glass blocks: 19x19, as well as 24x24 cm. The weight of the products reaches 2.5-4 kg. There are materials of non-standard sizes and different shapes.
