Today, many people install sliding doors at the entrance to the room. Such systems are easy to use and have many advantages. To install them, it is not necessary to order the service of a specialist. To save money, you should try doing the job yourself. But the installation of sliding systems has certain nuances and pitfalls. They need to be understood and taken into account, as well as know and follow the algorithm of actions. Then installing sliding interior doors with your own hands will be simple and successful.
Types of sliding doors
Installation of sliding doors is carried out in different ways. There are different types of these door blocks. They differ in design features and opening mechanism.
Sliding doors are distinguished by their shape:
- arched;
- rectangular;
- radius type.
In terms of design features, the following sliding systems exist:
- sliding-folding type;
- parallel-sliding type.
Sliding door sizes are:
- standard;
- non-standard.
In addition, sliding door structures can be made from various materials. Which is also a reason for their classification. For example, sliding doors are available for sale:
- glass;
- wooden (made of natural wood);
- made of MDF;
- combined.
Also, the following models can be classified as types of interior sliding systems:
- coupe;
- hanging;
- double;
- single;
- pencil case;
- recoil;
- tricuspid;
- French.
Such a variety of doors with a sliding type of opening allows you to choose the most optimal option in all respects.
Advantages and disadvantages of sliding doors
Today, instead of the usual swinging interior doors, many people choose sliding counterparts. The door in them moves along the wall. Such systems have a number of advantages.
The advantages of installing sliding doors in an apartment include the following:
- Saving usable space.
- Do not block the passage or block access to other doorways.
- Situations of arbitrary opening under the influence of a draft are excluded.
- Easy to use. Achieved by installing a roller mechanism. Thanks to him, the sash opens with minimal effort.
- Easily adjustable.
- Reducing the likelihood of injury. When opening the door, it is impossible to hit anyone.
- Long service life. Such door structures have been working properly for decades.
- No problems with changing the position of the door leaf under its own weight, or creaking during the movement of the leaf.
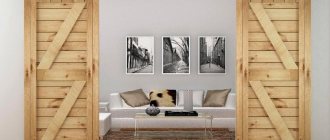
- They act as an interesting interior solution or an inconspicuous element, successfully fitting into the plane of the wall.
Sliding doors also have their disadvantages. They are listed below:
- Installation of sliding doors is more difficult than their swing counterparts.
- Lack of secure locks. There are latches.
- A lot of dust and dirt accumulate in the rails. This makes it difficult for the sash to move.
- The mechanism responsible for the movement of the door leaf may break if the door is used incorrectly or carelessly.
- The purchase price is higher than that of swing door units.
Sliding door installation options
Installation of sliding interior doors can be carried out in various ways:
- Inside the opening. This is how sliding doors are installed. They are located in the plane of the load-bearing wall. The door is recessed into the partition. This installation option eliminates one of the disadvantages of sliding systems - the difficulty of placing interior items near the wall along which the door leaf is located.
- Above the doorway. In this case, the sash moves along the surface of the wall. Today, sliding systems are more often installed that are equipped exclusively with an upper guide. This makes it possible to get rid of the need to create an uncomfortable and unsightly threshold on the floor. A lower guide is added if the sash is heavy and there is a desire to fix it better.
Practical recommendations
They will help those who are thinking about how to make an accordion door with their own hands:
- To make planks, you can use thin boards, multilayer plywood, chipboard, fiberboard, and PVC siding. It is necessary to take into account the location of the intended installation. Plastic is more suitable for installing an accordion in the openings of built-in wardrobes or for curtains, for example, in showers. But you shouldn’t use it for an interior door - it’s difficult to fit into the interior. If the lamellas are attached only at the top, this is definitely not an option - the slightest draft will lead to spontaneous movement of the folding sash.
- Its weight can be artificially reduced in order to simultaneously facilitate installation and decorate the canvas according to the principle of paneled doors. That is, provide inserts made of thin glass, plastic, film or original grilles. Focusing on a specific opening, choosing the best option is easy.
- To avoid skewing of the canvas panels and possible snags, it is recommended to leave a gap of about 2.5 mm between them.
- The accordion design is designed so that it is slightly wider than the opening for which it is intended.
If the installation principle is clear, then installing the door, regardless of its modification, will not cause any difficulties. The main thing is to properly prepare the opening, taking into account all the features of the wall material. And what kind of accordion to choose (make) is up to the owner to decide.
Design of sliding interior doors
In order for the installation of a sliding door to be successful, you need to understand what it consists of and how it is assembled. The set includes one or two guides and a door leaf. The movement of the last element is ensured by a roller mechanism and wheels. The design, which includes two guides, is considered more reliable and safer than the option with only the top guide.
Hanging systems
Suspended structures are attached to the top of the doorway. They open like an accordion or slide to one side. Look good in home interiors. The components for such doors are varied. The standard list includes the door leaf, top-hung system and main guide profile, as well as guide fastenings.
Rail type sliding system
The design of such systems includes lower and upper rail guides. They are attached to the doorway. The door leaf is placed in them. It moves on rollers and wheels on rails. Structurally, sliding doors are more reliable, since the leaf is fixed not only at the top, but also at the bottom.
Completion of work
When everything is finally secured and checked, you can begin installing platbands around the perimeter of the doorway on both sides. Using a hacksaw and wort, excess parts of the trim are cut off at an angle of 45 degrees, limiting their length. The platbands can be attached using either liquid nails or special furniture nails with countersunk heads or without them at all.
At this point, the installation of the doors can be considered complete. We can also say that according to these instructions, a folding door-book is also installed. The only difference is the process of assembling the door leaf itself.
Interesting ways to use sliding systems
Sliding door blocks are installed today in rooms of different types: in the nursery, bedroom, study. Installing doors on rollers or rails allows you to implement various interior solutions. For example, you can use a similar system as a wardrobe, separating part of the room. This is an ideal option for both large and small spaces. Allows you to significantly save money on the purchase of a full-fledged wardrobe. Also, the door structure can serve as a functional partition between the bedroom, study and loggia.
What is needed for high-quality installation
Before you begin installation, you should prepare everything you need. Then the work will go faster and you will be able to avoid fuss, during which serious mistakes can be made.
To install a sliding door, you will need:
- wooden beam;
- open-end wrenches;
- screwdrivers;
- building level;
- screws;
- milling cutter;
- drill;
- self-tapping screws;
- saw.
Naturally, you need a door set consisting of a leaf, rollers, guides, handle, trim and latch.
How to install a sliding door: step-by-step algorithm of actions
Step-by-step instructions describe the installation of sliding interior doors with your own hands. It is presented below:
- Dismantling the old door structure.
- Preparing passage for a new door.
- Attaching the upper guides.
- Assembling carriages. Attaching limiters.
- Creating a groove at the bottom of the door leaf.
- Fastening to carriages.
- Door leaf insert.
- Decorating the door to give it an attractive look.
The installation procedure is described in the passport. This document is included with each door set upon sale. To understand how to install sliding doors, it is worth considering each step of the instructions in more detail.
Removing the old door
The door leaf needs to be removed. Remove the trim and awnings from the box. After this, the frame is dismantled. If the box is securely attached and does not interfere with the canvas running on the rails, then you can leave it.
Working with aisle
The door structure must be installed in a high-quality opening. Therefore, the passage needs to be leveled, all cracks filled, and differences removed. It is especially important that the top and bottom of the passage are parallel to each other and the floor covering. The deviation should not exceed 5 mm. The evenness of the side parts of the passage is also important.
A new box is placed in the prepared opening. Level it with special small wedges. The frame is fixed with screws.
Installation of the upper guides
You need to attach the canvas to the finished passage with the frame and mark the upper border with a line. It is necessary to add 0.7 cm upward to the intended line and draw a parallel line. This is where the timber will be installed. The beam is secured with self-tapping screws. A rail will be attached to the lower end of the beam. Self-tapping screws are used for this. First, the rail is slightly fixed. Check its straightness. And only then is it finally secured.
Assembling carriages, installing limiters
After securing the upper guides, the rollers begin to be mounted. The bolts are inserted into the carriages so that they protrude slightly from the hole. The carriages are launched into prepared rails. They look at whether they move unhindered. Stoppers should be placed at both ends. They will prevent the track from accidentally leaving the rails during careless movement. Rubber shock absorbers should be directed inward.
Creating a groove at the bottom of the door leaf
To create a recess in the lower end of the sash, you need to retreat 1.5 cm on both sides. Holes are drilled. Their depth should be two centimeters, and their radius should be 0.35 cm. A groove for the guide in the middle is selected between them. The depth of the recess should be 1.8 cm. The width should exceed the width of the guide by 0.3 cm. It is impossible to create a perfectly even groove. Therefore, the slats are mounted in a U-shape.
Attachment to carriages
It is necessary to retreat 0.2 cm from the side borders of the canvas. The fasteners are fixed to the carriages in the center. The cutouts on the brackets in the form of a semicircle should be directed towards the wall.
Hanging the door leaf
It will not be possible to install the sash yourself. It is necessary to ask a family member to help. Next you need to do this:
- Place the canvas on the rail. Carefully connect the carriage bolt on the right to the notch on the bracket. During this, the sash must be lifted.
- Place the end of the bolt into the hole in the adjusting nut.
- Fasten the brackets to the carriage bolts, but not completely.
- Install the bottom rail into the notch. You need to move the bottom part vertically. Place the door leaf horizontally and move it to the open position.
- Measure the opening length. Make marks using a regular pencil.
- Establish a gap between the side of the passage and the panel. For this purpose, the lower part of the sash is moved aside and a mark is placed in the place of the knife. The distance should be up to 0.5 cm.
- Remove the sash. Tighten the guide at the bottom with self-tapping screws.
- Align the notch in the end of the blade with the rail. Hang the sash. But do not tighten the nuts completely.
- Set the gap between the panel and the floor covering by loosening or tightening the adjusting bolts on the carriages.
- Screw the nuts until they stop. It is important that the bolts do not turn.
Decorative design
The assembled door should be decorated to give it a more attractive appearance. Platbands are used for this purpose. The handle and latch are usually attached at the very end.
Materials and tools
You will need the following tools:
- tape measure, ruler, square and pencil;
- jigsaw or circular saw;
- screwdriver;
- drill;
- drills of different diameters for wood and concrete;
- self-tapping screws;
- roller mechanisms;
- construction plumb and level;
- milling machine;
- sandpaper or sander;
- chisel and hammer.
Canvases can be made from the following materials:
- plain or laminated chipboard;
- MDF;
- strained glass;
- solid wood;
- combination of several materials.
The weight of the structure depends on the material of manufacture. To install sliding doors with your own hands, you need to select mechanisms based on this indicator. The material for the door leaf is selected based on the owner’s budget and the functional purpose of the door.