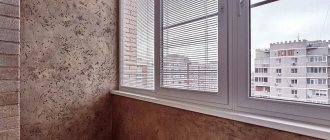
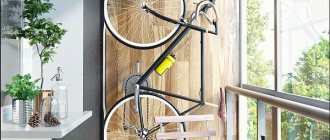
Balconies and loggias are part of our home, which is its continuation into the street space. It is quite natural to want to make it pleasing to the eyes, comfortable and cozy. Plastering a balcony is one of the most successful means of accomplishing this task. Decorative plaster on the balcony (like any other thing) has its own difficulties and life hacks.
Types of decorative plaster
Which plaster is better to choose for a balcony? To get your bearings, it’s enough to answer a simple question: how do balcony conditions differ from indoor conditions? First of all, these are temperature changes (including up to tens of degrees below zero), increased humidity or dryness, aggressive substances contained in city air, direct sunlight, exposure to precipitation (rain, hail) on unglazed balconies.
These are quite outdoor conditions, so for plastering loggias and balconies, choosing facade plasters is the right decision. Further in the article we will talk only about plaster compositions for facades (including universal ones).
Plaster is a type of building material that begins by mixing components into a single solution, similar to a viscous dough, which, due to the hardening of the base - the binder - turns into artificial stone.
Accordingly, based on the main binder, the following types of plaster are distinguished:
- mineral;
- silicone;
- acrylic;
- silicate;
- polymer.
Types of decorative plaster
Mineral plasters
Mineral plaster compositions can be considered old-timers. They have been used since ancient times. So the oldest - gypsum, lime, cement - solutions have been tested by time, and with the development of organic chemistry they have been enriched with new properties.
Gypsum plaster is used as leveling or decorative. The material is environmentally friendly, plastic, easy to form, allowing you to create the most complex reliefs. It hardens and gains strength very quickly. It has high adhesion - firmly adheres to almost all types of substrates. Allows walls to breathe.
The downside is the ability to absorb moisture and, as a result, lose strength. To increase resistance to water, modifying hydrophobic additives are introduced into the composition, and water-resistant agents are applied over the gypsum coating. Gypsum plaster on a balcony or loggia is used only in case of glazing.
Lime plaster is slightly more resistant to moisture (needs the addition of hydrophobic modifiers). Eco-friendly, highly plastic, vapor permeable. It has a bactericidal effect, so it is not favored by fungus, rot and mold. Less durable. Used for rough finishing and as decorative. Only for heated glazed loggias.
Cement, or rather, cement-sand, is the most durable of mineral compounds. The main binder for decorative mortars is white cement. Not afraid of dampness or repeated freezing. Durable. To increase plasticity, plasticizers are added to the composition. Also used for roughing (leveling) work.
Mineral compositions are fire resistant. Available according to market availability and cost. There are complex compositions that have two or more types of binders, for example, cement-lime, lime-gypsum, cement-polymer.
A common disadvantage of mineral coatings is the ability to crack due to vibrations and seismic influences. The compositions can be tinted, however, when drying, the color fades greatly, so mineral plaster coatings are often painted at the finish.
Acrylic
Acrylic compositions are based on acrylic resins. They form an elastic, moisture-resistant coating that can be washed with soap. Durable. Unpainted and tinted compositions are available. The disadvantage is its instability to fire, as well as the ability to accumulate static electrical charges. Therefore, they collect more dust than other species. Inferior to mineral compositions in terms of resistance to UV rays, price and vapor permeability.
Fake diamond
Imitation of rough stone
It is irrational to use natural stone as finishing, as it is too heavy. A good alternative would be an artificial one, which looks no less elegant. It helps to create an amazing look for a room decorated in any style, from classic to country, techno or modern.
Imitation of brickwork is especially popular in the interior decoration of balconies. It looks elegant on the external wall of both the facade and the partition. Creates a cozy and peaceful atmosphere.
False fireplace
Choose a building material that suits your interior and climate. Weigh the disadvantages and advantages of each type of raw material. Be interested in its properties and qualities in different environmental conditions.
It’s not enough just to choose a material. They need to properly and aesthetically tile the room. Before starting work, we recommend that you carefully study the technology of masonry and cladding, or hire a specialist.
This way your balcony will become a comfortable room where you can relax with a book and a cup of aromatic tea. To make the space seem larger, use special techniques to visually increase the space when creating the interior. Remember, the size of the loggia does not matter - any area can be turned into a cozy corner for work or relaxation.
Watch this useful video to help you choose the right building material for your apartment:
Advantages of decorative plaster
Compared to other types of finishing, such as wallpaper, lining, plastic panels, decorative plaster on the balcony is advantageously different:
- non-flammability;
- long-term operation with preservation of properties;
- preservation of color in the sun;
- high resistance to abrasion and impact;
- good compatibility with most decorative materials;
- saving space due to the absence of a frame;
- solidity.
In addition, decorative plaster finishing allows the walls to breathe, is repairable, and “off the charts” in terms of the quantity and quality of possible effects and color palette.
Just think about the opportunity to create a unique design with your own hands to your liking!
How to apply
When the walls are prepared accordingly, we begin to give our balcony a new look. The application steps are as follows:
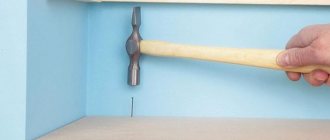
- Cover the balcony door and baseboards with masking tape to prevent plaster from getting on them.
- Next, the decorative mixtures are diluted according to the instructions provided by the manufacturer (if ready-made ones are not used), strictly observing the recommended proportions. They are usually mixed with a drill with a special “mixer” attachment. At the same stage, if necessary, color is added.
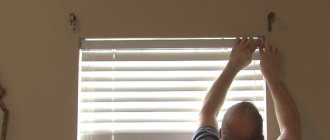
Technology of applying decorative plaster - The finished composition is applied with a wide spatula or a smooth stainless grater, moving from corner to corner, from bottom to top. Make sure the layer is even. Craftsmen do not recommend taking breaks during work - then joints may be noticeable.
- When plastering and subsequent drying, the finishing on the balconies must be protected from the sun, wind, and moisture. Complete drying time is about two days. If pigment was not previously added to the mixture (some types of plaster do not provide for this), you need to paint the surface with interior or facade paint. We do this using a roller, in one pass.
Note. In some cases (if finishing particles can crumble), it is better to pre-treat the surfaces with a colorless primer before painting (we also wait for it to dry completely).
At the final stage, the decorative plaster is coated with varnish and wax (glossy, matte, waterproof or dirt-repellent). This process is called glazing.
https://youtube.com/watch?v=SYlxS75gY0U
Features of plaster for cold glazing
Cold glazing imposes a number of conditions for finishing. When you open the door, warm air comes out of the room along with moisture, which condenses on cold surfaces, so with cold glazing, before plastering, it is recommended to treat the wall with either waterproofing plaster or a water-repellent primer. Do not keep the door to the room open with the windows closed.
Plastering work should be carried out at an air and surface temperature of at least 8 degrees. It is important that this temperature is maintained the entire time the plaster coating gains strength.
When choosing a plastering option, take into account the possibility of subsequent work to insulate the balcony space.
Warm plastering of the balcony
Warm balconies and loggias are already similar to indoor spaces; they are not threatened by the external climate. For decorative plaster on the loggia, compositions for interior work are suitable.
You can make a glazed balcony warm by covering it with sheet insulation. Often, polystyrene foam, foil-coated insulation foam is used for this, or walls are insulated with foam plastic. Expanded polystyrene, unlike mineral wool, will not cause condensation to accumulate on the walls.
It also does not require a frame to be installed. The sheets can be attached (glued to the wall or attached using dowels with disc-shaped caps). The sheets themselves are quite rigid and durable. Glue the insulation onto mastic, plaster mortar or foamed polyurethane glue (it also seals the joints).
First, the ceiling and floor are insulated, then they move on to the walls.
Stages of insulation and plastering of balcony walls:
- The walls of the balcony (or loggia) are first prepared (preparation is described below).
- Grooves are punched under the electrical wiring. Lay the wire, install sockets and switches.
- The wall is treated twice with a primer. Dry.
- Sheets of insulation are attached to the outer walls of the balcony/loggia. Vertical seams are made offset, for which the overlying horizontal rows of slabs are slightly shifted. The seams are sealed. The surface of the sheets, if there are protrusions, is leveled by grinding with a special grater. First, the insulation sheets are mounted on the outer fence, then on the side walls. The wall of the house itself is insulated only if it does not retain heat well in the room.
- If the front wall “collapses” onto the street, then triangular areas are formed on the side walls, which cannot be covered with rectangular sheets. They are measured, triangular inserts are cut out, installed and sealed with foam.
- All work is controlled using a level and a square, preventing the formation of large gaps.
- A leveling plaster mortar is applied on top of the expanded polystyrene, and a fiberglass reinforcing mesh is applied, pressing it into the mortar layer. When the plaster solution has dried, apply a leveling layer and rub it in after it begins to set.
- A smooth wall of a house is usually plastered.
- Before finishing, the rough material is thoroughly dried. If painting or wallpaper is planned, the laid layer after rubbing is sanded or a layer of putty is applied and smoothed. This is not necessary for applying decorative plaster composition (with the exception of Venetian).
Successful examples in the interior
Any balcony or loggia with decorative plaster applied looks stylish and elegant.
In order for the apartment owner to imagine the design options for outdoor premises, we can note the advantages of different coatings:
- Venetian plaster looks good on the walls. It gives a balcony or loggia true European splendor and visually expands even a very small space.
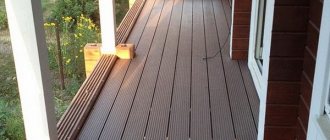
- Fine-grained, bright plaster appears to be decorated with genuine taste. The floor and walls of the balcony echo each other with their original texture.
- Finishing the balcony with decorative stone in combination with decorative plaster - this option is always appreciated by professionals.
- The decoration of the balcony in the style of the cozy atmosphere of a London coffee shop is reminiscent of a scenic drawing from a canvas of a genre painting by a British artist. In this poetic spirit, any outdoor space always looks impressive and original.
- Bark beetle plaster with shallow decorative grooves visually gives the coating volume and a pleasant piquancy.
Finishing a balcony with decorative plaster has numerous advantages. Therefore, it is recommended to choose it when carrying out repair work on external premises.
Tools
The craft of plaster has developed over the centuries. During this time, masons and plasterers developed the most convenient form of tools for applying and processing mortar. So you will need the usual tools and equipment for plastering. First of all - a trowel. It is convenient to apply and smear the solution, as well as form a pattern.
In addition to this you will need:
- spatulas;
- roller;
- brushes;
- grater;
- sponge;
- rule;
- plumb line or level;
- container for plaster mortar;
- mixer;
- masking tape;
- stamps or other improvised means for applying a pattern;
- cutter (for cutting sheet insulation);
- rags.
Very useful video, information on the tool is towards the end of the video.
Technologies for applying decorative plaster
Beginners will need information on how to properly plaster a balcony. All work is carried out in suitable weather. The timing of applying the plaster finish is chosen so that the temperature is kept at least +5 °C. If direct rays of the sun fall on the balcony, then the work site should be protected from them. Precipitation is also prevented from entering not only during application, but also in the first days, while the solution sets and gains strength.
Pay attention to the instructions on the packaging. All steps must be followed accurately. This way you will ensure the quality of the finished coating.
Plastering work includes a number of successive stages:
- preparation of the base;
- preparing the solution;
- applying the solution;
- finishing.
Surface preparation
- Remove (if any) the old coating: wallpaper, whitewash, paint, peeling plaster.
- The presence of dust on the wall being plastered sharply reduces the adhesion strength of the mortar to the surface of the base. Therefore, before plastering, dust must be removed.
- Grease stains and rust can “seep” through the plaster coating and protrude onto its surface, so before plastering they are removed using special means. Mold pockets are also removed.
- Metal embedded parts (if they cannot be removed) are insulated. To do this, they are coated with insulating compounds, such as oil paint.
- The seams in the brick wall are deepened by 1 cm, after which the surface of the masonry is cleaned (scratched) with a metal brush. Notches are made on smooth concrete.
- The cracks are “healed” with cement mortar. A reinforcing mesh is placed over large cracks.
- Waterproofing is done in places where water can reach.
- To increase the adhesion strength of the mortar to the base and to strengthen the surface of the wall, it is primed twice with a deep penetration compound.
- After the entire set of measures, the surface is well dried.
- The platbands of windows, doors, recesses for sockets and switches are covered with masking tape so that the solution does not get on them. The electrical wiring is de-energized.
Finishing of surfaces from the inside
After plastering the walls on the balcony is completed, a decorative coating should be applied. For this purpose, varnishing, waxing or painting is often used. The application of paints and waxes gives the walls a more pleasant, attractive appearance. If work is carried out on an open balcony, high-quality painting will protect from rain. In addition, the paint film will make sharp protrusions less noticeable.
You should always remember: the material for the finishing coating is selected to match the base of the plaster composition. If it is acrylic, then the dye used should be the same. All work is carried out in one or two passes. The paint is applied with a soft brush only after the surfaces have completely dried.
Advice! To cover plastered walls, it is recommended to use tinted, colorless varnishes, since they are easier to match to the main component of the plaster mixture.
A suitable material for the finishing coating is selected depending on the base of the plaster composition used Source vplate.ru
Caring for decorative plaster
Complicated, backbreaking maintenance of a plastered wall is not required. Dust is removed from the surface. If the wall becomes dirty, wash it with a cloth, sponge or soft brush with warm water. Detergent is added to the water.
You learned how to design the interior of a balcony and loggia with your own hands using decorative plaster solutions. We learned how to choose the material suitable for plastering work and what tools will be needed. There is little left - to get down to business and gain experience in doing the work. This stage is valuable: you acquire new skills, and your space gets a unique design.
Types of textures
It should be noted that all the plaster solutions presented above form the same textures on the facade walls of the house. Namely:
- Fur coat. This textured finish is independent of the mortar content. The method of application is important here. Therefore, to form a fur coat, they try to use plaster mixtures that contain fine fillers.
- Bark beetle This type of finishing, on the contrary, depends on the fractionation of fillers. The larger the granules present in the material, the more clearly the texture and intensity of the relief is formed.
- Lamb. This mixture also contains fillers, but not just one fraction, but several. Therefore, a lumpy surface forms on the wall, reminiscent of curls on a sheep’s wool.
- Cereal or pebble plaster. The composition includes pebbles of the same large sizes. This plaster forms a finely lumpy surface.
- Mosaic, also known as plaster with crumbs of decorative stone. Included in the group of silicone or acrylic types. For this purpose, transparent resins and stone chips are used. Essentially, a rock ripple is formed on the wall.
Varieties of textures of facade plastersSource nashaotdelka.ru