Mulwatt
7008 0 4
Mullvatt September 13, 2016Specialization: Capital construction work (laying a foundation, erecting walls, constructing a roof, etc.). Internal construction work (laying internal communications, rough and fine finishing). Hobbies: mobile communications, high technology, computer equipment, programming.
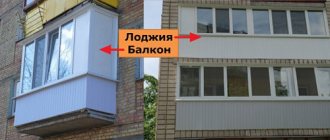
Tiles are an elegant way to decorate a balcony.
One of the most effective ways to decorate balconies and loggias is to tile them. However, due to the specific microclimate in this room, you must be very careful in choosing the material, otherwise this coming spring you will be disappointed in this finishing method. So, what kind of tiles are suitable for the balcony on the floor and possibly walls?
I dedicate today’s article to covering this issue.
Is it possible to lay tiles on the balcony floor?
Before we consider in detail all the nuances of laying tiles on a balcony, we will first figure out whether it is possible to lay tiles on the floor of a balcony/loggia. To do this, we will formulate the requirements for the floor covering of the balcony.
Flooring requirements
The general list of requirements includes the following items:
- low specific gravity is the main indicator due to limited loads on the balcony;
- resistance to sudden temperature changes, including freezing (the material must be frost-resistant);
- low hygroscopicity and complete absence of water absorption;
- high level of resistance to abrasion (wear) and deformation under the influence of natural factors;
- easy care;
- non-slip surface.
Is it possible to lay tiles on the balcony?
The tiles meet almost all of the above requirements for the flooring of a loggia/balcony. The only thing you need to pay special attention to is the weight of the floor pie in a glazed balcony and the surface of the tiles in an open one.
The walls and double-glazed windows place a serious load on the balcony slab of a closed balcony. Therefore, laying tiles on a leveled surface with cement-sand mortar is questionable: you need to consider the weight load of the walls, double-glazed windows and floor on the balcony. Practice shows that a screed on a balcony under tiles 4-5 cm thick is incompatible with any porcelain tiles and tiles more than 11 mm thick - the mechanical load becomes critical and when several people go out onto the balcony at the same time, something irreparable can happen: a collapse.
On an open balcony, any type and type of tile can be laid on a screed up to 7-8 cm thick. But there is another problem: the slipperiness of the material, which is aggravated by the need to arrange a slope of 3-4o for rainwater to drain. To minimize the risk of injury from a fall, you should purchase satin porcelain tiles or grooved ceramic tiles. Clinker tiles work well.
Main advantages of tiles
The interior decoration of the balcony must take into account the operating conditions: if we are talking about an open structure, then all finishing materials must be frost-resistant. Gypsum tiles are used only on closed balconies, as they are negatively affected by high humidity. That is why ceramic tiles on the balcony are most often used for all surfaces, which have the following advantages:
- high frost resistance;
- high strength;
- low water absorption;
- a wide range of;
- ease of installation;
- durability.
Ceramic tiles on the balcony are a great opportunity to make high-quality repairs that will last for many years. By using this material on the balcony floor and walls, you can reduce operating costs and greatly simplify cleaning.
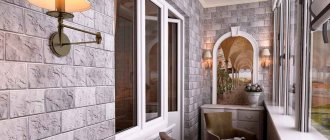
Brick wall to be painted
If the wall on your balcony was originally made of brickwork, it can be painted in any color depending on the intended design.
For interior work on the loggia, it is better to purchase paint that does not emit harmful substances. In addition, it is desirable that the walls can be easily cleaned after treatment. Water-soluble as well as emulsion dyes have these properties. They apply well and dry quickly. Balcony walls covered with polymer, latex, silicone, and acrylic products look good.
There are so-called acrylate pigments. They stay on the walls for quite a long time and are easy to work with. Despite the high cost of such a dye, it will more than reimburse you for all your expenses later. In general, to paint brick-style walls on a glazed balcony, you can buy any paint you like.
Using brick finishing on the loggia can make this part of your apartment original and unique. This type of cladding allows you to embody a fashionable vintage style in the interior. At the same time, you can create any interesting images from different historical times. The imitation of brick walls is varied. It is enough to come up with an interesting idea for decorating a balcony, and then choose from the commercially available facing materials the most suitable one for its implementation.
.
For many people, the balcony is a favorite place in the apartment: a secluded space with a beautiful view allows you to relax your body and soul. Finishing the balcony with decorative brick will make this place unique, cozy and allow your imagination to run wild, because decorative brick can be used in a great variety of styles. In modern stores there is a huge selection of materials that vary in their physical and visual characteristics.
If you decide to use decorative brick or its imitation in your balcony design, this article will answer many of your questions.
Types and benefits
When you come to a hardware store, you will be surprised how many different building finishing materials look like brickwork. It is worth noting that finishing the interior walls of a balcony with real brick is not available to everyone: this material weighs a lot and not every balcony ceiling can withstand such a load. To implement a “brick” design, it is better to resort to the use of decorative bricks, which have many types.
Photo:
One of the easiest ways to imitate brickwork can be wallpaper with the image of the latter.
You can find high-quality material that is almost indistinguishable from natural brick.
Using wallpaper in the interior decoration of a balcony has a number of advantages: ease of installation - most people have been able to hang wallpaper since childhood, you need a minimum of auxiliary materials, gluing wallpaper is not the messiest thing. And in modern stores there is an assortment of wallpaper with images of any size, color and texture of brick. The cost of this finishing option is relatively low.
Read more about finishing the balcony with wallpaper here.
They even learned to decorate plastic to look like stone. With the help of a set of special decorative panels, the balcony will not be visually different from its counterpart lined with natural brick.
The panels are presented in the form of separate parts that are attached to the walls using screws or self-tapping screws.
Among the advantages are lightness, which will serve well if the balcony is not on the strongest floors; long-term preservation of aesthetic properties - unlike wallpaper, this plastic is less susceptible to temperature changes, moisture, rust, and has greater wear resistance. It is also an inexpensive material. Composing a composition from individual parts will allow, if necessary, to replace any of them.
Its varieties
Standard tiles for a loggia (balcony) are divided into main types, and each type has its own advantages:
- Tile.
- Clinker tiles.
- Cotto slabs.
- Porcelain tiles.
- Quartz vinyl tiles.
To make a ceramic product, sand, clay and related materials are used under high temperatures.
After preliminary shaping, the tile is fired in a kiln and then covered with a glazed mass (the last component determines the future color and texture).
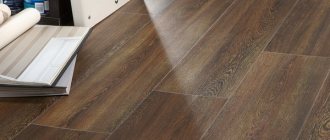
Tiled floor on the balcony
Standard clinker tiles are highly resistant to low temperatures and high humidity, and are also distinguished by their enormous wear resistance, which is significantly superior to other types of facing material. The price is cheaper than porcelain tiles.
Clinker board
The specific tile on the balcony, the photo of which can be seen just below, is called Cotto tile. Initially, it was produced exclusively without glazed mass and had a yellow or brown tint. Now glaze is used in its production, which affects the range of materials.
Cotto tile
Facing porcelain tiles are manufactured as follows:
- It is given its original shape in special containers.
- Next comes the mold processing under pressure.
- After pressure – firing at high temperature.
After all the procedures, the finished porcelain tile not only looks like natural stone, but also has similar properties, namely: increased strength, resistance to frost, sudden temperature changes and good resistance to a humid environment.
Porcelain tile options
The product is produced both without admixtures of the glazed mass and together with it. The latest type of porcelain tile has a good selection of textures and colors, which is preferable from an artistic design point of view.
The only disadvantage of porcelain tiles is their cost.
Quartz vinyl tile floors have fairly high performance, competing with other materials.
Quartz vinyl for flooring
The floor covering is practically not subject to wear and has good durability. This is due to the specific manufacturing process, including components consisting of 80% quartz sand. But wear resistance is ensured not by decorative material, as is commonly believed, but by a special protective film on top of the product.
What tiles are used on the balcony floor?
Ceramics have been used as a flooring material for centuries. Today, the floor on the balcony under the tiles can be laid out from tiles, clinker, or porcelain stoneware. These materials can also be laid on electric heated floors. Where should you choose, because each tile has its own advantages? Traditionally, tiling a balcony is done using ordinary tiles. This material attracts with its affordable price, variety of collections and practicality.
If increased demands are placed on the interior of the balcony, it is recommended to pay attention to a finishing material such as porcelain stoneware. Among its features is the presence of collections that perfectly imitate expensive types of natural stone, rare leather, and precious woods. The material is frost-resistant and has minimal water absorption.
Clinker tiles, collections of which in the Mediterranean style will create a cozy atmosphere, will add unique charm to the balcony. The advantages of this material include high strength, resistance to aggressive chemicals and mineral oils. If you plan to use the balcony as a home workshop, then this will be the right choice.
Features of decorative brick finishing
Brick finishing of balconies began to be used as a decorative element only in the mid-nineteenth century. For centuries, brickwork was also actively used in construction activities, but was not considered as interior decoration.
When using decorative bricks on a balcony, you need to take into account some features. First of all, when repairing a balcony, it is advisable to use brick only if the room has glazing.
Decorating a brick wall can be done using a variety of methods, among which the most popular are traditional painting, for example, white or purple paints. There are many other options.
For example, you can decorate a wall by aging each brick. This process is quite dusty, noisy and meticulous. However, imitation aging will allow you to create a magnificent texture on the wall, which will serve as a luxurious interior decoration.
Another way is to use various types of finishing materials . Currently, many manufacturers offer a fairly wide range of products, but the selection of one type or another depends on many factors that must be taken into account when carrying out repairs yourself.
So, one of the factors is the presence of glazing on the balcony. As a rule, a loggia is a separate room, open on one, two or three sides. In this case, the wall of the loggia is replaced by a parapet. The openness of the loggia means that it is more susceptible to atmospheric influences such as moisture, frost, sunlight and wind. In this regard, for loggias it is more appropriate to use simple painting or varnish. More rarely, they resort to choosing decorative plaster or laying ceramic tiles for the interior walls of the loggia.
If the balcony has glazing and is sufficiently well insulated, then the range of cladding technologies used expands significantly. In closed premises, popular finishing methods most often include the use of finishing materials that imitate the finishing of a balcony with decorative brick or stone.
For example, you can decorate a wall with wallpaper or beautiful wall panels. Wallpaper is the easiest and most affordable way of modern decor. However, finishing the balcony with brick panels, also called siding, is actively used by the population due to the relative cheapness and speed of the process.
Plastic siding performs two functions. It allows you to cover a wall, thus protecting it from external influences (snow, sun, rain and wind). This function is called utilitarian. Another important function is aesthetic, which allows you to bring a design idea to life.
The use of siding is relevant for balcony rooms located in panel houses.
How to choose tiles for a balcony
The material is selected based on the degree of openness of the balcony and operational characteristics. The latter include wear resistance class, weight, safety, and weather resistance. The set of properties depends on the tile production technology, the presence of a protective coating and the raw materials used.
Heavy flower pots on the balcony require wear-resistant flooring
There are five classes of wear resistance of floor tiles - PEI IV. Abrasion resistance increases from the first to the fifth class. For a balcony where traffic is low, material of the first two classes is suitable. It is also placed in bedrooms, living rooms, and bathrooms.
Advice. If a winter garden is installed on the loggia, forged and other furniture is installed that will be frequently moved, it is better to choose a third-class covering.
The porosity of the material determines its frost resistance (from B-III to BI). The denser it is, the more resistant to low temperatures, the lower its moisture absorption.
If there is no glazing on the balcony, choose a dense coating marked “BI”. Its moisture permeability does not exceed 6%. This means that when freezing, moisture trapped in the pores will not destroy the finish. For a balcony that is insulated or combined with an adjacent room, class B-II and B-III material is suitable.
The higher the resistance of floor tiles to wear and low temperatures, the greater their weight. It is calculated in advance based on the standards and the condition of the balcony slab. The load on it should not exceed 200 kg/m2. This takes into account the finishing, concrete screed, glazing design, furniture and people in the room.
Tiles in the interior of the balcony
Tiles on the balcony are not only a reliable covering, but also a decorative surface. It emphasizes the interior design and serves as a backdrop for furniture and floor accessories.
A balcony is a small room that is visually sought to be made larger and brighter. That is why when choosing a floor covering, the traditional rules are followed:
- for a dark room, light finishing material is preferable;
- on a small floor area, use elements measuring no more than 30x30 cm;
- a coating with a contrasting pattern is appropriate only on a spacious balcony or with plain wall decoration, neutral in color furniture.
Light floor on a long narrow balcony
You can decorate the balcony with tiles in classic, minimalist, hi-tech, modern, Moroccan, loft and Provence styles. Correctly selected colors and prints help to emphasize the style of the material.
For the loft style, a coating with imitation brick is suitable, for Provence - natural shades, with plant or floral motifs. In a classic interior, marble or granite flooring is appropriate.
Various options for laying the material help make the finish more decorative. For each of them, make a drawing diagram on paper, which is then transferred to the floor:
- staggered (offset) - the coating resembles brickwork, where the vertical seam falls in the middle of the finishing element;
- traditional - tiles are laid in even rows parallel to one of the walls so that they form clear, long seams;
- checkerboard - suitable for a two-color contrasting coating, the pattern resembles a chessboard;
- herringbone - when simulating wood, it resembles a parquet floor; diagonal - this is a classic option, but rotated 90 degrees relative to the walls of the room.
Methods for laying out floor tiles
If desired, you can create a whole panel on the floor from individual elements, but this will make a small balcony visually even smaller.
Features of brick veneers
At first glance, the so-called brick veneers differ little from clinker tiles. However, these are separate cladding parts, the material for which can be plastic, glass, leather, wood, clay or paper. You can cut them yourself or purchase them individually at the store. Brick veneers are intended for decorating one part of the wall of a balcony or a separate area in the room.
These tiles are glued to the wall, like other materials, the joints are sealed with mortar and smoothed.
Laying brick veneers
The places of fixation of veneers on the surface are preliminarily indicated by markings. During operation, each of the artificial bricks can be further “aged”, creating erased areas or cracks.
Types of installation
There are quite a few ways to lay tiles, other than standard laying. All others involve complications in the installation process. But the result will ultimately be unique and much more interesting from a design point of view.
Standard
Installation is carried out along the walls, this is the easiest way. The main condition is the evenness of the base. But even here, before you start laying, you should first make markings. Since on an elongated balcony the walls are most often free. It will be ideal if tiles of the same size are laid along opposite walls. Therefore, installation should begin not with whole tiles, but with cut ones of a certain size.
Takeoff
For this type of installation, a rectangular format is more suitable. Separating means installation with offset seams. Therefore, the square option is not very suitable for such a task. In construction stores today there are enough floor tiles in plank format.
Diagonal
The diagonal on the balcony will visually expand it, but gluing the tiles is associated with high costs. Since cutting tiles diagonally results in more waste.
Chess
The principle of a chessboard can be easily repeated on the balcony floor. To do this you will need tiles of two colors. Installation is done standard or diagonally.
Christmas tree
You will need material from a long format. The classic Christmas tree is a simpler option, but to add some zest, you can also choose a French Christmas tree. In addition, such options are available for sale.
What tools and materials will be needed
In advance, before starting the process of installing tiles on the balcony, you will need to first stock up on the most important tools, check them in action, practice and test them in their work:
- Laser level; in extreme cases, a set of construction bubble levels will do: a long one and a half meter and a short one half meter. Working with a laser without experience is quite difficult, and given the very cramped conditions and small size of the room, a modern device will allow you to lay tiles on the balcony quickly and with minimal errors;
- Grinder or table tile cutter. You will have to cut tiles or porcelain tiles right here, on the balcony, so this needs to be done quickly and as accurately as possible, but manually adjusting the material is simply unrealistic.
In addition, you will need at least a set of mounting crosses, a container for glue, and a rubber hammer. If the process involves laying tiles on the balcony with a lining layer, then you will additionally need a jigsaw, wooden slats, and a carpenter's square.
The main problem with the floor is the uneven surface with numerous slopes, so there is nothing to do on the balcony without a level.
In addition to the ceramic tiles themselves, you will need to prepare the following for the balcony floor:
- Primer;
- Film waterproofing;
- Polyurethane foam;
- Tile adhesive;
- Grouting compound, better for epoxy or polyester acrylic base.
It is clear that the specific set of materials depends on what base, concrete or wood, it is planned to lay the tiles on the balcony. However, the main operation, namely gluing onto the base, will need to be mastered in advance, since redoing and correcting mistakes will be extremely difficult.
Execution of work
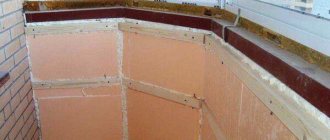
Let's look at how to lay tiles on the floor on a balcony with your own hands. You need to start, as always, by preparing the base; it should be smooth and clean.
Various methods are used to level the floor:
- Wet screed. To perform the work, cement mortar or self-leveling mixtures are used. Before pouring the floor, waterproofing material and a layer of insulation are laid on the slab.
- Dry screed. A dry screed using expanded clay allows you to simultaneously level and insulate the floor. Gypsum boards are laid on top of the dry screed.
- Lags. Using wooden blocks and height-adjustable racks, logs are laid, on top of which a subfloor made of gypsum fiber boards is laid.
Advice! Having finished leveling the floor, it is necessary to cover the surface with soil, this will increase the quality of adhesion.
General installation recommendations
Before carrying out work, it is necessary to decide on the laying method, which allows not only to simplify the laying process, but also to calculate the required number of tiles. The most popular installation schemes:
- The standard method is to sequentially lay square tiles while maintaining vertical and horizontal joints.
- Diagonal method - the tile is rotated 45 degrees and cut off at the corners. This method implies increased consumption of tiles.
- The “runaway” method - the tiles on the balcony are laid in a shift, simulating brickwork.
Buying tiles.
It is important to buy tiles with a small margin. Before purchasing, tiles must be checked for defects and chips. You also need to pay attention to the thickness of the tiles, namely, that they are not different. The packaging must have a frost resistance mark.
Surface preparation.
All work surfaces are cleaned and leveled. If the floor is in poor condition then it is necessary to screed. Another important condition is a strong parapet. If necessary, the parapet is reinforced with foam blocks or bricks. To complete the preparation, the surfaces are primed using a roller. Preparation of tools and materials.
Required tools:
- A hammer drill with a mixer attachment for mixing the solution;
- Building level;
- Grinder with a diamond wheel for cutting tiles;
- Spatula with comb;
- Rubber spatula.
Necessary materials:
- Adhesive composition;
- Plastic crosses;
- Grout;
- Self-tapping screws for the guide profile.
Preparation of the solution.
One of the important points when laying tiles is purchasing high-quality adhesive. We recommend choosing the composition of the German manufacturer Ceresit and Knauf.
According to the instructions on the package, mix the adhesive until it reaches the consistency of thick sour cream. The glue consumption is determined according to the information on the bag.
Artificial aging of brick
Old masonry is characterized by chips, cracks and the absence of some bricks.
Note!
- Window sill on the balcony - functions and advantages of a window sill on the balcony. Types of window sills. Choice of material. Methods of fastening and installation (photo + video)
- Decorating a balcony with stone: 145 photos and video description of how to decorate a balcony in a stylish and beautiful way
Living room with a balcony - 115 photos of the best ideas and beautiful combinations of a balcony with a room
For artificial aging, each brick must be treated. They chip randomly. Sandpaper wipes all the bricks.
If desired, the seams are rubbed with moss or earth. To fix the result, cover the wall with a couple of layers of acrylic varnish.
Floor installation instructions
This example describes the standard installation method. First of all, we make markings. Laying should begin along the parapet from the far corner of the balcony slab.
- Apply the solution to the selected area with a thickness of no more than 3 mm. To avoid drying of the solution, it is recommended to apply the solution to an area of no more than 1 square meter.
- Excess glue is removed with a notched trowel and the surface is leveled.
- We prepare the tiles and, if necessary, cut them to the required size.
- The mortar is applied to the back of the tile and leveled with a notched trowel.
- Press the tile evenly onto the prepared surface and check the evenness with a level.
- Then, by analogy, subsequent tiles are laid. To ensure symmetry and evenness of the seams, plastic crosses are used. If porcelain stoneware tiles are laid, then seams are not needed since you need to achieve a monolithic surface.
- Leave the floor to dry for a day.
How to lay tiles on a balcony with your own hands
There are two main ways to install tile flooring:
- Directly onto the concrete floor;
- On a sub-base or refinished plank floor.
The first option is considered the fastest, most durable and least labor-intensive to work with. The only inconvenience is that you have to put up with the uneven surface of the concrete slab.
For your information! On all open balcony floors without exception, the concrete slab always has a slope of several degrees to ensure the drainage of rain and melt water. Sometimes the slope occurs in several directions at once, it all depends on the quality and condition of the console.
The second option is simpler, but more labor-intensive. Tiling a balcony will require laying a plywood or plasterboard base, which leads to an increase in the height of the floor level and additional financial costs.
How to lay tiles on a wooden floor on a balcony
If you decide to lay the cladding without dismantling the old plank base, then the wooden floor must be properly cleaned, freed from old paint, and sanded to “white” wood. In addition, at the stage of trimming and stripping the floorboards, it is necessary to check the horizontal position of the wooden base, otherwise the tiles on the balcony will lie at a slope.
The wooden floor is sealed with plywood or plasterboard
The wooden floor will need to be treated with a protective impregnation that protects the wood from rotting, painted and a waterproofing film applied. There must be vents under the floor to ensure normal pressure of water vapor and condensate, otherwise the wood will rot.
The next step is laying plasterboard sheets; moisture-resistant plasterboard with a thickness of at least 18 mm is used for lining. The joints between the sheets are sealed with silicone, and the seams around the perimeter are sealed with polyurethane foam. The material itself is laid on a wooden base without screws.
Ceramic tiles on the balcony floor must be laid using acrylic glue. But it is best to use silicone-based elastic compounds. The same material, but of the appropriate color, matched to the tone of the floor covering, is used to grout the joints.
Laying tiles on a concrete floor
First of all, the stove on the balcony must be thoroughly cleaned of debris, dust, washed and dried. Next, we apply an acrylic primer to the surface of the concrete floor, which improves the adhesion of the tile adhesive and tiles.
The process of gluing tile material to concrete begins with measuring the floor surface. You can use a laser level or string several paint cords aligned with the horizon. It is necessary to find the highest point on the surface of the concrete floor. It is from this point, or almost from it, that you will need to start laying tiles or porcelain tiles.
The highest point of the surface is usually located under the wall near the balcony door
After the highest point has been found, we move the laser beam or cords from it 17-20 mm higher. To reliably glue ceramic tiles at the highest point of a concrete floor, you will need at least 5-8 mm of tile adhesive plus 10-12 mm of the thickness of the ceramic itself, so you get the desired value of 17-20 mm.
We begin laying the tiles from the far row, right under the fence. The top point, as a rule, is located under the wall of the house, so we place the first tile on the floor in the corner opposite, photo.
Since the floor was not leveled, the layer of glue turns out to be quite large
For installation, you will need to apply a fairly large amount of glue, the layer thickness is approximately 15 mm. We leave a small gap, 4-5 mm, and lay the tiles in place, after which we level them using a building level or a laser in two mutually perpendicular directions along the horizon.
Next, you will need to lay the entire row under the balcony railing to the end. When laying tiles, do not forget to install seam crosses. At this point, work was stopped for at least two to three days until the glue completely sets. We lay out the second and third rows in a similar way on the concrete floor of the balcony using a snake or parallel strips.
Deciding on the purpose of the balcony area
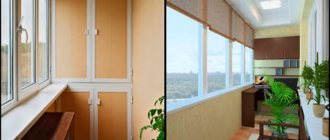
Before you start designing a loggia with panoramic glazing (or balcony), you need to decide how the room will be used. There are many options (playroom, bedroom, workshop, etc.). However, the main purpose of large windows is to provide access to a panoramic view of the streetscape.
It is logical to use the balcony area for a relaxation room, a minibar, a tea or dining area, or an extension of the room. In the latter case, the balcony space can be one with the room (or living room, kitchen) or be separated from it by glass structures or a decorative partition.
White color in the interior relaxes and helps to adapt to an optimistic mood, provided there is good natural lighting. Source happymodern.ru
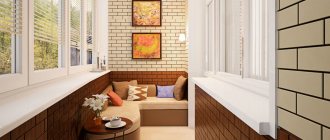
Rest zone
To create a cozy relaxation area on a balcony or loggia with panoramic glazing, you can create a corner consisting of a sofa and armchairs. Add a low table to them, where it will be convenient to drink a cup of tea or coffee or a cocktail.
Decorating a dining area on the balconySource modernplace.ru
Instead of standard chairs for the interior of a loggia with panoramic glazing, you can use the following types of furniture:
- non-massive low chair-beds (transformers), which can be easily unfolded and used as soft chaise lounges;
- frameless chillout sofa, consisting of poufs with and without backs;
- frameless sofa bed;
- a chair-mattress that unfolds directly on the floor;
- rocking chair (country version made of rattan, wood, metal, poeng with a springy base or papasan with a hemisphere seat);
- soft beanbags and beanbags;
- hanging chair;
- hammock.
Transformable chairSource carcostcheck.com Another transformer option with the ability to adjust the backrest positionSource static.tildacdn.com KresPad chaise longueSource static.tildacdn.com Chillout sofaSource chillone.ru
Chair-mattressSource livin.dk
Frameless sofa bed (modular transformer)Source yandex.net
Soft floor sofa without legsSource ph.sellprice.co
Papasan rocking chair with spring block and cushion seatSource inmyroom.ru
Bean bag chairSource lookernew.com
As a table for decorating a balcony with panoramic glazing, designers offer small coffee models with one or more legs for the balcony lounge area. Some designs are equipped with drawers or open shelves.
When arranging a recreation area, one of the most important questions is what and where to place light sources. Lounge area lighting options:
- on the ceiling you can install LED spotlights in one or 2-3 rows, depending on its width;
- use chandeliers;
- place sconces on the wall.
Designer lampSource alicdn.com
To make it convenient to read or do needlework on the balcony, you can place a floor lamp or table lamp. LED strips are used for decorative lighting and creating soft, dim light. It is customary to place such devices around the perimeter on the ceiling and floor. Local lighting involves attaching strips to shelves, the bottom of furniture, railings, and window sills. Instead of monochrome strips, you can use RGB backlighting. The brightness and color palette parameters are adjusted using the remote control.
Night lamps that create a 3D illusion of a three-dimensional figureSource podari.name
Bionic styleSource warisanlighting.com
Balcony with bar counter
It's nice to spend time with a cup of coffee or a glass of cocktail at home at the bar and admire the street scenery that opens up through the panoramic windows. There are several options for how to place the rack. The most popular is with a tabletop moved directly close to the window.
Rack with shelfSource abitant.com
The bar table can be placed on the border of the room and the balcony, instead of a partition between them. Source static.tildacdn.com
To make stands, craftsmen use materials such as natural and artificial stone, glass, metal, acrylic, wood, and pressed boards (chipboard, MDF).
Mobile bar counter in industrial styleSource links-stroy.ru
The dining area in country houses is usually arranged on the terrace or veranda. The balcony is used as a place to relax, have tea or simply contemplate the beauty of the surrounding landscape and is not cluttered with furniture. Here you can place a compact coffee or tea table.
Rattan furnitureSource static-eu.insales.ru Sometimes the size of the balcony allows you to organize a spacious seating areaSource www.remontbp.com
Grouting joints
A day later, after the surface has completely dried, we proceed to grouting the joints. Grouts containing epoxy resins are considered universal because they have water-repellent properties and do not wear off quickly.
We select a grouting compound of a suitable color and mix according to the instructions on the package.
- Apply a small amount of the mixture to a rubber spatula and rub it into all the seams between the tiles.
- Excess grout is periodically removed with a sponge. In addition, this allows you to level the grout layer inside the joints.
- After the grout has dried, the surfaces are washed with a sponge.
At this point, the work on finishing the balcony with tiles can be considered complete.
Finishing touches
The main work on arranging the balconies is almost finished. Now the tiles need to dry completely. And this may take quite a lot of time. Especially if you designed a “cold” balcony, and not interior decoration.
After the glue has completely dried, you can begin sealing the seams. A special grout is used for this.
Grout for joints is applied to the tiles with a rubber spatula, which allows you to evenly fill the voids between the tiles.
By the way, today it is sold in such a wide range of colors that you can experiment. If you are a fan of the classics, then choose a grout of the same shade as the tiles for the balcony or loggia, or a little darker.
And if you want something truly unusual, then opt for a material in a contrasting color. The brighter it is, the more unusual your loggia will look. Friends and acquaintances will definitely appreciate it.
Remember the main thing, the atmosphere that will be present on the balcony and in the room adjacent to it, and the entire decoration of balconies in general, will depend on which tile you choose. If you want warmth and sun, then go for warm peach or pink tones.
And if you are a fan of laconic classics, then white, gray and black tones of tiles for balconies will suit you. They are always in fashion. So go for it, it all depends only on you and your imagination.
Source: dekormyhome.ru
Design options for balconies of different shapes
With the right selection of patterns on the tile covering, the room of a loggia or balcony can be seriously transformed, becoming brighter and more interesting. You can use the photo as examples of the design of finishing the inside of the balcony with tiles.
Tree
If you plan to use the balcony for light meals in the fresh air, choose wooden lining as finishing. This is a natural, eco-friendly material that, with its color and texture, will create the atmosphere of a country terrace. High-quality wooden lining is easy to install - its elements are equipped with special grooves, thanks to which the material forms a smooth surface without cracks. Repairing such a coating will not create any difficulties - it is possible to replace only the damaged part without dismantling all the others. Lining made of pine or spruce is a budget option, and if you are interested in the durability of the finish, choose oak, linden or aspen.
Large loggia in a new building, equipped in a club style
Wood on the ceiling of an insulated loggia
Decorating a balcony with wood is not exactly a budget option, due to the fact that wood requires expensive impregnations for weather resistance
Open balconies
An open, unglazed balcony is constantly “at the mercy of the elements”: sudden temperature changes, precipitation, direct sunlight - all this significantly tests the strength of the structure.
So the floor covering must be resistant to climatic and temperature influences, safe from a fire point of view, and easy to care for. These criteria include porcelain tiles, rubber and ceramic tiles, as well as PVC panels. Another suitable material that has recently appeared on the market is frost-resistant linoleum - pay attention to it.
Closed balconies
The floor of glazed balconies is protected from many harmful influences, so the choice of materials is wider. But do not forget that with cold glazing the problem of temperature changes does not disappear, and in this case it is necessary to use frost-resistant coatings. With warm glazing, you don’t have to think long about how to cover the floor on the balcony - literally any material will do.
Balcony operating conditions
The choice of coating is also determined by what the balcony is planned to be used for. So, if you want to arrange a work office, a guest room or a recreation area there, then the material must be resistant to wear and stress, safe for health, and easy to clean from dirt.
If you plan to use the room as a greenhouse, then you should think about protection from moisture, because when watering some “leaks” are inevitable. In addition, soil will constantly fall on the floor - which means the material should not get too dirty. And slide too, because it’s easy to slip on a slippery surface that’s also flooded with water. If the main purpose of the room is to store things, then you can get by with the simplest option that is resistant to intense loads - linoleum or tiles. Using something too expensive, ornate and decorative is simply not practical.
Solving possible problems
If you strictly follow the recommendations for laying tiles, difficulties are rare. The problem often becomes the presence of round sockets or other holes on the balcony. The hole is made with special nippers or a drill. Another problem that you may encounter when finishing a balcony is that the tiles do not lie evenly. The error is usually hidden in improper surface preparation. It is worth making sure that the walls and floor are perfectly level, using a level. It is important to completely remove dust using a damp cloth. Even a few grains of sand can disrupt the ideal plane.
Difficulties often arise when decorating corners or window sills. The use of plastic corners is unacceptable. The recommended option for decorating the corners is to use only tiles, carefully measuring every millimeter before arming yourself with a tile cutter and removing the excess.
Surface preparation
First you need to prepare the surface for installation. To do this, it needs to be leveled as much as possible and cleaned of dirt, dust and other unwanted elements. If there are large protrusions, they can be knocked down using a hammer drill.
Before laying the tiles, the surface must be primed. This is best done with a roller, and in hard-to-reach places - with a brush. You can start working in just an hour.