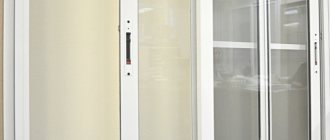
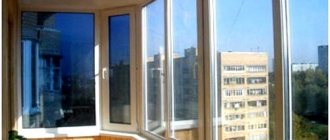
Sliding aluminum systems today have become the most popular type of glazing for balconies and loggias.
This is explained by the fact that this option is the most practical, easy to install and operate.
And besides, sliding glazing requires practically no space, since the doors move along guides, using the “wardrobe-compartment” system.
The latest sealing systems allow this to be done very hermetically, so the room on the balcony will be protected from all types of precipitation.
Modern guide structures provide improved sliding of the valves and delay the process of bearing wear.
The profile is coated with an external anti-corrosion layer using the electrostatic powder coating method, so such frames are durable, resistant to temperature changes and can be successfully used for 80 to 100 years.
How to assemble an aluminum sliding window
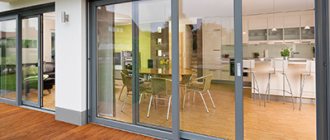
Sliding aluminum windows not only create a cozy atmosphere in the house, but also do not take up an extra centimeter of free space when opened.
Due to the strength of aluminum profiles, sliding windows are reliable and durable, and also have maximum light transmission. Such windows look great in any interior. Similar to a wardrobe, sliding windows are an ideal option for balconies and loggias. They do not interfere with free movement in a small room. You can arrange a whole greenhouse on the balcony, filling the window sill with flowers, without worrying about constantly rearranging the flowerpots when the window is opened. The sliding window sash is equipped with a special lock that secures the window in the closed position, protecting the apartment from dust and precipitation.
In this article we will take a step-by-step look at how to assemble an aluminum sliding window yourself.
The difference between a plastic profile and an aluminum profile
Metallic profile
Installed on hanging balconies with slabs up to 6 m long. Most often, the slab extends beyond the outer wall (the protrusion can be up to 80-90 cm) and is not able to withstand a load of more than 450 kg. It is dangerous to place any pieces of furniture on such a balcony, not to mention massive double-glazed windows with additional cameras.
For this reason, on most balconies in older buildings, aluminum profiles are installed (cold glazing method, there are no thermal breaks inside).
Ordinary glass is installed in metal profiles, and there is more space left on the balcony, because there is no need to attach additional structures (a plate to support the frames). If desired, the profile can be placed deep into the balcony, thereby expanding the area.
The service life of such a balcony is longer, because the structure is lighter and is practically not subject to loads.
Frame dimensions:
- Minimum – 40 mm, sash – 47 mm (for cornice and other structural parts).
Aluminum structures can be not only cold, but also warm.
Warm option: double-glazed windows, thermal inserts, glass with thermoregulation are installed. This increases the weight of the structure.
Unlike plastic, which often has one standard size, aluminum is more flexible and easier to install - if desired, the doors can be given any shape, such as round or triangular.
The dimensions of the aluminum structure should not be more than 2 m - otherwise the upper profile will sag and the doors will not open normally. If the window is too wide, the sash may unscrew and fall out.
If the dimensions still exceed the permissible norm, then the frame must be reinforced with bars, and the upper metal profile with plates. For additional support, a special holding visor is installed.
How to evaluate the skill of installers if you don’t want to install windows yourself
Contact several companies and ask them to take window measurements. They usually do not charge money for this work. In addition, you can find out the total cost of installation and compare the difference between the two companies.
Before purchasing, check the documents for the materials (certificates indicate quality).
Keep in mind that the cost of services will be higher if glazing is carried out on the upper floors - additional installation and covering of the canopy is required.
Plastic profile
A plastic profile is half as heavy as a metal profile. Before installation, it is necessary to take into account the condition of the building - the walls and parapet may not withstand the pressure.
For weak walls of a house, single-chamber double-glazed windows with a thickness of no more than 60 mm are suitable. Single-chamber packages differ in the number of glasses inside the frame.
The plastic in the section is empty and separated by partitions. The quality and thermal conductivity directly depend on the number of these voids - if there are few of them, it means more heat is retained. The voids perform certain functions: one ensures heat conduction, the second – water drainage, the third is responsible for the strength of the structure.
The number of cavities can reach up to 8.
In many frames, one of the compartments inside is reinforced with a metal frame. The frame can be closed, U-shaped or L-shaped.
The main function of the frame is to provide additional rigidity, protect the frame from subsidence, which can occur due to frequent opening of the sashes, and reduce the deformation of parts.
The metal frame regulates air flow and enhances resistance to sudden temperature changes.
In order not to make a mistake with your choice, look at the markings before purchasing - they are usually indicated on the inside of the frame. The manufacturer's brand is also indicated there.
The plastic should be smooth to the touch. The first sign of low-grade material is a rough, slightly grainy surface. Over time, such a window may turn yellow or become askew due to strong pressure.
Pay attention to the color of the frame - at first glance, the plastic is all white, but if you look closely, you will notice differences in shades. A high-quality plastic profile will have a uniform color.
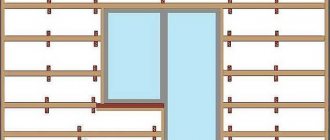
Types of metal reinforcement for plastic windows
An L-shaped frame is suitable for small windows; usually a long strip is laid between two walls.
In U shape, suitable for windows with a height of up to 190 cm, it reinforces the profile of three internal walls.
A closed (closed) frame closes four voids at once and greatly enhances rigidity. It is recommended to install if the loggia is very large; it is popular for installing panoramic balconies.
Double-glazed windows: number of chambers
If a two-chamber package has three glass compartments, then a single-chamber package has two, and between these compartments there is an air partition - air that retains cold and at the same time allows heat to pass through.
In a two-chamber package there are three air chambers, which means more heat is retained, but the load also increases.
The overall weight of the structure is affected by the thickness of the partitions. The larger it is, the heavier the plastic window. The minimum width starts from 60 mm and ends at 120 mm (usually for residents of the north).
Plastic is divided into classes A, B and C.
Class A includes frames with an external wall thickness of 2.8 mm and an internal wall thickness of 2.4 mm.
In class B, only the inner wall differs in thickness - from 2.0 mm (the frame retains heat less and can be damaged during transportation or installation. Installed in stores).
Class C includes frames with thinner walls. But such windows are also in demand - double-glazed windows are installed in utility buildings, warehouses and other industrial premises.
What you need to know before assembling aluminum sliding windows
Before assembling an aluminum sliding window, it is very important to inspect the surface of the glass unit and frame for the formation of cracks and scratches.
A sliding window found to be defective will be returned to the company where it was purchased.
When starting to install sliding aluminum windows, you need to carefully dismantle the old window with a window sill and prepare the window opening.
We recommend considering frameless glazing of a balcony or loggia as an option, and also pay attention to remote glazing of the balcony, which will help you increase the space. However, we should not forget about the disadvantages that this or that type of glazing has. For example, if you want your balcony to be warm in winter, frameless glazing will not work.
The wooden frame from the old window must be sawed in several places to make it easier to remove the structure from the window opening. Then, using a crowbar to pry the cut area, carefully remove it. The window sill is removed using a chisel and hammer.
Having dismantled the old structure, the remaining fragments of concrete and fasteners are removed from the window opening. Severely damaged or skewed openings are leveled with cement mortar and left until it hardens completely.
Before installing aluminum sliding windows, it is better to prime the opening.
Warm glazing
Of all aluminum systems, the share of warm glazing accounts for no more than 20%. Such low popularity is primarily due to the high weight of the structure and no less high price compared to plastic counterparts, despite the fact that the latter, as a rule, are superior to aluminum in energy efficiency. There are now quite a lot of specialized products available for the construction of translucent structures. Among all the diversity, the products of the Italian manufacturer NEWTEK (Newtek) and the joint German-Russian development ALUMARK are worthy of special mention.
NewTec NT 75 windows with thermal break made of polyamide
The strengths of the profile systems of these manufacturers include:
- High level of thermal insulation. The installation size for double-glazed windows allows you to equip window structures with infill up to 40 mm thick. That is, it is possible to install a high-quality double-glazed window with thick energy-saving glass and gas filling. The profile itself consists of three layers - two aluminum on the outside and a polymer in the middle. Such solutions significantly reduce heat loss, which allows them to be used in cold climates. A balcony glazed with a warm profile can become an addition to the room if heating is installed there.
- Good absorption of external noise. A wide multi-layer profile and soundproofing glass with an asymmetrical formula allow the installation of warm aluminum systems in noisy areas, for example, near active construction or busy roads.
- High structural strength. Aluminum systems are significantly stronger than even metal-plastic products, not to mention wooden ones. This allows them to be used for continuous glazing of balconies or in panoramic structures, without the risk of deformation throughout the entire period of operation.
Flaws:
- First of all, this is a lot of weight, compared to cold structures, which makes installation possible not on every balcony slab.
- Warm glazing made from aluminum profiles costs 2-3 times more than cold glazing. Its price is also higher than that of metal-plastic structures with similar thermal insulation characteristics.
Assembly diagram of aluminum sliding windows - general progress of work
Frame installation
Installation of aluminum sliding windows begins with installing the frame. The video below shows in detail the process of assembling the frame of aluminum sliding windows.
1. Basically, the structural parts of sliding windows come already disassembled, the frame is separated from the double-glazed window with fittings. Once the structure is assembled, the frame is freed from the glass unit and sashes, and with the help of wedges it is placed in the window opening and leveled.
2. Holes for fasteners are drilled along the length of the frame and the wall, into which screws are screwed in so that the double-glazed windows can be inserted back in the future. To avoid getting confused with the glazing beads, you can mark them with a marker.
3. If the gap between the side opening and the sliding window frame exceeds 5 mm, additional plates must be used.
4. The frame is attached to the wall with an anchor bolt or using an anchor plate. It is better to use an anchor plate; it does not damage the profile as much. It is secured with two self-tapping screws. One is screwed to the frame, the second to the wall.
5. The installed frame is foamed with mounting foam throughout the entire window from bottom to top. After two hours, the wedges are carefully removed from under the frame. The resulting voids are filled again with polyurethane foam.
The remains of the frozen foam are cut off. Also, on the outside of the window along the length of the structure, you can stick a special film that allows air to pass through and retains water.
Installation of aluminum window sashes
A sliding aluminum window is a track system with built-in sashes. Sliding sashes move in the desired direction using rollers and can be combined with fixed sashes.
1. Installation of sliding window sashes begins with the installation of guides. Using a tape measure, the length of the top and bottom of the window frame is measured and markings are applied to the guides, along which the required length is cut. The cut area is smoothed with a file.
2. The finished guides are attached to the frame with screws, first at the top and bottom of the frame, then at the sides. The gap between the screw holes is 30 cm.
The gap between the guides and the frame should not exceed 5 cm, since in winter the wall can freeze.
An analogue of aluminum sliding windows is Slidors windows with a plastic profile. This type of glazing is considered warm, although it is less efficient than standard metal-plastic windows. However, for glazing balconies and loggias, Sliders has established itself as the most optimal type.
3. Next, a U-shape is formed from the upper and lower and one side elements of the sash, into which a double-glazed window or single glass with a thickness of 4-5 mm is inserted. The sides of the glass must be covered with a rubber seal in advance. To ensure a better fit of the seal to the surface, cuts are made in the corner parts of the glass. The finished window glass is inserted into the sash, to which the second side of the sash is secured with screws.
The sash is supported on 2-3 rollers, which are secured at the bottom of the sash with screws 5 cm from the edges. Screws must be screwed at low speeds.
4. A brush seal is inserted into the grooves of the sliding window sash with the bristles facing each other. The shegel should protrude beyond the dimensions of the workpiece by a couple of millimeters.
5. The sliding window sash is placed first in the upper part of the frame, and then placed on the lower runners of the guide.
6. Once the aluminum sliding window is completely assembled, the height of the rollers for better sliding of the sashes along the guide rails is adjusted at the bottom of the sash with an adjusting screw.
For greater comfort, you can install a mosquito net on an aluminum window. The mesh moves using rollers along a separately provided guide.
Closing an aluminum sliding window for the first time will require a lot of force to get the sash into place. The fact is that the holes in the upper corners of the sash are made larger in size compared to the lower corners in order to prevent incorrect placement.
Aluminum sliding windows are easy to maintain. A beautiful appearance is ensured by wiping the glass unit and frame with a soap solution or special detergents.
For a longer service life, the fittings must be cleaned of dirt once a year and the moving parts lubricated with oils.
The sliding aluminum window structure is distinguished not only by its durability and strength, it contributes to the creation of non-standard-shaped structures. Shutters, roller blinds, and mosquito nets are offered as additional components for the windows. When ordering an aluminum sliding window, ask in advance about the completeness.
Tools needed to clean windows
Before you start cleaning, you need to wisely choose tools that will not harm the glass. It is wrong to believe that only a rag is needed. There is a standard glass cleaning kit. So, to save time on cleaning and avoid redoing the same job twice, you will need:
Soft sponges
The surface of the sponge should not contain hard elements. Otherwise, you risk scratching the glass and ruining its appearance forever. The larger the sponge size, the more convenient and faster you will cope with cleaning. The latest innovation is melamine sponges, which gently and carefully remove dirt.
Basins with water
You will need two basins. The first is diluted with detergent, and the second is filled with clean warm water to wash off the foam. Clean water will have to be changed several times after use.
Mop with brush
This simple device will help you get to hard-to-reach contaminants. If you want to make the task easier, there are magnetic brushes on sale that allow you to clean the glass on both sides at the same time. Both of its parts are connected by a magnet, which allows it to adhere firmly to the glass. And special pieces of felt remove stubborn dirt.
Rags
Like buckets, you will need several of them. Use a rag soaked in the solution to wipe off stains and dirt, then remove the stains with a dry cloth. The most popular cloth is made from synthetic suede. The porous fabric perfectly absorbs excess moisture and does not leave lint behind.
Ladder
If a mop and brush did not help, then a stepladder will come to the rescue. Ask your loved ones to back you up, and your windows will shine like new.
Rubber scraper
Another important device. Soft nozzles quickly remove dirt and do not scratch the glass
If you are eliminating the consequences of repairs, the scraper will instantly remove cement stains and layers of lime dust from the glass.
Advice!
Use wipes to clean your monitors. You can also use dishwashing sponges to clean plastic windows. They will erase all the dirt and will not leave cracks into which dust will then get clogged.
Gloves
When using chemicals, it is advisable to protect the skin of your hands. Gloves are selected by size. It is better to give preference to rubber products.
Washing vacuum cleaners
Washing windows yourself on upper floors is quite dangerous. To avoid wasting energy, use a washing vacuum cleaner. It will not only collect all the dirt from the windows, but also the remaining moisture.
Aluminum balcony frame
The debate about which profile frame is best suited for balcony glazing can go on for quite a long time, and each manufacturer has its own weighty arguments. Let's try to briefly figure out which material to choose.
So, if you plan to insulate your balcony in the future, then you will definitely need warm glazing, which involves the use of single-chamber (at least) or double-glazed windows.
A plastic frame made of a 3- or even 5-chamber profile will cost much less than an aluminum warm profile of the EK-57 or EK-69 series. But plastic is inferior to aluminum in many respects (aesthetic and technical), especially when it comes to glazing a large balcony.
If insulation of the balcony is not planned, then it is cheaper to use a sliding aluminum balcony frame from the “cold” profile “Tatprof”, “KramZ”, “Provedal”, etc. They have a low price, are convenient to transport and easy to install. Here is one example of how to assemble a frame with your own hands.
We glue a sealant (included in the kit) to the ends of the upper and lower profiles. Lower (photo 1)
and top (photo 2)
profiles differ in the presence of side walls (do not be confused). First, we take the lower profile and attach the side profile to it (photo 3).
Pay attention to the location of the side profile partitions. In this case (version with four doors), the profiles are arranged “mirror-like”. When changing the number of sashes, the side profiles may not be positioned in a “mirror” manner.
We secure the profiles with self-tapping screws (photo 4).
Before installing the top profile, we insert the lock strike plate (photo 5).
Once assembled, it will be impossible to insert it. After the doors and locks are installed, we will secure it with a hex key at the required height (photo 6).
Install the top profile (photo 7).
The sash is first inserted into the upper one (photo 8),
then into the lower profiles (photo 9).
Adjustment of the sash level, if necessary, is done with a hex key on the removed sash (photo 10).
We insert the lock by pressing the “tongue” at the bottom with your finger (photo 11).
The frame is ready (photo 15).
You can rearrange the “tongue” and also adjust it using the same hex key (photo 12, 13, 14).
Construction of houses
0 votes
+
Vote for!
—
Vote against!
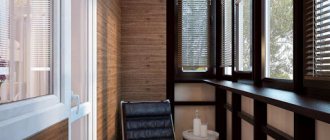
Recently, the balcony is increasingly becoming like one additional recreation room. People place chairs and small tables there for conversations over a cup of coffee in the fresh air. They make it more comfortable and functional. Less and less often, the balcony began to resemble a pantry or a room for storing unnecessary things. To ensure beauty not only internally, but also externally, people began to resort to aluminum glazing. Indeed, in addition to the modern appearance, this design has a large number of other advantages.
Table of contents:
- Installation of an aluminum balcony
- DIY aluminum balcony installation
- DIY aluminum frames for balconies
- How to install aluminum frames on a balcony yourself
- How to install an aluminum loggia
- Do-it-yourself glazing of a balcony with an aluminum profile
- DIY aluminum balcony installation video
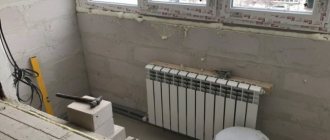
Installation of an aluminum balcony
In most cases, a balcony is a room that is not heated additionally. Installing additional battery sections there is complex, costly and impractical. Previously, we were used to seeing them with a wooden bottom or slate. The frames were also usually made of wood, and the window sashes opened inward. But this design, although inexpensive, had its drawbacks. Especially in winter, constant drafts appeared due to cracks in the wood; snow fell on the ledges located between the upper and lower parts. When it melted, water could get inside the room, and if frost hits, it could also ruin the material from which the structure is made. Therefore, people increasingly began to resort to more modern materials that are not subject to such shortcomings as, for example, wood. Most people leave the bottom of the structure opaque and glaze the top with aluminum or PVC. Sometimes you can see fully glazed balconies. For these types, exclusively aluminum frames are used. Modern window sashes can be either sliding or outward opening. Both the first and the other options significantly save space indoors. Installing a balcony made of aluminum, like other materials, has its advantages and disadvantages.
| pros | Minuses |
| The most important advantage is its cost. It is an order of magnitude lower than when using, for example, plastic. Even with a small amount of money, you can transform your balcony. | Poor thermal insulation properties. This option is not suitable for regions with harsh winters. But on the other hand, there is “warm aluminum” technology, which does not have such problems. |
| A light weight. The structure weighs quite little, which makes it easy to install in houses where it is prohibited to heavily weigh the balcony. | It will be impossible to use other materials to decorate the room. If you neglect this, an irreversible chemical reaction will occur. The metal will begin to adjust. |
| Fire safety. Aluminum will not be able to ignite if hit, for example, by a cigarette butt from above. By choosing this design, you can significantly save on the interior space of the room. And the sliding window system will allow you to wash them with convenience and comfort. |
If you want to isolate yourself from the outside world, noisy streets and enjoy the warmth and comfort of home, then this is what you need. After all, building from aluminum allows for improved sound insulation. In addition, the material is resistant to atmospheric conditions and temperature differences.
DIY aluminum balcony installation
Of course, it is much easier to call a team of professionals who can quickly install an aluminum balcony. After all, they already have their own work scheme, technology and certain skills. But with some skill, there will be no problems with independent installation. To do this, you first need to carry out some preparatory procedures. After all, the outcome of all the work will depend on them:
- First of all, the old frames are removed. When dismantling, the force must be directed parallel to the frame, and not perpendicular. Otherwise, there is a possibility of damaging the parapet structure.
- After which, you need to get rid of fasteners and concrete residues that were not removed along with the old frame and remained on the parapet.
- If the parapet is not level enough, then it can be additionally leveled with mortar in order to subsequently attach an aluminum structure to it. If this stage is present, then it is better to postpone the installation of the balcony until the concrete mixture has completely dried. Usually one day is enough.
- To fix the window frame more securely, it is necessary to install a wooden beam with a cross-section of at least 50 millimeters. This will also create better thermal insulation between the concrete structure itself and the aluminum profile.
To make the installation process easier and more convenient, you need to carry out several preparatory steps:
- All moving parts that are on the aluminum structure are removed. This action will facilitate further installation work.
- Double-glazed windows are removed from the “blind” areas of the frame. Thanks to this, they will not be damaged during installation work.
- Using metal screws, special plates are attached along the window frame. Their pitch must be at least 700 millimeters.
- The assembled structure is placed on the balcony railing.
- You need to take a construction level to level the frame in a horizontal position. The frame is secured from below with self-tapping screws.
- Vertical frames are mounted using wooden wedges. After that, holes are drilled in both the walls and the upper ceiling using a hammer drill. It is better to use anchors for fastening. Before attaching the structure to the upper part, a visor made of thin metal is screwed to it - galvanized or ferrous metal with a protective coating.
- Next, you need to construct an ebb at the lower fragment of the frame. Fixation to the aluminum profile occurs using metal screws.
- Using polyurethane foam, all cracks and holes are blown out.
- After this, it’s time to install double-glazed windows in “dead” areas.
- The latter is the return of the moving fastener parts to their previous position.
Such simple procedures will help you install a balcony made of aluminum profile in a high-quality manner and significantly save your budget on calling specialists.
DIY aluminum frames for balconies
Aluminum frames last longer than wood or other materials. This is due to the fact that this metal does not corrode. The service life of an aluminum window frame can reach fifty years. The metal does not require any additional care at all. It is non-toxic, non-flammable and is considered an ideal option since it is not fire hazardous. The frames made from it are strong, reliable and flexible, thanks to which you can install windows of any size and appearance. But good thermal conductivity is considered the main disadvantage of using aluminum for a window frame. But this drawback was quickly eliminated by design engineers.
Currently there are two types of aluminum profiles on the market: cold and warm. The first is much cheaper than the second, and if we take into account its other distinctive features, then this is an excellent option for a window frame if the balcony will not act as another living room all year round. Cold profile frames are quite thin, so it is easy to make sliding doors from them, which will save balcony space. The warm profile includes an additional heat-insulating insert made of polyamide. It is located in the center between the inner and outer halves of the profile. In this case, the double-glazed frame becomes much thicker. Only one thing can scare a person away - the high cost. But when the balcony will be used as a living space in winter, then frames made from a warm profile are an ideal option. In addition, fashionable aluminum double glazed windows can be constructed in modern and varied designs, and can be opened in different ways.
How to install aluminum frames on a balcony yourself
After the frames with the appropriate measurements have been purchased, the most important point remains - installation. Self-installation significantly saves money, and thanks to detailed instructions, it will not be difficult. The first step is to acquire devices that will be useful for further work:
- hacksaw for metal;
- tape measure;
- drill;
- self-tapping screws;
- screws;
- screwdriver;
- brush seal;
- weather-resistant silicone sealant;
- polyurethane foam;
- hex wrench.
For high-quality glazing, it is necessary to carry out actions in the following order:
- If there is a previous window frame, then we disassemble it.
- We clean dirt and parts of the cladding from the parapet and slab.
- We assemble a new frame from elements.
- We secure the assembled installation elements to the parapet using galvanized self-tapping bolts and mounting loops.
- Afterwards, we measure the length of the horizontal part of the opening, transfer the measurement values to the guides and then cut them. Afterwards, the guides for the sashes are installed.
- Using a file, polish the sawn area.
- In the openings we drill holes for self-tapping screws at intervals of 30 centimeters. We install guides on the screws. To avoid freezing of the frame, the distance from the outer edge of the frame to the guides should be no more than 5 centimeters.
- We install the brush seal along the line of the sashes.
- We first insert the sash into the upper guide, and the part on which the rollers are located into the lower one.
- We install the steel canopy under the mounting loops.
- We attach it to the top concrete slab with self-tapping screws.
- We draw the low tide on a strip of steel and cut it out with roofing scissors.
- We install the ebb.
- We seal the joints using weather-resistant silicone sealant.
- We fill all visible cracks with foam.
- We install glazing on blind sashes.
With the help of these instructions, mounting the window frame will not cause any difficulties.
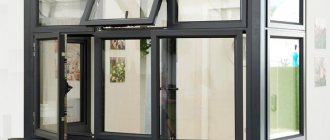
How to install an aluminum loggia
It is better to use cold glazing for a loggia if the balcony does not turn into a separate room. Aluminum frames look decent due to the fact that they are painted using a modern powder method. They are much stronger and lighter than plastic ones, which makes the installation process more convenient. In addition, a lot of light enters the room, since they practically do not darken the space. These structures do not require periodic intervention from professionals to carry out preventive maintenance. Modern designs make it possible to create a six-leaf window, each sash of which can be opened separately. The pressure on the bearings by the flaps is minimal. This extends the service life. Due to the light weight of the frames, any loggia can easily support them.
Aluminum doors open and slide silently and smoothly. To ensure a tight closure, the frame is fixed with a special lock, which is invisible from the outside. The strength of the thin frame is capable of supporting loggia glazing up to two meters in height. Aluminum loggias are installed only when maximum protection from wind or other adverse weather conditions is needed. If desired, sliding and fixed sashes can be combined. There are usually two or three guides on an aluminum profile. Each video moves in its own way. If desired, a mosquito net is installed on the loggia. A separate guide is provided for it.
For cold windows, single-chamber double-glazed windows are usually installed. Warm windows have a thermal insert or thermal bridge. But it is located in the middle of the profile, the thickness of which is no less than 12 centimeters. If desired, the aluminum structure can be combined with wood. Then the strength of the metal and the “breathing” properties of wood will help resist strong condensation. In addition, wood has excellent thermal insulation characteristics and is environmentally friendly. To install an aluminum structure on a loggia, we first remove all movable opening elements from the frame for ease of work. In order not to spoil the glazing, it must be removed from blind areas. Next, the mounting plates are secured to the frame using self-tapping screws. After which the assembled structure is installed in the loggia opening. Then the frame is leveled along all planes using wedges. Mounting plates are attached to the walls and top. Then it is checked how evenly the frame is installed, and the sashes return to their previous position. After this, the sealing process occurs.
Do-it-yourself glazing of a balcony with an aluminum profile
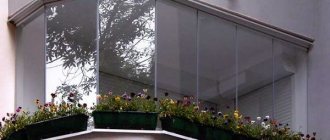
As was said earlier, there is nothing complicated in the process of glazing a balcony with an aluminum profile. Even if you don’t have the appropriate skills, thanks to the detailed instructions, glazing will not be difficult. But sometimes a person wants to admire the views from the window without any restrictions. For these purposes, you can use the frameless glazing method. It is no less durable and reliable than with a frame. The main load-bearing element of the structure in this embodiment is considered to be an aluminum profile, which is attached to the top plate.
The guide rail, also known as the lower profile, is fixed on the parapet post. The enclosing parts of the structure are considered to be tempered glass; their thickness should be 6-8 millimeters. The blades move thanks to a special sliding mechanism, which is located at the top of the profile. If there are uneven or rounded areas on the balcony, then a roll is made there. The joints of the panels are covered with tape, which easily transmits light. The doors open one after another in turn. When choosing this type of glazing, special attention is paid to indicators such as reliability, durability and stability.
DIY aluminum balcony installation video
Do not forget that when installing an aluminum balcony yourself, you need to leave gaps for the mounting foam, two or three centimeters under the window sill. All manipulations should be carried out with a plumb line and level. The video shows a clear example of how to properly install an aluminum balcony with your own hands:
How to assemble a sliding window from an aluminum profile
Modern aluminum alloy window frames are becoming increasingly popular. They are reliable, durable and aesthetically pleasing, meeting the strictest sanitary standards. Most often, their installation is trusted to professionals, but independent installation is not so difficult. Let's look at how to properly assemble aluminum sliding windows with your own hands.
Sliding structures are used in limited space. This is the best model for installation on balconies or loggias. The frame opens according to the “compartment” principle, which is very convenient for these rooms.
In apartments, a “warm” type of aluminum profile is used, equipped with inserts made of heat-insulating material inside.
Technical features of frameless glazing
Frameless glazing is a sliding system made of transparent, stained or impact-resistant glass. Partitions and frames are not provided. The glass is mounted on metal profile rails. A rubber seal is laid between the doors and the aluminum profile.
The system is lightweight, durable with a glass thickness of 8-10 mm. Although it is not warm. After installation, there will definitely be cracks and gaps due to the impossibility of fitting the glass close to each other.
Professionals consider frameless glazing to be universal. The absence of frames allows the room to be heated by the sun and muffle noise from the street. Although the temperature on the balcony is unlikely to rise by more than 2 degrees, unlike outside. This option is suitable for gardeners who want to grow plants.
For frameless glazing, tempered thick, durable, impact-resistant glass with round ground edges is used.
The advantages of this glass:
- withstand high loads;
- inability to get hurt.
This option is suitable for dark rooms when you want to add sunlight. But it involves the complete demolition of the parapet. This means that we are talking about reconstruction and you will have to contact the relevant services to obtain permission.
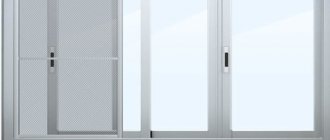
Operating principle and advantages of sliding windows
Such systems are sometimes called sliding windows. Their opening is carried out by moving the shutters on rollers along guides. Several guides can be placed on one profile at once, which makes it possible to install up to 5 sashes.
When choosing such a window, close attention should be paid to the roller mechanism: the most durable are equipped with a shell made of polymer materials.
The sliding window system has a number of advantages:
- Due to the use of aluminum from which the frames are made, the structure weighs little.
- The strength of the material allows the window sashes to be narrow, so they let in more light.
- Double-glazed windows and hollow profiles improve the thermal and sound insulation of windows.
- Aluminum's resistance to the external environment makes the window durable.
- The roller system does not require any free space in the room for the window to fully function. At the same time, it becomes possible to combine blind and opening window openings.
- A special coating makes the appearance of the window aesthetic and attractive.
- The simple design is convenient to use and easy to repair.
- When using shut-off valves, such as latches, latches or even locks, such windows will ensure the safety of your home.
What are soft windows
Owners of summer cottages and country houses often have gazebos, verandas and terraces on their property. Spend time in the fresh air, cook and taste delicious dishes over coals or celebrate a family holiday - what could be better. When the weather is beautiful and sunny, there are no problems. But as soon as the wind rises, precipitation begins, or cold weather sets in, a feeling of discomfort immediately arises.
Weather protection
Typically, when the above problems occur, the following tricks are used:
- Transparent polyethylene. So that the wind would not disturb you, and everything would be more or less visible from the outside. But as soon as a sharp gust of wind looks at your light, you won’t notice how holes will begin to appear in one place or another. And over time, the level of transparency, to put it mildly, disappears.
- Glass. Neither wind, nor precipitation, nor cold will stand in your way to comfort and a pleasant pastime. Plus, if the glass gets dirty, you can always wash it. But the considerable high cost and fragility of glass can become objective reasons to abandon this method of protecting terraces, gazebos and verandas.
The most convenient, practical and cheapest way to protect yourself from bad weather is to use special PVC windows, which are commonly called “soft windows”.
We will take measurements, select the necessary materials, and install in a short time
We work in Moscow and the Moscow region up to 200 km from the Moscow Ring Road
We travel to Dmitrov, Kaluga, Naro-Fominsk, Mozhaisk, Obninsk
Balashikha, Khimki, Podolsk, Korolev, Mytishchi, Lyubertsy, Krasnogorsk
Elektrostal, Kolomna, Odintsovo, Domodedovo, Serpukhov, Shchelkovo
Ramenskoye, Orekhovo-Zuevo, Dolgoprudny, Zhukovsky, Reutov, Pushkino
Noginsk, Sergiev Posad, Voskresensk, Lobnya, Klin, Dubna, Chekhov, Istra
What are PVC curtains
Windows made from polyvinyl chloride (PVC) are distinguished by enviable functionality. Thanks to the material they are made of, they are flexible and durable at the same time. There is no need to remove them from time to time and put them back in place. They will survive strong winds and tree branches knocking on the surface.
Soft windows are a kind of film that has a gradation in thickness from the thinnest options of 500 microns to options of 700 microns and thicker. When installing such PVC curtains, they require advance edging, which acts as a frame.
This layer of PVC windows completely blocks insects from entering the room and at the same time helps maintain a comfortable air temperature. And most importantly, flexible windows perfectly retain their structure both in severe frost (up to -39 C) and in severe heat (up to +50 C).
Installation of soft windows is much simpler and faster than glazing, and the service life on average varies around 10 years.
Types of soft windows
According to the thickness of the material of manufacture
The main gradation of PVC windows is based on the thickness of the film. The most common types of these products:
- Flexible PVC curtains with a thickness of 500 microns
are a budget option. Most often used to close small openings. - Flexible PVC curtains with a thickness of 700 microns
are the most popular option. Suitable for large and medium areas.
According to the material of manufacture
There is a division based on materials of manufacture, because soft windows are not always made of PVC:
- Polyvinyl chloride or PVC
is the most common material used in the production of flexible windows. - Polyurethane
is a little more elastic and stronger than polyvinyl chloride, however, it is an order of magnitude more expensive. Precisely because of its high cost, PU is rarely used for the manufacture of soft curtains. Therefore, we recommend that our clients make only doors from polyurethane. Because doorways are the most worn part of the structure.
At the place of installation
And we must not forget about the categorical differences between manufactured products and their practical applicability:
- For gazebos
- For verandas
- For terraces
- For cafes and restaurants
- For balconies and loggias
- For car washes
- For industrial premises
We will take measurements, select the necessary materials, and install in a short time
We work in Moscow and the Moscow region up to 200 km from the Moscow Ring Road
We travel to Dmitrov, Kaluga, Naro-Fominsk, Mozhaisk, Obninsk
Balashikha, Khimki, Podolsk, Korolev, Mytishchi, Lyubertsy, Krasnogorsk
Elektrostal, Kolomna, Odintsovo, Domodedovo, Serpukhov, Shchelkovo
Ramenskoye, Orekhovo-Zuevo, Dolgoprudny, Zhukovsky, Reutov, Pushkino
Noginsk, Sergiev Posad, Voskresensk, Lobnya, Klin, Dubna, Chekhov, Istra
Advantages and characteristics of flexible windows
When discussing the question of why the use of soft windows for gazebos, terraces and verandas in country houses is more practical and reliable compared to glazing, you just need to list the characteristics of PVC curtains to make the right choice:
- The price is 2-3 times lower than glazing. It is much cheaper to use PVC film than glass. Especially when it comes to large areas.
- Installation. The installation speed of flexible windows is much higher, and the process itself is simpler and safer for the material of manufacture.
- Reliable protection against creeping and flying insects.
- Resistant to wind gusts and protection from blown dust.
- Immunity to all types of precipitation: from rain and snow to large hail.
- Soft windows cannot be broken; mechanical damage to the coating will not make you worry about the safety of yourself and others.
- High level of light transmittance. Up to 90% of incoming sunlight passes through PVC curtains.
- Equal resistance to heat (up to +50 C) and frost (up to -39 C).
- In the cool season, the building, decorated with soft windows, perfectly maintains the air temperature.
- Service life of at least 10 years.
In recent years, the popularity of installing flexible windows has been growing significantly. Thanks to modern technologies, the coating acquires a presentable appearance, its reliability is beyond doubt, and its practicality makes you convinced of the correctness of the decision made.
Dismantling the old frame, preparing the opening
Before installing the window, you need to remove the old frame and prepare the window opening.
Wooden frames are sawn in several places. For this, it is most convenient to use an electric jigsaw, but an ordinary carpenter's saw will also work. The frame elements are removed using a small crowbar. Using a chisel and hammer, remove the window sill slab.
The opening must be cleared of concrete fragments and old fasteners. If it is severely damaged or distorted, leveling with cement mortar will be required. You can proceed to the next stage only after the leveling mixture has completely hardened.
Before installation, carefully check the completeness of the product and carefully read the attached instructions. In most cases, the delivery package separately includes frames, double-glazed windows and fittings.
How to glaze a balcony yourself
A glazed balcony will not only expand the space of the room, but also protect the additional area from exposure to bad weather outside and reduce heat loss in the room. To decide on the direction of work, you need to know what types of glazing in an additional room exist and what type your balcony is.
Choosing a glazing method
For cold type glazing, single glasses framed with lightweight window frames are used. An inexpensive do-it-yourself glazing option, suitable only for summer time, is made with an aluminum profile that does not load the support.
When choosing a warm glazing option, you will have to install double frames with special plastic inside the profile. This design reliably protects from the cold from the street, but has a high cost and greater weight.
The French type of glazing is made with windows with transparent mirror glass. Frames made of high-strength glass are installed along the perimeter of the balcony space along the entire height. The solid glass sheet creates a stunning viewing effect.
Important. For comfortable use of the balcony at any time of the year, the space should be protected from condensation. They implement the task by using high-quality insulation with double sealing, as well as the presence of an adjustable ventilation system.
Which double-glazed windows to choose?
- Plastic structures with single glass for low-budget reconstruction are considered to be the most convenient for installation on a balcony. The option of massive windows with the installation of double-glazed windows is more expensive.
- Lovers of antiquity prefer double-glazed windows framed with wooden frames. Massive structures made of natural wood look good, but have a significant drawback - the need for careful maintenance.
- An aluminum profile can be considered a current option for glazing loggias in old houses. Installing a light frame on the balcony base slab and parapet will not greatly load the weakened ceiling.
Frame installation process
The installation diagram for sliding windows is as follows:
- If the windows are already assembled, double-glazed windows are taken out of them and the sashes are removed.
- In order to subsequently attach the frame to the wall, holes are drilled into which screws are screwed. It is recommended to mark the glazing beads that are being removed. This will help you install them back and not mix them up.
- In the window opening, using wedges, the frame is leveled. Adjustment of its position and preliminary fixation is carried out using wedges. In this case, bending of the frame structure should not be allowed.
- Having secured the anchor plates to the wall with dowels, screw the frame to them using self-tapping screws: one of them is screwed into the wall, and the other into the window profile. The cracks are sealed with polyurethane foam. You can use anchor bolts for fastening. But there is a risk of damaging the profile surface.
If the gap between the frame and the wall exceeds 5 mm, then additional plates are used. In this case, foam alone will not be enough.
- After the foam has hardened (usually it takes about two hours), its excess is cut off and the wedges are removed. The holes from them are foamed, after drying the excess foam is removed.
The window sill and ebb are being installed:
- The outer perimeter of the frame is covered with a special tape. It is impermeable to water, but breathable.
- The ebb is attached to the bottom edge of the frame. All gaps are filled with foam. A pause is taken while it hardens. After this, cut off the excess with a painting knife.
- There is a special groove at the bottom of the frame. The window sill is inserted there and leveled using a building level.
- The gap between the window sill and the wall is filled with foam, and the gaps between it and the window frame are sealed with silicone sealant.
- After the foam has dried, its protruding excess is removed.
Preparing a new plastic window for installation.
At this stage, the pivoting sash of the plastic window is removed and the glass unit is removed from the blind side of the window.
To remove the window sash, you need to make sure that the window is closed. This is necessary so that the sash does not tip over when we pull the rod out of the upper canopy.
Then you need to remove the decorative plastic trim from the window awnings. This can be done using a knife, using it to pry up the pad and remove it by hand.
Removing the decorative trim from the canopy.
Now you need to remove the rod from the upper canopy. To do this, you need to press the upper edge of the rod with something so that the rod moves and its lower edge comes out of the canopy. All that remains is to use pliers to pick up the edge of the rod and pull it out of the canopy.
We remove the rod from the upper canopy.
After this operation, the sash will be supported by the lock and the lower canopy. Holding the sash with your hand, open the window lock and lift the sash, thereby removing it from the lower canopy.
Lower window awning. The window sash has been removed.
The back sash will be installed according to the same principle, only in reverse order.
To remove a double-glazed window, the window must be installed vertically with a slight slope, for example, rest it on the wall.
Now you need to pull out the plastic beads. They must be pryed with a thin knife or spatula and then pulled out of the window frame. Beads should be removed in a certain sequence. First, the long vertical beads are removed, and then the horizontal ones. Moreover, in order to avoid the glass unit falling out, the top horizontal bead is removed last.
In order for the glazing beads to fall into place later, they should be numbered.
After removing all the glazing beads, the glass unit is removed from the window frame. Be careful when removing the glass unit. As a rule, the edges of the glass are very sharp, so it is better to make the recess using rubberized gloves.
Before installing the window, do not forget to remove the protective stickers. If they are not removed immediately, then after installation it will be quite difficult to do this from the street side of the window.
Use a spatula to pry up the glazing beads of the plastic window.
Installation and adjustment of sashes
We proceed to installing guides and sashes with glass.
- Prepare the guides: measure the frame horizontally and saw off profiles of the required length. The cut areas are cleaned of roughness using sandpaper or a file.
- The guides are fixed with self-tapping screws on the upper and lower edges of the frame. The fastening step is 30 cm.
- The sashes are being assembled: double-glazed windows are inserted into them.
The easiest way is to assemble the three parts of the sash in the form of the letter “P” lying on its side. The glass is pre-glued with a rubber seal, which is cut at the corners. After inserting the double-glazed window, the second side post is carefully screwed on.
- The rollers are fixed in its lower part, at a distance of at least 5 cm from the edge of the sash. It is better to use a screwdriver for this operation rather than a screwdriver, so as not to crush them.
- Along the entire perimeter of the sash, a special brush seal - Schlegel - is attached to the grooves, the bristles of which should be turned towards each other. The schlegel itself should protrude 2–3 mm beyond the boundaries of the sash.
- The assembled sash must be inserted into the frame, first into the upper guides, and then with rollers into the lower ones.
- The lifting of the sashes, if they do not close well, can be adjusted using a screw. It is located at the bottom at the end of the sash.
The screw is turned using a hex key. To raise the sashes, it is rotated clockwise, to lower it - counterclockwise.
- They adjust all the fittings to ensure their flawless operation.
The process of glazing a balcony with sliding aluminum windows is shown in the video.
Sliding aluminum windows are easy to install yourself. Strict adherence to instructions and installation rules guarantee long and trouble-free operation.
How to remove sliding frames on a loggia
To safely clean a sliding window, it must be removed.
You can wash the outer windows without using fancy devices only if you remove them. Unfortunately, not all design options allow for easy dismantling. Windows that move vertically or require rotation before sliding are difficult to remove without the knowledge to work with them. Independent dismantling is easier to do on frames that move strictly parallel, like doors in cabinets.
To remove sliding balcony windows for safe washing, you need to take into account their design features.
Possible options:
- Grab the frame sash with both hands and lift it up so that the bottom edge comes out of the guide grooves. Then move the lower part inwards towards you and lower it. A working window should be removed without much effort.
- If the frame does not move up enough to remove it from the grooves, you need to carefully examine the marks on the structure. Further actions depend on the detected elements and tags.
- The guides have special notches. The edge of the sash must be brought to them and removed in this position.
- Instead of notches, there are grooves on the windows and guides. They need to be aligned and then the frame removed.
- The design includes locking plugs that prevent vertical movement. They are located at the ends of the window frames. They need to be removed by picking them up with a screwdriver. After this, the window should come off easily.
It is difficult for one person to hold the sash suspended from the frame. To be on the safe side, it’s better to shoot together.
Aluminum windows to the balcony
Glazing a balcony is one of the most important activities in the process of renovating an apartment. Firstly, this is necessary for insulating the home, because a significant part of the heat comes out through the balcony. Secondly, after installing windows there, you get additional space that can be used for certain residential or business needs. But, before starting work, you need to decide what material the glazing should be made of. And one of the popular options is aluminum windows to the balcony.
Aluminum windows to the balcony
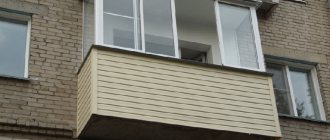
Balcony glazing with aluminum profile with extension
Operating rules
Proper operation can reduce the risk of breakage of aluminum balcony windows. When using the design, you must adhere to the following list of rules:
- To move the sash along the guides, you need to hold on to both vertical posts. When the structure is moving, you must not leave your hands between the sashes, and when closing, do not leave your hands between the sashes and the guide profile, as this can provoke a traumatic situation.
- Before sliding the window, you should make sure that there are no foreign objects in the guides. The presence of pieces of ice, stones and other small particles that get under the roller mechanisms and the lower part of the sash can cause the frame to rise and fall out.
- It is possible to prevent unwanted fogging and the formation of ice during the cold period if, when opening a window in a room facing the balcony, you simultaneously open the sash of the balcony glazing system by 10-15 cm. If you do not move the structure on the balcony, the warm air will be converted into condensation, which will lead to icing of the glass.
- The sashes must be opened and closed without sudden movements, which can lead to shock loads, disruption of installation adjustments, and mechanical damage to individual elements.
- If it is necessary to remove a sliding aluminum structure, it is better to use professional help, since this procedure is highly complex. Otherwise, there is a risk of breakdown of the structure or its individual mechanisms.
Pros and cons of aluminum balcony windows
Installing aluminum windows on balconies is becoming increasingly popular today. And for those who are just thinking about this, we will present the pros and cons of such glazing. Let's start with what advantages aluminum windows on the balcony have.
- Availability . Often people give their preference to aluminum windows precisely because of their low cost. On average, the price for them is 1.5-2 times cheaper than for similar glazing with PVC windows.
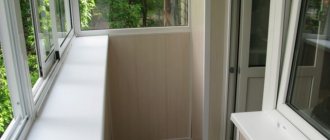
Glazing of balconies with aluminum profiles
Aluminum sliding windows for balcony
Balcony with aluminum profile windows
Photos of aluminum balcony windows
French balcony made of aluminum profile
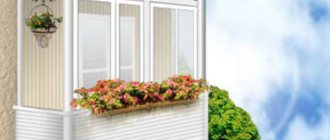
Important! For owners of small apartments, it makes sense to consider the option of glazing the balcony with aluminum windows with a perimeter larger than that of the parapet. As a result, the useful area of the balcony increases and it can be used for arranging indoor plants in the warm season or as an additional refrigerator in winter.
Option for glazing a balcony with aluminum windows with a perimeter larger than that of the parapet
Aluminum window with sliding sash. Most often, similar structures are used for glazing balconies.
Section of “warm” and “cold” aluminum window profiles. The first differs from the second by the presence of two glasses with an air gap and a heat-insulating gasket between the outer and inner sides
Also, when thinking about purchasing aluminum windows for a balcony, you should be aware of their disadvantages. The main disadvantage of such structures is the insufficient degree of thermal insulation. A balcony with aluminum windows, as a rule, will be “cold” - in winter the temperature in it will exceed that outside by no more than 5-6°C.
Sliding cold aluminum structure Framex S22
Balcony in Provence style
The design of a balcony or loggia in the Provence style is becoming fashionable among our compatriots. They are attracted by discreet elegance, French simplicity, natural finishing materials and the presence of vintage elements. For a more detailed understanding of the issue, we recommend reading this article.
Another disadvantage is that aluminum frames and sashes are installed only on perfectly flat and pre-prepared surfaces. Therefore, before the installation process begins, the parapet will either have to be leveled using a cement mixture, or a wooden board will be placed under the structure and all glazing elements will be installed on it.
Advantages and disadvantages of sliding doors
Both professional window fitters and ordinary owners treat sliding systems differently. I also cannot evaluate such designs unambiguously: they have both strengths and weaknesses.
Pros:
- Compact sizes. The shutters in such windows move parallel to the frame (or even inside it), so you can place anything near the window. Neither furniture, nor flowers on the windowsill, nor other objects will interfere with opening.
Opening does not require free space either inside or outside
- Wind resistance. This applies primarily to the open sash, which is fixed not on hinges, but along its entire length where it enters the profile. There is no risk of slamming or swinging open during ventilation.
- Ease of operation. Aluminum sashes move almost effortlessly, so both a child and an elderly person can open the window.
The roller system makes it easy to open even large doors
- Aesthetic appearance. The sliding structures do not look too rich, but neat. In any case, they fit perfectly into modern interiors.
Minuses:
- Low tightness. With simple sliding windows it is almost absent, with systems with a clamp the situation is better, but they are still inferior to casement windows. As a result, the window is blown around the perimeter, and the seal solves this problem only partially.
In the cold season, thermal insulation becomes the biggest problem
- Low resistance to burglary. The absence of normal pressure allows you to remove the sash from the guides with relatively little effort. So such windows are clearly not for the first floors and the private sector.
Latches are relatively easy to break, which is why such systems are usually used on floors three and above
- High complexity of fittings. Systems with clamping are more effective, but at the same time much more capricious - both accordions and tilt-and-slide mechanisms require regular maintenance and care.
The window fitting system with tilt-sliding and folding fittings is very complex and therefore demanding to maintain
Finally, a few words about the financial side of the issue:
- If we take the simplest aluminum windows for a balcony or loggia, then we will most likely be able to save money compared to glazing based on PVC profiles.
- If you install more complex structures, their cost will be much higher than standard ones - primarily due to the use of high-strength profiles and complex fittings.
How to properly glaze a balcony with your own hands
If the parapet is not to be dismantled, it will have to be additionally insulated to retain heat in the constructed room. Cracks in the vertical fencing of the loggia are sealed, surface unevenness is leveled, insulated and insulated.
Frame installation rules
The installation of the balcony begins after installing the canopy. We take out double-glazed windows with non-opening sashes, and remove the hinged ones from their hinges. Such actions will protect the glass from damage and lighten the weight of the window product. What to do next:
- Windows are freed from packaging.
- Double-glazed windows are removed from the frames.
- Remove the hinged sashes (you don’t have to remove the double-glazed windows from them).
- Turn the frame over by 1800, install the support support profile into the grooves and knock it down with a wooden hammer.
- At a distance of 150 mm from the edges of the frame, fixing plates are mounted, driving them into the grooves and screwing them with 30 mm long self-tapping screws.
- The metal-plastic structure is installed in the opening, leveled and secured with self-tapping screws, clamps and anchors. If the glazing consists of two or more window blocks, their frames are connected to each other.
- The cracks along the window contour are filled with polyurethane foam.
- The time has come to return the double-glazed windows and sashes to their place.
Installation of wooden window structures
First you need to install a box made of wood. After fixing the lower beam (railing) and the upper part of the structure (ceiling), the side elements are fastened with brackets to the walls.
Step-by-step instructions for glazing a balcony with your own hands:
- installation and fastening of support posts made of wooden beams - corner, end, intermediate;
- insert the frames after first removing the glass, install the front glazing first, then the side glazing;
- if distortions or other defects are found, they are removed by leveling with wedges;
- Having fixed the frames with self-tapping screws and anchors, seal the seams using polyurethane foam;
- return double-glazed windows and removed sashes to their place, making sure that the glazing beads fit snugly to the frames.
Advice. Before installing the wooden frame, treat the mounting surface of the main beams with sealant and antiseptic. This will help protect the structure, which can be pre-painted, from the accumulation of moisture penetrating from the outside, and will make the balcony room much warmer.
Construction Work Guide
When starting to glaze your own balcony with your own hands, you need to decide on the scope of the preparatory work. Step-by-step instruction:
- Having cleared the room of things and debris, assess the condition of the external and internal structures;
- if defects are found (irregularities, cracks, bevels), they must be leveled so that there are no problems during operation;
- if you choose to install frames on a metal parapet, insulate it before starting glazing work;
- when leaving the old fence, take care of the strict horizontality of its surface and strength;
- if old frames are installed, dismantle them; in the case of a balcony on the top floor, install a canopy.
Having completed the preparation, they begin to measure each surface, not forgetting the space from the processed parapet to the installed canopy. The dimensions of the side windows and the front area must be done especially carefully. Control is carried out according to the difference in diagonals - no more than 2.0-2.5 cm.
Measurements and ordering of designs
Inaccuracy of measurements threatens problems after installing frames; it is better to entrust the measuring work to a professional measurer. If you are not a professional, taking your own measurements will help you estimate the estimated cost of glazing a balcony space.
Measurement plan:
- the height of the balcony is measured as the distance from the plane of the parapet up to the bottom of the balcony slab located above;
- for a plastic structure, subtract 8-10 cm from the resulting height, in the case of an aluminum frame - 3-4 cm;
- The width of the loggia is determined by taking measurements in the horizontal plane along the parapet between its edges;
- with a plastic glazing option, 5-6 cm is subtracted from the resulting length, for the aluminum type - 2-3 cm.
Advice. Measurements are taken with a construction tape; it is important to monitor the tension of the tape. If the balcony room is wide, height measurements are taken at a distance of a meter from each other. By choosing the smallest value among the obtained values, you will determine the height of the balcony.
Before placing an order for the production of balcony windows and frame supporting structures, it is necessary to decide which of them will remain stationary and which will need to be equipped with sashes. If deviations are found, they will need to be taken into account when ordering the manufacture of frames with double-glazed windows.
The accuracy of measurements can only be guaranteed by a professional who will take into account the features of the structure, suggest the volume of necessary components, and give advice on finishing and insulating the interior.
Additional preparation for glazing installation
When taking the dimensions of a hanging balcony, before measuring the front and side railings of the balcony, you should make sure that the roof of the balcony overhangs its vertical fence with railings. This is checked using a plumb line. Also check the calculated value of the upper perimeter with the lower one, they should match.
To install windows on an open balcony or loggia with your own hands, you need to prepare a set of tools in advance:
- a reliable hammer with a hacksaw, nails, screwdrivers;
- hammer drill with a powerful drill (8 mm), dowels, set of self-tapping screws;
- gun for construction work, spatula;
- varnish and brushes, high-quality sealant, polyurethane foam.
Important details. From a legal point of view, work on glazing a balcony is classified as redevelopment of an apartment; permission must be obtained for this. To ensure safety, you will have to stock up on a safety belt and find a partner to install heavy frames with glass.