One of the pressing issues when renovating or purchasing a new home is the quality of window installation. And in particular their appearance and level of finishing.
You may not like the way it is done in your new apartment, or it may need to be done during the renovation process.
Here the question even arises that internal slopes can be finished in different and very different ways: plaster, plastic, siding, wood. All this will also be discussed below.
Do not think that slopes perform an exclusively aesthetic function. They also help improve soundproofing and heat retention. Accordingly, you need to approach the issue of installing slopes no less responsibly than installing the windows themselves.
Indoor slopes for a plastic window yourself
Let's figure out what a slope is. This is the side and bottom of the window niche. The lower one is very familiar to us because a window sill is installed on it. Everything on the sides of it is the slope.
Without its finishing, window installation is impossible. It can be simpler and cheaper, or sophisticated and designer. The design of slopes can even become a feature of the interior of the house. But they also perform a protective function, for example, preventing moisture from entering under the assembly seam.
If you decided that by filling the seams with polyurethane foam you can completely prevent heat from escaping from the apartment, you are mistaken. The structure of the foam is such that it absorbs moisture and is susceptible to external influences. It won't be long before it begins to lose its integrity.
Namely, the slopes provide the foam with the necessary protection, increase insulation, and also play the role of decoration.
What are the types of slopes for PVC windows?
During the installation of a double-glazed window, professionals will do everything necessary from measurements and installation work to “settings” the window. And they will also be happy to supply you with slopes. But you will have to decide on their type.
Excluding extremely expensive and designer finishing options, the market offers the following types and materials of slopes:
- Plastic,
- Drywall,
- Tree,
- Metal,
- Styrofoam,
- Plaster.
Let's take a closer look at some of them.
Plaster slopes
In fact, this is one of the most difficult, and at the same time, not the best finishing options. The process itself is divided into several parts. First you need to cover the entire surface with primer. This is necessary so that subsequent materials adhere well.
Then comes the actual plaster. The slope is covered with 2 layers, and the next one cannot be applied until the previous one has dried. The layers are separated by a special mesh, and cracks and gaps near the window itself are clogged with silicone.
Plaster will cope with the decorative function, but it will not protect the seams from external influences, the windows from fogging, or the room from heat loss.
Plasterboard option
When installing plasterboard slopes, no fewer steps are taken than when putting putty:
- Insulation is being laid
- The slope is mounted,
- Primer and putty are applied,
- After complete drying, the slope is painted.
If all this is done efficiently, such slopes are durable, attractive in appearance, and retain heat well. This, and sound insulation, will also depend on the quality of the wool or foam that is placed under the drywall.
A noticeable disadvantage of this material is that it does not like water. It is best not to be used in areas where high humidity is expected or outside of a building.
Wooden slopes
This type of slope already speaks of a certain level, since such slopes are made from various species of coniferous trees, or more noble species such as mahogany, oak or beech. The thickness of the sewing must be at least 18 mm. Such slopes are rarely installed independently, because a person who has allowed himself such luxury would be better off hiring workers who will bring the material, adjust it to size, install it, and then impregnate it, prime it and apply two layers of paint. When installing it yourself, cheaper options are used.
Plastic slopes
At the moment, this is the most popular option for slopes. This is explained:
- Availability of prices,
- Easy to install,
- The strength and lightness of the material,
- High level of insulation against noise and heat loss,
- Great view.
This material can be called universal for this installation solution. It can also be used outside the building. A certain type of plastic slope is a “sandwich panel”. It has now practically replaced classic plastic for these needs.
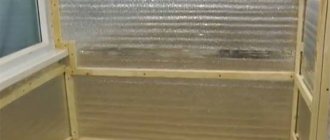
The panel is well suited for the side walls of a window niche. The “sandwich” has three layers: two external ones, and an insulated layer between them (expanded polystyrene). It is practically no different in appearance from the frames of the plastic window itself. Therefore, no additional decor will be needed anymore.
A definite advantage of this panel will also be a huge number of decorative solutions. It will be difficult to choose from the variety of colors. They are also sold as a “semi-finished” finished slope, for those who decide to do the installation themselves.
But this work is painstaking and requires at least minimal knowledge and understanding of the procedure. But you can also deal with it yourself.
Separately, we can highlight this type of material for sealing a slope, such as PVC foam panels. They have almost all the same qualities as sandwich plastic.
PLASTIC WINDOW CALCULATOR
Profile system
- REHAU BLITZ NEW (60mm)
- REHAU GRAZIO (70mm)
- REHAU INTELIO (80mm)
REHAU BLITZ NEW (60mm)
BLITZ New is the basic system in the product line, developed in accordance with the most current needs of Russian consumers. Reliable windows that effectively retain heat, protect the house from street noise and easily fit into any interior.
REHAU GRAZIO (70mm)
The new five-chamber GRAZIO system is a unique invention from REHAU, combining elegance of form and exceptional heat-protective properties.
REHAU INTELIO (80mm)
The new window system from REHAU - INTELIO 80 has already received the unofficial title of the “quiest” REHAU profile for the highest level of sound insulation.
Plastic slopes for interior decoration
When the installation of windows is completed, it is worth starting the slopes. You can choose from several finishing options. But if you settled on plastic, study in more detail the material options for these needs.
Now they offer mainly two options for plastic slopes: the so-called sandwich and ordinary PVC panels. They vary in price and have differences in characteristics.
Window sizes in Khrushchev
The rapid housing construction of the “times of developed socialism” left a great legacy in the form of the so-called “Khrushchev buildings”. Plastic euro-windows are also very often installed in such houses and they have no less standard sizes (two options - depending on the width of the window sill):
- A double-leaf window with a wide window sill should measure 1500mm in height and 1450mm in width;
- Three-leaf window, wide sill – 1500mm in height and 2040mm in width.
- A double-leaf window with a narrow sill should measure 1350mm in height and 1300mm in width;
- Three-leaf window, narrow sill – 1350mm high and 2040mm wide.
With this data, you can easily estimate the “issue price” of installing windows. But it should be noted that when ordering directly, real measurements should be taken, because The dimensions of the openings may differ greatly from the design ones, to the point that the new window simply will not fit into the opening. Therefore, measuring window sizes before ordering is mandatory.
Slopes for the interior of the room made of PVC panels
PVC panels designed for walls are also suitable for finishing slopes. This is a cheaper material compared to sandwich. It will provide excellent appearance, uniform color, and a smooth surface. In this case, the panel does not require additional painting or other treatments.
The structure of this material is simple, it consists of two strips of plastic, which are separated in the middle by another “corrugated” layer. They are called stiffeners. It is important to remember about them because a low-quality outer layer can “imprint” this ribbing on itself after installation. Poor quality will also make the panels yellowish over time, or even warp them.
In general, speaking about a PVC window and all the structural parts, details necessary for its complete installation, it is important to remember about savings. Or rather, that this is exactly what you shouldn’t be greedy about. If you expect your purchase to last you a long time, then choose quality over cheap.
Returning to PVC panels, it is worth noting that it comes in a standard width size - 25 cm. If the side walls are wider, it is better not to use end-to-end panels, but to give preference to another type of plastic finishing - sandwich panels.
What panels can be used for manufacturing
There are several types of plastic panels on sale that can be used for finishing slopes.
The two most popular types are:
wall panels (sometimes called ceiling panels), which are two layers of thin plastic with stiffeners installed inside - strips of the same plastic installed on the edge perpendicular to the plane;
sandwich panels. These are two layers of plastic, between which there is a heat insulator - foamed polyurethane or polystyrene.
Ordinary wall panels are not expensive, easy to cut, and light in weight. However, they tolerate mechanical stress extremely poorly - such a panel can be dented even with a careless touch (for example, if you lean on a slope while performing maintenance or washing windows).
Sandwich panels are much more expensive, but stronger. They have the ability to efficiently insulate a slope, which makes them very practical. They are available in different thicknesses - 24, 10 and 8 mm. Sandwich panels with a thickness of 8 mm are most often used, since they can be installed using a standard profile for wall panels.
Using sandwich panels
The structure of the sandwich panel speaks for itself. It's like a two-piece sandwich with a layer in the middle. In this way it is similar to a regular PVC wall panel. But if the latter has semi-hollow ribs between the outer sheets, then the sandwich panel is filled with special foam. Typically this is polystyrene or foam.
With this “filling” the panel has the highest thermal insulation performance. “Sandwiches” come in different thicknesses and, importantly, in a variety of colors. They are also significant in size, so they are suitable for window niches deeper than 25 cm.
The disadvantages of sandwich panels include instability to excessively aggressive environmental influences. This means that they cannot be used outdoors. For exterior decoration, take an interest in metal materials.
As for the price of the “sandwich”, it is more than for a regular PVC panel. But the difference is about 300 rubles for a regular window with two sashes.
Subtleties of installing plastic slopes for windows
The window and the slope are inseparable in practice. This is about the same as a window without glass. Without a high-quality slope, the service life of the fittings is reduced. Since the main function of this element can be called not even an aesthetic moment, but a protective one.
The slope covers the seams from external influences: temperatures, damage, sunlight.
It is important to remind and emphasize these points once again, because at some point a person can be “led” by beauty instead of quality.
Requirements and restrictions
- What is the best material to make slopes from? What properties should materials have? ?
The finishing of the opening from the street must be resistant to any weather conditions and prolonged contact with water (rain and melt). Internal window slopes may not be waterproof: with properly functioning ventilation, they remain dry all year round.
Here are the materials used for finishing:
External
- Plaster and putty based on Portland cement;
- Galvanized with paint or polymer coating;
- Plastic (more precisely, PVC).
Domestic
Here is a list of solutions for interior decoration of the opening:
- Cement and gypsum plasters and putties;
Plaster slopes can be seen in any Soviet-built house in which the windows have not been replaced.
- Drywall and gypsum fiber sheet;
- Plastic (sandwich panels with a polystyrene foam layer and ordinary honeycomb wall panels).
In my opinion, the most practical finishing option is plaster external slopes and plastic internal ones. However, I myself finished the internal slopes after installing the windows with plasterboard - simply for reasons of saving time and money (all the necessary materials were left over from the previous stages of repair).
Drywall or putty, painted with high-quality facade paint, is not much inferior to plastic in terms of performance. They get dirty just as little and are easy to clean from dirt.
Waterproof silicone facade paint from Sevastopol.
A special case
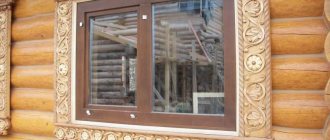
In a wooden house, the window block is installed in a frame - a box that does not interfere with the shrinkage of the crowns and holds them in the plane of the wall. The window is a few centimeters below the opening.
A frame window in a log house.
In this case, there are no external slopes as a class: the frame is installed flush with the facade; the junction of the frame to the wall and the window frame to the frame is covered with a plastic or wooden frame.
Do-it-yourself installation of platbands on wooden windows begins with vapor and waterproofing of the installation seam: excess foam is cut off, after which the seam is sealed with aluminum tape.
Internal slopes are usually wooden - for wooden windows and for plastic ones. They are made from wide planed boards or assembled from lining (if the wall is of significant thickness).
Wooden slopes in a house made of planed timber.
Definition of a slope and its purpose
It is unlikely that the literary concept of slope is spelled out in the dictionary. But it is generally possible to formulate it. And in fact, this is a profile with which the side parts of the window niche are finished.
But it is worth noting that this is not a complete designation. Since in this article we are talking about PVC windows, that’s why we stop there. And slopes are just as successfully and often installed on doors. The most striking example is the balcony. The same decoration of both windows and doors to the balcony is common, and is also beautiful and logical.
Therefore, everything said above, and what will be said below about window slopes, automatically applies to door slopes. Of course, in the context of interior decoration. If the opposite is indicated.
And so, as already mentioned, slopes perform two important tasks. The one we think about more often is window decoration. And the one that is still more important is protective.
Because of this distribution of priorities, some people wonder whether it is possible to install the slopes not simultaneously with the installation of the window itself. The question is controversial. Here we will remember the exterior decoration. This is what needs to be done immediately. If the seams in the room do not succumb to such active environmental influences, then outside it will be enough to rain and hit the frost, and the integrity of the polyurethane foam will suffer.
Firstly, it really does not like direct sunlight, and begins to crumble under the influence of ultraviolet radiation almost on the very first day. Secondly, it is not friendly with moisture, which reduces its thermal insulation abilities.
General rules
Measurements of window openings are performed from two sides: from the inside and from the outside of the room. In this way, the first important value is determined - the depth of the window opening. .
In panel houses, a typical situation is when the window openings were initially made with significant distortions at the stage of installation of slabs during the construction of the house. These values should be taken into account when installing plastic windows, and based on them, increase the size of the manufactured window. Internal and external measurements should be compared and the error determined.
When taking measurements, it is necessary to take into account possible distortions
After installing the window, to visually correct the curvature, you can use slopes, which not only give the window opening a neat appearance, but also prevent condensation from accumulating due to high humidity, thereby preventing the formation of mold.
Advantages of plastic slopes for PVC windows
The current market provides a good selection of materials and options. The same thing rocks the slopes. Many people prefer plastic and its varieties. It is quite easy to understand this choice, especially after familiarizing yourself with the advantages of a slope made of this material.
Let’s not discount the fact that, having decided to install a plastic window, people also take a plastic window sill. In this case, why not install a slope made of the same or similar material?
This choice of slopes complements the appearance of the window to a “complete set”. And it copes well with protective functions. It is impossible not to note the ease of installation and maintenance of such an element. And also its practical eternity:
- Not susceptible to ultraviolet radiation,
- Not afraid of moisture
- The temperature difference is not scary,
- Does not deteriorate from most acids and solvents,
- Does not require special care
- Mold and insects are not afraid.
To manufacture both the material itself and the slope itself in the form as we know it, the latest materials are used. They are durable, safe, and practically heat-resistant.
How to determine the size of blinds for different types of fastening
It is difficult to imagine the interior of the offices of respectable companies without blinds , light-diffusing products of the modern window curtain industry. It is difficult to keep track of fashionable new items, the range of their line is so wide. It is not surprising that this aesthetic, convenient, comfortable product has become a decoration for window, doorways, and partitions:
- in houses, apartments;
- hospitals, clinics;
- schools, kindergartens.
The question of how to measure blinds is gaining relevance at an enviable speed. When making goods from a manufacturer to order, there are no problems with measuring products, since they are produced by professional measurers. If you purchase a ready-made store product, you will have to measure it yourself. To do this, you need to have information about their varieties, types, and methods of fastening.
Interesting fact! This elegant, light French word "blinds" is pronounced in a peculiar way. No matter how much one would like to put the emphasis on the first syllable, it escapes to the last. Curtains always hide some secret. You can easily fit anyone and anything behind them. Even an astute boss will not guess what his subordinates are keeping behind them.
How to install plastic slopes
We have already determined that most often clients choose plastic slopes, and among them they give preference to sandwich panels. The latter are often filled inside with a foam-like frozen substance called Penoplex. It is also used for thermal insulation on large-scale construction sites because it is one of the newest materials.
The distance from the window itself to the plastic slope is filled with liquid plastic. This is PVC glue, which has recently appeared on the large market. It definitely wins over silicone, putty, or other materials that can be used for the same purpose.
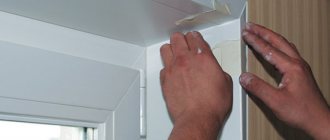
The peculiarity of this substance is that it acquires an appearance similar to the plastic on the window, down to color and texture. To “completely complete” the window, corners can be added that cover the cut of the slope and cover the corner. They are also matched in color and completely blend with the rest of the design elements.
But this does not mean that we are talking exclusively about classic white materials. Now there are a huge number of colored panels that will help complement any design. In addition, there is such an element as lamination film. The German brand Renolit is mainly used. It is “stretched” onto the panel, and the latter acquires any desired color.
Why should professionals measure windows for installation?
Measuring a PVC window yourself is not always profitable or economical. Do-it-yourself measurements often lead to serious consequences: the window does not fit into the opening or is smaller in size, vertical and horizontal defects, large gaps.
Our experienced craftsmen will perform all the necessary measurements with high precision, which guarantees ideal aesthetic perception and ease of use of the products.
Why contact us:
- Products are manufactured on modern automatic equipment with high precision.
- It is possible to produce double-glazed windows with a heat-reflecting coating, using reinforcing and colored films, with increased noise insulation, complex geometric shapes, and with the required heat transfer resistance coefficient.
- The products are guaranteed for 2 years.
Leave a request on the website. Our managers will contact you promptly.
Preliminary preparation before installation
It is not for nothing that they trust professionals to install PVC windows because it is a labor-intensive and delicate process. It is necessary to take measurements, clean, carry out the installation itself, and adjust the fittings. In all this, you should adhere to the installation technology. At a minimum, after a series of all these actions, the customer will be able to count on a certain warranty period.
But some aspects, such as installation of slopes, can be placed on your own shoulders.
First you will need to understand their types, choose colors, and decide on the material. As for what slopes can be made from, they are:
- Wooden,
- Metal,
- Plastic (sandwich and wall panels),
- From plaster,
- Plasterboard.
But for several reasons, the most common are plastic options. One of these reasons is that after the entire procedure is completed, the window along with the slopes visually merge into a single whole.
Other reasons for the popularity of plastic slopes include: competitive cost with high quality, ease and speed of installation, ease of maintenance, variety of colors.
Before you begin self-installation, you must first determine what you will need for this. Before this list, it should once again be filled out that there can be no savings here. Low-quality materials will not last long, will deteriorate, and as a result you will spend much more money.
First, select and purchase plastic panels and corners. Give preference to plastic no thinner than 8 mm. Carefully monitor the dimensions of the panel; the depth of the slope and the width of the plastic must match.
Secondly, we collect the necessary set of tools. In general, this is a completely standard “repair kit” consisting of a tape measure, a hammer and a screwdriver, a drill and self-tapping screws, silicone foam and a device that will allow you to use them, a trowel and/or spatula, and rags.
Third, we collect all the building materials. Here you can’t do without an f-shaped profile, starting strip and tape, insulation, a mixture with cement for construction work, self-tapping screws to size and paper clips.
Only by collecting all of the above does independent installation of slopes become possible. And please note that only after 1.5 or 2 days have passed after installing the window, you can begin installing the slope. During this period, the polyurethane foam should dry completely.
How are plastic slopes made?
First you need to prepare the window and wall surface. Remove the adhesive tape that remains on the surface of the plastic window. Carefully cover the unevenness and cracks that you see from the outside.
This is necessary in order to protect the external seam and the mounting foam, which does not like direct sunlight and is destroyed by ultraviolet radiation.
If you did not purchase a cement mixture specifically for this purpose, you can get by with another solution intended for exterior finishing. When all the materials are dry, paint the slopes on the outside with the paint you have corrected, and start working on the inside.
The first step is to establish a base, the role of which will be played by the starting strip. To do this, take measurements, and do not forget about “measure 7 times - cut once,” and cut the desired piece. Using self-tapping screws, attach a strip in a circle to the profile. This will be our sloped base made of plastic.
Next, proceed to “creating” the panels themselves. Start with the one that will be located on top, then go down to the sides. Using the measurements from the top opening, cut a piece of plastic to the desired shape. Insert it into the grooves located on the starting strip. Repeat the same for the two side panels.
Even if you have a “diamond eye,” it is better to arm yourself with a level or plumb line. There are several fundamental requirements for our resulting design. These include:
- Leave a gap of about 2 centimeters between the plastic and the base to fill it with foam,
- Use a corner to measure the profile in different places so that the rotation of the side parts is not the same on different sides.
- Anything that protrudes, sticks out and is out of size - correct it immediately and only with a mounting knife,
- At the joints of the panels, it is advisable to cover the cuts using the remnants of the starting profile.
Plaster slopes: advantages and disadvantages
This method of finishing slopes is unpopular, because its advantages do not always outweigh the disadvantages. The latter include: dirt, complexity and service life, questionable moisture resistance. But the advantages of plaster are significant:
- Strength, solidity;
- Availability, versatility;
- Maintainability.
Preparation here means, first of all, protecting the window with film and tape, as well as “dust-freeing” the surface. Close all through holes with cement mortar with the addition of liquid glass or a special composition. Then secure the sheet insulation with “mushroom” or “umbrella” dowels. Seal all gaps with foam. Only then do the stages of plastering work begin:
- Reinforce the insulation surface with fiberglass mesh.
- Install the plaster beacons using the level as a guide.
- Cover the base with plaster, cutting off the excess using the “rule”. Cement mortar is inconvenient to work with, but it is much stronger and more resistant to moisture than gypsum.
- Drying time depends on the microclimate and layer thickness. For a cement composition it is four times longer than for gypsum. May take up to 2-3 weeks.
- Only then can you apply the finishing putty. If you do not have the skills to work with a spatula, dilute it thinly, like thick kefir, and apply generously with a “shaggy” roller.
- When the first layer has dried - after a day - attach coarse sandpaper or mesh to a block (mesh holder) and treat the surface. A light bulb or flashlight will help you find defects.
- Repeat the procedure 2-4 times, depending on your skills and the required quality.
- The final stage is painting. It is more convenient to paint with a regular “shaggy” roller, and to paint corners with a “finger” roller or brush. Apply each layer of paint perpendicular to the previous one. A total of 2-4 layers may be needed.
Plastering, or more precisely its final stages, largely repeats the work with plasterboard. It also needs to be puttied and painted. But in general, this procedure is much more complicated and takes longer.
Subsequent stages of work on the plastic slope
Continuing work on finishing the plastic slope, we take on the F-shaped profile. You need to make special edgings out of it.
The system does not change - first make the top element, then the remaining two. There is one more subtlety here. Where the profile will be joined, you need to make “mirror” cuts at 45 degrees so that they meet.
Having completed such a piece of work, you will come to a very important part. You will need to fill all the cracks and voids with foam. The difficulty is that a golden mean is needed here. If air collections remain, this may subsequently damage the slope. But do not forget that foam expands as it hardens. And if you apply too much of it, it will expand and deform the plastic.
Apply foam from the base of the window along the entire perimeter, and it is advisable to do this in the form of jumpers between the panel and the previous slope. Apply the next ball of foam to the edge of the slope, and place the previously made F-shaped profiles in the resulting space.
You can glue them securely using tape. And so that the foam adheres well to the surface, it can be slightly moistened. But not too much.
In a little less than half an hour, the foam will harden so much that everything we have done will become stable. All that remains is to seal the cracks with silicone or sealant.
The last thing that remains is the cleaning and aesthetic aspects. That is, all the defects that most often appear near the window sill must be repaired and the surfaces must be cleaned.
A few more necessary tips that will help you cope with the task easier and much better.
- Never skimp on the quality of plastic,
- Carefully select the shades of the profile to the window, preferably in daylight,
- The panels have a special tenon, it must be cut off before starting work,
- Cut plastic exclusively with a mounting knife or jigsaw,
- Choose foam with a low expansion rate, and also fix the slope until the foam dries a little,
- If you want to add additional insulation, do so before foaming.
- If the tape leaves marks on the plastic, remove them with a small amount of acetone.
- The opening that will be under the window sill needs to be plastered.
There are quite a few processes, and some require hands-on work. But you can do everything yourself. In addition, every time you look out the window, you will understand that this is your work.
Types of slopes, and which ones are better to choose?
There are several main types of slopes. Each differs in installation mechanism, price and characteristics.
- Plaster slopes are one of the oldest. They are very ordinary and cheap. Price can also be indicated as one of the main advantages. Another plus is that it is easy to make. The shortcomings include a short service life. Without additional care and protection, it has little strength. But the main drawback of plaster as a slope is poor heat insulation. Because of this, the structural integrity of the surface may be compromised and condensation will occur on it. And ultimately this will lead to cracks.
- Wooden slopes are placed mainly under a wooden frame. Against the background of plastic, wood will not always even look advantageous. The most commonly used wood is beech, oak or larch. Such slopes are not very popular. Firstly, they are expensive, and secondly, they are included in a set with wooden windows, which are even more rare now.
- Drywall slopes are not particularly expensive, but they require additional treatment such as an antifungal coating. Then the surface needs to be primed and puttied. Before this, the wall should be cleared of pieces of plaster. After the putty has dried, the slope can be painted or covered with wallpaper. But when starting to work with drywall, it is better to have preliminary skills in working with this material.
- And finally, plastic slopes. In many respects they may deserve the title of best choice. They are the most convenient to use and very easy to install. Moreover, they are ideal for plastic windows. If you choose the same tone of plastic for the slope as for the windows (which is very easy to do due to the variety), they will merge into a single harmonious design. Another advantage of high-quality plastic slopes is their resistance to external influences: ultraviolet radiation, temperatures, and non-critical mechanical damage. They also retain heat well and insulate sounds well. To install the plastic, you will not need any liquid building materials. And 3-4 hours will be enough for everything.
- There are more interesting options for covering slopes. For example, cork panels. They are made of cork oak and will suit an interesting interior. Naturally, they are absolutely environmentally friendly, have an exotic look, are interesting to the touch and are available in a fairly wide range of colors.
Technology
In this section of the article I will tell you how to make slopes on windows using some materials from the list I provided. All stages of work will be described step by step and in as much detail as possible.
External
Plastering
- How to make plastered external slopes correctly?
For rough leveling of the surface, any façade cement plaster is used. Cement putty, which differs from plaster in the smaller grain size of the filler, will help make slopes perfectly smooth. I advise you to purchase putty with white cement: then even if the paint is damaged, the base will not show through it.
Hint: as a rule, the window opening is painted white, as it makes the room lighter and visually enlarges the window. Colored slopes are exotic, and quite dubious in terms of aesthetics.
White putty will keep the external slopes looking neat if the paint is damaged.
The instructions for finishing external slopes with your own hands differ little from the procedure for plastering any other wall with a complex surface shape:
- The ends of the opening are cleaned of flaking plaster, dust, dirt and old paint, after which they are primed with penetrating acrylic primer;
- The plaster solution is applied with a rectangular spatula. Here you have to use an intermediate technique between throwing and spreading: the mortar is pressed against the wall with a light blow of a spatula and smoothed out;
- Plaster that has dried but not completely set is rubbed with a wooden or polyurethane trowel. Puttying is carried out after the slopes have completely dried.
A rectangular spatula is used to apply plaster, a grater is used to level the surface.
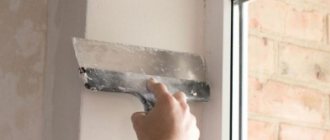
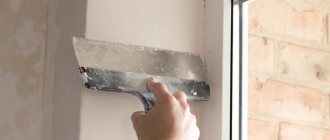
- How to putty a slope on plaster?
And there is nothing unusual here: the finished putty is applied to the surface with a wide spatula, using sliding movements with moderate pressure. The ability to obtain a constant thickness of a layer of putty comes only with experience; if you don't have one, just apply two layers as thin as possible.
- How to cover up an installation seam from the street in a panel or brick house?
Along with cement, you can use acrylic facade putty. It is advisable to reinforce the seam with cut foam with serpyanka (self-adhesive fiberglass mesh); The putty is applied over it using a narrow spatula in two or three thin (no more than 3 mm) layers.
To apply putty only to the assembly seam and a narrow strip of the outer slope, use masking tape.
Steel
- How to attach metal external slopes?
The procedure should be as follows:
- We cut the ebb to the width of the window sill, leaving petals that curl upward on the sides. They will prevent the flow of water between the low tide and the side slopes;
The curved edges of the ebb will prevent water from flowing under it.
- We sit the ebb on the mounting foam. The seam between it and the frame is sealed with silicone. The ebb is attracted to the frame with galvanized screws in increments of 50 - 60 centimeters and loaded on top while the foam sets;
- On the upper slope, a pair of the same petals as at low tide are cut out and bent downwards. They should extend beyond the side slopes, closing the gap at the junction of the parts. The slope with foam previously applied to it is attached to the frame with self-tapping screws, and to the wall above the opening with dowel screws. The connection to the wall must be filled with silicone sealant;
Connection of the upper and side slopes.
Hint: the adhesion of silicone to brick and concrete leaves much to be desired. If you want to completely eliminate the possibility of water getting under the upper slope, bend its edge about a centimeter wide and insert it into a slot in the wall made with a grinder and a metal circle. By filling the free part of the slot with silicone, you will get a much more reliable and obviously airtight connection.
- The side slopes are cut to the size of the opening and, after applying mounting foam to the inside, they are attached with self-tapping screws to the frame and a pair of dowel screws to the wall inside the opening. Sealing the junction with the frame is possible, but not required: water can only get into this seam during extremely heavy slanting rain.
The side slope is ready for installation.
Domestic
Plasters, putties
- How to putty internal slopes on windows with gypsum putty?
Finishing, as in the case of external slopes, begins with stripping the wall of peeling plaster and old fragile coatings.
It is especially worth mentioning the removal of different types of paint coatings:
- The most universal method is abrasive cleaning (with a flap wheel for an angle grinder or a metal brush - manual or made in the form of an attachment for a drill);
This tool will help remove any paintwork.
- Oil and alkyd enamels are easily removed with a steel spatula after heating with a hair dryer;
Attention: this should only be done before installing the windows. PVC is resistant to temperatures only up to 80 - 100 degrees; already at +120C it begins to decompose with the release of hydrogen chloride, which irritates the respiratory tract. Meanwhile, at the exit from the hair dryer nozzle, the air temperature reaches 350 - 600 degrees.
- With the same success, oil and alkyd paints can be softened with a special remover. It is applied 10-15 minutes before starting work. During this time, the paint swells and begins to move away from the base;
- Lime whitewash can be easily removed with a spatula, after thoroughly wetting the wall with water (with a brush or garden sprayer).
Soaked lime can be easily removed with a spatula.
The next stage is primer. I strongly advise you to sequentially treat the opening with antiseptic and penetrating primers. The first will prevent the appearance of mold, the second will strengthen the walls and improve the adhesion between them and the putty.
- How to make gypsum putty from a dry mixture?
- Water is poured into a wide container (I use a plastic paint bucket) in the amount specified by the manufacturer of the mixture (usually about 1 liter of water per 1.6 kilograms of dry mixture);
- Gypsum putty is distributed as evenly as possible over the surface of the water surface and left to swell for 3 - 5 minutes;
Dry mixtures are always poured into a container with water. If you pour water into the mixture, it will form dry clumps at the bottom.
- After this time, the putty is mixed until there are no lumps using a spatula or mixer.
A portion of putty is prepared at a time, which you can work out within 20-30 minutes; then the mixture begins to thicken and becomes difficult to apply.
The actual puttying is most conveniently done using two tools - a rectangular one and a regular one, about 30 centimeters wide, spatulas. The putty is first applied to the wall, the surface is smoothed with the second, removing excess.
The optimal spatula width for puttying slopes is 30 - 40 cm.
When applying putty, it would be a very good idea to place a reinforcing fiberglass mesh under it with a cell size of about 2 mm. The mesh will prevent the finish from cracking due to temperature fluctuations.
If you doubt your ability to make the slope smooth, attach a couple of beacon profiles to the plaster and putty the surface, removing the excess with longitudinal movements of a wide spatula or any other suitable tool.
Like that.
The quality of the surface is checked by a rule, a long level or a straight rod.
If the unevenness is large and to seal the recesses above the window sill, it is better to use not putty as the first layer of finishing, but gypsum plaster that differs in the grain size of the filler: it shrinks less when the volume is large.
Hint: slopes on internal windows (for example, skylights in the bathroom and toilet) can be finished with gypsum-based materials on both sides. Of course, if the window is not in contact with water: as you remember, gypsum is not resistant to it.
An important point: when working with gypsum putty, dishes and tools must be washed before preparing each new portion. Otherwise, the seized lumps of old plaster, falling under the spatula, will leave untidy grooves on the walls.
Drywall
- How to level slopes with plasterboard?
As a rule, gypsum boards are attached to gypsum glue (Volma Montazh, Perlfix, etc.) or to regular gypsum putty. A frame made of a profile or bar can be used, but it will noticeably reduce the size of the opening.
Gypsum mounting adhesive Perlfix from the German company Knauf.
This is how I make it work:
- Slopes are cut from gypsum plasterboard with a small margin in width (no more than 5 mm);
- The wall is cleaned and primed;
- Pieces of gypsum putty are applied to a sheet of plasterboard in increments of 15 - 20 cm, after which it is pressed against the slope and leveled according to the rule or long level with light blows of the palm;
Gypsum glue is applied with gaps: then it will not squeeze out when installing the slope.
- While the putty is setting, the upper slope will have to be secured with supports or several dowel screws screwed through it into the wall;
- After the putty or gypsum glue has dried, the edge of the gypsum board protruding beyond the plane of the wall is removed with a regular carpenter's plane. This allows you to get an ideal angle even when adjacent to an uneven wall;
- The joints of the upper and side slopes are reinforced and puttied;
- Then the junctions with the frame and the corner common with the wall are puttied;
The angle between the wall and the slopes after puttying and sanding.
- How to seal the edge of wallpaper at the corners of an opening? I use it for window edging
decorative plastic corner 25-30 mm wide. It is glued with silicone sealant; While the silicone is drying, the corner can be secured with masking tape.
The window opening with plasterboard slopes is edged with a plastic corner.
If you don’t know which paints are best to use for finishing slopes, take a closer look at “rubber” water-based emulsions. Rubber paint makes the surface waterproof and washable, and any means except abrasives can be used for cleaning.
Plastic panels
Construction of a plastic slope made of a sandwich panel with a removable casing. To assemble from scrap materials, we will significantly simplify this design.
- What are homemade plastic slopes made from??
From ordinary wall panels of the appropriate width. The maximum width of the panels that I came across in stores was 37 centimeters; this is sufficient in the vast majority of cases.
- What you should pay attention to when choosing panels?
Here are the selection criteria:
- The preferred color is white. I already wrote that it visually expands the opening and makes the room brighter;
- The preferred texture is gloss. Glossy plastic gets dirty less than matte plastic and is much easier to clean due to its smoother surface;
- The thicker the panel walls and lintels in the internal honeycombs, the less chance there is of breaking the slope with an accidental blow. To assess the strength of the plastic, squeeze the corner of the panel with two fingers: it should not crumple or even crack.
White glossy wall panel. Strength can be visually assessed by the thickness of the walls and partitions.
- How to calculate the required number of panels?
Simply adding up the perimeter of all the windows and dividing it by the length of the panel is not enough: you need all the slopes to be solid. The smartest thing to do is to draw a sketch indicating all the dimensions and calculate how many solid pieces of the required length you can get from each panel.
Let me explain with an example. Let's assume that you need to finish two windows 180 cm high and 140 cm wide. You will need 4 slopes 1.8 meters long and 2 1.4 meters long. To make them, you need two six-meter panels: each of them will be cut into two sections of 180 cm and one section of 140 cm in length; one meter from each panel will go to waste.
The typical size of a window in Stalinka is 190x150 cm. 180x140 centimeters will be obtained taking into account the window sill and insulation of the slopes.
- What, besides panels, will be needed to finish slopes with plastic??
Here's the full list:
- Starting profile for panels of appropriate thickness;
- Corner profile;
- Mineral wool for slope insulation;
- Silicone sealant. Better - sanitary: it includes antifungal additives;
The sanitary sealant includes anti-fungal additives.
- Polyurethane foam;
- Galvanized self-tapping screws 16x4 mm;
- Decorative corner made of PVC about 30 mm wide (white or to match the color of the walls).
- How panel slopes are installed?
- Along the perimeter of the frame, a starting profile with a strip of sealant applied to it is attached to it with self-tapping screws in increments of 15 cm;
- Panels cut to size are inserted into the profile;
Tip: to cut them, use a grinder with any abrasive cutting wheel. The cut is perfectly accurate and without burrs. Do not be lazy to wear a gauze bandage or a respirator while cutting plastic: fine dust is unlikely to benefit your health if it gets into your lungs.
- The cavities between the panels and walls are filled with insulation;
- The slopes are connected by a corner profile cut to size. From below, vertical panels edge the starting profile trim;
The corner profile is cut flush with the wall surface.
- The edge of the panel sits on a strip of polyurethane foam and is edged with a corner placed on the sealant.
Board
- What is the best way to make wooden slopes in a log house??
Everything is very simple: a board cut to size, sanded and coated with varnish or protective impregnation is nailed to the ends of the crowns with copper nails without heads. In the corners, the boards are butt-fitted to each other. To avoid crushing the wood when driving nails, use a hammer (for example, a construction dowel with the tip removed by sanding).
Gaps and wood defects are filled with acrylic putty, matched to the color of the wood. Instead, homemade putty made from sawdust and PVA glue can be used.
To putty soft wood, use a plastic putty knife.
Installing plastic slopes with your own hands
You will have to free up quite a lot of space in the room in order to fit comfortably and place all the necessary materials. In the preparation process, purchase and prepare everything according to the list:
- Plastic for slopes no thinner than 8 millimeters,
- U-shaped and F-shaped profiles,
- starting line,
- Insulation, can be either foam or cotton wool,
- Reiki and level,
- Roulette,
- Drill and screws (some are about 95 mm long, others 4.5 mm),
- Spatula and metal scissors,
- The stapler is, of course, not a stationery one,
- Assembly knife,
- Mortar with cement and silicone sealant.
Before starting the actual work, you need to bring the walls into the desired shape. They need to be cleared of everything: wallpaper, pieces of plaster, paint. A strong recommendation is to walk over the wall with an antifungal solution.
Be sure to take a look at what's going on from the outside. All cracks must be covered with cement mortar. If the integrity of the external seams on the outside is compromised, the polyurethane foam will suffer from ultraviolet radiation, and the strength of the seam itself will be in question.
What steps do you need to go through to install plastic slopes yourself?
No longer the preparatory stage, but not yet the installation itself, begins with screwing the slats. A batten is placed at the window openings where the future slope will be. For this we will need the aforementioned longer screws.
They should not stick out from the edge of the wall. Insert the screws into the holes previously prepared with a drill. And do not screw them in all the way until you check that they are perfectly even. For this purpose, we previously stocked up on a level.
Only after careful checks, drive the screws in completely.
Step one is the starting line.
The starting strip should be U-shaped. It should be screwed with “bugs” along the outer edge of the window. Make sure that the strips meet evenly. If there are any irregularities in the cut, they are removed with a previously prepared knife. Also, do not damage the groove on the profile; this is where our slope will be driven later.
Step two - F-shaped profile.
This profile is mounted strictly against the groove of the starting strip. Or rather the groove of this profile. We don’t need anything that extends beyond the window, so we remove it with a knife.
When working with the profile, first leave the ends with a margin at the top. Only after double-checking the correctness of the docking can the residues be removed. To do this, use metal scissors.
Fastening to a wooden lath is carried out with a stapler. It is most convenient to pin on the part of the end of the profile that is closest to the wood.
Step three - plastic panels.
Let’s even start writing with the fact that you first need to take measurements, and after checking the measurements again, begin cutting out the slope. This plastic will need to be driven into the grooves of our profiles.
If you decide to additionally insulate the slope with cotton wool, you also need to work with it at this stage. Needless to say, the quality of insulation installation also needs to be monitored.
Once the panels are installed, minor gaps may occur at the joints if they have not been measured exactly to the millimeter. No need to worry - use silicone sealant.
The fourth step is sealing the seams.
Liquid plastic will not be superfluous in this installation process. Basically, preference is given to the Cosmofen option. They need to process all seams and joints for complete tightness. Remove unwanted splashes and drops from the surface immediately. After installation is complete, clean all surfaces.
Step five - for those who install sandwich panels
Sandwich panels are mounted slightly differently. We install the starting profile as in the first option, but then the already measured and cut panels are inserted into it. And the free side is screwed directly to the wooden strip with self-tapping screws. This needs to be done diagonally.
Only then is the F-shaped profile installed and the seams and joints are sealed. You can also do without a starting profile. In this case, the sandwich panel is placed directly on the foam. To do this, make a slight depression in it around the entire perimeter.
These are all the differences from the instructions given above.
But it wouldn’t hurt to leave a few more tips:
- Always install the top slope first,
- Do not overdo it with the amount of polyurethane foam, which swells and can deform the plastic,
- Only quality, no savings,
- Do not remove the film on the window until everything is done,
- Do not “disturb” the slopes for at least 12-16 hours, so that everything dries and hardens,
- Only after studying the whole process and understanding it, proceed with installation.
This is worth knowing when installing plastic slopes yourself.
If you decide to install, or have already installed, plastic windows, the next point will be the slopes. The window slopes are, in fact, the walls of the window niche. A window sill is installed on the lower one, and slopes are installed on the other three. These are the so-called internal ones, and there are also external ones that are installed from the street.
Self-installation of internal slopes will be discussed below.
It is a mistake to think that a window inserted “into a bare wall” perfectly insulates heat and sounds. This will continue until the unprotected polyurethane foam collapses under the influence of ultraviolet radiation and rain. To prevent this from happening, slopes are installed.
If such an element is made using high-quality material, and in compliance with the required mechanism of action:
- The slope will protect the assembly seams,
- Increases sound insulation
- Reduces heat loss,
- Prevents fogging.
For example, if there are no slopes, or they are not installed well, the room will lose up to 40 percent of heat.
General principles of slope construction
According to the purpose, the finishing of internal slopes (bevels) must be carried out in compliance with certain rules. They are set out in SNiP 23-02-2003, TR 95.17-01, STO 45089902-001-2010, etc. These documents establish and clarify standard requirements for the construction of enclosing structures (including slopes). Highlighting the most important, it says the following:
- The thermal conductivity of the slopes, as a single unit, must be no lower than the thermal conductivity of the wall as a whole;
- Vapor permeability is not recommended at all;
- Resistance to aggressive climatic, mechanical and chemical influences - the maximum possible, based on the characteristics of the materials used;
- Covering a window profile and, especially, a double-glazed window with structural components is not recommended;
- The rotation of the internal bevels (angle to the plane of the window) is maximum, based on the dimensions of the opening;
- Vertical and horizontal control is carried out using a building level - bubble or laser.
The ability to reflect light must also be excellent.
Attention! Slopes for plastic windows are made white. The materials most suitable for assembly are plasterboard, plastic wall panels, sandwich, plaster.
It is worth considering in detail their advantages and disadvantages, as well as installation technology.
How installation depends on the selected material
Plaster for slopes.
We can say that this is an old finishing method. Plaster is cheap and not very difficult to apply. But she has too many negative qualities.
It cracks, crumbles, and changes color quite quickly. With a sufficiently strong physical impact, for example, subsidence of a wall, it may completely fall off.
The period for finishing a slope with plaster is calculated in weeks. The reason for this is the need for the material to dry. Since plastering is done in several layers, sometimes with a mesh between them, you need to wait until each layer is completely dry. Then prime and paint.
Plaster will not protect against heat loss and condensation of drops on the windows. And without the necessary skills, there is a risk of making the surface crooked.
Drywall for slopes.
Drywall already scores more points than plaster. It will last longer and is stronger. And if you supplement the material with mineral wool for insulation, good heat retention will appear.
But the big disadvantage of the material is its hostile relationship with water. It is absolutely suitable for external work. And there should also be no high humidity in the premises.
The need for additional treatment with primer and paint is not in favor of drywall. Manufacturing and installation also take a lot of time and require skills.
Measure the thickness of the opening (wall), G.
It is recommended to place the mounting plane in single-layer walls at a distance of no more than 2/3 of the wall thickness from the inner surface of the wall, and in layered walls with an effective seal - in the area of the insulating layer (GOST 30971-02, clause B.4.1.). Be sure to agree on the position of the mounting plane with the Customer (hereinafter - make every effort to ensure that all approvals are in writing). Shifting the plane towards the street worsens the thermal insulation characteristics, but improves sound insulation; towards the room - vice versa.