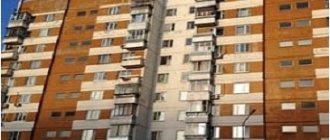
Combining a loggia or balcony with a room is a tempting option for expanding living space. But will the project be approved? Is it worth spending money on paperwork if in the end he is “hacked to death”? What if the balcony is clearly in emergency condition? “Khrushchev’s” balconies have reached the end of their intended service life and are crumbling with might and main. Even if the slab still seems fine, it’s scary to look at the parapet, let alone lean on it. Finally, how to glaze a balcony - cold, with insulation, PVC, metal-plastic, wood? Will the balcony withstand durable and warm, but heavy cladding? In general, once you think about repairing a balcony, a whole bunch of problems are revealed, and no wonder - the entire balcony is open to the elements. So it makes complete sense to thoroughly understand balconies, so as to at least know what you can count on, and what’s better not to fool your head.
Do-it-yourself overhaul of a balcony in a panel house: the right recommendations
When constructing new panel houses, the balconies in them are made according to standard templates and most often do not carry any particular attractiveness. They are distinguished by a number of design features, the absence of any decorative finishing, some of them are not even glazed. For these and other personal reasons, it is worth considering the option of reconstructing a balcony room. If the prices for installation work performed by specialists are beyond your means, then you can safely take on the repairs yourself.
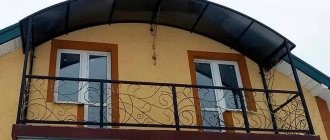
Standard balcony of a panel house
Basic recommendations before starting work
First, you should carefully consider the further use of the balcony after repair, since the amount of work, the choice of materials, and much more depends on this. Repair work of this kind is quite complex, but after receiving the necessary information and following all recommendations and safety precautions, the repair will be easy and enjoyable.
The main difficulty when reconstructing a balcony is the limited space . When making repairs, all tools should be carefully stored in a separate place so as not to disturb the technician or injure him. You should also think through all your locations and movements to prevent emergency situations.
Assessing the condition of a balcony in a panel house
Let's look at the stages of a major overhaul of a loggia with our own hands using the example of panel houses of type P 44. The platforms in them differ in their frame features from standard balconies, and in appearance they resemble a zigzag shape. The right approach to balcony reconstruction will significantly increase the free space. It can easily accommodate a wardrobe, a coffee table with chairs, and, if necessary, you can organize a personal office.
The load-bearing capacity of balcony structures in panel houses is famous for their long service life. Finishing materials used in construction are rarely of high quality. In a panel house of type P 44, it is necessary to carry out repairs on the interior and exterior decoration.
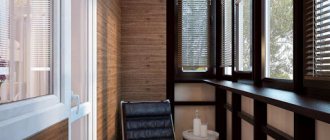
Renovated balcony - a cozy corner in the apartment
How to calculate the load on a balcony slab
According to SNIP 2.01.07-85 “Loads and Impacts”, the maximum norm per 1 square meter of an external slab in a panel house is 200 kg, for loggias this figure is twice as much - 400 kg. The permissible load on a balcony with parameters of 1.2 * 3.0 m for a standard panel house will be 720 kg.
This value also takes into account the weight of the trim, transoms, and glass that are already installed on the balcony. It can reach up to 100-150 kg, therefore, 580-630 kg remains for other types of load. If we subtract from these indicators the weight of possible precipitation during rain and especially snowfall (about 200 kg), 380-430 kg will remain.
The maximum load on the balcony is 200 kg/m2
When arranging a place to store things or relax, the weight of people who can be on the balcony at the same time is also taken into account. Three adults weighing 75-85 kg on average will weigh 240 kg, then 140-190 kg will remain for upholstery and furniture. These calculations are relevant for new panel houses; if the house is more than 20-30 years old, then the permitted load will decrease by another 50-80%.
Now the law provides for a maximum load per square meter of a balcony slab of 112 kg. And this will reduce the figures by several tens of kilograms.
Exterior decoration
The need for exterior finishing of a balcony for houses of type P 44 is not a rare case. There are a number of fundamental rules for choosing materials for exterior finishing:
- Only high-quality materials that are durable and have a long service life are acceptable.
- The material for exterior finishing must be able to withstand any weather conditions and precipitation well.
- Affordable price.
- Easy to install with your own hands.
External finishing of the balcony with corrugated sheeting
The most suitable according to the above criteria are:
Installation of balcony cladding with vinyl siding
For DIY repairs, polyvinyl chloride (vinyl) siding is ideal. The material is lightweight, has high strength and reliability, and is easy to install. This material looks good on balconies in a panel house of type P 44. Before starting work, you need to prepare:
- Vinyl siding (the number of square meters is determined from the volume of the sheathed area + 15-20% is added for additional trimming).
- Wooden beam 40x40mm for installation of the sheathing (the length depends on the perimeter of the lower part of the balcony).
- Starting strips mounted at the bottom of the structure (the number depends on the length of the sheathing beam).
- External corners to hide siding corner joints.
- Fasteners (anchors with dowels, self-tapping screws).
- Window sill strips.
- Installation tools: grinder with discs for metal and wood, hammer drill with a set of peaks and drills, level, screwdriver with attachments, screwdrivers, hammers.
Installation of siding outside the balcony
Sheathing begins with the installation of wooden sheathing. Type P 44 houses have from 9 to 16 floors, so do high-rise work with your own hands in strict compliance with all safety regulations.
Important! If the siding is planned to be installed in a vertical position, then the sheathing is mounted horizontally and vice versa!
To do this, racks made of wooden beams are attached to the corners of the balcony using anchor bolts. Nuts will help to better secure the sheathing from the inside. Then horizontal bars are installed along the upper and lower edges of the structure. Now you can attach the vertical posts of the sheathing.
At the final stage of repair, the siding is attached to the wooden structure. Special outer corners are screwed to the corners of the sheathing, and the ends of the product will be inserted into them.
The balcony of a panel house is covered with siding
Do-it-yourself vinyl siding installation begins with a starting strip, which is attached to the lower wooden beam using self-tapping screws. Now each subsequent plank is inserted into the previous one and fixed. The topmost span is not mounted; instead, a strip for the window sill will be installed. When screwing in self-tapping screws, it is important to leave 0.5-1 mm as a gap, which will prevent the siding from deforming during thermal expansion.
Is the area of the loggia or balcony included in the living space?
The question often arises whether the area of a balcony or loggia is included in the living space, whether heating charges are charged for additional square meters and who should be responsible for repairing these premises.
The total area of the apartment is calculated as the sum of the areas of all rooms and additional premises located inside the apartment, officially registered extensions. But if the area is not heated, it is considered unsuitable for living.
Therefore, the total area is calculated with a reduction factor - for balconies equal to 0.3, for loggias - 0.5. Sometimes real estate agents, in order to attract the attention of buyers, announce the living area along with the balcony area.
If the loggia area is officially attached to the apartment, then it is included in the total area and is included in the payment for heating and rent.
When making purchase and sale transactions, you do not need to take the sellers’ word for it, but you should carefully study the relevant documentation for housing.
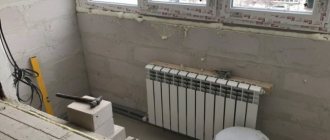
Interior decoration
After completing the exterior work, it is necessary to give the balcony a cozy, warm and elegant appearance. To do this, use the following materials to choose from: PVC panels, plastic lining or plasterboard. The easiest to install with your own hands are PVC panels.
The walls of the balcony are covered with plastic panels
Wall and ceiling cladding with PVC panels
Before starting work, you must prepare the following materials:
- Wooden beam 20x20 for installation of the sheathing (the number of square meters is calculated from the area of the room).
- Polystyrene foam or penofol for insulating walls and ceilings.
- PVC panels: U-shaped profile, H-profile, F-profile (have widths: 0.250, 0.3, 0.5 m; lengths: 5.9, 2.95 and 2.6 m). To accurately determine the number of parts for repair, measure the perimeter of the room and divide by the selected panel width.
- Polyurethane foam.
- Self-tapping screws with a press washer and for wood.
- Tools: hammer drill with pobedit drills, grinder with discs for metal and wood, screwdrivers, hammers, screwdriver.
Installation of lathing for covering a balcony with plastic panels
The first step is to install the wooden sheathing according to the principle of exterior finishing using vinyl siding with horizontal guides. We insert sheets of foam plastic into the spaces between the frame, securing them with dowels. Then the starting corner panel is installed in the corner of the balcony where it is most difficult to work.
Each subsequent panel is inserted into the previous one using special grooves. We use the F-profile to go around the corners of the balcony. In places where the wall meets the ceiling, we install ceiling plinths. The damping profile is installed at the end of the work.
Weight of cladding and double-glazed windows on the balcony
When carrying out glazing and wall cladding on an external structure, the load on the balcony should not exceed permissible standards.
When calculating the load, we take into account the weight of the cladding, glazing and precipitation
The following materials can be used for glazing:
- Glazing using a “cold” aluminum profile installed on the railing (without removal). The weight of this structure will be approximately 14-16 kg per linear meter.
- The use of wooden frames installed on the railing will give a load of 16-18 kg per linear meter.
- If glazing is carried out with the profile removed, you need to add 4 kg to the weight of the aluminum or wooden profiles.
- Single-layer glazing with plastic systems will already weigh 20-26 kg, depending on what kind of plastic is used.
- Glazing made of “warm” aluminum profile weighs 21-23 kg per linear meter.
Having decided on the type of glazing, you need to select suitable materials for covering the walls. If the maximum load does not allow the use of too heavy materials, you can pay attention to siding panels. In second place in terms of bulkiness is gypsum board, then you can choose lamellas or PVC panels. If the load is not terrible, then you can use euro-lining made of wood, MDF panels, decorative stone and even clinker tiles for cladding.
Floor installation
To choose a flooring option, you need to consider the available tools and materials. The easiest way to install a floor with your own hands in houses of type P 44 is the typical raising and insulation. To do this you need to prepare:
- Screwdriver.
- A grinder with a wood disc or an electric jigsaw.
- Dowels 80 mm.
- Plywood or chipboard 20 mm.
- Wooden beams 40x40 mm.
- Self-tapping screws for wood.
- Polystyrene foam or penofol 30 mm thick.
- Tape measure, pencil, screwdriver, hammers, level.
Installation of heated floors on the balcony
Related article: Do-it-yourself loggia insulation technology
Using a hammer drill, holes are drilled for attaching rough timber along the entire length of the room. We measure the width of the balcony (in houses of type P 44 it is 105 cm) and cut the beams 40x40 mm into the appropriate size minus 1-2 cm. They are laid and mounted at a distance of 40 cm from each other. Then we drill through holes and secure with 80 mm dowels.
Polystyrene foam is tightly placed into the formed cells. We make sure that no gaps are formed. Foil is placed on top. Using a level, level the layers of plywood evenly. If necessary, add another layer of polystyrene foam or penofol. Now all that remains is to paint the floor in your favorite color. This completes the repair of the balcony floor.
Fastening the channel to the wall - channel on top
In this embodiment, the channel is welded to a plate, which is attached with anchor bolts to a monolithic belt (or monolithic cushion). In addition, it is important to anchor the upper part of the channel to prevent rotation. To do this, a corner is welded to it on top, which will be embedded in the masonry of the wall, which also serves as a weight for the channel. A corner is one of the anchoring options. You can also weld a metal element to the upper flange of the channel, which in turn will be welded to the embedded part in the monolithic belt or in the ceiling. The main thing is to create a reliable anchor that prevents the channel from turning.
It should be noted that for a reliable balcony design, it is necessary not only to calculate the channel, but also to calculate its support unit. Let's look at this with an example.
Example. Calculation of a cantilever balcony structure in the form of a channel beam without a strut and a channel support unit.
Given: a balcony 1.2 m wide, channels are installed in 1.1 m increments, the thickness of the balcony monolithic slab along the channel is 80 mm, the floor is ceramic tiles on mortar (total thickness 30 mm).
Determine: channel number; design the console support unit.
We collect the load on the channel (per linear meter)
Standard load per 1 linear meter of channel, kg
Load safety factor
Design load, kg
Weight of the balcony slab (thickness 0.08 m, volumetric weight 2500 kg/m³, design span 1.2 m)
Weight of the floor structure (thickness 0.03 m, volumetric weight 1800 kg/m³)
The channel's own weight (let's take No. 16 offhand for now - weight 14.2 kg/m)
Total (constant load)
Live load on the balcony - at a width of 0.8 m along the edge of the balcony (Table 6 DBN “Loads and impacts” 10a)
400∙1,2 = 480
480∙1,2 = 580
Layout of the load on the channel:
As you can see, the permanent load is distributed along the entire channel, but the temporary load (according to clause 10a of Table 6 of the DBN “Loads and Impacts”) is distributed along the edge of the balcony on a strip 0.8 m wide.
Let's determine the maximum standard and design moment for the console (the maximum moment will be located at the support).
The moments from the constant load are equal to:
M = qL², where L is the design span of the beam (for a console it is equal to the distance from the end of the console to the wall).
The standard moment from a constant load is equal to:
Mn, post = 320∙1.1² = 387 kg∙m.
The calculated moment from a constant load is equal to:
Mr,post = 365∙1.1² = 442 kg∙m.
To determine the maximum standard and design moments for the console from a live load (not distributed over the entire beam), we use reference table 14.1 (Ulitsky “Reinforced concrete structures”)
For our case, a = 0.8 m, x = L, the moment must be determined at point B.
The standard moment from the live load is equal to:
Mn, time = 480∙0.8(1.1 – 0.8/2) = 269 kg∙m.
The calculated moment from the live load is equal to:
Mr, time = 580∙0.8(1.1 – 0.8/2) = 325 kg∙m.
We sum up the moments from permanent and temporary loads, obtaining the final moments for calculation:
Mn = 387 + 269 = 656 kg∙m.
Mr = 442 + 325 = 767 kg∙m.
Let us determine the required moment of resistance of the channel:
Let's check the rigidity of the console (according to DSTU “Deflections and Displacements”, when checking the deflection for the console, the L value must be doubled).
Mn∙L/(10EI) = 656∙2∙120/(10∙21000∙174) = 0.004 = 1/232 2557 kg). This is a very decent bolt diameter; fastening with bolts only is a rather expensive method.
Once the brand of bolts has been determined, the restrictions on the installation of these bolts should be checked.
According to the table “Installation parameters”, the minimum distance from the axis of the M20 bolt to the edge of the concrete should be c = 140 mm. We have 50 mm. This means that it is necessary to move the fastening unit towards the center of the wall, if the width of the wall allows us to do this.
Case 2. Let's consider a variant of a support unit for a cantilever beam with an anchoring angle No. 50, 300 mm long, welded to the channel, while the angle is held by the brickwork of the window sill (masonry height 800 mm, thickness 250 mm). The channel is secured with four HST M8 bolts.
In this case, the calculated moment Mr is perceived by the design of the unit in two versions: on the left is shown the perception of the moment by bolts working in compression and pull-out under the action of a pair of forces F (this pair of forces represents a moment); and on the right is shown the perception of the moment by the anchor angle and bolts (the angle receives a horizontal force trying to pull it out of the masonry along with the beam, and the bolts at the same time work to shear, receiving a horizontal force in the opposite direction). Our task is to check what moment is perceived by the structures in each of the options, then add up these moments and compare them with the calculated moment MP acting on the structure.
Let us determine the moment perceived by bolts working in pullout and compression.
We have four M8 anchor bolts that are subject to moment force. The moment M, according to a simple formula, is decomposed into a pair of forces - two forces F, one of which tries to tear the beam up (tear out two bolts), and the other simultaneously presses the beam down (compresses the other two bolts). Together, these two forces represent the desired moment M1. Moreover, the relationship between forces and moment is transmitted through the distance between the bolts: M1 = Fa. That is, the greater the distance between the bolts, the less torque they will have.
In our case, the beam extends into the wall by 270 mm, the distance between the bolts is 150 mm, the distance from the edge of the wall to the bolt is 70 mm.
We are not interested in the compressive force, because The compression bolts work very well, but the pullout needs to be checked.
Let's use the Hilti Anchor Guide (you can download it freely from their website) and determine the calculated pullout resistance for the M8 HST anchor stud. This will be our force F = 5 kN = 500 kg.
Let's find the moment that the M8 bolts can withstand, taking into account the fact that there are two bolts experiencing the pull-out force:
M1 = F∙2a = 500∙2∙0.15 = 150 kg∙m.
You should also check the installation restrictions of these bolts.
According to the table “Installation parameters”, the minimum distance from the axis of the M8 bolt to the edge of the concrete should be c = 50 mm. We have 70 mm - there is some reserve.
Next, we will determine the moment that can be perceived by a structure operating according to the diagram shown in the figure below.
In this case, we have a moment M, but we decompose it into another pair of forces: a force F acts horizontally to the left, tending to tear out the corner, and a force opposite to it acts horizontally to the right, tending to cut off the bolts. The distance between these forces is equal to the height of the channel 100 mm.
Let's determine how much force the corner anchored in the masonry will withstand. The cross-sectional area of the corner No. 50x5 is 4.8 cm2; 2100∙4.8 = 10080 kg (here 2100 kg/cm2 is the design resistance of steel). This is a significant effort, but we also have weaker elements.
Let's find the force F for the corner: F = Mр/a = 767/0.1 = 7670 kg.
Let's find the force F for the bolts (taking into account that there are 4 of them): F = Mр/4a = 767/(4∙0.1) = 1918 kg.
Let us determine whether the corner of such a section will withstand the force acting on it. The cross-sectional area of the corner No. 50x5 is 4.8 cm2; 7670/4.8 = 1598 kg/cm2 19.18 kN).
The minimum distance from the axis of the M12 bolt to the edge of the concrete is c = 55 mm - the support plate should be moved 5-10 mm from the edge.
Source
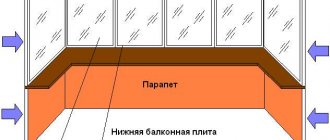
Glazing
Balcony glazing is the final stage of do-it-yourself renovation. In houses of type P 44, the most suitable option is to install double-glazed windows. You must order windows from a trusted manufacturer. First of all, you need to take measurements. To do this, we remove the old window frames right down to the base of the parapet and the upper ceiling. Now we measure the distance between the walls and from the parapet to the ceiling. Based on the technical data received, we manufacture windows.
To install metal-plastic windows yourself, you will need:
- Ready-made frames with double-glazed windows.
- Drill or hammer drill with 140 mm Pobedit drill bits.
- Self-tapping screws with plastic dowels.
- Screwdriver.
- Polyurethane foam.
- Tape measure, level, screwdrivers.
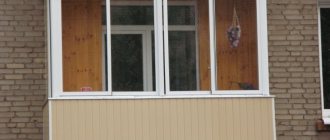
Installation of metal-plastic windows on the balcony
So, before installing the windows, we remove the glass unit from the frames. The frames are inserted into the window opening, where the points of future holes are marked. Insert plastic dowels into the drilled holes. Then we mount the frame using self-tapping screws, screwing them into the dowels. All cracks are sealed with foam. Then we install the double-glazed windows, securing them with a plastic strip. Attach the swing-out doors.
The main types of slabs used for balconies and their features
A balcony is a slab that protrudes some distance from the wall of the building. For security purposes, it is fenced with railings along the entire perimeter. A balcony is a structure that includes a horizontal base plate, fastenings and fencing.
Today there are several types of balcony slabs, which differ in design:
- Cantilever plate. It is used in brick houses with reinforced concrete floors. They fasten it by pinching it into a wall with two opposite sides or one;
- PB (balcony slab). It is a multi-hollow reinforced concrete or metal floor platform. Used in old buildings, at a depth of more than 38 cm;
- The balcony slab in a monolithic house is a continuation of the floor slab. Features of installation of balcony slabs
Many people believe that all slabs are a continuation of the floor, but this is not entirely true. When building a balcony, a wide variety of fastening methods are used:
- Use of additional support. It is mounted on the ground floor, as it requires an external steel, reinforced concrete or wooden support fixed to the ground;
- Pinching in the structure of the wall of the house. A cantilever plate is used;
- Suspension to the load-bearing walls of the balcony platform;
- In frame buildings, the support rests on the consoles of the internal walls or columns. In this case, there is no load on the wall.
- In panel-type houses, for example, in Khrushchev, balcony slabs are used with floors and supported on reinforced concrete structures.
- Installation in a brick building is carried out by pinching it into the facade of the house. Overhead and underlay elements made of reinforced concrete are walled into it. They make up a niche for the stove. The edge that is adjacent to the wall is thickened. A fairly large entry into the wall of the building is required. It must be welded using steel anchors to reinforced concrete elements.
Features of balconies
Mounted
Hanging balconies differ from permanent balconies in that they can be installed on any floor, regardless of whether there are balconies below or not. They can be installed anywhere, since they are mounted on a special frame, which, in turn, is fixed to beams.
Scheme of strengthening the slab of a small balcony using guy wires
Moreover, the brackets and the metal frame itself rust over time; the structure will have to be strengthened at least once every 5 years. This rule should not be neglected, because you need to understand that we are talking about the safety of human life.
Before talking about the features of permanent balconies, it is worth adding that most often plastic material such as PVC or siding is used for finishing hanging balconies. A window sill, clotheslines, a flower pot and a dryer can be installed there, we must repeat, the same way as on a permanent one.
Capital
As it is not at all difficult to guess, a capital balcony is a structure that extends from the load-bearing wall of an apartment building. In new buildings, all such structures are exclusively capital.
Basic methods of fastening balcony slabs
On the one hand, such a design can withstand a very heavy load. On the other hand, it is extremely difficult to repair it; it will require a lot of time and a lot of money.
To drain water, even in capital balconies, the slab is laid at a certain slope.
The main thing that needs to be done when strengthening such a structure is to strengthen the load-bearing balcony slab, fences, parapet and everything else - this is also important, but secondary.
You can also install clotheslines on the loggia, put a flower pot, install a window sill in front of the parapet, organize a dryer, do glazing by installing any window, whether plastic, wooden or aluminum.
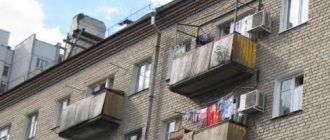
The main reasons for the destruction of the balcony
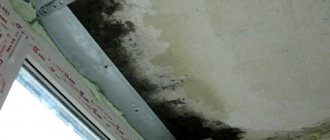
As practice shows, the main reason why balconies collapse is depressurization of joints and violation of waterproofing. As a result, moisture enters the room, forming condensation, from which mold appears.
In addition, moisture can act on reinforced concrete, penetrating into it and causing corrosion on the reinforcement. The age of concrete directly depends on the penetrating ability of water - the older it is, the easier it is for moisture to penetrate inside. Corroded reinforcement loses its load-bearing capacity and expands, which causes a deterioration in the load-bearing capacity of concrete.
Also, the destruction of the base of the balcony is caused by high pressure on the slab, sudden changes in temperature and a long absence of major and current repairs, such as in Khrushchev.
There are 2 stages of destruction of the base of the balcony:
- The first includes minor destruction when it is necessary to strengthen the slab. Such destruction occurs in houses whose age is approaching 40 years. You can do it yourself, as this is a minor repair. For example, in cases of crumbling corners.
- The second stage is the destructive appearance of the object. These include the collapse of part of the balcony, the appearance of cracks at the junction with the wall, open sections of reinforcement, destruction is observed in the upper layer of the platform or detachment in its lower part.
Who should repair the stove?
Due to the fact that the regulations do not stipulate what a balcony is (a living space or part of a supporting structure), it is impossible to clearly answer the question of who to contact and who is responsible for the repairs. Ideally, the balcony slab should be replaced and strengthened by the management company, but the railings and parapet should be replaced by the apartment owner himself. However, it is impossible to accurately answer the question at whose expense the repairs are being carried out. On this basis, disagreements very often arise between apartment residents and the management organization.
If the fact of destruction of the integrity of the slab has been noticed, then you should write a statement to the management company. This document is signed by a specialist and recorded in the appropriate journal. A good reinforcement of your words would be an application in the form of several photographs of a destroyed balcony. Neighbors who live on the floor below must leave their signatures on the corresponding application. The next step will be to decide on further actions. You can wait for utilities, or you can carry out repairs with your own hands or with the help of construction crews. In the latter case, an estimate is needed in order to receive a recalculation of the rent in the future. If none of the options are suitable, you can safely go to court.
Related article: Attaching a loggia to a room and how to insulate it
Strengthening a concrete slab in various ways
Factors that indicate that the balcony slab needs additional strengthening and repair:
It is advisable to treat all elements of the balcony with anti-corrosion liquid.
Recovery involves several stages:
Balcony reconstruction scheme with fencing replacement
As you can see, strengthening the balcony slab is not so difficult, although all this must be considered in each specific case separately. After strengthening, you can completely calmly install a window sill, hang clotheslines, install a dryer, and do glazing (you can choose a wooden window, but for some reason everyone is just obsessed with plastic ones).
A plastic balcony is no longer as relevant as it was 10 years ago: a wooden one is both more beautiful and more convenient to use.
If the reinforcement is very worn out, then significant reinforcement will be required, which is carried out in 3 stages:
An example of a scheme for strengthening openings under a balcony
It sounds trivial, but when working with balconies it is necessary to take into account all safety requirements. To begin with, the work site needs to be fenced off on the ground floor so that a piece of concrete slab does not suddenly fall on someone passing by.
Carrying out such work without fencing and warning signs is a violation not only of safety rules, but also of Russian legislation.
Balcony restoration stages
In order to carry out repairs with your own hands, for example, in a Khrushchev building, you need to know in what sequence and what to do.
- The first stage will be preparation for repairs - clear the balcony of debris, remove all unnecessary objects, remove crumbled concrete.
- Exposed parts of the fittings must be cleaned of rust. The first layer is easy to remove, but the lower ones need to be treated with a special product.
- The mesh of reinforcement is attached to the slab with dowels. So that it fits into the concrete screed without protrusions, leave a small gap between the mesh and the slab. Formwork boards are fixed along the entire perimeter of the board.
- Next, you need to prepare a solution consisting of cement and sand, which will be poured onto the reinforcement. Subsequently, the screed is covered with cement and rubbed, that is, “ironized.” It is important to remember that the thickness of the screed is twice or more times the thickness of the mesh.
- The surface located below should be treated with a primer and plastered a little later.
If the reinforcement cage is more corroded, the best solution would be to strengthen the slab. Here it is necessary to carry out a set of preparatory measures.
- The first step is to install steel beams on the sides of the platform and secure them to the wall with a console. Weld the mesh to them and begin pouring concrete, the process of which was described above.
- Upon completion of the repair work, the surface should be waterproofed. Coating or roll-type materials are suitable for this purpose.
Inadmissible fastening of the channel with anchor bolts to the wall
If you welded a channel to a plate, and this plate was secured to the wall with four expansion anchors (or another number of anchors - it doesn’t matter), this will be a hinge . The bolts experience a pulling force, the plate is flexible, all this will lead to rotation of the beam on the support. This is not an instantaneous destruction of the structure, but spread out over time. At first, the turn occurs very slowly and imperceptibly, but it constantly increases - and this will happen until a critical moment, when the weakest element in the structure will not withstand and cause an emergency condition. And no matter how reliable and powerful the channel is, if its fastening unit is not reliable, the entire structure is considered emergency.
Instructions for installation and repair of balcony slabs
The balcony slab is the basis of your balcony. The performance properties of the balcony structure depend on its strength characteristics and dimensions. Read a review of balcony glazing technologies with aluminum profiles.
Specifications
Types of balcony slabs, their main parameters and dimensions are regulated by GOST 25697-83.
Balcony slabs are divided into the following types:
- PB – flat solid beams;
- PBK – flat solid cantilever;
- PBR – ribbed cantilever.
Balcony slabs are manufactured in lengths from 1200 mm to 7200 mm, widths from 1200 mm to 1800 mm. Standard dimensions of balcony slabs: length – 3275 mm, width 800 mm.
The thickness of the balcony slab in brick and panel houses or in Khrushchev varies in the range from 150 mm to 220 mm, depending on the type of slab, its size and weight.
A series of balcony slabs consists of several groups of numbers and letters; the series is deciphered as follows: the main group of letters and numbers is the type of slab, the length and width of the slab in decimeters. Additional groups of numbers and letters may indicate the following information: if the balcony slab is equipped with an emergency exit, then indicate which side of the slab it is located on, left or right; class of prestressed reinforcement, type of concrete, if it is light; for heavy concrete indicates the type of finishing of the upper front surface.
- Balcony slabs PB are reinforced concrete hollow-core floor slabs. Dimensions of balcony slab PB 1: product length 3440 mm, product width 1400, product thickness 160 mm.
- In the monolithic version, the balcony slab can be integral with the floor slab.
- The cantilever balcony slab is fastened by pinching it into the wall on one side or two opposite sides. Suitable for buildings with heavy walls, such as brick with reinforced concrete floors.
Calculation and device
The balcony slab for brick walls has a special ledge to ensure that the slab enters a special niche in the wall formed by reinforced concrete underlays walled into the wall. Load-bearing brick walls, as a rule, are made of two or more bricks, so the penetration of the balcony slab into the wall is 300 mm or more.
The unit for supporting a balcony slab on a brick wall is a junction of horizontal and vertical planes. Moreover, the support unit can only be implemented on a load-bearing wall. The support unit is calculated to determine the permissible loads, in accordance with GOST 956-91.
The stability of a balcony slab against overturning is calculated by comparing the overturning moment with the restraining moment from the weight of the structure.
The picture shows the strengthening of the balcony slab on the top floor
Installation technology
The technology for fastening balcony slabs depends on the material from which the building is constructed.
When building a brick house, the balcony slab is attached to the masonry walls.
In a large-panel building, balcony slabs are sandwiched between the building blocks. In both versions, balcony slabs are welded to reinforced concrete lintels and floors using anchors connected to the reinforcement frame.
Extension of the balcony along the base of the slab
Extending the balcony along the base of the slab beyond its limits will provide additional usable space. But before you begin work to increase the balcony along the base of the slab, calculate all the loads of the balcony structure on the slab to prevent it from collapsing. As a rule, to expand the balcony, metal brackets made from steel angles are used. Read the recommendations on which canopy to choose for a balcony.
The photo shows an example of expanding a balcony along the base of the slab
Another example of expanding a balcony shower
Strengthening
To reinforce the balcony slab, a reinforcing mesh is used, mounted from wire with a diameter of 5 mm, the rods of which are connected by welding or special soft wire. The mesh is laid on the slab and filled with concrete.
Related article: Does a loggia count towards the total area of an apartment?
Balcony glazing will place significant additional loads on the balcony slab and railing. Therefore, before glazing, it is advisable to strengthen the balcony slab (mount a supporting metal frame and fix it to the wall panel with anchors) and strengthen the parapet. Read a review of balcony glazing technologies with aluminum profiles.
Strengthening a balcony slab in a panel house can be done using a cement screed method.
Repair of balcony slabs
Work to restore the balcony slab is considered a major overhaul. This type of work is carried out if the destruction of the slab has not yet reached the base, and the reinforcement is damaged by corrosion no more than 10%. The process of restoring a balcony slab includes: cleaning the slab, renewing the reinforcement frame, installing formwork, applying concrete screed, and strengthening the parapet. Slabs with more significant damage are classified as emergency and must be replaced. If destruction of the balcony slab is detected, it is necessary to contact the management company with an application to create a commission and draw up a report on the degree of destruction of the balcony and possibly recognizing it as an emergency.
Read instructions on finishing a balcony with siding on this page.
The main insulation of the balcony slab is carried out from the inside of the balcony, and additional insulation of the balcony slab from below, of course, will not be superfluous if the neighbors below insulate their ceiling, for example, with expanded polystyrene. A guide to internal insulation of a balcony is here: https://balkonus-pro.ru/uteplenie/rukovodstvo-po-vnutrennemu-utepleniyu-balkona.html.
To waterproof a balcony slab, you can use: coating waterproofing materials on a bitumen-polymer basis; penetrating compounds; roll or sheet waterproofing materials.
Cost of balcony slabs
The approximate cost of balcony slabs is from RUB 5,500/piece. up to 20,000 rub./pcs.
Where to buy balcony slabs?
Where to buy in Moscow:
- MZHBK LLC, Beregovoy proezd, 5. Tel.: +7 (499) 703-36-20;
- Group, 3rd proezd Maryina Roshcha, 40, building 1. Tel.;
- LLC Monolit Stroy Group, Chermyansky pr., 7, building 1, of. 3606. Tel..
Where to buy in St. Petersburg:
- ,etc. Piskarevsky, 63A. Tel.: +7 (950) 025-50-60;
- , st. Domostroitelnaya, 1. Tel.: (812) 612-08-93;
- , st. Efimova, 1/4, office. 37N. Tel.: +7 (812) 458-01-60.
Video
See the video for an example of expanding a balcony along the base of a slab:
Recently, balconies have become often used as living spaces. Various types of glazing are actively installed on them, insulation is carried out, the outside of the balcony is sheathed with siding, balconies are combined with living rooms, all these manipulations place a significant load on the balcony slab, which can lead to its destruction. It is recommended to contact specialists to carry out finishing work on the balcony.
What determines the permissible weight for a balcony?
In addition to SNIP data and the calculations obtained, the load on the balcony slab will depend on many factors. This should also be taken into account when drawing up a plan for repair work or glazing:
- age of the house and structures (for example, for a house 40 years old, the safety margin is reduced by 70%);
- degree of wear of slabs, reinforced concrete structures, beams;
- the weight of possible precipitation (especially for the top floors);
- apartment layout, balcony location (corner, in the center);
- the number of people simultaneously operating the structure.
The listed factors have a great influence on how much weight the balconies can withstand and what the maximum permissible load on this structure will be.
Types of balconies in houses
In most cases, old multi-storey buildings have open-type balcony structures, that is, there are no glazing elements. Such premises can only be used in summer. Most often they are installed near rooms that are shared, for example: the kitchen or living room.
In countries with hot climates, open balconies are installed not only near public rooms, but also next to the bedroom. The open balcony structure is small in size. In this regard, use this room for limited purposes, for example, for drying clothes or short walks to get some fresh air.
Types of open balconies
Nowadays, the construction of balconies can have various types, such as:
- French balcony designs are small in size. It is intended to go out onto it in order to breathe air or admire the appearance. It is placed opposite the doors. In most cases, this type of balcony is glazed.
- Attachment-type structures are often installed directly to the very façade of the building. For additional reliability of this type of structure, a foundation is erected from below.
- For high-rise buildings, cantilever-type balconies are used. The main supports are built into the load-bearing wall by more than half a meter. Cantilever holders are made of high-strength metal. The enclosing part is made of a decorative monolith.
- Balconies installed in a brick house have significant weight; therefore, they are used in structures made of material that can withstand such a load. This type is very similar to the previous version.
- Balcony room on additional support pillars. These types of structures often have a huge mass, due to this, additional brackets or pillars are installed. When using supporting structures in the form of columns, the balcony room is installed on the first or second floors. Brackets are used in the construction of higher floors.
- The hinged type of balcony in a panel house is installed on pins that are placed on the facade walls of the building. This structure is pre-fabricated, after which it is suspended on clamps using special equipment.
This or that type of balcony premises is equipped depending on the material used as the basis for the construction of the house, as well as its functionality.
Fastening brackets for balconies with anchor bolts
It often happens that you need to attach a balcony to an existing wall or build it right away, using cantilever beams from channels to support the balcony slab. This is a very common solution, but you need to know some nuances so as not to make mistakes.
Let's start with the theory. There are two main options for fastening in construction: hinge and pinching. With a hinge, the structure can rotate on the support; if pinched, any rotation is blocked.
And there is one simple rule of strength: any console (without additional racks or struts) must be pinched on the support. When hinged, it will simply rotate, and this will lead to an emergency state of the structure.
Now let's look at how to implement this pinching in real life, and how to attach brackets for balconies is strictly prohibited.
Loggia and balconies
In the cantilever type of structure there are as many as three open end surfaces. Such a structure is usually considered the most vulnerable and requires large financial investments for repair work.
The cantilever structure hangs on the edge, therefore it is more susceptible to external environmental influences. In panel houses, cantilever types of protruding structures have thin walls.
The attached type of building, located in the center, is often mistakenly called a loggia. This type of overhanging structure has a long service life and is considered highly durable. The protruding rooms are installed vertically in a row thanks to slabs with attached pylons.
The main difference between a loggia and a balcony is that it “does not hang down”, but on the contrary, is a niche in the supporting wall. As a rule, loggias are most often found in brick houses, since the prefabricated panel structure with a niche is not entirely durable.
Despite the fairly long service life of loggias, sometimes due to careless operation and maintenance, such premises quickly become unusable. As for the redevelopment of loggias, in this case almost any of them can be redone at your discretion.
Inappropriate fastening of a channel bracket to an existing wall
If you knock out a niche in an existing wall (it doesn’t matter whether it’s the entire thickness of the wall or not), weld a plate to the channel and lay it all on a plastic mortar, and then concrete the niche (or fill it with mortar), then this option is also a hinge . The shallower the depth of embedding in the wall, the greater the opportunity for the channel to turn, and the faster an emergency condition will arise. But even if you deepen the channel to the entire thickness of the wall, it will still have the ability to rotate, because High-quality filling with a solution will not work if the niche is small; the channel under load will chip this solution and tend to jump out of the socket. This fastening option is only possible for a beam supported by two ends, or for a balcony with a strut or post at the end.