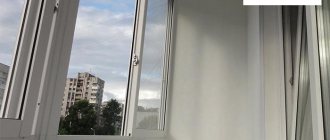
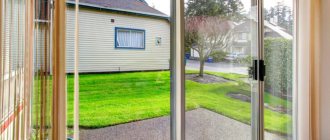
The Slidors sliding profile system is an excellent alternative to cold aluminum glazing. Its cost is not much higher, but its positive properties are greater. Especially if a single-chamber double-glazed window is used as a translucent filling. In latitudes with warm winters, rooms glazed with Slidors are used as full-fledged living rooms, however, in the climatic conditions of the Central Russian zone, with the advent of cold weather, it will be used only as a utility room or a habitat for a pet.
Slidors sliding system - what is it? How does it work?
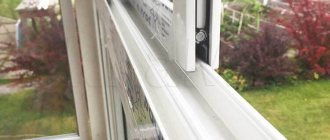
The base is a plastic profile, which can be either standard white or, at the request of the customer, brown. The opening doors do not swing inward, but slide parallel along a special rail, similar to a door in a wardrobe.
The filling can be single glass, in which case the type of glazing will be cold, or a single-chamber glass unit 18 mm wide, in which case it will be semi-warm glazing.
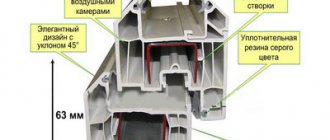
Among the profile features, it is also necessary to highlight the steel reinforcement, which gives the entire structure additional strength. The presence of rubber and brush seals provides protection from precipitation, noise and dust.
Structure of the profile system
Specifications
| System depth | 60 mm | |
| Translucent filling options |
| |
| Seals used | double brush in combination with moisture-proof inserts | |
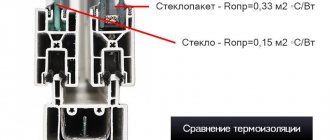
| Thermal insulation | 0.15 m2 * C/W (glass) 0.33 m2 * C/W (glazed window) | |
| Soundproofing | up to 46 dB | |
| Profile color |
|
Work examples
Advantages and disadvantages of sliding glazing Sliders
Advantages
- the doors do not open inward and do not require additional space, which makes it an excellent option for small or narrow spaces;
- easy care and simple operation;
- sufficient thermal insulation so that in warm weather the room can be used as a living space;
- does not freeze due to the special structure of the rails;
- reliable locks that do not freeze;
- protection from precipitation, dust and debris;
- the possibility of more complete use of the window sill;
- resistance to negative external influences - temperature changes, gusts of wind, solar radiation;
- possibility of installing an anti-mosquito net;
- long period of operation - up to 50 years.
Flaws
- due to the loose fit of the valves, a sufficient level of tightness is not ensured, which reduces the level of heat and sound insulation;
- not suitable for residential premises - such structures are used to glaze balconies, loggias, gazebos, terraces and verandas where there are no plans to live in the winter.
You can learn more about the features of plastic glazing and its advantages from this video.
We will be happy to help you make the right choice!
mosquito net
The window mosquito net installed on Slidors plastic windows can be either “original” or standard aluminum.
Do I need to remove the mosquito net from the window for the winter?
The “native” mosquito net can only be installed on the SF-070 Slidors window profile. Since it has an additional runner on which the mesh is placed. This allows you to move the mesh along the entire length of the guide depending on the width of the window.
Standard aluminum mosquito net - installed independently of the Slidors frame profile. It requires additional holes for fastening, which can negatively affect the service life of your windows due to dirt getting into the openings, and such a mesh will not move.
Where are sliding plastic windows used?
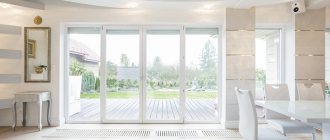
Structures made from Sliders are primarily associated with structures for loggias and balconies, but their scope of application is even wider. With their help, you can make terraces, verandas and gazebos of private households more comfortable.
Not only window but also door structures can be made from the Slidors profile. An interesting solution would be to use doors made from it as interior doors or as partitions to delimit one large space.
Balconies
Loggias
Gazebos
Verandas
Terraces
Glazing of balconies and loggias with windows from the Slidors profile is possible for structures of any shape. Suitable for both old and new extensions. Allows you to transform them into another living space during the warm season.
Prices for popular designs
| "U-shaped" balcony | Direct loggia |
| RUB 24,070 "TURNKEY": 39,800 . | RUB 18,270 “TURNKEY”: 28,500 . |
Find out the cost of products based on your sizes
| 1. | 2. | |
| Call center specialists will select a suitable option for glazing, and will also make an approximate calculation of the cost of structures based on your dimensions. | A detailed calculation of the order can be made by a technical specialist when visiting the site. He will not only take measurements, but also select the most suitable glazing option and components. An employee leaves at a time convenient for you. | |
Slidors or Provedal. Which glazing is better?
To better understand the difference between aluminum and sliding plastic profiles, we will compare them in all main parameters.
| SLIDORS windows | PROVEDAL windows |
| Strength | |
| High strength is achieved due to steel reinforcement of the profile | High strength is due to the material from which the profile is made (aluminum) |
| Type of translucent filling | |
| Glass or single-chamber double-glazed window | Glass |
| Combination with other materials | |
| Combines well with other plastic profiles, mosquito nets can be used | Combination with materials other than aluminum can lead to corrosion and a significant reduction in product life. |
| Tendency to freeze | |
| They don't freeze. The lock does not jam due to temperature changes. Comfortable operation at any time of the year | Due to temperature changes, the doors may freeze and the lock may jam. The sash is very difficult to move |
| Profile color | |
| White or brown | Any color according to the RAL scale |
| Thermal insulation | |
| Both cold and semi-warm glazing are possible. Heat transfer resistance with double glazing is 0.33 m2oC/W | Only cold glazing. Heat transfer resistance with glass is 0.07 m2oC/W |
| Durability | |
| Average service life - 50 years | Average service life - 50 years |
Thus, if the glazing does not have requirements for thermal insulation and noise protection, and operation in winter is not intended, then Provedal can be a more budget-friendly alternative to Slidors windows. Find out more information about this type of glazing by clicking on the link.
Profile installation features
Installation of the Slidors profile system is carried out in the same way as other window profiles. It needs to be installed by two people, as it will not be easy to cope with this task alone. You will need such improvised means as:
- screwdriver;
- drill;
- level;
- polyurethane foam.
Nevertheless, it is necessary to provide for all possible nuances.
The system can be installed at both positive and negative temperatures. But in frost conditions below -15°C, installation of the structure is prohibited. If the installation will be carried out in winter, then the structure must be stored indoors at a temperature no higher than +20°C, since in the cold the window may burst if this condition is not met. Therefore, it is recommended that the system be installed immediately after delivery.
Foam blowing is done after the entire structure is assembled and the locks are closed. If you do not adhere to these rules, the system may be led.
After completing the installation work, you should check the number of additional accessories. Security locks, seals, seals and covers on the doors are included in the kit. It is necessary to check their serviceability and functionality.
At the bottom of the doors there are 2 oval openings designed to drain water. You should check their availability.
1 section can support a block that weighs no more than 40 kg. Therefore, there are 2-4 rollers per sash based on the weight and width of the structure. You should ask the installers if all the rollers are present. Sliding windows Sliders differ from other systems. It lies in the fact that in Sliders it is impossible to adjust the rollers in height. In this regard, installers during installation should pay attention to the horizontal lines, leveling them if necessary. The parallelism of the vertical elements must be checked when closing for the first time.
To correctly carry out self-assembly, the instructions included with the profile must be thoroughly studied. The brief instructions include the following steps:
- Checking the completeness of the package. The disassembled frames are packaged together with additional profiles, an aluminum rail for a mosquito net and connectors. The doors are packaged in pairs in protective film. Attached is a package with fittings and hardware intended for assembling frames. Completeness is checked by the number of profiles, sashes and additional elements. It is necessary to check the integrity of the glass and double-glazed windows and the conformity of their sizes.
- To assemble the frame, remove the protective film from the frame profiles and connect them into one structure . There is an option for assembly “at the corners”: the frame profiles are fastened using corner connectors and self-tapping screws. Another option is “on a mill”: the side profiles of the frame are equipped with milling, where you need to attach the upper or lower profile and tighten it using self-tapping screws. It is best to seal the joint with silicone sealant.
- The frame should be installed in the opening , leveled and secured. The fastening depends on the opening: it can be done using frame dowels or mounting plates. An important role in the choice of fastening is played by the material, the intended load, and the parapet (location). The configuration of the ebb and canopy may be different.
- To install the sash , you need to position it with the rollers down, then insert its groove into the upper frame runner, and then into the lower one. First, installation is carried out on the outer runner, and then on the inner one. To check whether the sashes are functioning correctly, you should start moving them along the frame.
- The next step is the installation of a crescent lock with a strike plate (if they were not installed at the time of production).
- Filingpis (brush seals) are attached to the joints of the frames . To secure these elements, the sash should be pulled all the way to one side, and then to the other.
- Now you need to drill the drainage holes . Their size should be 6-8 mm. They are made on the street side in the frame runner in the most suitable places so that the elements are not visible when viewed from the room. The number of these holes should not exceed 1 pc. for 1 linear m frame.
- In those places where the sash lock and frame will come into contact, stoppers should be installed that will protect them from damage.
- The protective film is removed from the profiles. Aluminum rails for the mosquito net are screwed to the frame, and then the net is mounted . Check the functionality of the element.
- External flashings are installed , then the sashes . The joints are sealed, and the space between the opening and the frame is filled with polyurethane foam. After the foam has dried, it is cut off at the edges and decorative strips are installed.
After assembling and glazing the structure, it is not recommended to use the windows until the mounting foam has completely dried. They must remain closed for 24 hours.
At the initial stage, opening the windows and moving the mosquito net will require a little effort. This is normal and there is no need to worry about it. The brush seal will be crimped over time, and the sashes will move without much effort. The situation is similar with a crescent lock: at first it opens and closes with difficulty.
A problem may be indicated by the fact that the doors jam or move jerkily during movement. Proper installation guarantees that the structure will last at least half a century. To create a cozy atmosphere in the room, it is recommended to line the interior and seal the seams to prevent drafts and moisture penetration.

