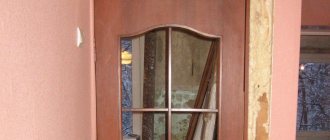
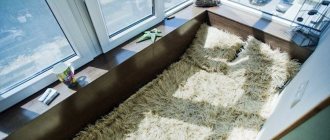
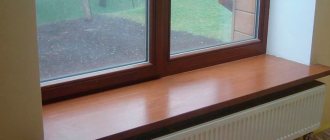
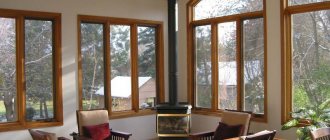
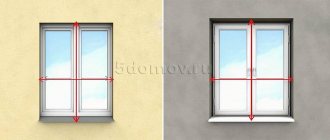
The inner part of the window opening in the room is called the slope. Sometimes this opening has a slight slope towards the room. When repairing or replacing a window unit, the slopes become unusable or damaged. For restoration or complete replacement, drywall can be used. Plaster is not convenient in all cases.
This building material will help to avoid all the difficulties associated with the plastering process. Why drywall? Its installation can be carried out in two ways. Using metal structures or glue.
Preparatory work
At the preparatory stage, it is necessary to prepare not only building materials, but also tools. When installing plasterboard slopes, the following steps are performed:
- removing excess foam;
- cutting sheets from gypsum board sheets;
- installation of canvases (on foam or on a frame);
- slope putty;
- painting;
For the manufacture of slopes, moisture-resistant gypsum plasterboard or gypsum fiber sheet (gypsum fiber sheet) is used.
What types of window slopes are there?
Slopes are elements of window framing on the outside and inside of rooms, covering the seams between the frame and the window opening. The final touch in the finishing of window openings, which gives them completeness and an aesthetic appearance, protecting the installation seams from external influences, providing additional sound and heat insulation.
Functions of window slopes:
- Protective. Finishing elements protect windows from negative external influences, and installation seams protect them from destruction under the influence of precipitation and temperature changes outside;
- Aesthetics. Slopes give the window a well-groomed, finished look. They can have a simple or creative design. A fashionable solution is colored slopes for plastic windows - they allow them to fit into any interior. If the installation of the structure is not ideal from an aesthetic point of view, slopes will help to disguise them;
- Providing easier care. It is easier to clean slopes than polyurethane foam or other material on which the window frame is attached;
- Thermal insulation, sound insulation. Slopes prevent the penetration of cold air masses and extraneous sounds from the street.
Installation using a metal guide profile
A frame is installed to cover the walls and create a new slope. For the frame, special metal profiles 27x28 mm are used.
Insulation is placed between the wall and the sheet. In this way, the resulting void is filled.
The stages of sheathing work are simple. First of all, the frame is installed.
Then parts are cut out from the sheet to size. The parts are attached to the metal frame with self-tapping screws. The finished structure must be puttied. The putty will cover the screw heads and make the surface smooth. After complete drying, it must be sanded. The finished surface is covered with paint and varnish material.
The method of installing slopes on a frame is outdated. With the advent of low-expanding mounting foams and special adhesive compositions (for example, Knauf Sevener), it is easier to install slopes without a frame.
Padding
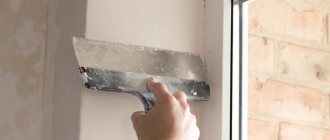
Like any plasterboard structure, the slopes will be supported by putty. In order to smoothly putty the surface, you first need to apply a layer of primer. It is necessary that the plaster be cleaned. Do not putty on a dirty surface. A primer is applied to improve adhesion.
Drywall should also be treated with a primer. It is better to prime the entire plasterboard sheet at once, so as not to bother with individual elements later. In addition, you need to take into account that the primer needs time to dry, so if you lubricate the elements as needed, you can waste a lot of time.
Installation using adhesive composition
The main advantage of this method is that it does not reduce window space. The absence of a metal frame saves space. The covering occurs using a special adhesive composition.
The appearance of the glue resembles powder. It is a dry mixture. Before use, dilute to the desired consistency with water. It is best to dilute in a large container. Stir the composition thoroughly. The mixture should be homogeneous, smooth, without lumps. It is most convenient to mix a large volume with a drill.
Manufacturers recommend applying a primer first. Thanks to it, the surface stops collecting dust. The adhesion of the glue to the primed surface is much stronger. The adhesive mixture is applied to the previously prepared part. The part is attached to the slope only after the primer has completely dried. After installation, the finishing stage begins:
- trim the corners, putty, attach the perforated corner;
- slopes are puttyed, leveled, all fastenings are hidden;
- after the first layer of putty has dried, apply the second;
- the prepared surface is ready for decoration.
Plastic
The most popular. The main advantage is the ideal combination with the window frame. Fastening with PVC is carried out using sealed types.
- reliable protection of the junction of the window opening and wallpaper (provided by a frame that covers the outer contour);
- speed and ease of installation (against this background they look more advantageous than plaster and drywall);
- resistance to repair (damaged parts can be replaced an unlimited number of times);
- ease of cladding (small amounts of dust and dirt are generated);
- moisture resistance is 100%;
- providing additional sound and thermal insulation (this is facilitated by the Isover layer).
- Low quality corners and other additional materials. They are made of 2-part plastic that is prone to yellowing. An ugly contrast of yellow corners and luxurious snow-white slopes arises.
- Instability to mechanical trauma.
- Inability to carry out local repairs If a breakdown occurs, it can only be repaired after replacing the entire panel.
Mounting on polyurethane foam with alignment of the window opening
Polyurethane foam is multifunctional. It fastens, levels, insulates. Universal building material. Polyurethane foam is also used to fasten plasterboard slope parts.
Attention! Construction companies recommend making slopes at an angle. This will allow more natural light to enter the room.
The space between the wall and the gypsum board panel is filled with foam. During the filling process, remember that the polyurethane foam increases in volume. Therefore, the space is not completely filled. For additional fixation, you can use masking tape. Or use mineral wool as insulation. It is laid between the sheet and the part.
Excess foam is cut off after drying. The seams are sealed with sealant.
As an installation option, you can see a photo report on the installation of slopes made of plastic sandwich panels on polyurethane foam.
Puttying
Here you can go in two ways: budget and fast, or more complex, better quality. The budget option consists of covering the foam seam with putty (you must first remove the foam to a depth of 1-2 cm), covering the internal corners and screws. All surfaces are stripped once. Fugen is suitable for all operations. If the slope is assembled from several pieces, the seams are puttied with sickle. This option is completed after painting the slopes and pasting wallpaper with an external overlay corner
.
A better option involves the same thing, with cutting in and plastering the reinforcing outer corner
.
After removing and sanding the surfaces, it is recommended to also stick a reinforcing bandage on the inner corners and glue fiberglass
. After drying, the fiberglass is puttied several times with the same “fugen”.
After the final sanding, the slopes must be primed; smudges of the primer must not be left; drying of the drops must be avoided by any means. It is best to apply the primer using a roller.
The final operation before painting is to apply acrylic sealant to all the joints of the plaster and the window/door.
Finishing
After all the preparatory and main work is done. The structure is assembled and installed. The final finishing is coming. It includes several basic and important steps:
- getting rid of all irregularities;
- forming an outer corner, applying putty;
- alignment of side joints;
- applying a primer;
- applying final putty;
- painting with water-based paint and varnish enamel intended for interior work.
Types and features of gypsum sheets
Today, the construction market offers a wide range of plasterboard sheets. Various internal works are performed from sheets of this material. They make partitions, window slopes, niches, ceilings and much more.
The material is universal. Easy to install. Available for purchase. Easy to use. The service life is not limited. The main component is gypsum. It is this that gives strength to the sheet. Its advantage is that it does not emit substances harmful to humans into the atmosphere. Structures made from this material do not withstand strong physical impact. It is not recommended for leveling floors.
Slope preparation
Usually, if old windows are replaced with new ones, then the slopes inevitably suffer as they are not knocked down completely, but only just enough to pull out the old window frame and install a new one. After installing a new window, it makes sense to knock down the remaining plaster on the sides of the window opening with a hammer drill until the brickwork appears.
In the future, these places will be insulated with 3 or 5 centimeter polystyrene foam, so feel free to pick up a hammer drill and beat everything off without leaving a trace, putting it in garbage bags. If you suddenly see mold stains, treat the problem with copper sulfate, diluting it with water according to the instructions on the package, put on rubber gloves and use a flute brush to “paint over” generously.
I forgot to say, before you start all this dirty and dusty work, you should protect the window sill (provided that it is installed), if there is no protective film, you need to cover the window sill with polyethylene, and in addition it won’t hurt to throw a piece of drywall sheet on top (mortar knocked down with a puncher, if falls to the bottom, it can easily break through the polyethylene and damage the top covering of the window sill).
Regular plasterboard
It is a laminated material. Plaster is placed between thick cardboard. Regular plasterboard is gray. Its markings are blue. Used for interior decoration of residential premises. The humidity level should not exceed 70%. At high humidity levels, the material is destroyed. Use only in dry rooms.
The width of the material is 1 meter 20 centimeters. The length is 2 m 30 cm and 2 m 50 cm. Thickness is 10 mm. Without special additional additives. The properties of gypsum plasterboard are standard. Easy to use. To work, it is enough to have a minimum of tools. Does not release heat outside. The design is fragile to physical impact.
The cleaned area is primed in the most painstaking manner.
Now you should measure the depth and width of the space in the window opening that needs to be covered with slopes. Using the acquired dimensions, the silhouette of the slope is measured on a sheet of drywall and then the window element that suits us is cut out using this silhouette.
To perform the given task we will need the following set of devices and instruments:
- roulette;
- rule;
- special knife for cutting drywall.
If you don’t have one at hand, then a regular stationery knife with special break-off blades can also replace a special wave knife.
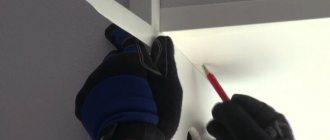
In order to cut the sheet as smoothly as possible, you will need to adhere to an absolutely precise sequence of actions, which is advised by both finishing specialists and the drywall developers themselves:
- after measuring the contour of the slope on the canvas, it is pressed tightly to the intended features and with pressure moved along its working boundary in such a way that the tall sheet of cardboard is completely cut to the plaster layer;
- the sheet is transferred to the opposite side (if you do not make enormous efforts and do not allow sudden movements, then you do not have to worry about the sheet breaking autonomously at the cut site);
- literally the same incisions are made on the accessible side;
- Now it is allowed to press it to the edge of the cut and lift the sheet by one corner. The drywall breaks perfectly smoothly along the cut strips.
Applying glue.
The adhesive solution prepared according to the manufacturer’s recommendations should be transferred to the back side of the fixed slope. In this case, the layer of glue should not be allowed to come out uninterrupted. Some places on a clean surface are required so that after pressing the slope onto the surface of the window opening, the glue can spread freely and fill all the microcracks and bulges. If you apply the glue in a continuous layer, then after applying the slope it will begin to “float” on this layer of glue, not allowing the last one to firmly grasp or dry completely over a long period of time.
All work on gluing slopes should be completed no later than thirty minutes after working with glue. If the set time is longer, the glue will already begin to set and will be unsuitable for implementation.
Inclined slopes.
When installing similar slopes, it is strongly not recommended to fill the free space with glue alone. If the width of the interval near the window frame reaches 3 cm or more, then in this place it will be necessary to glue strips of the same plasterboard to the walls in the window opening, to which the slope itself will be glued in the future.
Horizontal slopes in the upper part of the window opening.
In order to prevent the horizontal slopes from simply falling off before the glue sets completely, they should be strengthened with vertical spacers. Wood beams or slats can be used as such spacers, the length of which is easier to arrange.
Moisture-resistant gypsum plasterboard
In the store you can find moisture-resistant gypsum plasterboard by its standard green color. The layers are treated with special moisture-resistant impregnations. They improve the properties of gypsum plasterboard. It is more resistant to high humidity. Recognized as a universal building material. Use in rooms with humidity above 90%.
Sheet thickness 12.5 mm. The main advantage is fire resistant. When in contact with fire, it burns slowly without producing large quantities of acrid smoke. Does not emit toxic volatile substances. Withstands wet and dry cleaning. The scope of application is wider than that of a conventional one. Used to create partitions, multi-level ceilings, and leveling walls.
Gypsum fiber GVL
It differs from the standard conventional plasterboard. Has a homogeneous structure. There are no outer cardboard shells. Consists of 80% gypsum, 20% cellulose. Available in rectangular shape. Production is prescribed in GOST R 51829-2001.
It is highly resistant to physical impact; if necessary, you can hammer a nail. A distinctive feature is a high level of sound insulation. GVL does not crumble. Resistant to frost. Resistant to moisture, does not get wet or swell. Eco-friendly and easy to install. Operation is not limited. Has disadvantages: fragile; weighs more than regular plasterboard; high price.
Gypsum fiber non-flammable GVL
It is a homogeneous sheet. Belongs to the group of fire-resistant, slightly flammable. You can hammer nails and screw in self-tapping screws. Density is achieved through additional components. The density is equal to expanded clay concrete. Doesn't crumble. Resistant to mechanical stress and frost. At high humidity, it absorbs excess. And when there is a shortage, he gives. The itself is very fragile. You have to work with it carefully.
If you want to extend the service life. Do not cover the surface with silicate paints, putty, or liquid glass-based enamel.
Author of the site
How to make slopes on plasterboard windows: 2 comments
As I understand it, you cut the gypsum board with a grinder. Can you tell me what else can be used to cut gypsum board? and another question, what kind of gypsum board did you use for the slopes? waterproof or regular? It's not clear from the drawing.
Thank you for reminding me of another name for drywall. No, for slopes, when drywall is cut in straight lines, there will be less dust and it will be easier to work with drywall if you cut the paper along the line to the gypsum layer with a stationery knife, and then simply bend the sheet in the opposite direction. When the sheet is broken along the line, cut through the second layer of paper again with a knife. If you want to preserve the rest of the drywall and not break it, then instead of a grinder you can use a hacksaw blade or a drywall saw. Moisture-resistant drywall was used, although this is not important for slopes.
