Corners for tiles in the bathroom
The element has several important functional properties, which we will try to understand in this article. In some cases, it is simply impossible to do without corners.
Places of use
I would like to draw attention to places where you simply cannot do without using this element. For example:
- places where the tiles are cut in two corners at once;
- on an uneven edge, which is obtained when cutting tiles. Otherwise, coloring of the glaze is inevitable;
- if the craftsman is not sufficiently qualified, one or more wall tiles may be slightly shorter or longer than others.
When some surfaces meet, a fillet weld is formed:
- wall-to-wall (internal seam located vertically);
- ceiling-wall (horizontal internal seam);
- floor-wall surface (internal horizontal);
- bath-wall (internal-horizontal seam);
- wall-to-wall (external seam located horizontally;
- slope-wall (internal rounded seam, which can be located both vertically and horizontally).
Using corners in these places will help hide defects and give the finished masonry an aesthetic appearance.
According to the intended purpose, corners for tiles in the bathroom are:
| Type of corner | Purpose | Place of application |
| external edging | Protect tiles from damage and perform a decorative function | To decorate protruding corners |
| internal edging | Concave face smoothes the transition between the sides of the corner piece | The junction of the bathtub with the wall plane is often designed |
| finishing corners for steps | Protects the edges of the tiles from damage. | It is advisable to use only indoors; in combination with rubber pads, they make the stairs less slippery |
| compensatory | Hides expansion joints that compensate for changes in tile size due to temperature changes | Profiles are necessary in spacious rooms |
| docking | Indispensable when combining tiles with other materials. For a straight joining line, they use rigid steel layouts | flexible plastic and aluminum profiles are used when the boundary between materials runs along a curve |
Functions
The tile corner acts as a material that helps create a finished and attractive appearance for the masonry.
Important! Its use makes it possible to hide defects that arose during the installation of tiles.
Advantages
Corners are popular among both experienced and novice craftsmen. This is due to the advantages inherent in them. For example:
- allow you to give a finished look to masonry formed from complex geometric shapes. This became possible thanks to the ability of the elements, such as the ability to easily and simply bend in the right places at the required angle;
- helps disguise areas with defects or small flaws, which provides an attractive appearance to the finished product;
- prevents the possibility of water and moisture entering through the joints between the tiles. This will prevent the development of bacteria, mold and fungi;
- guarantees safety while moving on any floor.
Based on the information provided, you can finally be convinced of the need to use bathroom corners when installing tiles.
Flaws
It is also worth noting some negative aspects inherent in these elements:
- difficulty in choosing the element necessary for work. This applies to its material and configuration. You can make the right choice after consulting an experienced specialist;
- Installing a corner for tiles requires additional time and consumables.
By comparing the advantages and disadvantages of corners, you can be convinced of their necessity when laying floor or wall tiles.
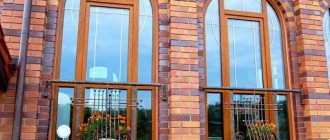
Windows with layout in the interior of a private house
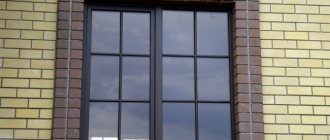
When choosing a layout, keep in mind that the design on the window can add sophistication to the facade, or negate all the designer’s efforts. If the house is still under construction, be sure to consider several options. Let's take, for example, an ordinary red brick house, without bay windows or other decorative frills. The best option in this case is white double-glazed windows with narrow profiles and a classic cross layout or Viennese (imitation of an arched window).
If you like a prim and, at the same time, laconic English style, choose overlays in the color of wood, medium in width with milled edges.
Panoramic French windows will only benefit if complemented with a simple geometric layout. Strict straight lines will add rigor and sophistication to the interior.
Golden sprockets are suitable for houses with plastered, wooden or walls decorated with textured brick. White or brown tabs look good in the design of bay windows or elongated arched window openings. Choose depending on the color of the frames and facade.
Advice: on special forums, users share their opinions that golden sprockets begin to irritate over time. Especially if they are installed in small double-glazed windows. In this case, the only way out is to replace the structures. Pleasure is not cheap.
If you don’t want to constantly look at the street through the cage, choose the layout in such a way that the central part remains free. For example, a rectangle in the center, framed by narrow strips along the perimeter of the glass closer to the frame. You can find photos with suitable examples on the Internet.
A significant drawback of the internal layout is heat loss. If you plan to add French windows with shutters, then you cannot do without installing floor radiators.
If the sashes are hinged, it is worth considering the placement of the pattern in advance so that the hinges or linings are positioned symmetrically. Narrow stripes around the perimeter, forming simple geometric shapes at the corners, look good.
Tip: monograms and curlicues, imitation stained glass are suitable for decorating large glasses. For narrow openings, it is better to choose simpler designs - there will be enough light in the room, and the window will not resemble a sideboard door.
To decorate your house in the same style, you can additionally order a layout for entrance and interior doors. The layout also looks good on glass, sliding partitions.
Types of profile by configuration
There are several types of bathroom corners. Among them are the following:
- one-sided - the tile is pressed against the groove of the corner, and the second one is in close contact with the lining of the second wall. The element is suitable for work only on straight or sharp corners;
- double-sided - along the length of the inner corner, fittings are embedded in the adhesive mixture for installing tiles, and then a finishing strip with flexible elements located in the middle is fixed in it. Its cost is slightly higher than one-sided. Used for work at angles greater than 90 degrees;
- external - used to mask corners on boxes. They have a streamlined shape. They ensure safety of movement on tiles and also perform a decorative function;
- internal - has a concave shape. It is used when it is necessary to mask the seams between tiles on internal corners.
Each type has its own characteristics of shape, material of manufacture and purpose.
Difference between internal and external
When choosing an internal or external corner for tiles, it is recommended to take into account that there are some differences between them. For example:
- the internal decorative element is a kind of cavity located between the walls. External - looks like a protruding part;
- the main difference is the purpose of the two elements;
- Installation of an internal corner is much simpler than an external one. Unevenness can be corrected by using grout or glue.
Taking into account these properties and qualities, you can choose the decorative element that is suitable for a certain type of work.
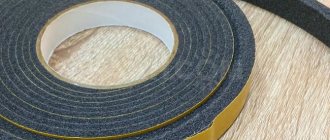
Types of trims
Layout under tiles is impossible without the use of special inserts - trims. They are presented in the form of a profile made of plastic. Their use ensures the formation of an angle of a certain size.
To decorate external corners, it is recommended to opt for trims in the form of an L-shaped overlay. The formation of internal seams requires the use of concave overlays.
Trims can be installed using several materials:
- glue;
- sealant;
- nails in liquid form.
When installing overlays on internal corners, it is enough to drive the plate under the tile and secure it with sealant. This process is simple and gives the seam an attractive appearance. It is also worth noting that the use of trims protects the seams from moisture and water getting into them.
The process of attaching trims to outside corners is more complicated. To attach curbs, it is better to choose a sealant made of silicone or acrylic.
Important! Experienced craftsmen recommend selecting trims whose length is 1-1.5 mm longer than the thickness of the tile.
When choosing a certain type of overlay, you should take into account the thickness of the tiles. If the work requires the use of tiles of different thicknesses, they all also need to be taken into account. The length of the overlays is calculated as the sum of the lengths of all external and external seams. It is recommended to purchase 1 element more. This will help you calculate the exact number of overlays, taking into account their trimming.
Modern manufacturers offer a wide selection of trims according to their color range. When purchasing, this criterion should also be taken into account.
Material of manufacture
Tiled outdoor corner can be made from different materials. Each of them has its own characteristics and operating conditions. Therefore, you should study each profile in detail:
- ceramic - low cost. Their use allows you to mask the seams, as well as provide a high level of waterproofing of the joints. Their aesthetic appearance and variety of colors are also important. This helps create a harmonious interior;
- plastic - made from PVC. They are lightweight and elastic, which simplifies the installation process. These profiles can be installed after finishing the wall surface. For this you can use a special sealant. There are several types of PVC edging: L-shaped - one edge is inserted into the corner, and the second is in contact with the tiles of the previous row. C-shaped - the edges of the tiles are inserted into the profile;
- metal - it is characterized by such properties as strength and long service life. As a rule, manufacturers offer metal profiles made of aluminum. They not only look attractive, but are also lightweight and reliable. It is possible to purchase a metal profile made of stainless steel or brass. They are additionally coated with a ball of chrome or nickel. The painted surface of the profiles can imitate silver, gold or platinum.
The use of one or another material also contributes to another classification of products:
- soft - in their manufacture, PVC is used, which is combined with silicone. They can be successfully used for porcelain stoneware tiles, both with grooved and smooth surfaces;
- hard - they are characterized by such properties as reliability and strength. For their manufacture, you can use aluminum, which, after painting, acquires the color of platinum, silver, bronze or gold. The possibility of using ceramics for the production of rigid profiles cannot be ruled out;
- semi-rigid - made from plastic without the use of silicone. Their flexibility is slightly less than soft pads, which guarantees ease of installation.
Important! To ensure reliable fastening of the tile coverings and corners, their edges must be smooth.
The use of one or another profile when installing tiles in the bathroom depends on the characteristics and purpose.
Viennese sprats
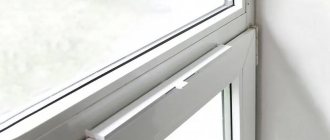
The grommets that are glued to the outside of the glass (external grommets for double-glazed windows) have a sealing gasket on the working surface, and inside the double-glazed window there is a spacer frame that imitates the division of the double-glazed window into different parts, called Viennese.
Frames and external patterns are made of light metals or plastic, sometimes from thin wood veneer. The finishing of the slats corresponds to the processing of the main window profile, contrasts or matches in color.
If the wiring is made of wood and plastic, it does not make the window cooler, but the metal pattern reduces the heat of the window.
Water from precipitation and dust will be retained in Viennese patterns because they protrude 5-10 mm above the surface of the glass. If you like this type of glass decoration, wash it more often and carefully, going around all the bends with a soft, damp cloth.
Forming an angle at the junction of three planes
When designing some corners, you have to work with three planes at the same time, for example, the end of a shower stall.
Before starting work, you must make sure that all walls are located at an angle of 90 degrees and have no protrusions.
Next, you need to cut out decorative corners of the required height for both walls. Using tape, press both sides of the profile tightly against the tile.
Now you can start laying the tiles. One of its edges should extend slightly under the wall of the corner. Crosses should be gradually installed between the tiles. In this case, do not forget about the tape, which is gradually removed from the surface of the corner.
Options for installing corners: after tiling, before laying tiles
Moldings can be installed both after laying the tiles and before. In the first case, the profile is located above the tile at the junction of the surfaces. This installation option can be used equally successfully for both external and internal bathroom joints.
If the corner cap is glued before laying the tiles, the corner is carefully glued at the junction of the walls, and then you can begin installing the tiles.
Important! You can ensure a beautiful appearance of the finished product if the edges of the tiles are perfectly smooth.
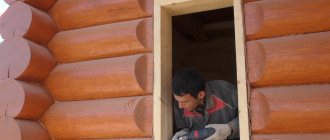
How to mount the layout yourself
First, sketch out a sketch of the future drawing on paper. There is no need to come up with complex ornaments. No matter how carefully you work, it will still not be possible to adjust the profile exactly to size. The easiest option to use is to imitate the classic layout. The result should be a window with lintels, reminiscent of windows in ancient houses.
Stages of work
- Mark the glass according to the sketch, measure and calculate the required amount of materials.
- Cut plastic profiles with a sharp knife. There should be no unevenness or burrs - all flaws will be obvious. The result is a sloppy look instead of a decorative one.
- Place the finished pieces on the glass and check the dimensions again. If necessary, trim so that the profiles at the joints fit snugly against each other.
- Degrease the glass (acetone or alcohol will do).
- Remove the protective film from the profiles and apply it to the glass with light pressure. For a reliable connection and protection from moisture getting under the profiles, apply silicone sealant along the edges of the pattern and joints. The main thing is to be careful so that there are no marks left on the glass.
Advice: it is better to repeat the work from the inside. The adhesive back of the profiles looks ugly, and because of the black color it is very noticeable.