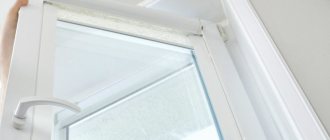
A PVC window with double glazing is part of the enclosing structure of the outer wall.
When installing a translucent element, thermal technical requirements must be observed to achieve proper energy efficiency of the room.
The window frame must be installed in such a way that a dew point does not form in the room. To do this, the window is often hung above a layer of insulation in the wall. When organizing such a complex installation, anchor plates for PVC windows are required.
Application of anchor plates for plastic windows
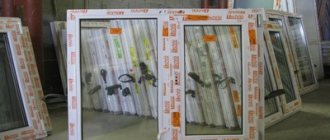
To make the room warm, cozy and comfortable, you need to pay close attention to the windows.
The quality and reliability of their installation will determine the comfort of staying in the room and the durability of the structure. Installation of windows is carried out for years, so it is necessary to carefully consider all the nuances and carry out the installation correctly. There are many fastening materials, but anchor plates deserve special attention.
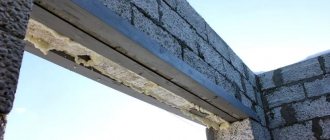
This material is ideal not only for metal-plastic windows, but also wooden ones, as well as for various openings: brick, reinforced concrete, foam and aerated concrete.
This versatility makes anchor plates truly unique.
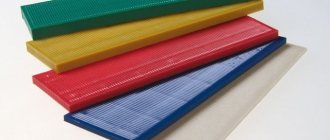
Externally, these are metal plates with round holes and notches. Products are made by cold stamping from galvanized sheet, the thickness of which ranges from one to two millimeters. They ensure the stability of the window structure.
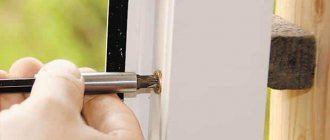
Rice. 2. Mounting anchor
There are two types of anchor plates:
- rotary;
- non-rotating.
The rotating element is installed during complex installations, when it is difficult to fully secure the windows for some reason. The rotating crab allows installation at any angle.
Fixed plates are used in the classic installation of plastic or wooden window structures.
Supporting Consoles
They are made in the form of profile metal plates with holes, which are used for fastening the profile on one side and the anchor on the other. The use of supporting consoles allows the installation of large-format window structures with complex configurations and heavy weight.
Supporting consoles are used when installing large-sized window units
The material used to make the supporting consoles is coated with a layer of zinc, so they are resistant to moisture. An example of a single cantilever is a flat rod bolted to a wall. Its height can be adjusted.
Installation Basics
Now there are 2 methods of installing windows, which differ in the type of fastening unit and the method of fixing the frame to the window opening. This is installation with and without unpacking. To install a window yourself, it is wiser to choose the 2nd option, since it is simpler, does not require special skills, and the work does not take much time. In addition, it helps to avoid errors during installation and makes it quite easy to configure all the fittings.
Installation without unpacking does not imply removing the bead and dismantling the glass unit from the frame. The structure itself is attached to anchor plates. The principle of forming such fasteners is shown in Fig. 1.
Before installing a new window, you must select the correct plates themselves. They come in two types: universal and designed for a specific model. That is, they take into account the requirements of a specific profile system. As a rule, such anchor plates come complete with complex, non-standard structures.
Figure 2. Layout of anchor plates during installation.
Specialized fasteners differ from universal ones in that they are equipped with ears. These elements are installed in the groove of the frame profile and fixed with self-tapping screws. Universal plates do not have special ears. They are simply secured with bolts.
For the installation of window structures, experts recommend choosing bolts of the 4.5*25 type. Their body must be equipped with a metal drill. Since the self-tapping screw is attached to a reinforced structure, another type of fastening may not fit or will not fix the plate very securely.
Window installation rules
As a rule, it is recommended to install 5 anchor plates on a standard type window. Their location is shown in Fig. 2.
The central plate is fixed exactly in the middle of the frame, and the side plates are fixed approximately at a distance of 20-25 cm from the edge of the structure.
As mentioned above, the method of installing a plastic window without unpacking does not require removing the glazing bead and the glass unit itself. This becomes possible due to the fact that the frame is fixed using anchor plates to the outside of the window opening. Otherwise, you have to form through fasteners.
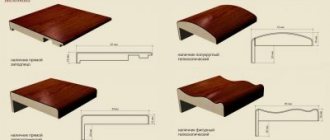
Figure 3. Low tide installation diagram.
But you need to remember that large structures (with an area of more than 4 m2) should not be installed using plates. After all, such a mount may not withstand the weight of the window. In this case, it is wiser to use anchor dowels. For plastic double-glazed windows of small or medium size, plates will be the most rational method of fastening.
Not only large windows, but also doors are secured with dowels. Professionals believe that this installation method is the most reliable. But it has a number of significant disadvantages:
- Installation with unpacking is difficult even for specialists. Often, with this installation method, the glass unit breaks or cracks form on it.
- Installation on anchor bolts is almost impossible to do alone.
- Working with such fasteners requires experience and special skills.
- The work requires more effort and time.
If you prefer this installation option, then you need to purchase dowels measuring 10*132 mm. In addition, installing anchors requires a powerful hammer drill. Some modern stores that sell equipment for construction and repair provide rental services. Therefore, it is not necessary to buy an expensive device. But it’s easier to install the window on plates.
Nog
A dowel is a simple screw that is screwed into the wall to secure a window. This type of fastener is also very reliable. Unlike a dowel, the dowel can be easily unscrewed in any case.
Dimensions. There are a huge number of dowel sizes from 100 to 250 mm, and thickness from 5-12 mm. To calculate the length of the dowel, you need to measure the width of the window and opening from the frame and slope. If your distance from the wall to the window is about 3-4 cm, then you need a 110 mm dowel, if 8-10, then 170-200 mm.
Flaws. Before installing a plastic window in an apartment panel building, you need to find out its type and wall structure. Because in many panel houses, builders install insulation inside the walls. Therefore, during installation you may get caught in the insulation and the dowel may fall out.
You should also not install the dowel in soft building materials.
Features of fastening to anchor plates
This method of attaching a window system is as simple as possible and accessible to everyone.
Compared to the unpacking method, the method is considered absolutely safe for the window system, but the only disadvantage is that some fastening elements (plates) will remain visible after installation. However, they can also be properly camouflaged by hiding them under the slopes when they are finished.
Inserting a plastic window using plates is easier and safer than fixing it with bolts
There is another recommendation from experts: if the window has an opening sash that will be used very often, then the window may fail. This type of fastening is recommended for moderate opening or for fixed windows.
An alternative method of fastening is considered: the upper part of the structure is mounted on plates, and the lower part is fixed with anchor bolts.
What it is
An agreement is concluded with them, which states that the installation of plastic windows must be carried out in accordance with GOST.
Requirements and recommendations
If craftsmen are hired for the work, they install the products according to the standard. By law, all templates are respected. But often, each individual case is discussed.
To install
If a worker performs a procedure according to all the rules, then he must maintain appropriate documentation.
GOST for PVC windows 30971 talks about the following standards:
- filling the assembly seam;
- size of the gap between the profile and the opening;
- the dimensions of the opening itself;
- installation of the structure;
- general installation rules;
- correct maintenance of documents;
- guarantee.
When performing work, all of the above standards are observed.
To the window opening
According to the requirements, the window opening must be completely level. Most often, this is possible if the structures are installed in a new house.
Replacement may be difficult. The thing is that the opening transforms over time. It is affected by temperature, wind and other natural conditions.
During dismantling, you may find that the plaster has crumbled and the bricks have been chipped. In order to comply with all standards, it is necessary to prepare the opening for subsequent manipulations.
To the assembly seam
Its standards consist of two main rules. First of all, it must be resistant to external influences. The connecting part of the structure has its own characteristics: heat and sound insulation, water resistance.
According to standards, the seam is divided into three parts:
- interior;
- central;
- outer.
Fastening according to GOST
GOST also provides clearly indicated distances at which fasteners and other structural elements should be located. All these parameters are designed on the basis that depending on conditions and temperature, windows may become slightly deformed.
The minimum distances between fastening elements should not exceed:
- for white PVC profile boxes: 700 mm;
- for boxes made of colored PVC profiles: 600 mm;
- distances from the inner corner of the window block: 150 - 250 mm;
- impost connection to the fastening element: 120 - 180 mm
These dimensions can always be checked using a laser ruler.
Recommended minimum penetrations (screw-in depth) and dowel fits
| Name of wall material | Minimum depth, mm |
| Concrete | 40 |
| Solid brick | 40 |
| Slot-shaped brick | 60 |
| Porous natural stone blocks | 50 |
| Lightweight concrete | 60 |
Fastening to flexible anchor plates most effectively resists loads directed perpendicular to the plane of the window block, such as wind loads, as well as operational loads that arise when opening the sashes of a translucent structure.
The bending angle of the plate is selected locally and depends on the size of the installation gap. The plates are attached to the window blocks before they are installed in the openings using construction screws with a diameter of at least 5 mm and a length of at least 40 mm. Flexible anchor plates are attached to the inner layer of a multilayer wall with plastic dowels with locking screws (at least 2 fastening points for each plate) with a diameter of at least 6 mm and a length of at least 50 mm. One of the conditions for using mounting plates is the further finishing of the window opening slopes by plastering or cladding using the “dry” method.
Please note that the anchor plate is attached to the wall, and not to the plaster slope, and must be under the sealing tapes that are used during installation!!!
The peculiarity of anchor plates is that their use makes it impossible to install platbands covering the assembly seam without additional measures to deepen the plates into the slope and subsequent sealing of the recesses with plaster mortar or putty.
It is better to mount plastic windows made of colored PVC only on anchor plates, because... the coefficient of linear expansion of colored plastic is 1.5-2 times higher than that of white plastic, and accordingly the temperature deformations are greater.
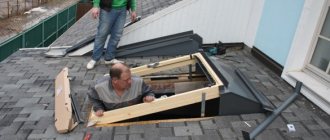
Installing the window sill and slopes
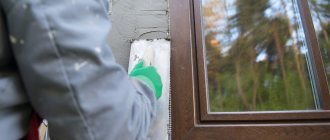
The installation of wooden windows, like plastic ones, cannot be considered complete if the window sill is not installed. The window sill board snaps into place and is attached to the stand profile. If, during dismantling, voids are identified under the window, you can fill them with insulation, for example, rolled or tiled, and then install a window sill. To finalize the opening, you need to understand how to properly install the slopes. They can be plastered or assembled from sandwich panels made of expanded polystyrene foam. With the latter option, the panels are cut to size locally, taking into account the geometry of each slope. A U-shaped plastic profile, otherwise called a starting profile, is screwed to the frame close to the slopes. A panel is inserted into it. The voids foam. Foam is a polyurethane foam sealant that, due to its properties, requires a certain amount of time to fully expand and harden. Typically from 1 to 24 hours. Where they adjoin the wall, the sandwich panels are covered with a decorative profile, most often F-shaped.
Installation features
For a window block, fastening with plates is the safest, and metal parts can be hidden during the finishing process.
But before you undertake independent installation, you will need to study the rules for working with anchor plates.
The rigidity of fixation with any metal strip is somewhat less than with anchors. If the window is blind, only plates are enough. When installing a large product with heavy sashes, uniform load compensation is necessary, so you will need to not only insert the part into the groove and snap it into place, but also secure it with a self-tapping screw, which should go deep into the frame profile. Fasteners on the sides are mounted at a distance of 25 cm from the corners, in the upper and lower parts, and at the top the connection is placed strictly in the middle
It is important to maintain an interval of no less than 50 cm and no more than 1 m between the plates. It is necessary to ensure the correct bending of the parts (only at an acute angle), which reduces horizontal displacement to a minimum and provides optimal rigidity to the connection. In the opening, you first need to drill a hole for the anchor dowel, and then place it so that the wide neck presses the metal strip to the surface of the opening. To fasten one part, take 1 or 2 dowels measuring 6–8 mm
Final fixation is achieved using a conical locking screw. Despite the fact that the connection is subsequently masked by finishing the slope or plaster, it is advisable to make recesses of up to 2 mm when preparing points for fixation - this will ensure that the plates are positioned flush with the surface of the opening.
Let's consider the algorithm for installing a window system using PVC products as an example.
It is necessary to free the window frame from the packaging film, then remove the sash from the hinges and install additional and connecting profiles.
An exact calculation is made at which points the fasteners will be mounted. The plates are inserted into the frame and placed in the opening. The location of the points is marked on the wall with chalk or pencil.
The frame should be covered inside and outside with mounting tape, vapor barrier and vapor permeable, to ensure waterproofing.
The toothed elements of the plate (“claws”) are inserted into the grooves on the profile at the required angle so that they fit snugly against the slope
Additionally, you can fasten the part using a special self-tapping screw. Keeping a distance of 20–25 cm from the anchor to the edge, screw all the plates around the perimeter of the opening.
It is important that there is a correct bend of the fastener in two places of contact: to the opening and to the frame. Each strip must be fixed with a self-tapping screw and screwed through a plastic nozzle into the reinforcing profile. The depth of the hole should be 10 mm greater than the length of the dowel. The frame is installed so that there are rigid seals under each section of the structure and in the corners
After this, the structure is fixed vertically using mounting wedges. Before finally firmly securing the parts, it is necessary to adjust the position of the block using a building level.
Final work - creating an assembly seam, moistening it with water using a spray bottle, thermal insulation with polyurethane foam. It is advisable not to allow its excess. To do this, you can use vapor barrier butyl tape or construction sealing mastic. At the end, the slopes are finished with a plaster mixture, facing stone-polymer tiles, and facade materials. If you choose between two methods of installing windows, in the absence of experience, professionals advise using plates.
When using anchor dowels, additional assistance will be needed, the process itself will take a lot of time, and there is always a risk that the glass may be damaged. In addition, you will need expensive equipment - a high-power hammer drill and special 10x132 mm dowels. If a PVC window is secured with bolts, its depressurization is possible; in addition, if you are unaware of the subtleties and improper installation, the geometry of the frame is disrupted and it stretches over time.
In the next video you will see the installation of PVC windows on anchor plates.
Window installation. Scheme of work
1. Prepare the window.
- The protective film of the window is removed from the outside of the product. Under the influence of sunlight and precipitation, the protective film can become embedded in the profile. Therefore, the film must be removed from the outside at the very beginning of installation work.
the frame is covered with an external vapor barrier - PSUL (along the outer surface of the frame). PSUL - vapor-permeable tape will not allow the polyurethane foam to escape when processing gaps to the outside, protecting not only the appearance of the structure, but also the polyurethane foam from environmental influences - precipitation, ultraviolet radiation and wind, which destroy the foam. The degree of compression of the tape should be at least 25% of its full expansion.
anchor plates are attached to the window block (window frame).
2. Window installation. (2 photos alignment, window fixing)
- the frame is installed in the opening (attached on 4 sides of the frame in increments of 70 cm, while the distance from the corner of the window frame to the first fastener should be no more than 15 cm);
leveled (using a level or plumb line, the windows are aligned in compliance with the required installation gaps within permissible deviations - up to 1.5 mm per meter, but not more than 3 mm for the entire length of the product. The difference in window diagonals should not exceed 8 mm);
is fixed and secured.
3. A low-tide diffuser tape is attached to the outside of the window opening.
Diffusion tape is a waterproofing, vapor-permeable tape made of membrane-type synthetic non-woven material. The tape has two adhesive strips on one side. One strip is intended for attaching the tape to the translucent structure, the other is for attaching the tape to the wall slope. The use of waterproofing tapes provides reliable protection of the mounting foam from moisture on the street side and ensures the removal of moisture from the foam to the outside.
4. Fittings are adjustable
5. Gaps foam. (3 photos of foamed gaps and foamed, view of a fixed window)
Filling the mounting gap with mounting foam should be done with the window block fully assembled and finally secured, and the completeness and degree of filling of the mounting gap should be monitored (the mounting foam is applied along the entire perimeter of the window frame, taking into account that this mounting material increases its volume up to 3 times) .
6. Vapor barrier tapes are applied. Indoors, the seam is treated with a special tape that has vapor barrier properties (made from aluminum foil). Width: installation gap width plus 30mm or more.
7. The ebb is attached.
The ebb molding is designed to protect the lower part of the window opening and the mounting seam from the effects of rain, snow, and ice. When installing the drip sill, one mandatory condition must be observed: since there are special drainage holes on the outside of the window frame that cannot be blocked, it is necessary to ensure that the lower edge of the window frame is not recessed relative to the outer edge of the window opening. With this arrangement of the box, the ebb will fit firmly under the window from the outside. The flashing is installed under the window to avoid water seepage at the connecting seam of the flashing and the window frame.
Upon completion of window installation, the protective film must be removed from the frames and sashes. Under the influence of sunlight and precipitation, the protective film can become embedded in the profile.
The warranty on the assembly seam in accordance with GOST R 52749-2007 is at least 5 years. (photo by guest)
Any deviations from GOST requirements provide serious savings, but lead to loss of quality for the Customer.
The most common “saving” is the usual foaming of the seam without steam and waterproofing the seam. This installation is 2 times cheaper!
Installation of plastic windows is a responsible process, which significantly determines how trouble-free their operation will be. Of course, this operation must be performed by experienced professionals; only in this case can it be guaranteed that the windows will fully comply with all technical specifications.
Assembly seam
An assembly seam is an element of an abutment assembly, which is a combination of various insulating materials used to fill the installation gap and having specified characteristics. The seam must meet the following requirements:
- Ensuring reliable fastening of the window unit to the wall;
- Ensuring the required temperature and humidity conditions at the junction of the window frame and the wall. In this case, the window unit must be installed in such a way as to avoid freezing of the window slopes and the frame profile itself;
- Density and tightness;
- Low thermal conductivity and high durability;
- Susceptibility to thermal expansion and contraction of the window unit without loss of tightness.
GOST establishes the requirements that the three-layer construction of the construction seam meets - it ensures ideal preservation of the thermal insulation properties of the foam.
Assembly seam – 3 layers:
- External – waterproofing, vapor permeable;
- Central – thermal insulation;
- Internal – vapor barrier.
This design is designed to ensure the resistance of the assembly seam not only to atmospheric influences, temperature and moisture, including from the inside, but also resistance to operational influences. In addition, it must be resistant to various types of deformation, both temperature and force.
The outer (outer) layer of the assembly seam protects it from moisture penetration, exposure to ultraviolet radiation, exposure to temperatures from -35 to +70°C, and partially prevents the penetration of cold air through the assembly seam, etc.
In addition, the outer layer of the installation seam must have high vapor permeability ( vapor permeability coefficient
outer layer material –
at least 0.15 mg/(m*h*Pa)
to remove condensation moisture from the installation seam to the street.
Today, the most mature technology is the construction of the outer layer of the assembly seam using vapor-permeable self-expanding sealing tapes (PSUL). There is a fairly wide range of names for this type of material, but not all are suitable for sealing window installation joints. PSUL tapes intended for installation of window blocks must withstand water pressure in a compressed operating state of over 300 Pa. The PSUL must be resistant to ultraviolet radiation (the total irradiation dose to the front surfaces during testing is at least 5 GJ/m2
).
Applying a layer of plaster, putty or painting compositions to PSUL is not allowed!!!
The central layer must provide the specified resistance to heat transfer of the assembly seam and the necessary sound insulation. To create the middle layer, polyurethane foam or, more simply, polyurethane foam is used. (Spray foam is a polyurethane foam sealant). The central layer must be made without voids, cracks, peeling and overflows. Shells larger than 10 mm are not allowed. The water absorption of foam insulation of the central layer when completely immersed for 24 hours should not exceed 3% by weight. The high heat and noise insulation characteristics of polyurethane foam are maintained only in a dry state. Humidification negates all of its above-mentioned advantages. Therefore, keeping the insulation in as dry a condition as possible is the main task performed by the outer and inner layers of the assembly seam.
The inner layer must be sealed and provide reliable insulation of the central layer materials from the effects of water vapor from the room. Vapor barrier materials along the internal contour of the installation gap must be laid continuously, without gaps, tears or un-glued areas. Vapor barrier materials of the inner layer of the installation joint must have a vapor permeability coefficient of no more than 0.01 mg/(m*h*Pa). Vapor barrier sealing tape is made of aluminum foil, coated on one side with a self-adhesive plastic-elastic mass based on butyl rubber with a high degree of adhesiveness. The tape must be glued tightly along its entire length. Any gap or swelling is a channel for moisture penetration. The width of the tape is determined by the formula: the width of the installation gap plus 30 mm or more.
Preparing the opening
When performing window installation work, you always have to devote some time to preparing and restoring the opening. This problem is especially relevant when replacing window units in old buildings due to extensive damage to dilapidated structures. In a good way, for a high-quality solution it takes two to three days, which is simply impossible in residential premises. Quick-hardening cement-based compounds and polyurethane foam in combination with sheet insulation come to the rescue.
After dismantling the old window, the opening must be freed from moving, crumbling particles and protruding elements of the old internal slopes. All surfaces are cleaned of dust, dirt, and oil stains. Loose areas should be secured by filling with a waterproof binder.
Large voids formed when replacing window blocks, for example, between rows of facing and load-bearing brickwork, are sealed with dense insulation, and all through holes are foamed.
In addition, it is necessary to remove sagging mortar, repair cavities and chips on the internal surfaces of the quarter that exceed 10 mm in height
Such attention to this section of the opening is explained by the fact that a hermetic tape seal will be placed here
Difficulties associated with bolt-on installation
A few more reasons why you shouldn’t bother with bolt-on mounting when installing it yourself, but prefer plates. In order to attach the anchor bolt, it will be necessary to drill a hole in the PVC window frame. As a result, depressurization of the glass unit chamber is possible.
As a result of the fact that during drilling, the reinforcement of the system may be disrupted, problems are observed in the future when the window system freezes. As a result, excessive moisture formation occurs inside the room and mold appears on the surface of the slopes.
When fixing a PVC window with bolts, depressurization of the double-glazed window may occur.
If you lack experience and do not know the properties of the material from which the structure is made, it may happen that it will stretch if installed incorrectly. It will be almost impossible to correct the geometry of the window frame.
There are still positive qualities to attaching plastic windows to anchor bolts:
- reliability of fastening of the structure - in order to dismantle it, it will be necessary to carry out the reverse order of work that was done during installation;
- after fixing the window system, there is no need to carry out additional work, as happens with fixation with polyurethane foam: time for hardening, leveling, cutting, finishing;
- the structure can begin to be fully exploited immediately after it is installed;
- This connection method is reliable and durable, and fastening materials in the form of bolts are widely available and have an affordable price.
The process of attaching a window to plates
The first step is to fasten the anchor plates in increments of no more than 1 meter. In order for the frame to maintain a stable position, the fastening elements relative to the corners of the frame should be located at a distance of no more than 25 cm.
The distance from the plates to the corners must be at least 25 cm
It is important to remember that the distance from the border of the window structure to the opening must be at least 2 cm. If this condition is not met, recesses must be made in the surface of the opening to accommodate fasteners
To do this, the plates are installed on the frame, then it is installed in the opening.
On the surface of the wall, use a pencil or chalk to mark the future location of the fasteners. Then the frame is removed and in place of the marks, using a chisel, a recess is made into which the plate should fit and be tightly fixed. This will allow you to subsequently effectively mask the plates when finishing the slopes.
At the next stage, a window structure is placed in the opening and its position is leveled using wooden blocks prepared in advance. Their thickness should not exceed 3 cm and their installation occurs only horizontally, while vertical alignment occurs, which is controlled using a level.
Vertical alignment is done by level
When the position of the frame is leveled, you can begin to secure the plates using 6*40 dowels on a concrete base or with self-tapping screws in other cases.
Gaps are sealed using polyurethane foam
To avoid frame distortion, the plates are secured in order. First, fix the lower left corner, then the right, monitoring using a level. The top plates are secured last. At the final stage, the seams are sealed using polyurethane foam.
Spacer wedges for doors: technology of use
Another area in which these elements are actively used is the installation of doors, and they are used for both interior and entrance structures. The only difference is the number of sides of the vestibule.
Entrance doors, which usually have four-sided blocks, if installed on spacer wedges, do not require additional screed preparation. But the required number of wedges is selected depending on the mass of the door frame to be worked with in a particular case. Based on this, small or medium elements are used.
Hollow honeycomb doors can get by with two blocks of medium-sized wedges. Heavier items will require larger wedges. However, this makes it easy to level complex structures that have significant weight. To do this, just use a pry bar to slightly raise the edge of the threshold, and then adjust it using a level and install the block correctly. If everything is smooth and the support remains motionless, you can safely proceed to the final fixation.
It is advisable to use spacer wedges for installing interior and entrance doors.
Separately, it is worth mentioning how spacer wedges are used to adjust a door with a three-sided rebate. In this case, the installation of two leveling blocks is required - vertically on the box.
Note! It is of great importance whether the door is installed on a finished or subfloor. In the case of a subfloor, the block must be assembled from wedges, the thickness of which will approximately correspond to the thickness of the finishing coating
To do this, you can glue several pads together.
How to attach to plates?
Anchor plates for PVC windows help make the installation process quick and easy. One of the important advantages is that there is no need to remove the glass unit from the frame. The profile system will not be drilled, which means it will be possible to avoid problems that arise when drilling through the frame. The double-glazed windows will not depressurize, the structure will not lose rigidity, and will not begin to freeze. There is absolutely no risk of frame distortion. However, the method cannot be called perfect either: one of the important drawbacks is its unattractive appearance, since part of the fastening will be noticeable after installation.
The second significant drawback is the increased load on the structure when the doors are opened frequently. A window can quickly fail, which is why experts recommend fixing only solid structures in this way.
How to fasten plastic windows?
The choice of fasteners largely depends on the material from which the opening is made. We will consider below which fastening is most preferable for common types of buildings.
In a wooden or frame house
The best fasteners for plastic windows in wooden structures are anchor plates. The first and most compelling reason for this is the deformation processes to which wood is susceptible depending on changes in ambient temperature and humidity. This is especially true for log houses, even if the house has been allowed to stand.
If the block is fixed with self-tapping screws through the frame, there is a high probability of vertical shrinkage of the opening, which will cause the fasteners screwed into the lower and upper profile to be squeezed out. And it’s good if these are opening sections, since the beginning of extrusion will be visually noticeable. In blind blocks, the problem will only become apparent when the fasteners enter the glass unit.
Installation in frame structures should also be performed on plates. In some cases, the sidewalls of the structure are secured with self-tapping screws through the profile.
Video instruction:
Into concrete
Drilling high-quality concrete (lintels of window and door openings) with a ten-millimeter drill for an anchor is not an easy task. For such situations, it is better to use plates, which can be fixed using self-tapping screws for a 6mm dowel.
Scheme of fastening window blocks to the wall
In conventional panel high-rise buildings, concrete is more amenable to drilling, and in most cases, anchoring does not cause any particular difficulties. Regarding the installation technical conditions mentioned above, there are a number of points that require special attention.
When glazing balconies or loggias, the structure must be placed almost flush with the outer part of the opening. Anchoring in such a situation is quite dangerous: the edge of the concrete floor or wall may be destroyed. Mounting to plates in such cases is the only correct option.
To the brick wall
Perhaps the simplest installation, but with some caveats. Unpleasant moments arise if the opening is partially destroyed or poor quality brick was used for masonry. In addition, drilling for an anchor in place can be complicated by the displacement of the drill when it hits a masonry joint. Therefore, it is necessary to clearly see the drilling location in order to make a hole in the middle of the brick.
Using plates makes installation a little easier because if a plate hits a seam, it can always be turned slightly. The quarter-snap anchor plates simply slide into a comfortable position.
Most often, installers combine the type of fastener: the sidewalls of blind sections can be safely fastened through the profile with self-tapping screws (6mm dowel and press washer of suitable length), sections with opening doors - a 10mm anchor. Top/bottom - either plates or no fasteners at all, only foam and spacers.
Combined fastening: top and bottom with plates, side with self-tapping screws for concrete
To aerated concrete
There are only two correct options for fastening to porous materials (foam concrete, aerated concrete and the like):
- Ten-millimeter anchor of maximum length (202 mm). The traditional method of fixation is through the profile.
- It is more preferable to fasten with anchor plates. The plate is attached to the profile as usual: either screwed with a screw or snapped into a groove. The other side is fixed with a regular self-tapping screw, but through a special dowel for aerated concrete. For successful installation in this way, you will need a hex key or bit to screw the dowel into the seat.
Besides these two methods, there is another one, but it is difficult to call it correct. Nevertheless, it is actively used by a certain category of installers. The fact is that foam concrete is a fairly loose material, and self-tapping screws can be screwed into it without drilling. This makes it tempting to fasten the blocks with screws without any dowels. Disadvantage: you cannot re-tighten the screw into the same place; low quality of fastening under axial loads on the screw.
Video instruction:
To metal structures
Depending on the design of the opening, the window is attached either to metal screws, or, which happens much less frequently, to anchor plates. The installation process depends on the thickness of the metal to which the block must be secured. A square pipe with a wall thickness of 2 mm, which is common on the construction market, is attached with a press washer and a drill through a pre-drilled profile. If the metal is thicker and a self-tapping drill is not enough for successful drilling, a hole in the opening will have to be made before tightening the press washer.
Fasteners for PVC structures
Plastic structures are installed using anchors, self-tapping screws (in some cases with dowels) or anchor plates.
Anchors
This type of fastening is available in two versions: a classic anchor and an anchor for hollow materials.
- Classic anchor. Consists of an outer galvanized sleeve, a Phillips screw and a bushing. The principle of operation is as follows: initially the screw and part of the sleeve screwed onto it are inside the sleeve, which expands when the screw rotates in a certain direction, thus fixing the anchor in the seat. A regular anchor is great for fastening in dense materials (brick, concrete, cinder block).
- For hollow materials. In general, this anchor is similar to the classic one - the differences are in the design of the sleeve and the sleeve, which now does not expand the sleeve, but deforms, squeezing along the axis (deformation is possible thanks to special slots). When twisted, part of the anchor significantly increases in diameter, which allows it to be fixed in loose environments. In dense materials, such fasteners also hold up well.
The length of the dowels varies from 70 mm to 202 mm. The size suitable for installation is selected based on the thickness of the window profile (60mm), the installation gap between the frame and the opening (standard 2 cm), and the material from which the opening is made. An entry of 5-6 cm into brick or concrete is enough, therefore, in a normal situation, you will need a 152mm anchor.
For foam concrete, the maximum fastener length should be used (202 mm).
Screws
There are two types of screws, like the anchors described above: ordinary ones for wood and more special ones for concrete.
- Self-tapping screws for wood. A quick and cheap way to fix a window block in the openings of wooden structures, and when using a dowel, the screw holds perfectly in concrete, brick and similar materials. This fastening has one more positive quality compared to anchors: ease of dismantling.
- Self-tapping screws for concrete (dowel). An alternative to anchors, which, unfortunately, is quite rare on the domestic market. This type of fastening is noticeably thicker in diameter than wood screws, which makes installation using it more reliable. The actual application is as follows: a hole of the appropriate diameter is drilled in the concrete base, after which you can screw the self-tapping screw without a dowel directly into the concrete. There is one drawback: due to the heavy loads when screwing in, concrete screws often break.
Anchor plates
There are more varieties of anchor plates than self-tapping screws and anchors combined. This is due to the fact that many PVC profile manufacturers produce plates specifically for their products; fortunately, they are universal and interchangeable.
The anchor plate is attached on one side to the outer part of the window frame, the other side is fixed in the opening with anchors or self-tapping screws. There are plates that are held on the frame by serrated protrusions or snap into a quarter profile. Some installers don’t even screw such plates.
The use of anchor plates is the simplest and most reliable fastening option. The only drawback is that after such installation you cannot do without finishing the slopes.
Foam laying
Having completed the main installation work, you need to fill the gaps between the frame and the walls of the opening with foam. It is better to fill large gaps in two passes, with a pause of 1.5-2 hours. There are several types of polyurethane foam on sale with different characteristics. When choosing a suitable option, they are guided mainly by the weather characteristics of the region. Most often, there are instructions on this matter on the packaging.
Laying polyurethane foam
It is best to insulate the inside of the installation joint with polyurethane foam, construction sealant or butyl-based vapor barrier insulation tape. It is recommended to lay the foam very carefully: a lack of material will not allow you to achieve good tightness of the room, and an excess amount threatens to deform the window profile. After hardening, the foam protruding beyond the cracks is cut off using a sharp knife. It is better to do this after 48-36 hours.