Straightening plates are plastic plates used for leveling and fixing double-glazed windows when installing windows and door blocks.
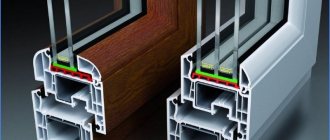
Another name is linings for double-glazed windows. Straightening plates are inserted between the window frame and the glass unit as supports and spacers. They reduce the load on the window frame by evenly distributing it over the entire contact area. The straightening plate is installed between the rebate liner and the glass unit to create the necessary gap and fix the glass unit. The lining can be made with a transverse collar interacting with the edge of the seam liner. Depending on the installation, it can serve as a spacer or support pad.
WS Straightening plate (distance pad) 100x38x2
Minimum packaging - 50 pieces.
Functional purpose of linings for double-glazed windows
- Linings for double-glazed windows are designed for the following. Distribute the weight of the glass unit, thus equalizing the load on the frame, and additionally eliminating unwanted stresses arising due to temperature changes, operating conditions, and so on.
- Prevent the possibility of pressing the sash when it is broken.
- Avoid unwanted contact of the glass unit with the rebate of the frame or sash.
Technology for adjusting sashes when installing double-glazed windows
- Liners are installed in the sash to align the rebate art. 171 in those places where the linings under the double-glazed window will be installed, at a distance of 5 cm from the corners of the double-glazed window. The double-glazed window is installed in the window sash on two linings 5 mm thick. No. 1 and No. 2. We align the position of the glass unit in the window opening using a mounting blade and install pads No. 3 and No. 4, each 5 mm thick. We take out lining No. 2, and the entire weight of the glass unit will transfer to lining No. 1. Unlock the handle and check the operation of the sash.
When the sash sags, you must:
- Insert the mounting blade between the frame rebate and the top of the glass unit.
- While pressing on the glass unit, move the top of the frame up and install lining No. 6 of the required thickness.
- Check the operation of the sash and, if necessary, change the thickness of the lining No. 6.
- If the sash height is more than 1.3 m, it is necessary to install additional spacers No. 7 and No. 8. When installing them, the thickness of the linings is selected so that there is no bending of the vertical parts of the sash.
All pads are fixed with a small amount of silicone sealant. This is necessary to ensure that the pads do not move during installation of glazing beads and transportation.
After installing the glazing beads, it is imperative to “press down” the sash parts with a nylon hammer. All operations for adjusting the sashes are carried out in a vertical position on a stand, on site - after installing the product in the opening. The linings are installed 50 - 70 mm from the internal corner along the rebate; if the sash width is more than one meter, the linings can be shifted up to 250 mm from the internal corner along the rebate.
At the installation sites of load-bearing and spacer pads, pads are installed to align the fold art. 171.
- The glass unit is installed on load-bearing pads No. 1 and No. 2 with a thickness of 5 mm.
- Using a mounting spatula, level the position of the glass unit in the frame opening.
- Select the required thickness for distance pads No. 3 and No. 4.
- When glazing solid structures with a horizontal mullion, it is necessary to transfer the weight of the upper glass unit to the building frame through the linings and the lower glass unit. To do this, additional pads No. 5 and No. 6 must be placed on top of the lower glass unit.
Layout layout
In fixed windows, the linings are arranged as follows - two supporting ones at the bottom of the glass unit, and spacers on the sides. In tear-off doors, linings are placed according to the principle of a panel door.
Diagonally, the weight of the structure is transferred first to the pads and then to the frame.
In the same way as on a panel door, the pressure diagonal serves to keep the leaf in its position and thus ensure its perfect functioning. For more information about the placement of linings in windows of different types, see the article “Wedging a double-glazed window.”
Do-it-yourself repair, adjustment and maintenance of plastic PVC windows
Any owner can repair, adjust and maintain the functionality of a plastic window. Self-repair or maintenance will take no more than half an hour, but you will always be confident in the reliable operation of all the mechanisms of the plastic window.
Modern PVC windows are a high-tech and reliable design, but they also require regular maintenance and preventive repairs, especially the complex design of the fittings, which ensures the mobility of the hinged sashes. All modern windows have vulnerabilities, regardless of the manufacturer.
In order to understand the basic principles of adjustment, repair and care of PVC windows, we will consider the most common breakdowns that you can fix with your own hands without calling a specialist.
PVC window handle repair
The most common problem is the breakdown of the handle of the sash closing and opening mechanism. In most cases, for inexpensive models, which make up 90% of the “park” of windows installed in Russia, this element of fittings is also made of plastic.
It is the handle that experiences the most significant and frequent physical stress when opening a window. If the closing mechanism and the pressing force of the window sash are normally adjusted in the “winter-summer” modes, as well as the geometry of the window frame is not broken, it is quite difficult to break the window handle. But if the window sag or moisture gets between the sealing rubber and the PVC frame in winter, the window can either jam or freeze. In this case, trying to open it by force will inevitably lead to breakage of the handle.
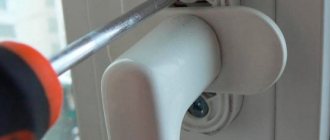
Luckily, window handle repair is one of the easiest repairs to do. It is enough to turn the decorative trim at the base of the window handle 90° to see two self-tapping screws securing the handle to the PVC profile. After unscrewing the screws, the broken handle is removed along with the square rod on which it is attached, and a new handle is inserted into the free space.
It is advisable to pry off the decorative trim with a wide spatula or a plastic card, but not with an ordinary slotted screwdriver, since you can leave quite noticeable burrs and deformations on the edge of the part; after all, plastic is a very soft material.
Advice! In order not to make a mistake with the length of the rod on which the handle is mounted, remove the broken handle from the window and use it as a sample when buying a new handle, showing it to sales consultants.
Types of window seals: silicone, rubber, rubber and thermoplastic
As already mentioned, the material from which it is made is of great importance when choosing a window seal. There are several options, each of which has its own operating features, advantages and disadvantages.
Synthetic rubber based on ethylene with propylene
EPDM is ethylene propylene or synthetic rubber. This material is characterized by high quality, reliability, durability and, in turn, comes in various types. Types of EPDM are distinguished by what chemical processes occur during its vulcanization. If sulfur acts as a vulcanizing agent, then such rubber is called sulfur rubber. This type is not recommended for use in combination with white PVC windows, as the sulfur can react chemically with the window profile, leaving yellow marks on it.
EPDM seals for plastic windows
The second option is pyroxide EPDM, in which organic peroxides act as a vulcanizing agent. It is more expensive than the previous type, but boasts higher durability and reliability. Both types of EPDM seals have the following advantages:
- large temperature range of use – from -60 to 120 degrees Celsius;
- high resistance to temperature changes;
- practically insensitive to direct sunlight and ultraviolet radiation;
- are characterized by a high level of strength to mechanical deformation;
- long service life - 10-20 years, subject to regular maintenance.
EPDM seal can be of any shape
There are also disadvantages to this type of window seal, which can be purchased at any specialized store:
- it can only be secured with glue, it cannot be welded;
- if you need colored seals for plastic windows, the price of 1 meter will be higher than for the same material, but black;
- If you choose a sulfur-based gasket, it may have an unpleasant odor.
EPDM sealant is a good option due to its high resistance to various types of adverse influences.
Features of thermoplastic seals
TPE or thermoplastic elastomer is most often found in finished double-glazed windows. It is a modified PVC and is characterized by a high spring rate. TPE is intended for use in mild climates as it reacts rather poorly to low temperatures. This property of the gasket has been corrected in a new type of thermoplastic elastopolymers - mixed TPE. They differ in that they contain rubber and polyethylene, so they can boast greater resistance to negative temperatures and generally higher performance characteristics.
Thermoplastic seal in section
The advantages of PVC window seals, which can be purchased as easily as EPDM, are the following:
- absolutely safe for human health, as it is made from environmentally friendly materials;
- can be welded rather than glued;
- non-flammable, that is, it can be installed in rooms with an increased risk of fire;
- costs much less than EPDM;
- characterized by high levels of springiness;
- there are many color options.
Placement of thermoplastic seal
This type also has disadvantages:
- loses its properties at too high or too low temperatures, in the first case it softens, in the second it completely loses its elasticity;
- quickly fails under regular mechanical stress and is easily deformed;
- does not have a high level of elasticity.
Related article:
Adjusting plastic windows yourself: video tutorials
Winter-summer mode. Setting the clamping mechanism. Adjusting loops. Repair of plastic windows.
It is recommended to install a TPE seal if you live in a warm climate and do not use your windows too much. Otherwise, it will quickly fail, and you will have to change the sealing gasket on the windows again.
Helpful advice! If you still decide to give preference to TPE sealant, then choose modern options made on the basis of polymer mixtures, as they have higher performance characteristics.
There are many bright colors of seals
Silicone seals for plastic windows: advantages and disadvantages
Silicone seals are not very popular due to their high cost. The performance characteristics of this option are at a high level, and it is based on silicone rubber, which contains methyl. The main advantage of this type is its high level of resistance to high and low temperatures. In addition, the following advantages are highlighted:
- very soft material that does not lose its properties in the temperature range from -60 to 100 degrees Celsius;
- perfectly tolerates not only temperature changes, but also other negative factors, for example, constant exposure to moisture;
- resistant to aggressive chemical environments;
- not afraid of ozone radiation;
- differs in durability.
Silicone seals are not sensitive to ultraviolet radiation
The disadvantages of silicone sealant are the following:
- susceptible to mechanical stress, quickly torn and deformed;
- high price.
The last point is the most significant drawback of the silicone-based sealing gasket, which is why it is not popular among buyers.
Features of rubber seal for windows
A rubber gasket made from conventional vulcanized rubber is a good alternative to the materials described above. Its advantages and disadvantages are the same as any other rubber product. The material provides a high level of window tightness and is relatively inexpensive, but it can lose its performance characteristics due to temperature changes, crack or dry out, and also suffer from strong mechanical stress.
Ordinary rubber seal for windows
The quality of the rubber seal largely depends on its manufacturer. This type of composition can use various fillers that increase or, conversely, decrease the properties of the material.
There is no clear answer to the question of which seal for a plastic window is better. Silicone is very popular due to its resistance to negative natural factors, but EPDM is cheaper and also boasts high performance characteristics. TPE is well suited for use in mild climates, and natural rubber will save you money. For example, a silicone gasket costs about 55 rubles per linear meter, you can buy EPDM window seals for 30 rubles, and TPE for 35 rubles.
Helpful advice! When choosing a gasket, pay attention to the country of manufacture. As a rule, sealing gaskets made in Finland and Turkey are of high quality.
Before replacing the seal, degrease the surface
Double-glazed window repair
Broken glass significantly reduces the heat and sound insulation properties of the window, and gives it an unaesthetic appearance. In this case, you should replace the entire broken glass unit, since its value primarily lies in the presence of a sealed chamber between the glasses and they can only be assembled in a factory setting.
To take the exact dimensions and order a new double-glazed window, you need to remove the glazing beads (plastic strips) holding the double-glazed window in the frame. For removal, use a plastic spatula and a rubber mallet so as not to leave marks on the plastic. Procedure for removing the bead:
The removed glazing beads must be laid out in the order in which they were removed, or marked with a simple pencil so as not to be confused when reassembling. After removing the beads, the damaged glass block is removed. It is quite heavy, and if it is broken and there are glass shards sticking out, you should work with construction gloves to avoid cutting yourself. After dismantling the unit, plastic bridge spacers may fall out; they should not be thrown away. They will be needed when installing a new double-glazed window.
To protect yourself from dangerous fragments, even before starting work, it is enough to seal all cracks and chips with tape so that they do not crumble or stick out beyond the glass unit. Ideally, you should use special vacuum suction cup holders, which can be rented at many hardware stores.
Related article: Repair of plastic windows, replacement of seals
The window frame, freed from the broken glass unit, is thoroughly washed around the perimeter with warm water and detergent and dried.
A new double-glazed window is inserted in the mirror opposite to the process of dismantling a broken double-glazed window. First install the bottom edge into the frame. Then the glass unit is completely inserted. If necessary, install bridge gaskets in the places where they were installed previously. After this, the glazing beads snap into place: top, bottom, right, left.
This completes the replacement (repair) of the broken glass. Replacement time is 25–30 minutes.
Rules for attaching windows to plates
Self-tapping screws should be used as a fixing element. Glue or foam are not suitable. The use of a percussion mechanism to create holes is only possible for concrete surfaces.
To avoid damaging the window frame with the drill, it must be of sufficient length. Additionally, you can protect the surface of the frame by installing a piece of PVC near the hole to be drilled.
Self-tapping screws are used as fastening elements
When installing a window in a brick opening that has vertical voids, holes for fasteners are formed in the interblock seams. To control the immersion of the self-tapping screw into the body of the frame, it is necessary to use a screwdriver with an appropriate function that limits the torque.
Replacing the seal
A cracked or damaged seal is replaced when the window sash is removed. First, the window hinges are freed from the decorative caps. The hinge rod is pulled down from the top loop using pliers. After this, the window sash tilts slightly towards itself and rises.
The window sash is laid on a horizontal surface and the damaged seal is removed from the groove. The groove is thoroughly washed and, after drying, lubricated with technical petroleum jelly or silicone grease.
The new seal is cut along the length of the groove with a margin of 20 mm. The sealant is lubricated with Vaseline (silicone) and inserted into the edge of the groove. After this, carefully pull it along the entire length of the groove, holding the end with pliers. The ends of the seal are cut with a sharp knife so that they overlap each other - vertical and horizontal. The edges of the seal are degreased with gasoline and fixed with silicone sealant.
The sash is installed in place in the reverse order: first, the lower loop is put on the rod, then the upper rod is hammered. After installation, the position of the sash and the degree of pressure must be adjusted.
Seal options by type of installation
In addition to the material they are made from, window seals vary in how they are installed. Here are the following types:
- Self-adhesive window seals are equipped with a special adhesive layer and are best suited for self-installation.
- Gaskets that are mounted with glue differ from the previous ones in that they do not have a ready-made adhesive layer.
- Grooved - used mainly to improve the performance characteristics of wooden windows.
When choosing self-adhesive pads, great attention should be paid to their shelf life. An expired seal can come off very quickly or not stick at all. In addition, it must be soft enough to stick evenly even on a not particularly flat surface, which may be important in the case of wooden windows. Roto seals for wooden windows are very popular.
Self-adhesive window seals
If you are installing a self-adhesive seal, then the surface of the window must first be thoroughly cleaned of dirt and dust, degreased with acetone, and it must be glued at a positive temperature, but not higher than 40 degrees Celsius.
When installing a groove seal, the window sashes must be removed from their hinges, and the groove in them is made using a cutter.
Adjusting plastic windows
During operation, plastic windows are subject to sagging under the influence of their own weight and due to the weakening of the movable joints of the fittings. To prevent possible jamming or difficulties when closing, it is necessary to timely adjust the position of the window sash relative to the window frame.
The simplest way to check the correct geometry of the window sash relative to the frame is to apply a level to the top and side edges of the window sash. The accuracy of the sash installation should be checked in three positions: closed, open at 45° and 90°. Adjustment is required if there is deviation in any of the indicated positions.
To adjust, you will need a screwdriver with interchangeable bits - “flat-cross” and a set of hex L-shaped keys.
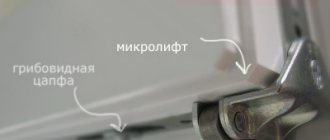
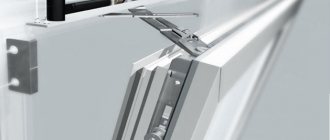
The adjustment units are located in the lower and upper hinges. To open them, you need to remove the decorative plastic caps by pulling up or down along the hinge. In addition, if there is a transom mechanism for opening the sash for ventilation, there is an adjusting bolt on the “scissors” located on top, with the help of which the tilt of the sash is additionally adjusted.
Adjusting the loop is easy. The design of all adjustable hinges allows for their slight displacement (a few millimeters) in three directions: vertical, horizontal and frontal.
If we are talking about window skew, then it is necessary to adjust the horizontal displacement (the adjusting bolt is located on the hinge on the side).
If the window begins to close poorly and the bottom edge clings to the window sill, then you should adjust it in the vertical direction - raise it (the adjusting bolts are on top).
Adjustment of the pressing force of PVC windows is carried out in two modes: “winter-summer”. Depending on the design of the locking mechanism, the regulating element may be oval eccentrics, displaced in the vertical direction:
- up - the clamping force increases - for the winter;
- down - the pressing force decreases - for the summer.
Some designs use a rotating bolt with an arrow pointing to the corresponding symbols (+/-) instead of an eccentric. It is important to ensure that the sash and eccentrics are installed so that the pressure along the entire perimeter of the sash is uniform, which can be seen from the condition and thickness of the seal. To check the pressing force, it is enough to place a sheet of paper under the seal in different places when closing the sash and then try to remove it.
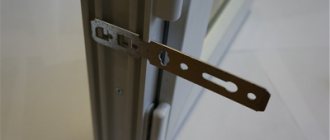
Features of fastening to anchor plates
This method of attaching a window system is as simple as possible and accessible to everyone.
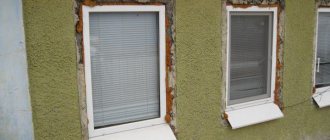
Compared to the unpacking method, the method is considered absolutely safe for the window system, but the only disadvantage is that some fastening elements (plates) will remain visible after installation. However, they can also be properly camouflaged by hiding them under the slopes when they are finished.
Inserting a plastic window using plates is easier and safer than fixing it with bolts
There is another recommendation from experts: if the window has an opening sash that will be used very often, then the window may fail. This type of fastening is recommended for moderate opening or for fixed windows .
An alternative method of fastening is considered: the upper part of the structure is mounted on plates, and the lower part is fixed with anchor bolts.
Caring for plastic windows
PVC structures are quite reliable and designed for a long service life. However, with frequent use, rubbing metal surfaces may begin to creak as a result of wear. To do this, it is necessary to carry out preventive cleaning of the fittings - hinges and clamping strips - from accumulated dust at least once a year and lubricate them with polymer lubricants intended for household use. The use of liquid mineral oil is not recommended. It does not adhere well to vertical surfaces and drains quickly.
The amount of lubricant applied should be minimal so as not to cause dust accumulation.
An effective way to care for the surface of PVC profiles and glass is regular cleaning with products intended for cleaning windows.
Most of the manipulations associated with the repair and adjustment of plastic windows can be done with your own hands. It doesn't require any rare tools or much experience. But if a breakdown occurs inside the locking mechanism or the PVC profile is damaged, you cannot do without the involvement of a specialist.
