Beton-House.com
Website about concrete: construction, characteristics, design. We combine the experience of professionals and private craftsmen in one place
Prefabricated Products
The article describes how to block window and door openings in a building made of aerated concrete blocks and whether it is possible to make a lintel yourself.
Reinforced concrete materials are used in prefabricated housing construction. In buildings made of aerated concrete, it is advisable to use lintels made of the same material.
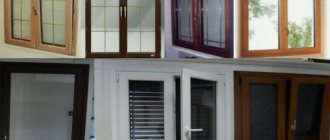
What are lintels for aerated concrete blocks
The masonry above the door or window opening is subject to additional load during the construction of the walls and during further use. The opening - the upper part and sides - is reinforced. Usually, to do this, grooves are cut out in the blocks that make up a row above the opening and iron rods are placed in them .
This kind of work is not that difficult, but it takes time and requires preliminary calculations. The same thing is much faster and easier to do using ready-made lintels for aerated concrete blocks. There are quite a lot of types of structures. They are selected taking into account the nature of the window opening, wall thickness, opening length and other factors.
Nuances of constructing walls from aerated blocks: brand and thickness of blocks
For the construction of load-bearing walls from aerated concrete blocks, blocks of grade D500 and higher are used.
The numerical index means volumetric weight in kg/m3. For internal non-load-bearing walls and partitions, the use of grade D400 is acceptable. The lower grade D300 is usually used as insulation for walls made of more durable material. When the number of floors is three or more, blocks with a grade of at least D600 are used.
The thickness of the walls is determined by thermal engineering calculations. The thermal resistance of a wall is determined by the sum of the coefficients of resistance to heat transfer by the internal and external surfaces of the walls, as well as each layer of the wall itself.
Let's consider a thermal engineering calculation of the heat transfer resistance of a wall made of D500 blocks 375mm thick, insulated with a 50mm mineral wool board.
The thermal resistance of a wall layer to heat transfer is determined by dividing the layer thickness by the thermal conductivity coefficient (see table).
Thermal characteristics of aerated concrete blocks.
Very often in advertising brochures you can find a thermal conductivity coefficient for the D500 brand equal to 0.1. This is nothing more than a marketing ploy. This value is either deliberately rounded down or simply provided for a completely dry block condition. In real operating conditions, the thermal insulation properties are worse - their values are given in the column of design coefficients. The letters “A” and “B” indicate the humidity zone corresponding to the construction site. For the coasts of large bodies of water, zone “B” is accepted, for other places, as a rule, zone “A”. The higher the water saturation of the material, the worse its thermal insulation properties.
Characteristics of other materials are given below.
Thermal characteristics of common building materials.
The sum of the coefficients of resistance to heat transfer by wall surfaces (external and internal) is equal to 0.158 W/mS.
We determine the thermal resistance for masonry made of D500 blocks with a thickness of 375 mm (0.375 m) in the humidity zone “B”:
0.375 / 0.16 = 2.344 W/mS
Insulation with a 50mm (0.05m) mineral wool board will give the following indicators:
0.05 / 0.09 = 0.556 W/mS
The total heat transfer resistance of the wall will be:
R=0.158 + 2.344 + 0.556 = 3.058 m2/W*S
Is this result enough? It depends on the climatic zone of construction. Determination of the required value of R is carried out according to table. 4 SNiP 02/23/2003. The calculation is relatively cumbersome; it is easier to find out the required R value for your region using any search engine. The higher the value of this indicator, the warmer the house.
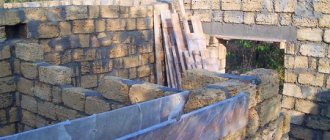
Support rules
If the crossbar does not extend into the masonry to a sufficient length, it will not strengthen the window opening, but will turn into a “weak link.” The support of lintels on aerated concrete blocks is carried out according to certain rules and taking into account the material .
- aerated concrete model is used for a total opening length of no more than 174 cm . The support depth according to the standards is 25 cm .
- A reinforced concrete product is heavier. The monolithic structure is inserted into the masonry at least 35 cm .
- The U-shaped block is lighter due to its cavity. The support depth according to GOST is 25 cm.
- The metal profile is inserted into the masonry 20 cm . Its strength significantly exceeds the strength of the wall, so it itself rather acts as an amplifier. The profile must be recessed into the wall.
With an opening width of up to 120 cm, you can do without reinforcement. Then the bricks will have to be tapped and the rods placed in the gas blocks of the several upper rows.
Tips and tricks
When constructing a house from gas silicate blocks, it is necessary to take into account a number of nuances when planning and installing lintels:
- You can save a little on materials by making trays yourself. For this purpose, formwork is used, into which flat additional elements made of aerated concrete are laid and glued. The strength of this design is limited by the reliability of the glue at the joints of the parts. To prevent the product from breaking during lifting, it is advisable to reinforce and fill it with concrete on the ground.
- When assembling and pouring directly above the opening, it is advisable to install a strong support under the lintel. This technique will prevent the crossbar from sagging under the weight of the solution and its accidental breakage due to careless movement.
- To make the prefabricated beam stronger, reinforcement should be used as a tie, extending 10-12 cm onto the ends of the outer blocks. The ends of the metal must first be covered with a mounting mesh.
If you choose the right material and follow the technology for its use, installing jumpers will not turn into a long-term problem.
Jumper installation methods
The installation of reinforcing blocks is carried out taking into account the nature of the material. The schemes are slightly different.
On angles or reinforcing bars
A corner lintel for aerated concrete is used for opening widths up to 120 cm or in cases where the height of the masonry above the window reaches ½ of its width . The step-by-step instructions are as follows.
- Grooves are cut out for the corners with a distance of 10–15 cm from the edge.
- Treat the profile with anti-corrosion primer or polymer paint. Then they wrap the corners with a plaster mesh.
- The corners are laid so that they rest on the walls and fit exactly into the grooves of the blocks. The profile is turned at an angle outward.
Valera
The voice of the construction guru
Ask a Question
If the opening is narrower, you can only reinforce it with rods. Take 4 rods with a diameter of 10 mm, cut holes for them in the aerated masonry blocks and lay them inside, filling them with glue or cement mortar. Blocks of the next row are placed on top of the rods as a lintel.
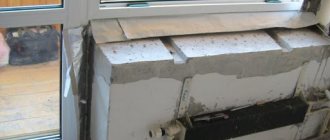
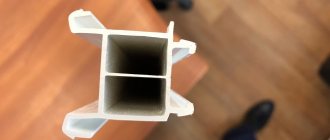
Using U-blocks
This is the most convenient reinforcement option, therefore it is used most often. The installation technology is as follows.
- Under the lintel, take a board along the length of the upper masonry and support it with bricks or metal pipes.
- Place the block on top so that its thick wall is on the outside and the arrow on the marking points upward. It is better to choose a lintel that matches the height of the blocks, since in this case there is no need to trim it. Raise the jumper manually, with two or three people. If the product is heavy - more than 100 kg, use a lift.
- Seams, including horizontal ones, are taped.
- From the outside, the block is thermally insulated with mineral wool or sheets of expanded polystyrene.
- Reinforcing bars of the required thickness are placed inside. Fastened with wire.
- The recess is filled with gravel and filled with M200 concrete. The composition is leveled and compacted.
After the concrete has dried, the supports are removed. Now you can continue construction.
Reinforced lintels
Installation of the reinforced version is as simple as possible. It is only important to choose the correct size of the aerated concrete lintel. The supporting depth for the protrusions is standard - 30 cm. The product is lifted upward, usually using a lift, since the weight of the jumpers reaches 120 kg. Then the block is installed on the wall using glue.
Installation of a double lintel is allowed for large wall thicknesses. The blocks are laid close to each other using glue. If necessary, the upper part of the gas blocks is leveled with a plane.
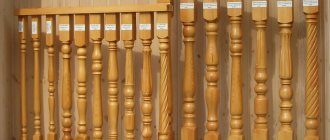
Materials used
In addition to the classic option (using reinforcement), other materials can be used to reinforce block masonry:
Galvanized metal mesh
Consists of steel rods welded in a mutually perpendicular position.
Of all the types of mesh used, metal is the most durable. But it has one big disadvantage: a special adhesive composition for joining wall blocks promotes the development of corrosion, which leads to a fairly rapid loss of all the positive properties of such reinforcement. Also, transverse rods act as cold bridges in winter. I do not recommend this type of enhancement.
Basalt mesh
It is made of basalt fiber rods, which are located perpendicular to each other. In butt joints, the rods are fixed using wire, clamps or specialized glue. This fastening ensures the correct and even geometric shape of the cells.
Basalt mesh can withstand strong tensile loads - about 50 kN/m. Its weight is several times less than that of metal mesh, which ensures ease of reinforcement work.
Basalt-based meshes are resistant to the negative effects of corrosion and do not respond to changes in temperature conditions. They have very low thermal conductivity, which ensures the absence of a cold bridge that occurs when reinforced with steel mesh.
HelpBasalt mesh costs quite a bit, so this solution is the most expensive of those proposed.
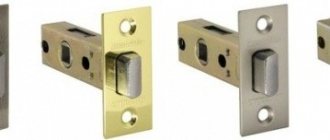
Metal mounting perforated tape
This is a galvanized strip of steel with holes made along its entire length.
It is enough to purchase a tape with dimensions of 16x1 mm. Reinforcement of the masonry is carried out without cutting the aerated concrete by fixing it with self-tapping screws. Otherwise the principle is the same as when using reinforcement. To increase strength, it is possible to fasten the strips in pairs using steel wire. Has lower bending strength compared to profiled reinforcement.
Attention! Punched paper tape with a thickness of 0.5-0.6 mm is common in online construction stores and markets. It is not suitable for reinforcement
Look for 1mm thick punched paper tape in specialty stores or order online in advance. Unfortunately, it is not so easy to buy it on the regular construction market.
I see the advantages of using this material compared to traditional fittings as follows:
- savings on delivery due to the compactness of the tape;
- no need to make grooves (saving on labor and installation adhesive).
Fiberglass reinforcement
The main material of the reinforcement is fiberglass, on which the thread is wound in a spiral to ensure better adhesion to concrete.
Significantly lighter in weight than its metal counterpart. Low thermal conductivity will avoid cold bridges in aerated concrete masonry. Ease of installation is ensured by a minimum number of joints, since such fittings are sold in packages in coils.
Attention! Fiberglass reinforcement has a significant disadvantage - it cannot withstand high fracture loads, and this is the main task of reinforcing masonry made of aerated concrete blocks with increased bending stress.
It is impossible to build a rigid frame from this material, therefore such reinforcement is not recommended in seismically hazardous construction areas. Our verdict is not to use.
The benefits of reinforcing wall structures are obvious. Therefore, it is worth sacrificing small additional monetary costs and time during installation, so that the building being constructed will serve you faithfully for many years.
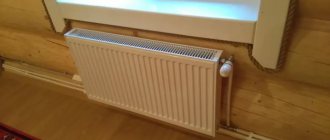
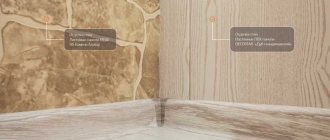
Installing fasteners on the frame
We continue installing windows in aerated concrete.
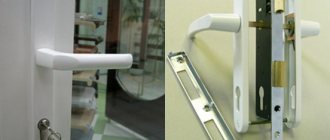
It should be remembered that the use of plates does not make it possible to strengthen the window in the opening area with the same reliability as using anchors. But when the method with plates is chosen, it is not recommended to use hanging elements for plasterboard sheets. It is better to use special window plates that have good rigidity.
The elements are fixed to the frame with screws, their long ends should be directed indoors. Before installing a window in an aerated concrete wall, you will need to knock down a certain part of the plaster layer from the slopes in order to secure the plates specifically to the walls. Only this option guarantees reliable installation.
When fixing fasteners to the frame, follow these recommendations:
- the plates are attached in increments of no more than sixty centimeters;
- Each window structure has imposts located horizontally or vertically and giving rigidity to the frame. From such a connection the plate is attached at a distance of twelve to eighteen centimeters;
- the same distance should be retreated to fix the plates at the corners of the frame structure.
If it is decided to use anchors to mount a window into an aerated block, then holes are first made in the frame. When choosing the distances between fasteners, use the above recommendations.
It is necessary to understand that there is no clear answer to the question of correct installation of a window (anchor or plate). With the help of plates, the process will go faster, but during operation the block may move slightly, a misalignment will appear, and the operational period of the entire structure will be shortened.
Preparatory work
To correctly install plastic windows in aerated concrete with your own hands, you need to prepare everything in advance.
After all, even a relatively small window weighs quite a lot, and one person may not be able to handle the work of installing it. Before starting work, even when you plan to use plates as block clamps, you should lighten the weight of the window structure as much as possible.
For this purpose, the sashes are removed, all work is performed in a certain order:
- the linings from the sash hinges are dismantled;
- the doors open slightly (the handle turns to the opening mode);
- on the top loop the pin is pulled down. This will require some effort;
- Now you can tilt the sash towards you and remove it from the hinge located below.
If it is decided to fasten the frame with anchors, the double-glazed window should be dismantled. The glazing beads are removed with a simple spatula. First, the vertical element is taken out, then the horizontal lower one. Then the second vertical element and the remaining top bead are taken out.
Installing a window in an aerated concrete room
Before moving on to the most important stage, you need to acquire the following materials and tools:
- Level;
- Hammer;
- Window frame;
- Wedges;
- Anchors;
- Roulette;
- Polyurethane foam;
- Windowsill;
- Low tide.
So, now that you have the entire list of equipment at hand, you can safely begin the process of installing a window in a house made of aerated concrete. Taking the window frame, clean it completely of the factory film. Check the entire structure and make sure that there are no cracks, scratches or other defects.
Window installation step by step:
- A window frame is installed in a cut groove in aerated concrete. Don't try to push it all in at once. First one side, and then the other;
- If you decide to cut the groove in advance, then we want to disappoint you - nothing will work. Therefore, it is necessary to lay special wedges. They can be either wooden or plastic. The advantage of the latter is that they can not be removed from aerated concrete, which cannot be said about wooden ones. Further, the leveling process is accompanied by the use of a level;
- Next we align it in width. At this stage, put the level aside and pick up a tape measure. The error may be no more than 3 mm beyond the backlash. We fix it on the sides with wedges, thereby immobilizing the structure;
- Align the vertical using a level;
- And now we gradually come to the four holes that are located in the inside of the frame. They are located with two holes on one side; you need to drill the base through them, using special drills for aerated concrete. The drilling depth is 40 cm;
- Anchors are driven into these holes. They should be hammered in until the top (hat) can, in principle, interfere with the closing of the window;
- Having completed all the above steps, you should have a perfectly fixed structure. Next, it should be blown out with foam with special small pores. Its cost is about the same as standard foam, but the quality is correspondingly much better. If wooden wedges were used during installation, then they must be removed. Plastic ones remain forever in aerated concrete;
- In the meantime, while the polyurethane foam hardens, a new window sill should be installed. Before installing it, a special silicone sealant is applied to the surface, which will act as glue. But for the installation itself you need to use polyurethane foam, thanks to which all holes and cracks are blown out. After fixing it, it is best to place some kind of press on top;
- The ebb is secured using the same mounting foam that is applied to the surface of aerated concrete and pressed down with the ebb. They are attached to the window with aluminum screws.
Attention! If the window is installed unevenly, even the best aerated concrete will not protect the room from drafts
Delivery
Delivery is made throughout the Samara region:
- Samara;
- Tolyatti;
- Kinel;
- Zhigulevsk;
- Novokuibyshevsk;
- Neftegorsk;
- And other cities.
Delivery is also made to other areas:
- Orenburg region;
- Tatarstan;
- Ulyanovsk region;
- Saratov region;
- Penza region;
- Bashkortostan
- The Republic of Kazakhstan
If necessary, delivery to other regions is discussed.