This is a fairly budget-friendly, versatile and attractive finishing method that even a housewife can do.
Windows must fully perform their functions. A comfortable microclimate in the house is created after high-quality sound and heat insulation of window structures.
To achieve this goal, slopes are installed on the windows. How to make slopes on plastic windows? It’s very simple - you can do this work yourself, or you can hire professionals to help.
What are slopes?
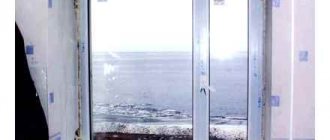
Slopes are the inner walls of the window opening niche. Finishing with various materials or plastering internal and external slopes is an integral part of window installation. The opinion that by foaming the window you have solved the problem of thermal insulation of the house is erroneous.
Foam that is not protected by slopes quickly picks up moisture and then breaks down. Slopes not only provide the room with the necessary insulation, but also give the window a finished look.
The design of the entire house or apartment depends on the aesthetic appearance of the window opening. The slopes also protect the installation seams, which prevents the windows from fogging up.
Types of slope finishing for plastic windows
The list of main services of companies that install metal-plastic windows includes measuring, installation and adjustment of plastic windows. Next, the customer independently decides what slopes there will be.
There are several types:
- plastering;
- plasterboard;
- plastic;
- metal;
- from foam plastic;
- wooden.
Let's take a closer look at the most common of them.
Plaster slopes
The construction of these slopes takes place in several stages.
To increase adhesion, the surface is first treated with a primer. Then several layers of plaster are applied, each of which must be allowed to dry.
Plaster is the cheapest, but ineffective way to finish slopes, since the lack of heat-insulating properties of this finish leads to hypothermia and further fogging of the windows.
The plaster is applied using a mesh, and the gap between the window and the plaster must be sealed with silicone.
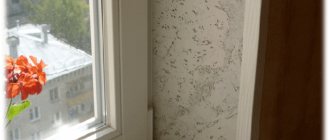
Plasterboard slopes
When installed correctly, plasterboard slopes will delight you with quality, aesthetic appearance and durability. Proper insulation with mineral wool or foam will create high thermal insulation properties of slopes.
After installation, the drywall is primed and puttied. The paint is applied last after the previous layers have dried. Remember, drywall is very sensitive to moisture. Therefore, they are not recommended to finish the external slopes of PVC windows, but they can install such slopes on the balcony if it is glazed and insulated.
Installation of windows according to GOST
Well, first of all, what is GOST? In short, this is a state standard or a certain norm that must be followed by enterprises.
Currently, GOST for the installation of PVC windows has been canceled and is advisory in nature. But self-respecting companies did not recognize this cancellation and continue to work according to GOST.
By the way, there are several GOST standards for PVC windows. For those interested, the list can be viewed here. But in my opinion, the most correct and useful is this “GOST R 52749-2007”.
For clients, installing windows according to GOST will cost approximately 1.5 - 2 times more than the so-called conventional installation. Therefore, many managers do not even offer GOST, and do not explain its advantages, fearing that clients will not buy anything at all.
What is the basic principle of this expensive installation of windows according to GOST?
But the principle is simple and it is also used in the construction of frame housing (the insulation must remain dry, but if the insulation still absorbs moisture, it must be able to escape outside).
It's all about polyurethane foam - the main insulation of windows. And this foam is hygroscopic, that is, it absorbs moisture well. And if this moisture is not removed, then the polyurethane foam loses its energy-saving properties.
What does GOST offer us for window installation? And it offers a system for removing moisture from polyurethane foam and protecting against this moisture, both from the room and from the street.
The moisture removal system is either:
- PSUL is a vapor-permeable self-expanding universal tape. It also protects the foam from external factors (rain and snow).
- Mastic, for example the most popular STIZ - A. Has high vapor permeability.
The foam is protected from internal fumes from the room by vapor barrier foil tape.
What disadvantages could there be, or more precisely, what should be taken into account when choosing this type of window installation?
The most important thing here is:
- Quality of PSUL (To be honest, I have not yet met a PSUL that would not crumble over time. You can simply pierce it with your finger without much effort. That is, I assume that low-quality PSUL has low resistance to ultraviolet. Here is my recommendation for the manufacturer , which you can trust - illbruk (from them you can purchase a complete set of materials for installation in accordance with GOST).
- The mastic application layer should not exceed 3 mm. If you cover the window with a thick layer of foam on the street side, steam will not be able to escape from it.
- In the old fund, it is impossible to work according to GOST, without additional financial costs and time losses. The vapor barrier tape should be as wide as possible, which is still not enough. Because the quarter is deep. And it is either reduced using masonry (and this is expensive and time-consuming), or the tape is calculated in double or even triple size and glued together (most often).
Installation of windows not in accordance with GOST
What is this anyway - normal installation (not according to GOST). And why, this option seems to be wrong, but this is the method used to install the majority of windows in our country?
This method is considered incorrect for one reason:
If the polyurethane foam does not allow moisture to escape, this is fraught with the formation of mold
But why is this mold and mildew only special cases, and not universal? Let's finally figure it out.
How is regular window installation done? In the same way, polyurethane foam is used as the main insulation. Instead of PSUL, the external seam is sealed with façade plaster. And vapor barrier tape is not used at all.
For some reason, everyone talks about the physical properties of PSUL and vapor barrier tape, but no one talks about the fact that:
- facade plaster has good vapor permeability
- and PVC sandwich panels that serve as window slopes are vapor-tight
By the way, fungus is most often found on plasterboard slopes and plaster slopes. Because these materials have good vapor permeability, that is, steam from the interior penetrates the polyurethane foam, destroying it.
And you should not seal the external seam with conventional sealants. This prevents steam from escaping from the foam. You can read about the main mistakes made by installers here.
The conclusion suggests itself. There is an alternative to installing windows according to GOST - this is a conventional installation using 3 layers of insulation:
- Vapor-permeable facade plaster
- Polyurethane foam
- Internal slopes of PVC sandwich panels
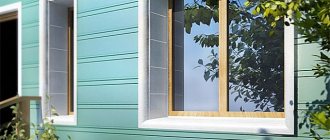
Plastic slopes
Finishing window slopes with plastic is the most versatile option.
Ease of installation, reliable design, high noise and heat insulation qualities combined with an attractive appearance are the main advantages of not only internal but also external plastic slopes. Sheet plastic slopes are often replaced with sandwich panels. Installing slopes made of this material is an excellent option for cladding the sides of window openings.
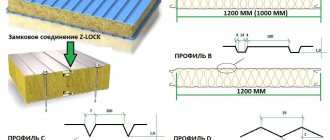
The three-layer panel consists of two external decorative layers of plastic and internal insulation. Extruded polystyrene foam is used as the internal thermal insulation layer.
The big advantage of this material is the huge selection of color shades. It will not be difficult to choose a panel to match any window color. The structure of sandwich panels is very similar to the surface of plastic windows, so additional decoration with plastic slopes is not required.
To install slopes from sandwich panels with your own hands, it is enough to have the desire, or better yet, a little experience in carrying out this work and following the technological instructions. Purchasing sandwich panels almost ready-made will greatly speed up and simplify their installation.
Foamed PVC panels are also used to finish window slopes. Thanks to its porous structure, this material creates additional thermal insulation of the room, does not deform due to temperature changes and does not delaminate due to prolonged heating. Let's take a closer look at the independent installation of PVC slopes on plastic windows.
Advantages and disadvantages
Positive technical characteristics of the material:
- Thanks to the surface structure of sandwich panels, which is similar in appearance to the structure of plastic windows and window sills, the material does not require additional decoration or processing.
- If we compare the panels with drywall, the latter clearly loses, as it is susceptible to cracking and getting wet as a result of the influence of condensation. Sandwich panels are reliably protected from this effect, thanks to the plastic coating.
- The panels provide better thermal insulation. Although the product itself does not allow cold to pass through, most often the structure is additionally insulated, but this is done more in order to immobilize the panel and obtain a reinforced bond of the material with the window block using polyurethane foam.
- Cleaning the surface of the panels is not difficult. Any stains can be easily removed from the plastic coating using a cloth soaked in soapy water.
- The panels are easy to install. which does not require any special skills.
- Long service life - according to the indicators specified by the manufacturer, it is 15-20 years.
The presence of shortcomings in sandwich panels is mainly due to the quality of the material itself:
- Poor quality panels, as a result of the influence of high temperatures, usually formed due to direct sunlight, can become deformed and acquire a yellow tint.
- In addition, poor quality also affects the durability of products, which, if manufactured unscrupulously, leaves much to be desired.
When purchasing, it would be a good idea to pay attention to the manufacturer and make sure that the seller has certification of the product
Do-it-yourself installation of PVC slopes
Like all construction work, the installation of plastic slopes begins with preliminary preparation, during which the materials and tools necessary for this work are purchased.
What materials and tools are needed:
- Plastic for slopes with a thickness of at least 8 mm.
- U-shaped starting strip made of plastic.
- F-shaped plastic profile.
- Insulation material: mineral wool, polyurethane foam.
- Wooden slats.
- Drill for self-tapping screws.
- Building level.
- Roulette.
- Putty knife.
- Cement mortar.
- Long screws - 95 mm, self-tapping screws - 4.5 mm.
- Painting knife.
- Silicone sealant.
- Metal scissors.
- Construction stapler.
Next, the working surface is prepared: the remains of wallpaper or old plaster are removed from the old slopes, and the surface is treated with an antifungal agent.
If, during the installation of a metal-plastic window, cracks appear on the street side, they need to be sealed with cement mortar. This procedure is necessary to protect the polyurethane foam from harmful sun rays and seal the external assembly seams.
Source: balkonsami.ru
Features of the material
Unlike wooden window structures, modern plastic frames have ventilation equipment. It is for this purpose that the upper part of the sash is tilted, resulting in a narrow opening through which air masses flow. Because of this, air turbulences with sharp temperature changes are formed. To increase the service life of the window system, you need to responsibly approach the finishing of window slopes.
Drywall is often used for these purposes, but in winter this material can freeze. In addition, it needs to be carefully looked after. If the building is made of reinforced concrete blocks or bricks, a sandwich should be used for maximum thermal insulation of the slope panels. Main advantages of the material:
- does not require special care, any contamination can be removed with a soap solution;
- low weight of structures;
- resistance to sunlight;
- resistance to fungus;
- the material does not require additional decoration, the outer surface resembles window plastic;
- high rates of thermal and sound insulation; construction foam can be used to improve thermal insulation and adhesion of the panel to the slope;
- good vapor permeability, the panels do not get wet or deform under the influence of moisture;
- resistance to mechanical damage;
- stylish design;
- acceptable price;
- The material is environmentally friendly and does not emit substances harmful to humans during operation.
Despite a number of obvious advantages, sandwich, like any other building material, has a number of disadvantages. Some of them:
- improper installation of panels can cause gaps and cracks;
- under the influence of high temperatures, structures turn yellow and become deformed;
- Products cannot be installed if there is a small distance between the hinge and the wall (otherwise the panels will “walk” around the entire perimeter).
Preparing for work
To install plastic slopes from sandwich panels you will need:
- sandwich panel;
- “P” profile (starting);
- “F” profile (slope cover);
- liquid plastic (optional);
- roulette;
- sharp knife;
- self-tapping screws 2.5x7mm;
- screwdriver, drill or screwdriver.
Using a tape measure, you need to measure the length and width of the slopes. Taking this data into account, three strips are cut out of the sandwich panel: the top (parallel to the window sill) and two side strips.
One caveat: if you plan to finish just one slope in a panel house, then in order to reduce costs, strips of the required sizes can be purchased from the seller company without buying a whole sheet of sandwich panels.
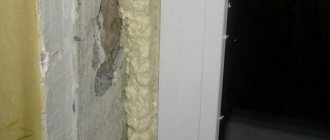
Using a sharp knife, carefully cut off the excess layer of polyurethane foam around the perimeter of the plastic window block. It should be borne in mind that the work is carried out after the foam has completely dried, that is, at least a day must pass from the moment the window is replaced.
Useful tips
When making slopes from sandwich panels, you must adhere to the following recommendations:
- For hot climates, it is better to choose a material with a renolit coating. This film will protect the slopes from high temperatures and deformation.
- When working, it is important to take into account the coefficient of linear expansion.
- To prevent cracking of the top layer of panels when cutting, it is worth using a circular saw with small tooth pitches.
- Do not cut parts at low room temperatures (below +5). Such conditions lead to brittleness and cracking of the material.
- When choosing a starting profile, you must take into account the recommendations of the panel manufacturer.
- Before installation, wooden slats must be dried and treated with antiseptic impregnation.
- The joint sealant must completely match the color of the panels. After drying, the difference in shades will be obvious.
Finishing window slopes using sandwich panels is a simple option for completing the installation of new windows. This material is characterized by high performance, ease of installation and ease of maintenance.
Fastener "P" profile
A starting profile is cut according to the dimensions of the slopes, resembling the letter P in cross-section. It is attached using self-tapping screws exactly along the edge of the window profile.
The distance between the screws is approximately 10-15 cm. In this case, first of all, the profile should be installed at the top, while the side elements are brought close to the top, leaving no gaps.
A nuance: it is possible to install slopes using a sandwich panel without using a starting profile. In this case, strips of sandwich panels are placed closely behind the window profile 1 cm deep, with step-by-step foaming of the niche to fix the slope. This process is more labor-intensive than using a “P” profile, but the result is more aesthetically pleasing.
Installation of strips of sandwich panels
The top panel is inserted into the starting profile already secured with screws.
After this, 4 more parts of the starting profile are cut off, the length of which is determined by the width of the slopes. The segments are inserted into the side starting profile at the top and bottom on both sides, secured with self-tapping screws to the top of the sandwich panel and to the window sill, respectively.
Nuance : most craftsmen specializing in these types of finishing work exclude this stage. In this case, the sandwich panel strips simply adjoin the top strip and the window sill.
The gap at the joints is closed with a special agent - liquid plastic, which, when hardened, acquires the same characteristics as ordinary plastic. There are also negligent workers who use conventional sealant, and after a short time the slopes lose their appearance: the joints treated with sealant darken and become dirty.
Any of these two methods reduces work time and material consumption, and has its supporters and opponents. Therefore, the choice of option is a matter of taste.
Next, a sandwich panel strip is installed into a kind of structure made from the starting profile, fixed on three sides (along the window opening, at the top on the sandwich panel and at the bottom on the window sill).
The process of working with the panel on the other side is completed in a similar way. As a result, the plastic slope is almost ready, and all that remains is to give the appearance to the outer sections.
Installation process
The procedure for installing sandwich slopes involves several stages. The first step is to prepare the tool. To work you will need:
Preparatory stage
The panels are a practical building material that is easy to install. Designs can be two- or three-layer. The last option is covered with PVC on both sides. These products can be mounted on a wooden frame because they have high rigidity parameters. However, it makes no sense to fix them to the walls using liquid nails, because plastic has low adhesion rates.
To install two-layer structures, you can use any of the possible fixation options: on a wooden frame, liquid nails, construction foam. The second option involves using minimal space. At the preparation stage, you need to thoroughly clean the slopes, remove everything that could cause the structure to separate from the base, and remove irregularities and bumps. If, after installing window structures, there is excess construction foam remaining, it must be cut off. All areas that are not involved in installation should be covered with polyethylene to prevent destruction of the window structure and window sill.
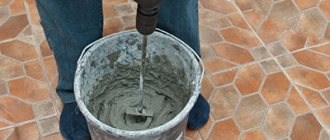
Then you need to prepare a plaster mixture for rough work. The resulting solution should be used to seal all cracks to make the surface perfectly smooth. The check is carried out using a level. If the initial surface was ideal, the plastering procedure can be omitted.
After the mixture has hardened, the slopes should be treated with a primer for porous surfaces. This is necessary so that the adhesive composition firmly fixes the sandwich. After the primer has dried, antifungal treatment is carried out. At this point, the preparatory work can be considered completed.
Installation procedure
The first step is to take measurements of the slopes and then cut the sandwich. First, using a cutting object, the sheathing material is cut. Experts recommend cutting the sandwich using a knife. The structure must be laid on the floor and marked with a tape measure and pencil. After cutting, the edges of the material must be sanded.
The next stage is the installation of side slopes. Self-tapping screws are used to fix the starting profile. The distance between the screws must be at least 15 cm. The panel can be installed without the initial profile. To do this, it is necessary to place the sandwich close to the window structure, inserting the material 1 cm deep. The slope is secured using foam. This is a more labor-intensive installation method, but in the end the structure will look more aesthetically pleasing.
Then liquid nails are applied to the material, with a zigzag strip in the middle and straight lines along the perimeter. Next, the structure is inserted into the original profile and pressed. The remaining panels are installed in the same way. To decorate the opening, an edging profile is glued around the perimeter. To make the design look neat, corner joints are cut at an angle of 45 degrees.
During the installation process, you should try to place the elements so that there is a minimum gap between them. White sealant can be used to mask butt joints. At this stage, the procedure for decorating plastic windows with sandwich panels can be considered complete. To completely dry the structure, you need to wait 1-2 days. Properly installed slopes do not require special care; the products are designed for a long period of operation.
Foam fixation
This installation method involves the use of multilayer panels with two stiffeners. Installation work is carried out according to a certain algorithm. Sequencing:
- Taking measurements. This is a very important stage; you need to obtain accurate data so that you don’t make mistakes when slicing a sandwich in the future.
- Setting up a starting profile.
- Applying markings to the cladding and cutting parts.
- Installation of the top strip, which is carried out by inserting the product into the groove of the original profile.
- Sealing gaps with construction foam. The latter should be applied very carefully, because during the hardening process it increases several times. Experienced builders advise giving preference to professional materials that need to be applied in a thin layer.
- Installation of a special plastic element, which is fixed with masking tape.
- Then the sides of the slope are sheathed.
Upon completion of the work, it is necessary to cut off excess material and wait until the construction foam has completely hardened.
Rail mounting
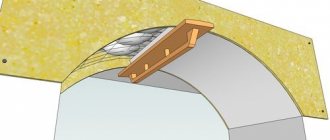
Another option for decorating slopes with a sandwich is to install the material on wooden slats. The work algorithm looks like this:
- First of all, measurements are taken from the slope, which are then transferred to the panel. After this, the material is cut.
- Wooden slats are installed on the outside of the window frame. As a result, a complete outline should emerge. The construction level determines the correctness of the work performed.
- Then the profile is fixed to the window frame. As a result, a slight gap is formed, which is filled with construction foam or mineral wool.
- At the next stage, the sandwich is inserted into the profile. When carrying out manipulations, you do not need to use adhesive mixtures; just take a construction stapler and use staples to punch through the outer side of the panel. This fixation method can be used for three-layer structures.
If the use of a starting profile is unacceptable, all parts must be glued. In such a situation, sealant should be applied to the inner corner to mask the resulting defects.
Finishing the slopes of plastic window structures is a very important step that should not be neglected, since as a result the performance characteristics of the window as a whole may deteriorate.
Today, sandwich panels are a popular material for decorating openings. You can easily install them yourself without professional help. There are several ways to fix products. Each master decides for himself which one to choose.
The last stage of installing slopes made of sandwich panels
To give the plastic slope a finished look, use the “F” profile, or, as it is also called, the slope cover.
The profile is cut into strips of the required length, based on the following calculations: slope length + profile width for the side parts and slope length + 2 profile widths for the upper slope.
It is advisable to leave a length greater than required, since in the end the excess will still be cut off, but a shortage of even one centimeter will require a complete redo.
Next, snap the slope cover onto the cut edges of the sandwich panels. In the corners at this stage the outer strips overlap.
Using a ruler and pencil, mark a cutting line along which the excess edging is trimmed. The result is neat right angles.
Nuance : for many slope installers, this stage is the final one. However, it is preferable to fill the niches between the sandwich panels and the wall with foam. To do this, the “F” profile prepared for installation is temporarily dismantled.
The voids are filled with foam, the next day the excess is carefully cut off, and the slope covers (“F” profile) are returned to their places. This creates additional heat and sound insulation in the apartment.
Source: rems-info.ru
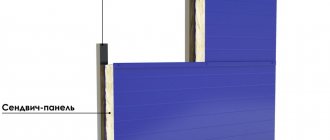
Sandwich panel slopes
Window slopes made of sandwich panels are a three-layer panel in which the two outer layers are decorative plastic, and the inner layer is insulation (expanded polystyrene).
The material used as insulation can be of two types - free foam or extruded polystyrene foam.
The plastic used for cladding sandwich panels has a wide range of colors, so choosing a panel to match the color of your window will not be difficult. Plastic sandwich panels are considered the best choice for cladding window slopes.
With this finish, a wooden window will look attractive, will not freeze even in severe frost, and condensation will not accumulate on the window. Today there are several ways to finish window slopes, and these are considered the most popular: plaster slopes; plasterboard finishing; slopes made of sandwich panels.
And as mentioned above, it is the latter method that is most popular. What is this popularity based on? And the answer lies on the surface - slopes made of sandwich panels have many advantages.
The essence of voluntary certification
As mentioned above, some companies that monitor the image of their products undergo voluntary certification in order to obtain a certificate of conformity for it. The certification process testifies not only to ambitious intentions, but also to the quality of the products. From the date of receipt of such a certificate, all relevant products must be manufactured in a similar manner under the approved quality system.
At an enterprise that has such a certificate, first of all, there must be strict order. Each department involved in the production process is required to accurately fulfill its responsibilities. The presence of the slightest disagreement is unacceptable; all employees should clearly carry out their work in strict accordance with the documentation received.
Also, to comply with these rules, there is a kind of control department, whose work is a supervisory function
Thanks to this approach, there are almost no deviations from the developed certified system, and if any quality discrepancies are still detected, then, depending on the reason for the deviation and their importance, the product or material is sent for processing
The functions of the control department do not end there; its competence also includes monitoring the quality indicators of all purchased raw materials that are used for the manufacture of certified products. The described activities are carried out within the company. In addition, the company must be sent for inspection once (or twice) a year to the regulatory authority that previously issued the quality certificate.
If, during such a check, any inconsistencies in the technological process that are specified in the previously issued certificate are discovered, they are brought to the attention of the company management, the control department of the manufacturer, as well as directly to the contractor. After which the manufacturer is given a certain time to eliminate the defect, and after this period expires, the company undergoes a re-inspection. In case of successful completion, the manufacturer receives a conclusion on the product’s compliance with GOST requirements.
Many enterprises operate under such a voluntary certification scheme. Companies involved in the production of sandwich panels can do the same. Firstly, this is a huge advantage over competitors. A manufacturer that has a quality certificate for its products is always a level higher than an ordinary non-certified product. And, secondly, it is the presence of such a certificate for products that plays a decisive role in the selection of companies for public procurement.
Advantages of window slopes made of sandwich panels
- Thermal insulation - due to the presence of insulation, sandwich panels have good thermal insulation properties;
- No special additional tools are required for their installation;
- Do not rot;
- They tolerate temperature changes well;
- Durability;
- They have soundproofing properties;
- Moisture resistant;
- With not much weight, excellent strength;
- Easy to care for - just wipe regularly with a damp cloth.
Just like any other finishing material, sandwich panels for slopes also have disadvantages.
The importance of standards in production
State All-Union Standards (GOST)… Quite common in the USSR. At one time, everyone adhered to them, but unfortunately, this does not apply to the present time. Now a large number of new materials have appeared on the market. During production, they often do not adhere to any norms and rules. These circumstances could not but affect the quality of the products.
Construction is no exception. Today, almost all manufactured building materials do not previously undergo mandatory certification. Only often large companies, for which image is first and foremost, provide the buyer with only certified goods of suitable quality.
Stages of installation of slopes made of sandwich panels
At the first stage, the window slopes are cleaned of dirt and all voids are sealed.
Then measurements of the slope and cutting of the panels are made, after which they proceed to installation. First, the slope is fixed on top of the window, the starting “U” or “J” shaped profile is attached using self-tapping screws.
The panel is then inserted into the profile with a slight slope. The gap between the jumper and the sandwich panel is filled with polyurethane foam. Using liquid nails, the front part of the slope is attached to the opening. The side window slopes are also installed.
After installing slopes made of sandwich panels, your windows will take on a finished look, and your home will delight you with warmth and comfort.
Positive traits
The sandwich is used in the manufacture of blind elements of balcony and street doors, as well as balcony enclosing structures. Doors with sandwich panels installed at the bottom prevent heat from escaping. This is due to the fact that panels for window and door slopes have the following positive qualities:
- The sandwich has low weight and sufficient strength.
- Thanks to the polystyrene foam filler, heat loss is eliminated, the energy efficiency of the room is increased and optimal microclimatic conditions are created. No wonder expanded polystyrene has established itself as a reliable insulation material.
- The ability to laminate the surface to create a single compositional integrity with the window system makes it a modern universal finishing material.
Using laminated panels you can decorate a window to suit any interior
- It is possible to select the size of the material depending on the parameters of the window opening.
- Plastic slopes are resistant to moisture, temperature changes and biological substances.
- Warm slopes for plastic windows are not susceptible to rotting and mold.
- Finishing the slopes of plastic windows with this material allows you to increase the sound insulation properties of the window system.
- Easy to install and maintain window slopes.
Cost of sandwich panels for window slopes
The price of such panels is quite affordable, so almost everyone can afford window slopes made from sandwich panels.
One panel measuring 1500 x 3000 x 10 mm will cost an average of 800 - 900 rubles. If you order the installation of slopes from a company, then installing a slope made of sandwich panels will cost around 500 rubles per square meter.
Today there is a lot of talk about the dangers of some building materials, and one of them is polystyrene. And many try to explain their reluctance to use finishing materials made of plastic by the fact that it emits substances harmful to health, while drinking water from plastic glasses that was boiled in a plastic kettle, and eating food packaged in plastic.
Of course, all this is harmful, but we have been living surrounded by plastic for a long time and therefore it is up to you to decide whether to install slopes for windows made of sandwich panels or not.
Source: proevrookna.ru