The final quality of the repair is often determined by the correct order of work. The golden rule is: first the ceiling is finished, then the walls and only then the floor. But what to do with the doors?
When installing a new doorway, any wallpaper will be completely damaged and contaminated with concrete dust Source Deviantrostov.ru
Main nuances
From the above rule, the sequence of actions is unclear - should you install the door first or hang the wallpaper? In the case of entrance doors, their installation should be provided for at the very first stages of repair. In the case of interior doors, the opinions of finishers and door installers are concentrated around the following facts:
- The easiest way: install a turnkey door, hang wallpaper and cover it with wide decorative trim. In this way it is possible to hide the trim line of the wallpaper, but thereby the aesthetics are lost. This method will not work if the door is installed close to the partition.
- If the repair process involves pouring screed at one level throughout all rooms, then installing the door leaf is done last. Depending on the design of the door, decorative elements are installed before or after installing the hinges, which means that wallpapering the walls will have to be completed before the final installation of the door.
If you plan to pour a concrete screed in one level, then installing the door frame should be done last, otherwise errors are inevitable that cannot be hidden either behind wallpaper or platbands Source Nikastroy.ru
Wall decoration
So, you already know what comes first: doors or wallpaper. Once you've finished the ceiling and laid the flooring, you can start working on the walls. This should be taken very seriously, because the comfort and coziness of the room largely depend on them. It is the walls that are responsible for heat retention and sound insulation. Today there are the following finishing options:
- ordinary paper wallpaper;
- photo wallpaper;
- fabric coverings;
- acrylic;
- metallic wallpaper;
- cork wallpaper;
- glass wallpaper.
Which option to choose is up to you. Each of them has certain advantages and disadvantages, as well as different costs. You must be guided by your own goals and financial capabilities.
Video description
At what stage of repair are doors installed?
- If you use wallpaper for painting, it is more convenient to install the door after painting.
- As work progresses, the humidity in the room rises. If doors made of non-laminated solid wood (for impregnation) are used, their installation is carried out after wallpapering and drying the room. This is done to avoid swelling of the door leaf. This advice does not apply to all other types of doors: those made of laminated solid wood or filled with corrugated cardboard.
- When installing expensive doors, it is better to play it safe and install them after all finishing work has been completed.
Pros and cons of each option
Wall decoration can be done when the door is ready or not yet. However, drafts can negatively affect the finish. Today the gluing process is quick, but it takes time for the glue to dry. When there is a draft in the room, the finishing can simply peel off from the walls. If the entrance opening is not sealed, then it is better to keep the windows closed, and also cover them with something to block the penetration of sunlight during the repair.
When the door installation is done in advance, it is necessary to prevent the formation of excess moisture in the room. It must be remembered that the humidity level rises after wallpapering. Moisture will cause the entrance box to swell, and mold will appear on the walls, ceiling and floor. To avoid this, you should provide access to fresh air into the room by opening a window or vent. At the stage of internal repairs, these nuances must be taken into account.
Wallpaper first
Anyone who has glued wallpaper at least once in their life knows how difficult it is to do it around the door. Pasting the corners will look like flowers. A free opening from the door frame is a definite plus when doing the work yourself.
Wallpapering should be done after all the “dirty” work has been carried out, while the installed doors should be gradually covered with plastic film Source Rerate.ru
Trimming wallpaper immediately after gluing is not an easy task. When installing a cheap door, there is a risk of delamination of the materials of the door frame and leaf when wet wallpaper comes into contact with its surface.
What comes first: wallpapering or floor installation
The average apartment owner makes renovations to his home infrequently—about once every five years. When work planning begins, the question often arises about the sequence of cladding. What to do first: install floors, install doors or glue wallpaper, because you want to do everything correctly and efficiently. Does changing the finishing order threaten difficulties and critical errors? Finishing specialists have a precise answer to this question.
What comes first: wallpapering or floor installation
Wallpaper is glued to the walls for painting or with a ready-made pattern and color scheme. Parquet or its more affordable imitation - laminate - is laid on the floor. In the kitchen, hallway and bathroom, laying tiles would be a good solution. Experienced craftsmen recommend starting repairs with preparatory measures for leveling and priming the walls before the finishing coating. On the floor, the rough base is a screed, and for fine leveling and finishing, a self-leveling compound is poured.
Pre-leveling the floors will prevent parquet or laminate flooring from squeaking
On the question that arises during the work about what to do first - the floor or the doors - the opinion of the experts is unequivocal. After pouring the floor, the door frame and leaf are installed, then the gaps are filled with polyurethane foam and the resulting slopes are plastered. Only after installing the doors can you calculate the width of the strips around the doorway and accurately lay out the damping gaps when laying the finishing floor covering. Thresholds and baseboards are installed at the end of the renovation.
If you are installing doors after finishing the floors, the laminate or parquet must be protected from damage with several layers of industrial cardboard.
When the walls and floor are smooth and dry, and the doors are installed, you can proceed to finishing. According to the rules, wallpaper is glued first; this order has a number of advantages and allows you to avoid difficulties during the work process:
- wallpaper is cut on the floor with a stationery knife, and if the laminate has already been laid, you can scratch it;
- applying glue and paint is impossible without “bloopers” and stains on the floor;
- under the ceiling they work on a stepladder, which scratches and rubs the new floor, putting pressure on it;
- Laminate flooring is installed without glue or other liquid or dirty substances, so the risk of staining the wallpaper is minimal.
After laying the floors, vacuum the walls to ensure that no dust remains on the wallpaper.
If an inexperienced craftsman is forced to first install the laminate and then glue the wallpaper, then by following the following tips you will be able to avoid mistakes:
- you should choose a laminate with a high wear resistance class, then it is not afraid of mechanical loads and scratches;
- To prevent increased humidity when the wallpaper dries from causing the floor covering to swell, it should be covered with thick plastic film, this will also protect it from glue and paint stains.
At the end, in any chosen order, a plinth is installed around the perimeter of the room; it will hide the bottom edge of the wallpaper and the technological gap of the laminate or parquet.
Usually the baseboard is chosen to match the color of the floors, but different options are possible
In theory, you can glue the wallpaper before or after installing the floor. Both options are quite doable, and difficulties can be smoothed out using available tools. However, the first way is more rational and practical, it is cheaper and requires less time and labor. It is better to install doors after rough finishing the floor, but before wallpapering.
Video description
When should interior doors be installed?
The “first wallpaper, then doors” method also has disadvantages:
- Installing a door is a messy and dusty process. After installation is complete, the wallpaper will have to be washed, and in the worst case, vacuumed.
- When forming the desired geometry of a doorway in a concrete wall, damage to the wallpaper is inevitable. If there are defects, the concrete may fall off in large pieces.
- No one is safe from human mistakes. Incorrect measurements, negligence of the door manufacturer and other factors lead to the fact that in some cases the doorway has to be reduced. After building up with a cement-sand mixture, an additional, unpasted wall surface appears, very different in color from concrete. Most often, decorative trims cannot cover this deficiency. There is a need for puttying and additional wallpapering, and with them a lot of difficulties: adjusting the pattern, a large number of scraps, etc.
- When finishing a doorway, it is almost impossible to avoid splashes of cement-sand mixture and other materials. Unlike dust, such contaminants are very difficult to remove. In addition, some door models do not have trim, which means you will have to tear off the wallpaper around the perimeter of the opening to form a solid corner.
To wallpaper a room with old doors, you need to remove the trim and restore the corners of the doorway to allow the work to be completed with the highest quality and accuracy Source Remontnik.ru
Ceiling finishing
You have already become familiar with the fact that doors or wallpaper come first. But this knowledge is not enough to carry out quality repairs. You will also need to select materials. As for the ceiling, suspended structures are the most popular. Among their main advantages are:
- a light weight;
- ease of installation;
- long service life;
- environmental friendliness;
- ease of care.
But the main advantage is the speed of installation. The main rule when working with such ceilings is fastening after wallpapering.
Doors first
Proponents of the “doors first, then wallpaper” method give a generalized, powerful argument: installing a door is a rough job, and gluing wallpaper is a finishing job. According to the general principle of performing repairs, rough work is performed first. There are other arguments:
- Bare walls allow you to install doors quickly and without the need to constantly monitor the condition of the wallpaper.
- When carrying out repairs on a large site, pre-installation of doors allows you to isolate further work. Dust from one room can interfere with finishing work in another.
- Defects in the doorway that arose during the door installation process can be completely hidden without deteriorating the appearance.
- High-quality doors (with the exception of non-laminated solid wood) are not afraid of fluctuations in humidity in the room, which means they will not swell and will not warp.
When performing finishing repairs without installing doors, it is necessary to cover all doorways Source Drive2.ru
Laminate: before or after wallpaper, advice from professionals
Which comes first, laminate or wallpaper, is a problem that worries all people faced with renovations. According to construction rules, it is necessary to finish the walls, and then the floors. But in some cases you can deviate from this requirement.
What do you do first - wallpaper or laminate?
Laying laminate flooring and wallpapering must be done according to the rules. Wallpaper is a construction and finishing material, it is used for cladding ceilings and walls in rooms. The sales format is a roll rolled into a single sheet, the width can be different, the length is on average 10-25 m.
Laminate is a floor covering based on dense wood fiber board. The top layer consists of a wear-resistant decorative film with pronounced protective characteristics.
Before starting work, surfaces should be properly prepared, namely:
- level the floors (finish, rough screed);
- remove defects of wall surfaces (plaster, putty).
Preparation should be done at the final stage of repair work, that is, after completion of the redevelopment, installation of window profiles, replacement of the heating system. Laminate flooring should never be laid on bare concrete floors; there must be a backing of polystyrene foam, polyethylene, cork or other suitable material. It is convenient to use tape to secure the joints of the substrate.
The correct sequence when performing finishing work is very important for the final result
You can hide the joints by laying the covering perpendicular to the window opening. It is also recommended to leave a gap of about 1 cm between the edge of the adjacent board and the wall. Laminate boards are secured with glue or locks. Additionally, it is recommended to use a hammer and bars. When the last row is ready, the wedges are taken out.
Is it possible to glue wallpaper after laminate?
First of all, builders recommend using wall finishing between wallpaper and laminate. But here a dilemma arises: is it possible to change the sequence of actions, and if so, when and why.
When choosing a technology, you need to take into account the degree of dust formation during certain work. The likelihood of damage to the finished finish is also taken into account. Installing laminate flooring rarely involves damage to the wall covering, unlike other floor coverings that require adjustments in contact areas.
Conclusion
The accumulated experience allows us to assert that the correct sequence of repairs will be “first – doors, then – wallpaper.”
The reasons for this lie not only in theoretical aspects, but also in the practical sense of this method:
- Construction dust has a completely different structure than household dust. If it gets on wet wallpaper, it is not possible to remove it, and after drying it turns out that it is very strongly stuck to the wallpaper.
- Repairs are most often carried out in stages. Before wallpapering, a lot of “dirty” work is done: plastering, puttying, grouting, etc. If there is no door in the room, then all the dirt will quickly spread to the neighboring clean rooms.
- There is no risk of damaging the wallpaper during the process of replacing or installing a door.
Wall painting option
What is the best thing to do if the walls are painted rather than papered? Here, too, it is better to first install the door frame, without the door leaf and trim. Then proceed to decorative finishing. Just first seal the cracks and arrange the platbands. In addition, the surface of the door frame should be covered with protective masking tape.
After the paint has dried, hang the canvas and install the trim. This technology reduces the risk of possible wood swelling, and damage to the door block is reduced to zero. In addition, the process of painting the wall near the platbands is greatly simplified.
What comes first: bathroom renovation or door installation?
If you decide to tile your bathroom, it is recommended to install the door frame before installation!
The master assembles the door frame, cuts in the fittings and installs the structure into the opening. As we know, doors must be installed level, but there are situations when the wall is not perfectly flat and you have to adjust the frame, and sometimes even move it, which, you see, will be very difficult with the tiles laid. And besides, fitting tiles to a door frame is easier than fitting doors. And besides, if there is a need to trim already laid tiles, it will be more expensive and not always smooth and beautiful, and besides, few people undertake such work.
So we have looked at the main repair work and installation of doors at certain points, and you can now evaluate when it will be more comfortable for you to install doors.
Repair procedure
We have sorted out the question of what needs to be done first - gluing wallpaper or installing doors.
However, I would also like to consider the procedure for repairs in general. Here the sequence is very simple: In other words, work is performed from top to bottom. This approach makes it possible to obtain an almost 100 percent guarantee that already repaired areas will not be damaged in any way during the finishing process of the next ones. However, one very important clarification is worth making here. If you plan to completely tear down the floor and pour a cement screed, then the work will need to start from the bottom.
In all other cases, the ceiling is done first. The most common options are drywall, tension board, or a combination of both. After the ceiling is done, you can start working on the walls. The material for leveling here is selected depending on their curvature. Often, putty is enough - starting and finishing. But if the walls are very crooked, then you can’t do without plaster. The best option is, of course, to completely rip everything off, to the ground. After this, apply a layer of plaster and then level it with putty. First, the starting one is applied, then the finishing one.
Do not forget that each layer must dry thoroughly. There's no need to rush here. The thing is that modern wallpaper has a non-woven base. Accordingly, moisture that has not had time to dry will come out on top of the layer of finishing putty. She will have nowhere else to go. The thing is that the base of the wallpaper does not allow moisture to pass through. Accordingly, mold forms on the wall. Ultimately, its spores will still leak through the non-woven fabric onto the surface of the wallpaper, and everything will have to be redone.
If you decide to lay laminate, linoleum or parquet on the floor without pouring a screed, then first of all it is recommended to level the surface using OSB boards.
It is best to do this while the putty is drying - this way you will not lose much time. If the work is done by several craftsmen, then you can glue wallpaper and, say, lay laminate flooring at the same time. One works against one wall, the other works against the opposite wall. And finally, finishing work. This is the installation of interior doors (frames and leaves), baseboards, and the very last stage - attaching the trim. In some cases, due to certain circumstances, the sequence of work may differ slightly from that described above. However, this scheme is considered the most optimal. Many craftsmen make repairs in exactly this sequence. Of course, we have not mentioned many more mandatory steps - dismantling old coatings, laying new wiring and communications, installing plumbing. However, then the description of the entire sequence would be too long. In addition, there are also a number of purely individual factors.
Source
Removal and replacement of windows
Are you planning a major renovation of your secondary home? Then you should get rid of everything that interferes. After all, now you decorate your apartment yourself. Are you planning a redevelopment? Be sure to contact government agencies regarding this issue. Your actions must be legal.
The next step is dismantling the windows. It is also suitable for new buildings if you are planning to insulate the apartment.
Important tip: do not remove the protective film from the windows. This will protect them from dust, dirt and scratches during repairs.
What comes first: ceiling repair or door installation?
It is recommended to carry out ceiling repairs almost as a last resort. The fact is that when replacing steel entrance doors in some apartments, it is necessary to make brickwork above the door. As a result, when dismantling the old door, it will be necessary to either dismantle the ceiling (if it is suspended or suspended), or re-glue the wallpaper or tiles. The same applies to interior doors. In some cases, it is necessary to add gypsum plasterboard from above, and it is simply unrealistic to do this addition without damaging the ceiling. Therefore, in order to save effort and money, it is recommended to carry out ceiling repairs as a last resort.
Ventilation device
Installation of utilities is perhaps one of the most important stages of repairs. But, as practice shows, not many people pay due attention to it. For a comfortable stay, the cooking area and bathroom must be equipped with a ventilation system and air exhaust, and the main room must be equipped with air conditioning. It is recommended to carry out installation work in the following sequence:
- The layout of the apartment is determined.
- Openings are made in the interior partitions.
- Installation of the external and external air conditioner unit is in progress.
- Ventilation is being installed.
- Electrical wiring is supplied to the devices.
Once you are done with this, you can start decorating the interior of the premises.
Algorithm for carrying out work
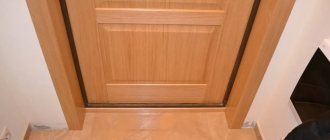
If the interior doors fit the opening, then the installation is carried out at the final stage of the repair work, when the ceiling surface is whitewashed and wallpaper is glued. When it is planned to widen the opening, this should be done during rough finishing, because there is no escape from a large amount of contamination.
The installation takes place in five stages:
Installation of thresholds and platbands.
Installation of fittings (handles and locking devices).
Each point is worth analyzing in more detail.
At what stage of repair are entrance doors installed?
Our customers often ask, at what stage are doors installed during an apartment renovation? Should this be done immediately, before the rough work begins, or can it be postponed until later? Unfortunately, a universal solution has not yet been invented. It is individual for each object. About what affects the order of door installation
, read this article.
Option number 1. The beginning of all beginnings
The builders' proposal to change the door at the beginning of the renovation may seem absurd. After all, there is dismantling, screeding, and other rough work ahead. However, there is a logical explanation for this.
Let us imagine the beginning of the creative process. To begin work, you need to bring a lot of valuables to your apartment. Naturally, we are talking about normal repairs and smart craftsmen, and not about gop brigades, who have the coolest boiler, shovel and socks in their arsenal.
Materials
Beautiful and comfortable housing requires the purchase of appropriate materials and equipment, the costs of which are estimated at impressive amounts. For example, components for assembling just one plumbing niche or a complex electrical panel can cost more than 100 thousand rubles. But this is only a small part of what is purchased for repairs.
Tools
To ensure high quality work, a good craftsman invests substantial amounts of money in a professional tool, for example:
• Bosch assembly hammer – 10 thousand rubles;
• Hilti laser level – 50 thousand rubles;
• DeWALT tile cutter – 80 thousand rubles, etc.
TOTAL: The cost of the kit used on site can easily exceed 500 thousand rubles. For example, this is what one of the sets of our masters looks like:
Now let's imagine a new building. There are still few permanent residents there, but there are plenty of unfamiliar people carrying out repairs throughout the house. It is difficult to keep track of who came to whom and what they took where. At the same time, do not forget that often in apartments from the developer, the entrance doors are either wooden or made according to the top recipes of Chinese consumer goods. If anyone else thinks that this props is an obstacle for outsiders, they are deeply mistaken. A piece of wood can be opened with a screwdriver or a foot, and a tin door can be opened with an ordinary can opener in 15-20 minutes. Don't believe me? See for yourself:
Do you agree that such a barrier will not protect against hacking? That is why replacement of such doors at the beginning of repairs is necessary to ensure the safety of the customer’s materials and builders’ tools.
A logical question, because it can be “killed” even at the stage of dismantling, removing garbage or delivering materials.
Firstly, the human factor plays a huge role in this matter. Therefore, a lot will depend on the responsibility of the people working for you. In particular, our craftsmen show maximum attention and care in relation to the customer’s property, which helps save your money and nerves.
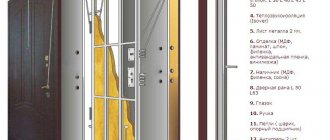
Secondly, it is necessary to protect the elements of the door structure using dense materials. For this we use dense polystyrene foam 2 cm thick and hardboard sheets (fibreboard), as well as, as auxiliary means, adhesive tape and film. Such packaging reliably protects finishing surfaces that are at risk of being hit. And this is what it looks like in practice:
Here's a snippet from the video. Title: “How to cover a door” https://www.youtube.com/watch?time_continue=796&v=2u91BUeadcM
TIP: Protecting a door with just plastic film or tape is extremely ineffective. These materials protect from dust, but not from impacts or scratches.
How to choose the size and width of interior doors in the house? on the Nedvio website
- Real estate
- Construction
- Repair
- Plot and Garden
- About country life
- Questions and Answers Interactive cadastral map
- About the Nedvio project
- Advertising on Nedvio.com
Anyone who has ever had to build or renovate a house knows that choosing the right doors is not as easy as it might seem at first glance.
How to choose a door frame? How should the doors open? How wide should the doorway be, and how wide should the trim be? What is the difference between gable and single-pitch doors? These are just a few of the questions you need to answer to make the right decision.
Why is it so important to choose the right doors?
A thoughtful choice of interior doors influences the character of the entire interior. When carrying out renovations in a house, it is important to choose them in such a way that they not only match the interior, but also complement it.
Doors should match the color and structure of the furniture and floor (for example, light floor = light door or natural materials in the interior = natural veneer on the door) or, on the contrary, create contrast (for example, light floor = dark door or natural materials in the interior = white doors or dark veneer). Both solutions are good.
Try to choose the doors in such a way that the interior of your home looks harmonious - all the doors in it should be from the same collection, the same height, and have the same finish (material, texture pattern, door handles, etc.).
Correct door functionality
In addition to an attractive appearance, interior doors should also be functional and match the character of the room. Solid doors are best installed in the bedroom (they guarantee seclusion and a sense of privacy, and thanks to better sound insulation they help you easily relax and fall asleep), transparent doors, on the contrary, are best installed in corridors and living rooms.
In dark interiors where there is not much sunlight, it is advisable to install glazed doors, which will make the room seem lighter and more spacious. Doors to bathrooms and bathrooms should have a lock, but do not forget to equip them with a mechanism that allows you to open the door from the outside (in case of an emergency), as well as ensure sufficient ventilation.
If you are faced with the task of choosing doors for small rooms or rooms with limited space, pay attention to more compact sliding door systems.
Installation of interior doors. What to consider?
The functionality and appearance of doors are very important factors, but experts recommend paying attention to other, more technical issues:
- Doorway width;
- Door opening side;
- Type of door frame and ledges, etc.
Which way should the doors open?
Let's start with the opening mechanism. There are so-called “left” and “right” doors, but how to properly distinguish them? It's not difficult - just stand in front of the door so that the door leaf opens towards you. If the hinges are on the left and the door is on the left, we are dealing with a right-handed door. For left doors, everything is, accordingly, the opposite.
In order to make it comfortable to use doors in the house, experts recommend taking into account the sides where the door should open:
- in small rooms the door should open outwards;
- the door should not cover the light switches after opening;
- the door should open onto an empty wall;
- The doors should not be too close, otherwise they will hit each other.
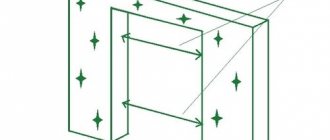
What size should the door frame be?
Door frames are divided into two main types:
- fixed;
- adjustable.
In the first case, a fixed door frame is mounted in a wall opening and trimmed on one side with strapping, and on the other with sheathing material, including foam and a connection to the wall.
Adjustable door frames are much more modern. They have fixed hinges on one side and adjustable (wall covering) hinges on the other. It is important to note that an adjustable door frame is much faster to install.
How to choose the right door frame for your home? Before purchasing a door, check the wall thickness and the size of the holes in the wall. Next, write down these values and pass them on to a measuring specialist, for example, to the Berezha company. If necessary, he will come to your home, take additional measurements and independently select a suitable door frame.
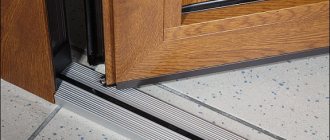
Sliding or non-sliding doors?
For the uninitiated, these terms may seem complicated. In fact, everything is simple - sliding doors differ from non-sliding doors in the finishing of the edges of the door.
In non-retractable doors, the edge of the leaf forms a single plane; it is installed completely flush with the door frame. The ribbed door leaf has a recess that overlaps the frame. Their main advantage is the hidden hinges, which are almost invisible when closed. This gives the impression that the door is built into the wall.