For decorative finishing or leveling the ceiling surface in residential and non-residential premises, modern cladding material is ideal - lining made of wood, plastic or MDF boards. The installation of the panels itself is not particularly difficult, but if you plan to do the work yourself, you need to know about all its intricacies. What and how to nail the lining to a pre-prepared slatted sheathing, which can be made of wooden beams or a metal profile?
Ways to fasten the lining
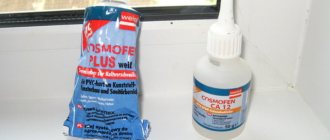
The principle of fastening decorative panels made of different materials is the same and is performed in a certain sequence. But the main difference lies in the choice of fasteners, which are selected for a specific type of lining. Nails, self-tapping screws, and clamps (special staples) are mainly used. Ways to fasten the lining
When starting work, you need to know how to properly nail the lining to a frame structure using a specific device:
- Nailing the lining with nails will require dexterity and skill. A neat appearance can only be achieved if the caps of the fasteners are invisible. To hide them in the grooves you will need a hammer, with the help of which the nails are evenly sunk into the sheathing board. You can also drill holes for the nail leg with a thin drill to prevent the wood from splitting.
- Self-tapping screws are suitable for fastening plastic sheathing. The fastener is inserted into the top of the board, and the head remains flush with the tenon.
- Clamps are used when installing linings of different types and thicknesses, so it is very important to select the correct fasteners according to the height of the “tongue”. The device is put on the groove of the board and screwed to the sheathing with self-tapping screws or nailed, as a result of which the facing board is not damaged, and the fastener itself remains invisible. For plastic or MDF lining, clamps with a height of 1/1.5/2 mm are suitable, for eurolining - 3 and 4 mm, for wooden panels - 5 mm and blockhouse - 6-8 mm. These are reliable and durable fasteners, since they are made from steel with a galvanized anti-corrosion coating. This method is the most practical because it is possible to dismantle and replace unsuitable panels.
Heavy lining is fastened in an open way. It is better to choose nails with a small head, since they are driven into the board from the outside. But in this case, the aesthetic performance of the decorative coating will suffer. The design of the lining allows for fastening to the sheathing “sunk” - with a nail through the groove. The most convenient option is panels with an offset profile, where the lower lip of the groove is longer than the upper one.
Preparatory moment. Marking and counting
It is present in every type of installation work.
- take all necessary measurements in the room;
- calculate the required amount of finishing material;
- decide how many consumables you need to purchase for the frame structure;
- equip your work area, getting rid of everything unnecessary; if there is any large furniture nearby, it is better to cover it with film to avoid contamination.
The process of covering the ceiling with clapboard
When the working surface is prepared and the frame is installed in the form of a wooden or metal sheathing (from a profile), we can talk about how to nail the lining. The process takes place in the following sequence:
- The first board is installed so that the side with the tenon is directed towards the wall (corner). The location of the lining must be strictly perpendicular to the sheathing. For this, a building level must be used.
- After the first board is fastened using self-tapping screws, you can begin installing the second lining. The joining of two panels is carried out according to the “tongue and groove” principle. After leveling, the lining is fixed in the same way as the first.
This sequence is followed until the entire ceiling surface is covered with clapboard. At the final stage, the finished coating is decorated with a plinth around the entire perimeter, which hides the cracks and edges of the cut lining.
Varnish and paint selection
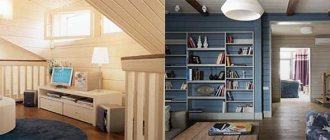
Means to maintain the excellent appearance of the panels for a long time are used in the initial stages, before covering. And walls covered with natural clapboard, an example in the photo below, must be treated upon completion with additional colorful materials.
In addition to them, to give a spectacular finish to the lining laying, at the end of the repair, the wood is coated with tint compounds.
It is based on a couple of components that greatly influence the appearance of the finish. Varnish happens:
- Alkyd;
- Acrylic;
- With a water base;
- Polyurethane;
- Mixed (acrylic with polyurethane).
Alkyd takes a long time to dry. For faster drying, use special. solutions. This varnish will give the room a sharp, not very pleasant smell, which is difficult to dissipate. But these little things can be tolerated, because the alkyd will give the boards reliable protection from moisture.
Acrylic – quick-drying. Used inside and outside buildings. Moisture-resistant, tolerates high temperatures well. The presence of many shades and colors is attractive. All surfaces treated with this varnish can be washed without problems, dirt and dust can be easily removed from them.
Water-based varnish is the safest and most environmentally friendly among all products. Dries quickly, odorless. Characterized by the absence of chemicals. solvents. There are water- and dirt-repellent varnishes. Caring for materials coated with this varnish is very simple. The cost is quite high.
Polyurethane. The most versatile one today. It will prevent the wood from turning yellow. Shades are offered in brightly saturated, semi-transparent shades. The product is presented for every taste. Do not forget about the primer of the required tone, especially if the choice fell on a light varnish color.
An interesting, practical, often used when covering walls with boards yourself is impregnation of wood with oil. Thus, the panels acquire an unobtrusively shiny, beautiful tone.
For our climate, in order for the board to look perfect for more than 10 years, it must be treated with acrylic varnish in two layers.
Methods for installing lining
Fastening the lining to the ceiling and walls is done in three main ways:
- Vertical installation. Covering the frame with clapboard is done from the wall. The board is attached to each lath of the sheathing using staples, self-tapping screws (screws) or finishing nails with a small head, located at a certain angle of inclination. If the ridge of the board is not thick enough, then it is better to pre-drill the holes to avoid cracking. All fasteners are hidden by the next panel.
- The horizontal method involves fastening the lining with the ridge upward; in this position, condensation will not form inside the structure. When installed from top to bottom, there are no visible gaps between the strips of cladding boards. The first panel is mounted near the ceiling, after which the second is inserted into the groove from below and secured with nails or self-tapping screws. The final strip is cut to width and secured in the groove of the previous one (a primitive nail puller is used for this). The lower part is covered with a plinth.
- Diagonal installation. The first board is located from the corner and then moves along the perimeter of the ceiling. The ends of the lining are cut at an angle according to the selected sketch. The most convenient option for fastening elements is clamps that sit on screws.
Methods for fastening lining
When the surfaces of the ceiling and walls are completely covered with clapboard, decorative elements must be used to seal the outer and inner corners. Special corners are nailed. The combined options for the arrangement of the lining look original, which allows you to add individuality to the interior.
Covering with clapboard
Basically, lining is divided into two types:
A – lining of a traditional “European” profile (tongue and groove), and B – “American” profile (overlapping). American is convenient for external cladding. It has a wider and thicker overlap, which better prevents flowing water from penetrating inside, but it is more difficult to join along the length due to the fastening features. The joining of the ends outside the fastening to the posts (sheathing) will not be so strong.
The European profile, on the contrary, can be built up almost anywhere by tightly compressing the ends of the joint boards in the grooves with the lower and upper boards. This allows you to use the material more efficiently, reducing the remaining trim to a minimum.
In our country, “European” type lining is widespread, and American type is less common.
Using eurolining as an example, we will look at the various subtleties and possible pitfalls of working with this material. In fact, the handling of such varieties as Imitation timber, Blockhouse, will be similar.
Selection of lining in the store.
Eurolining is usually sold in plastic packages of various lengths and is divided into three categories A, B, C. There is also a fourth category, “extra”. The difference in cost between the first three categories is negligible. Extra costs an order of magnitude more.
However, in practice, the manufacturer’s subjective factor prevails when sorting, and you must be prepared for the fact that having bought category A lining, you will find that it is roughly and often unevenly trimmed, its surface is rough, and the exact dimensions and number of knots do not correspond to the declared standard. This is normal, in fact, you are buying a “pig in a poke.” These defects can be explained by the level of conscientiousness of a particular work shift, the degree of sharpening of the cutting element in the equipment and many other factors. Very often, on the front side (if it is outward) of the first lining in the pack, the inscriptions from the label are clearly imprinted:
In fact, you bought 10% less lining - you can’t put such a board in a visible place!
In fact, specimens that are completely impossible to put into action are extremely rare.
More serious defects can be detected through the packaging if it is transparent. These are chips along the grooves and longitudinal cracks at the ends. They are usually clearly visible. Such packages should be set aside. It is also important to pay attention to the conditions in which the lining is stored, whether it has gotten wet in the rain. If you have a lot to buy, then it makes sense to make a “test purchase” and then take everything from one batch if the quality is good.
Read also: DIY wood processing machine
In my practice, there have been cases when, for example, one company’s category A at the beginning of summer was much better than that of its closest competitors, and at the end of summer, vice versa. It’s like with food, it’s either rotten or not very good or good - you look at it when you buy it. The brand and the manufacturer don’t rule here!
In addition to dividing the lining according to the quality of workmanship and wood defects, the lining differs in the type of wood itself. Standard lining is made from pine and spruce, and it is advisable to treat it with antiseptics. Lining made from aspen and linden is in demand for finishing paired rooms. It is even externally distinguished by a small number of knots and an even texture; it is much more expensive. Even more expensive is lining made from larch and other rare wood species.
Calculation of lining needs.
very roughly estimate the need for lining by the area to be sheathed, adjusted for scraps.
In reality, things are somewhat more complicated. It is necessary to take into account the actual dimensions of the planes that are to be sheathed, and combine this with the standard dimensions of the lining that is commercially available. By spending a little time on this, you can save a lot by reducing losses from scraps.
Suppose you need to cover a wall 312 cm wide. Standard lining, 300 cm long, will be short. The next available size on the market is 400 cm. There are also 200, 210 and 270 cm. What and how much to buy? As one of the options for patterning a wall, we can offer the following diagram:
We buy 210 cm lining, based on the fact that we will still have to trim it to 209 cm, cut it in half, with trim to 103 cm. In total, we will have two rows covered with three boards. Two whole and one in half. For a run of ten rows (90cm), we need 15 boards or one and a half packs. In this case, the net waste for (subsequent heating of the stove) will be 5 cm by 420 cm, or a little more than 1%. True, depending on the number of rows in the remainder, a trim of 103-105 cm and an “extra” board may be necessary. But such single excesses can easily be added when covering the next wall or room.
When determining the need for lining and its dimensions for each wall, it is important to consider the sequence in which these walls should be This sequence is determined by the convenience of corner fastenings, depending on the individual characteristics of each specific corner. Here's an example:
In option A, when the wall W is sheathed first, and then N, it will be much more convenient for you to hammer in nails than in option B. All such cases must be thought out and taken into account in advance.
It is important to immediately decide which wall, and in what sequence, to begin covering correctly. It may happen that you will have to beat the room in the sequence of walls: 3-1-4-2 clockwise and nothing else, and the dimensions for each wall can differ up to 2 times the thickness of the lining.
Checking the base for the lining.
The basis to which the lining is nailed in a frame house is usually the racks of the frame itself. In most other cases, the basis will be a special sheathing. Already when installing the racks, this must be taken into account, especially if the frame and cladding will be made by different teams of builders. This shouldn't happen:
Practical advice on nailing lining.
Hammering nails...
The most common method of attaching lining is with special finishing nails. They come in different lengths. The longer the finish nail, the more likely it is to bend when driven. Therefore, it is not advisable to buy finishing nails longer than 50 mm. They bend easily and always at the wrong time.
If you need to strengthen the structure of a house using lining, then in some cases it makes sense to use ordinary galvanized nails of the same size with a head in key areas rather than long finishing nails.
Nail thin finishing nails correctly with a regular hammer (not a lightweight version), using short blows with a small swing amplitude. The swing is wrist! The hammer should be held in the middle of the handle. The combination of a relatively heavy hammer along with a short swing allows you to drive a nail much more accurately than using a light hammer, where you will inevitably try to increase the amplitude and force of the swing and miss out on the accuracy of the blow. The most important thing when driving finishing nails is to achieve consistently identical, monotonous strikes. The hammer grip is something like this:
If you feel that the nail has rested on a knot, then in most cases the knot will “break through” if you increase the frequency of impacts and reduce their amplitude. The more monotonous the hammer blows, the less likely it is to bend the nail.
The vector of the applied blow must go strictly along the nail being driven. If you break this rule, the nail will immediately begin to bend. If you notice this in a timely manner, the nail can be straightened by changing the direction of the blows:
As the nail straightens, the direction of the blows also changes. After several attempts, this technique easily becomes automatic. The finishing nails are thin and soft; in addition, they are not sharpened “in the center”, but simply cut into the rod diagonally. That's why they tend to bend all the time.
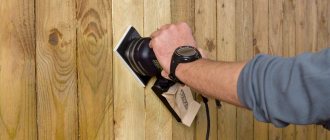
Dark spots - marks from hammer blows - also look very untidy If, before the final two or three blows of the hammer, you wipe its working surface at least on your pants, then there will be no stains. You can wipe the hammer on a board (pad).
In order to press the lining closer to each other, it is “knocked out”. So as not to spoil the work board. For padding, it is convenient to use an unusable piece of lining:
Also, you should not completely nail the lining the first time. Usually it is “finished off” when the next board is fitted on top (or below) and pre-fixed. If something goes wrong, you can return the situation back without loss of quality.
In recent years, clamps have become popular - special clips that work according to the following scheme:
First, the standard lining A , the clamps are inserted into the groove, pressed and finally screwed (you can use nails, but the meaning of the principle of disassembly of the structure itself is lost). Then board B and the operations are repeated. The clamps are selected to match the thickness of the lining.
The clamps allow you to work cleanly. Of course, this beauty costs more. I would not say that laying the lining on clamps is more difficult and takes longer. But I don’t use them myself for the following reasons:
Clippers are more expensive than finishing nails. Finishing nails do not spoil the appearance of the nailed lining at all; they are lost among the texture of the wood and knots. Finishing nails make the structure stronger: clamps use only a third of the total thickness of the board, then judge for yourself. Using the finishing nails, you can always later clarify where the racks are located under the sheathing if you need to hang a heavy shelf on the wall or something else for that matter.
And one more nuance. For the first time I saw how my neighbors' builders laid the lining in the room horizontally on clamps. I was surprised why their lining is turned upside down with the groove up and the tenon down? Moisture will accumulate. It turned out that laying the boards in a way that is convenient and natural for them - from the bottom up with clamps - is almost impossible. Correctly laying the lining can only be done by moving from the ceiling to the floor. Similarly, for a right-handed person, it will be very inconvenient to pull the wall from left to right.
Read also: How to reduce the Mercury 201 electricity meter readings
Are we working by level or what?
When the walls and ceiling are perfect rectangles and the floor is perfectly horizontal, you can work by level. In real conditions, a wooden house on a light foundation rarely has similar characteristics. Minor errors may always occur. Therefore, before you start covering, you should carefully check the geometry of the wall and decide how you will monitor the correct fastening of the boards. I will give an example when, working strictly according to the level, having reached the ceiling, you can see the following picture:
In the first case (A), the forcing was driven from bottom to top, strictly according to the level, and upon reaching the top, they discovered that the ceiling had a slight slope. As a result, we only emphasized the curvature of the room. In the second case, we controlled the situation and reduced the difference millimeter by millimeter. As a result, an error of a couple of centimeters is not visually visible and the room seems to be of the correct shape.
In a situation where the plane does not have the shape of a regular rectangle, the base of which ideally coincides with the horizon line, the level will only get in the way. It is safer to use a regular staff with marked marks, or a meter-long (or better yet, a little longer) building level.
In this case, you work in a “local” coordinate system and strive to always focus on it and correspond to it. Control measurements for making amendments can be made through a row, two, from the floor, from the ceiling, or even from a control board that has already been correctly nailed.
Horizontal or vertical?
How to nail the lining horizontally or vertically? In practice this is already predetermined. And this is the most decisive factor.
It is stupid to make additional lathing in a frame house specifically to nail the lining vertically (of course, if you did not plan additional insulation). The horizontal arrangement of the lining inside and outside is the most reasonable solution for a frame house, based on the design features of the euro-lining itself. Possible options for timber and log houses.
In addition to the purely aesthetic preference of the owner, the following arguments can be made in favor of vertical or horizontal placement of the lining. The vertical arrangement gives the feeling of greater wall height, which can be advantageously used for interior spaces. That's a plus. But being in such a projection relative to the windows, the shadows at the joints turn out to be more contrasting - this is a minus that disappears under artificial lighting.
The penetration of moisture inside, especially over time, when the structure dries out, is more noticeable with vertically positioned boards. With external cladding, the need for a ventilation gap is more important in this case. In this position, the horizontal arrangement is somewhat advantageous.
The accumulation of moisture both outside and inside in a vertically located lining is much more uneven within the same board. This occurs both for the outer cladding, when drying out after rain, and for the inner cladding (the temperature difference between the floor and the ceiling is an uneven thermal effect).
Bottom up or top down?
Should I nail the paneling from bottom to top or top to bottom? By and large, this is not important. A matter of taste.
For most people, it is more convenient to sheathe the wall from the bottom up. This makes it easier to knock out boards and more convenient to do all operations. You can do the job alone, and even handle long boards with ease.
But there is a slight subtlety here. I will demonstrate it with a simple example:
Sheathing the gable from the inside under the roof. If you start from the top (option A), then there will be no problems. If you are upholstering from below, then it will not be easy to install the last board in place, unless you create a triangle from several boards as a whole (option B).
In this situation, working from the bottom up, you will have to constantly solve the problem of inserting a larger groove of the upper board onto the tenon of the lower board, which is shorter.
The “excessive” dimensions of the lining turn out to be much larger than it seems at first glance. This factor must be taken into account when cutting such planes that have a tapering cone. Otherwise there will be unsightly gaps.
To accurately mark the angle at which the lining should be trimmed when it rests on an inclined plane of a ceiling or wall, a very simple and precise technique is used:
Take a small piece of clapboard (B) and insert it into the groove of the board close to the bevel. Then another board (A) is taken and pressed against the sloping wall (ceiling) overlapping board B. A line is drawn. The exact template for the specific angle is ready. At the same time, do not forget to make allowances for the increase in size by recessing the lining into the groove during the final cut.
Any complex cutouts are marked in the same way. Mark and saw the imaginary end of the future large board using a small scrap as an example.
Attach the resulting trim to the place, and if you are satisfied with everything, you can make cuts in the finishing board using the existing template.
Facing the room with eurolining
This material is easy to install, so such work can be done on your own. Eurolining is used both in residential and domestic premises. In each, it performs its function differently, in some it serves as a decorative finish, in others it eliminates defects on the walls.
Before choosing this material for finishing a room, you need to clearly understand its characteristics and properties. The design parameters are:
- The thickness of the lining strips is 12.5 mm;
- The width varies from 88 to 96 mm, depending on the presence of a groove. Prevents the formation of gaps between two elements, provided that the wood shrinks and shrinks;
- The length of the slats is in the range of 2...6 m with a step set at the production site.
It is also important to know that eurolining can be made from different materials. The conditions of its operation and appearance depend on this. The following types of lining are available on the market:
- Plastic materials made of PVC, characterized by resistance to moisture and temperature changes;
- Wooden boards that are environmentally friendly and hypoallergenic.
The parameter is taken into account before applying this finishing method.
This material is easy to install, so such work can be done on your own.
Advantages and disadvantages of the material
Before you definitely choose this facing material, it is worth understanding its advantages and disadvantages. This will help to avoid miscalculations during work and perform finishing work correctly.
Among the advantages of using eurolining it is worth highlighting:
- Easy to attach, so you can do the work yourself;
- High level of thermal insulation and sound absorption;
- Attractive appearance;
- Affordable price;
- Wooden products are characterized by high environmental friendliness and the creation of a special indoor microclimate;
- Plastic ones are not afraid of adverse influences, as a result of which they can be installed where there are temperature changes or excess moisture is present.
Wooden products are characterized by high environmental friendliness and the creation of a special indoor microclimate. But there are also disadvantages to this material:
- Wooden sheathing may warp as a result of exposure to moisture, or cracks may appear between elements due to drying of the wood;
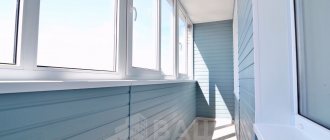
- Plastic elements can fade, especially on balconies, where the level of insolation is higher than indoors.
Plastic elements can fade, especially on balconies.
What nuances should be taken into account when working with lining
As with any other facing material, eurolining has its own characteristics. It is important to take them into account in order to avoid mistakes when fastening. This is an important point that allows you to obtain a high-quality and aesthetic coating that is ready to last for a long period without changing the basic characteristics.
What methods of fastening the lining exist?
Ease of installation and a large number of positive properties contribute to the widespread use of this material, despite the constant emergence of new types and methods of cladding the surface of the house.
One of the most acceptable properties of wooden panels is the ability to finish a room or the facade of a house with your own hands (see How clapboard cladding is done on the outside of a house), even for a novice craftsman, after studying the nuances of the work. The main condition before nailing the lining with your own hands is patience and purchasing quality materials.
There are several options for attaching the material.
These include:
- The simplest method of fixing lamellas is to use small nails and clamps or staples. But fastening with clamps can only be carried out on thin panels whose mass is small. Otherwise, the grips may not hold up. With this method:
- the lamella is inserted into the groove located on the previous panel;
- A clamp is fixed inside the groove (see Clamps for lining: selecting fasteners) with its help the board is screwed to the sheathing element with self-tapping screws or ordinary screws.
Fastening the panel with a clamp
Tip: Attach one panel to another tightly enough so that there are no gaps and all elements are adjusted to the same size. The last panel must be fitted into the free space, in which case it is cut to the required width and fastened.
- Fastening with screws . This method is used when other methods cannot be used. This is usually how the material is fixed in baths and saunas. A special feature of the method is the need to drill a hole in the board for each screw. In this case, the diameter of the hole is two times smaller than the axis of the screw. When installing panels:
- the screws are screwed in with a screwdriver, recessing each element as much as possible into the wood;
- the holes are plugged with a wooden pin, which will securely fix the panel and cover the screw head so that it is not visible.
Fastening the lining with a screw
Tip: Due to changes in temperature and moisture, the attachment points will begin to dry out and become more noticeable. To prevent the occurrence of such defects, the lining should be treated with special protective compounds.
- Using only finishing nails for lining. This is a simple method that does not require other additional devices or fixing elements. But in this case, the panels can often be damaged. The nails are nailed in increments of approximately 30 centimeters, which means that up to 8 nails will be needed for one two-meter-long board, which will amount to a fairly large number of elements for the total area. Instructions for driving them include:
- the nail is carefully placed with a hammer in the right place, its angle to the plane of the panel should be 45 degrees;
- the head of the element is recessed into the tree with the help of a blunt hammer, as deep as possible. This will avoid damage to the outer surface of the skin and allow the next lining panel to fit smoothly into the groove of the tongue.
Read also: Parallel connection of different powers
Fixing the lining with nails
Tip: This method cannot be used for the thinnest lining; hammering a nail may cause the material to split.
- Fastening the slats with screws . This method is used to fix old-style wooden panels that differ slightly from eurolining. Wherein:
- holes are drilled in the panels;
- the head is countersunk and chamfered, which allows it to be hidden;
- use a screwdriver to tighten the fastener until it stops;
- the groove is closed by the subsequent panel.
Fastening the paneling with screws
- The easiest way is to use construction staples, which a clapboard stapler helps to install in place . In this case, the staples are inserted into the groove, like nails, at an angle of 45 degrees. The force that the stapler creates allows the staple to be driven in sufficiently tightly and deeply, after which the second panel of material can easily be placed in its place. Then the next board is placed and the process is repeated.
Using a staple gun
How to nail the lining and what method of fastening and installation to use is decided by the repairman. In this case, it is necessary to take into account all the nuances and features of any of them, the conditions and factors in which the panels will be located after installation.
How to prepare a frame for mounting material
The video in this article will show you how to nail the lining and how best to position it on the surface.
The direction of the panels can be:
- Vertical. In this case, the boards are placed in the direction from floor to ceiling, the room visually becomes narrower and higher.
- Horizontal. The slats are placed from one wall to another, the room looks wider, but lower.
- At an angle or diagonally. This is a more complex method of laying material, and also with increased consumption.
- Combined. A combination of the first three methods in any variant.
With a perfectly flat wooden surface, the lining can be nailed directly to the wall, which is very rare. In other cases, the lathing is made from planed pine slats with a cross-section of 20x40 millimeters (see Lathing for lining according to all the rules), with a pitch of elements up to 50 centimeters.
Tip: Before installation, all wooden parts should be treated with an antiseptic.
The further procedure for installing the frame is as follows:
- The first rail is installed vertically in the corner of the room, its position is controlled by a plumb line. To install screws, plastic dowels and wooden spacers are used.
- Similarly, another rail is mounted in the opposite corner.
- At the top and bottom of the wall, two cords are stretched between the bars to facilitate installation of the panel at the top and bottom.
- Horizontal elements are fixed: one under the ceiling, and the other closer to the floor, their position is controlled by a cord.
- In increments of 50 centimeters, the remaining slats are installed horizontally.
Advice. To check the correct installation of parts, a cord or rule, which is a flat wooden block, is used, stretched between the outer slats, resting it on horizontal panels located at the top and bottom of the structure.
When the lining is placed horizontally, the slats for the sheathing are installed vertically. For diagonal laying - to the lining at a right angle.
Mounting options
How to nail vertical panels
The installation procedure is as follows:
- Using a jigsaw or a fine-tooth file, cut the lining panel to the required length, which is taken approximately one centimeter less than the height of the room.
- The first strip is placed with the comb towards the corner.
- To fix it, finishing nails for lining are used; their feature is a small diameter and a small head.
In the future, you can do different things:
- The clapboard is nailed with finishing nails in the center of the panel to each batten of the sheathing, and then the heads of the nails, recessed in the wood, are puttied, although it is not necessary to putty.
- Instead of nails, screws with a diameter of approximately 3 millimeters are used.
- The lining strips are fixed with nails or screws not in the center, but along the crest. In this case, the hole for the fastener must be carefully drilled. This is due to the small thickness of the ridge, which can cause cracking of the material. The photo shows how to nail the lining into the ridge.
Fixing the lining with nails into the ridge
- Nails are hammered or screws are screwed into the grooves of the lining. In this case, the fastener is hidden by the crest of the next strip.
Tip: Drive the nails at an angle, not all the way to the end to prevent damage to the face. To finish nails, you must use a punch or core with a specially blunted end.
- To fasten the lining, use clamps or metal brackets, which are fixed on the bottom flange of the groove and nailed to the sheathing. The ridge of the next strip is inserted into the groove of the first part and tapped until it stops.
Advice: To protect the groove from damage, the lining should be finished using a piece with a cut groove, which is inserted with a comb into the groove of the panel, and blows are applied to it with a hammer.
- The remaining strips are attached in the same way, with periodic monitoring of the verticality of their location using a plumb line, and if necessary, adjustments are made to the installation of the elements.
- The last strip is cut to the required width and fixed to the sheathing along the edge.
- For the next wall on the first strip, the ridge is cut off. This panel will cover the nail heads located on the last piece of paneling on the previous wall.
- Further installation is carried out in the same way as on the first wall.
How to properly attach strips horizontally
When installing the panels from bottom to top, you can clearly see how and with what nails it is better to nail the lining almost to the top of the wall surface. But having reached the ceiling, the strip needs to be cut to width, which may not look very nice.
In addition, with this method, the gaps between the strips will be visible, which is especially bad when finishing a sauna or bathhouse due to moisture getting into them, which will lead to the material quickly losing its beautiful appearance.
When installing panels from top to bottom:
- The first strip is fixed under the ceiling.
- The next one is installed with a comb into the groove of the first one from the bottom.
- It is nailed, and thus all the elements are attached.
- The last part is cut to width and carefully inserted into the groove on the previous strip. In this case, it is convenient to use a simple lever, which can be a nail puller or a pry bar.
- The gap formed near the floor is covered with a plinth.
Interior design features
A number of features that will further affect the overall appearance of the room.
- Products made from dark wood can visually reduce space, so they should be used in large and spacious rooms.
- On the contrary, light lining ceilings are suitable for small rooms.
- In small rooms, it is advisable to lay out the lining along, rather than across, this will make the room appear much taller.