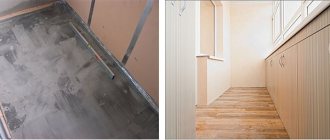
Insulation and insulation of loggias, balconies, and bay windows in houses using glazed frames is very popular among the average consumer, but profile fencing does not always meet the functional requirements due to the lack of a window sill. Therefore, many residents with limited financial resources or unoccupied free time have to solve the problem of how to make a window sill on the balcony with their own hands.
The task can be successfully solved with standard power tools and some skills in carrying out repair and construction work. To properly install a window sill, you will need knowledge on the selection of components, consumables, and options for its fastening in compliance with technology.
Window sills
Window sill materials
During the operation of the window sills, they place pots of flowers, dishes with food, place household chemicals, sharp and heavy objects, lean on their elbows and occasionally stand up to their full height, sometimes hot objects (cigarettes, if the window sill serves as a bar counter) fall on their surface ). Taking into account the above factors, window sills should:
- have an aesthetic appearance and color scheme that decorates the interior of the room and harmoniously fits into the design of the balcony frame;
- have high strength and wear resistance;
- do not be afraid of prolonged exposure to water, ultraviolet radiation and, in some cases, elevated temperatures;
- have high resistance to household chemicals;
- be easy to care for and maintain, easy to clean from dirt.
Based on the listed requirements, window sills made from the following popular materials are available on the construction market.
PVC products - device, installation, appearance
Polyvinyl chloride PVC
Glazing, the basis of which is a metal-plastic profile, is the undisputed leader in the window market; accordingly, PVC balcony frames are complemented by window sills made of a similar material. Polyvinyl chloride window sills are produced in a wide range of colors and textures to resemble natural stone and wood; they are resistant to moisture, temperature changes, ultraviolet radiation, and most household chemicals; their cost is lower than other products, and their service life reaches 50 years.
In comparison with the numerous advantages, window sills made of polyvinyl chloride have few disadvantages, the main ones being poor resistance to high temperatures above 80 ° C, some chemicals (ethers, ketones, aromatic and chlorinated hydrocarbons) and mechanical impact from sharp or heavy objects, abrasive materials.
The PVC window sills produced are a hollow chamber with vertical partitions to give the structure strength and rigidity; their length does not exceed 3000 mm, width 700 mm, standard thickness 20 mm with a side height of 40 mm.
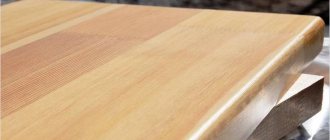
Wooden varieties
Wood
Wood products will never go out of fashion, window sills are made from solid hardwood and coniferous wood - pine, oak, beech, larch, merbau, teak, iroko are less commonly used, the surface of the products is coated with varnish, wax, or impregnated with oil. Cheaper options are assembled from small wooden planks glued together and then painted white; to save material, they have thickenings only along the outer perimeter.
The standard length of wood products is 2.5 m, width 160 mm and thickness 30 - 40 mm; it is always possible to make a product of the required size to order from any of the manufacturing companies.
The disadvantages of wood are its low resistance to temperature changes and high humidity, susceptibility to mold and rot, dyes can be absorbed by the surface and form difficult to remove stains. In addition, wood is a soft material and slight impacts with hard or sharp objects leave noticeable traces of deformation on its surface.
Expensive wooden window sills require periodic maintenance; approximately once every 5 years they should be coated with varnish or wax to give their original aesthetic appearance.
Natural stone products
Natural stone
Window sills made of natural marble, granite, travertine, onyx give the interior a refined and rich look, and are perfect for installing bar counters on balconies and loggias. The polished natural material has high rigidity and strength, is resistant to abrasion and temperature changes over a wide range, and its service life exceeds a hundred years.
Typically, window sills made of natural stone are produced to order in the required size and configuration with a thickness of 15 - 60 mm, their length reaches 3200 mm with a width of up to 2200 mm. The disadvantages of natural stone include high cost, difficulty of installation due to the large weight and hard surface, the ability of marble to absorb colored substances (wine, coffee), stains from which are very difficult to remove.
Artificial stone window sills
Fake diamond
Imitators of natural stone, due to their lower cost and technical characteristics that are in no way inferior to natural materials, are in quite high demand among consumers who want to give the interior a sophisticated, rich look. The technology for manufacturing artificial stone consists of mixing crushed natural components with binding resins, casting into molds with further vibration compaction, heat treatment, subsequent grinding and polishing of the slab. The following types of artificial stone are available on the domestic market:
Conglomerate - made from marble, granite, stone chips with the addition of quartz sand, limestone, coloring pigments; polyester resins are used for binding.
- Quartz conglomerate (agglomerate) - is produced from quartz fractions of various sizes and polyester resins as a binder; to expand the range of colors and textures, coloring pigments, glass and mirror chips, and decorative stones (mother of pearl) are added.
- Agglomarble is a type of conglomerate produced using the above technology with some differences; the material is a mixture of marble chips and crushed stone (95%) with binder polymer resins.
- Acrylic stone is one of the popular materials, widely used in the manufacture of kitchen countertops, made from a mixture of acrylic resins and finely dispersed aluminum trihydrate chips; pigments of various colors are added to expand the color gamut.
The disadvantage of acrylic stone is its poor resistance to scratches, which are most noticeable on glossy surfaces; the advantage of the material is that they can be removed by subsequent polishing.
All types of artificial stone have an aesthetic appearance and a smooth shiny surface, characteristics and service life comparable to natural products, are not afraid of moisture, temperature changes, are resistant to aggressive chemicals, and are easy to maintain.
Wooden MDF panels under the window
Wood boards
The use of thick particle boards and MDF boards with a laminated surface, widely used for the manufacture of kitchen countertops, is a budget option for making a window sill. The products have a wide range of colors and various types of textures with imitation wood, natural stone; in cross-section, the window sill resembles an inverted letter L with a thickness of 17 to 28 mm, a width of 100 - 800 mm and a maximum length of 6 m.
Window sills made of wood boards are not afraid of temperature changes and are reliably protected by laminate from the negative effects of chemicals and moisture, and the mechanical impact of hard and cutting objects. When installing on a balcony, one should take into account the fact that the cut edge without laminate, when installed under the frame, is exposed to moisture and the material may delaminate or increase in volume, which will lead to deformation of the surface of the window sill.
Homemade designs
If you wish and have skillful hands, you can give your balcony interior an unusual, original look by constructing a window sill yourself from building materials. Considering the high humidity on a balcony or loggia, it is optimal to make it from moisture-resistant components - ceramic or porcelain tiles, mosaics, marble or granite slabs.
Some craftsmen use wooden slabs of various shapes, laminate, and floorboards when making window sills themselves.
Homemade window sills
Installation
Installing a window sill is a simple process and, with some knowledge, can be done independently. The main thing is to do the work efficiently and reliably. If the window sill does not have a strong support, then under load it may fall off and damage the objects placed on it. Considering that the balcony is most often not heated, work in this room is best done in the warm season.
First of all, you need to prepare the tabletop itself from the selected material and adjust it to the size of the window. We check the condition of the surface on which the window sill will be attached. It must be clean and dry. We examine the window structure. If voids are found under the window frame, they must be filled with foam to prevent the entry of cold air.
Depending on the width of the window sill and the depth of the window opening, we fasten it using mounting foam or brackets.
7 photos
Installation using polyurethane foam
If we have chosen a narrow window sill that protrudes only a few centimeters, then we can use the simplest installation method using polyurethane foam. Place the required number of pads of the required height on the prepared base. We try on the tabletop and check its position using a level. A slight (2-3 degrees) tilt towards the room is allowed, which will avoid condensation on the surface. We fill the space under the countertop with polyurethane foam.
Brackets
If we want to make a wide window sill, then it is better to use a more reliable method of fastening using clamps and metal brackets. You should install a U-shaped profile under the window block and attach the clamps to it, so that you can then insert the tabletop into them. We attach the brackets to the wall under the window in increments that maximize the strength of the structure. The window sill is placed in the clamps in the prepared place, and then, using self-tapping screws and a screwdriver, it is attached to the brackets from the bottom.
If the balcony is small, but you need a wide working surface, it is possible to select special folding brackets that will allow you to create a more complex but convenient design. It will be used as a folding balcony table, which can be straightened and removed if necessary.
Mounting options
Before making a window sill on a loggia or balcony with your own hands, choose the appropriate material for its manufacture and mounting option, which largely depends on the type of window sill, its overall dimensions and weight.
In the vast majority of cases, the problem of fastening is simplified by the fact that the longitudinal end of the window slab is placed under the frame with a minimum gap between the profile and its surface, while a significant section of the window sill from below rests on the parapet, which takes the main load. The fasteners only need to securely fix the window sill under the metal-plastic (aluminum, wood) profile and on the slab to prevent it from moving forward and sideways.
Application of polyurethane foam
Polyurethane foam
Polyurethane foam is the main consumable material when installing windows, doors, and balcony frames; window sills are no exception. The use of foam allows you to level the surface under the window sill panel on which the window sill is lowered, and at the same time glue it to the frame and the concrete slab (brick, gas silicate masonry) - this prevents it from moving in any direction.
The foam is mainly used for gluing light products made of polyvinyl chloride, wood boards, wood; when using supports, it can be applied under products made of artificial stone on an acrylic basis.
Applying foam under the window sill does not require special skills; for better adhesion, all surfaces must be cleaned of dirt and dust, and then lightly moistened with water; the container should be shaken several times before use. Considering that the foam expands significantly in volume after application and lifts the light window sill, it is necessary to prepare a load that will press it to the surface of the parapet, and take care of the lower supports that prevent the window sill panel from lowering. Read also: How to clean a gun from polyurethane foam.
Laying a heavy slab with adhesive
Cement mixtures
When laying heavy window sills made of natural stone, polyurethane foam cannot withstand the load and after hardening the massive slab may sag, so products made of natural stone (marble, granite, onyx) are mounted by lowering them onto a cement-sand cushion. For laying heavy marble and granite slabs on cement-sand mortars, the construction industry has developed a special technology consisting of the following operations:
- Level the support base under the window sill with a dry cement-sand mixture, lay the window sill slab on top (it has a small mesh glued to the working side) and hammer it with a heavy rubber hammer until the required location and slope are obtained; if necessary, add a little backfill to the sagging areas.
- Remove the slab and water the surface of the screed with pre-diluted cement mortar with the consistency of liquid sour cream.
- Place the slab again in place and level it until the required spatial arrangement and slope are obtained, hammering it with a rubber hammer.
Instead of a cement-sand mixture, you can use a simpler installation option directly on tile adhesive without using cement milk - thanks to its high adhesion, tile adhesive adheres well to the concrete support and the surface of natural stone.
Note: Builders have come up with an option in which it is possible to fix window sills made of any materials in a cement-sand mortar; to do this, screw a number of screws into their lower surface along the perimeter, in the middle, or in a checkerboard pattern, and then lower the window sill onto the cement-sand screed, tamping with a rubber hammer and leveling. After the screed hardens, the heads of the screws are securely fixed in the solution, preventing the window sill from lifting and moving in any direction.
Glue mounting
Glue
To use inexpensive polyurethane foam, a certain gap of 20 - 50 mm wide is required between the base plate and the bottom surface of the window sill; if this distance is too small, it is better to use glue (popular brands - Assembly, Polyurethane, Construction KS).
The adhesive composition should be selected in such a way that it has high adhesion to the surface materials of the support and window sill, and has a certain volume to fill the hollow space. When carrying out work, glue is applied around the perimeter and in the middle of the support; for better fixation, the lower surface of the window sill is lubricated; additional staples are often used that are attached under the frame - they prevent the panel from falling down and press it against the profile frame.
Mounting on brackets
Brackets, guides and supports
Brackets, brackets, corner supports are used both as independent fastening elements when installing window sills, and as additional fastenings. Supports and brackets are necessary for fixing large-width window sill panels in cases where it is technologically impossible to fit them under the frame profile.
Important: If, when installing a window sill on a balcony under or along the window frame, it cannot rest on the narrow parapet on which the glazing is placed, in this case, corner supports are the main method of fixing the window sill.
On the construction market, special brackets are sold for fastening window sills under frames; in some systems, this option is provided technologically in the manufacture of a metal profile frame, which has a groove in the lower part for placing support brackets.
One of the options for attaching a window sill if it is impossible to slide it under the frame is to screw a U-shaped profile of the same width to the frame, into which the window sill panel is then inserted.
Clips, brackets and guides for window sill panels - fastening principle
Installation of window sills and installation of slopes. The most detailed guide!
Design and use
As noted above, often the window sill is used precisely as a tabletop, and the tabletop itself is formed as if by itself when the room is expanded due to the demolition of the partition on the balcony. It can even be used as a bar counter or desktop, shelves for various household equipment, flower pots and more.
From a window sill, if its width allows, you can make a reading corner and a bar counter (in the latter case, it is better to make it from a black or brown panel or apply a film in the appropriate colors to it). Sometimes you can find this option when it is made in the form of a bay window for a child on the balcony, sometimes in this case a pillow or blanket is placed on it.
When installing, do not forget about the linings
You can decorate it by decorating the panel itself, or you can also use accessories. Flower pots and vases are a traditional option, but still relevant today, if we consider accessories. As for the panel itself, it can be decorated with a special polymer film, onto which any design can be applied.
Naturally, if you use it in this capacity (for a child), then complete safety must be ensured (tempered graphite glass can be installed), and it itself must have a decent width, because it will not be comfortable on a narrow one.
How to install a window sill on a balcony yourself
Any rectangular window sill can be installed independently without the presence of special tools (in extreme cases, you will need a building level, although you can do without it), if it is cut exactly to size by specialists from manufacturing companies or employees of installation companies. When standard panels that are not adjusted to size are used, it is difficult to cut thick and durable slabs of natural or artificial stone at home without special cutting construction power tools.
Of the standard panels, the easiest ones to adjust in size are plastic, wood, chipboard, OSB and wood-fiber MDF panels, which, if necessary, can be cut with a hand saw for metal or wood.
Preparation
Self-installation of a window sill on a loggia or balcony is carried out if you have the necessary tools, fastenings and consumables; construction workers use the following kit for installing lightweight panels made of soft materials (wood, plastic):
- Window sill of the required width and approximate length, which during installation can be adjusted by cutting downwards, end caps for plastic products.
- Construction level, square.
- Electric jigsaw or circular saw.
- Window sill brackets, guides, supports,
- Polyurethane foam or glue, sealant in tubes with a gun for squeezing it out.
- Tape measure, pencil.
- Spray bottle for spraying water, vacuum cleaner.
Components and consumables for installing windows and window sills
Installation of plastic PVC
Before installing a window sill on the balcony, if the window is already standing, prepare all the tools, components and consumables, taking into account the option of installing the panel on window sill brackets or external guides. Installation work on installing a plastic sheet on a narrow parapet is carried out in stages in the following sequence:
- Prepare an installation site for installing a window sill; to do this, place brackets under the frame frame or screw them into self-tapping screws, knock out a shallow groove in the side wall of the loggia to recess the non-working end into it - this will increase the strength of the structure and give the junction a finished look.
- Cut a window sill of the required size along the length so that it extends slightly into the side groove (by 10 - 20 mm), place special plastic wedges under the bottom of the canvas and set it level or using a corner with a slight slope towards the room (1 - 2 mm per 100 mm width).
- They press the canvas from above with heavy objects, apply corner supports (brackets) from below and mark their locations with a pencil, tracing along the contour, the distance between the fasteners is chosen arbitrarily - the smaller the section of the window sill rests on the parapet, the more often the fasteners are placed.
- Remove the window sill and use a hammer drill to drill holes in the concrete slab for attaching the support corners, drive in dowels and secure the supports with self-tapping screws.
Tip: Instead of traditional plastic dowels with self-tapping screws, you can use special metal anchors that are hammered into the holes - due to internal expansion, they securely fix the corner in the slab.
- Clean the surface of the balcony slab and profile from dust and dirt using a vacuum cleaner and impregnate it with a primer. After the soil has dried, seal all the cracks with polyurethane foam, having previously moistened the surfaces to which it is applied, and insert the window sill into place.
- Screw the window sill to the supports with self-tapping screws from below, place a cylinder fitting with mounting foam into the free space under the panel, and foam the cavity between the parapet and the bottom surface of the panel.
- The junctions with the frame are sealed with sealant, and the side cracks and support corners are closed with cement-sand mortar if they were previously recessed into a concrete slab during installation.
Installing a plastic window sill panel on support corners - basic operations and components
Installation of wooden
If a wooden frame is placed on the balcony, then the window sill must also be made of the appropriate material; installing a wooden panel using technology is not much different from installing a plastic one. When the parapet under the glazing is insulated and has a significant width, during installation the window sill is supported on its surface and vertical supports (brackets) are not needed. In this case, the step-by-step instructions look like this:
- Cut grooves in the side walls to place the ends, attach brackets or guides under the bottom of the frame, and clean the surface of the concrete slab from dirt and debris with a vacuum cleaner.
- Cover the top of the slab with a deep penetration primer to increase adhesion and harden the surface.
- After the primer has dried, put the canvas in place, adjusting the slope of its placement with pegs from below, press it with a weight from above and check for the presence of cracks and correct installation.
- Remove the canvas, trying not to move the supports, moisten the surface of the slab and the bottom of the window sill with water, foam the cracks in hard-to-reach places, return the slab to its place, press it with a weight and foam the free space under the window sill.
- After the foam has dried, its excess from the bottom and sides is cut off with a small indentation (about 10 mm) and all foamed areas are covered with plaster mortar, and the cracks at the junctions with the frame are sealed with sealant.
To ensure that the wedges that are placed under the bottom to set the position of the window sill do not move, they are screwed with self-tapping screws or glued. In some cases (long distances, heavy fabric) it is easier to refuse them. The replacement is vertically located self-tapping screws screwed into the slab - during installation, the window sill rests on them and they do not move when it moves.
Installation of a window sill on foam - main steps
How to install a window sill | Window sill installation | Window sill installation
Installation Instructions
When installing a window sill with your own hands, you need to check whether the window itself is installed correctly, and only then proceed directly to the process. The quality of installation of the window sill determines its service life. Installing a window sill is the most crucial moment. Therefore, when you have a finished product, you need to establish the degree of its compliance with the standards and sketch.
Installation using glue
At this stage it is necessary to start preparing the niche. It is necessary to clean the surface so that the glue can adhere well to the base materials. If you are installing an acrylic window sill, you must use special stiffening ribs glued across the window opening, maintaining a 10-centimeter indentation. At this stage, the joining seams are filled with polyurethane foam. If your window sill is made of artificial stone, you can install such a product on a concrete screed, which is done in advance.
The next stage is a trial installation of the window sill. After trial work, it is necessary to find errors and errors and quickly eliminate them. In this case, you will save time and money on the finishing installation: it will turn out virtually perfect.
The weight of artificial stone is greater than the weight of plastic and less than the weight of natural material, so it is necessary to carefully observe the proportions in which the glue is applied. The window sill is brought to the installation site very carefully, according to the measurements taken. The attached product must be left for at least a day.
Installation of a window sill using brackets
In addition to the glue method, there are other options for installing a window sill on a balcony with your own hands. One of the most famous is the method using self-tapping screws and brackets. It is necessary to drill holes in the window frame, through which the window sill structure will be fastened. In order to process the joining seams, you can use a silicone-based sealant. To adjust the level of rigidity, polyurethane foam is used.
This method is popular due to the advantages:
— provides reliable and durable fastening;
- easy to use, so you can do it yourself;
- does not take much time, so even an inexperienced person can handle it;
- Suitable for almost any type of window sill.
If you want to do the job as efficiently as possible, then you need to attach the brackets at a distance of 25 centimeters. In order to secure them well on the stand, self-tapping screws are used. After completing the process, you need to place the finished window sill on top, carefully sliding it behind the frame. You should hear a click indicating that the connection was successful. All that remains is to attach the window sill to the frame using screws.
Installation with metal brackets
This method is very popular due to its simplicity and convenience. The brackets must be screwed to the window profile using self-tapping screws. It is necessary to install a window sill in the groove that appears between the frame and the bracket.
In the process of work, you can use any of the methods from the point of view of convenience. Your main task is to make the window sill as beautiful and comfortable as possible.
Expert advice
Installing a plastic window sill on a balcony or similar products made from other materials is a fairly simple job that most owners can do if they have a standard construction power tool - a hammer drill, an angle grinder, and in many cases you can do without it.
For craftsmen carrying out this type of work for the first time, the following advice from experts may be useful:
- The space under the balcony frame, in which the window sill panel is placed, is a source of high humidity; it is better to avoid installing window sill products that have low water resistance, primarily this applies to wood and wood-based panels. The exception is when the window sill is placed on an internal window balcony block.
- If the support area under the window sill is not sufficient for its installation, you can screw a wide wooden beam to the slab using long-length self-tapping screws, or replace it with two narrow beams connected together - this does not require long dowels and screws.
Installation of a wooden window sill - The surface on which the window sill is laid should be treated with a deep penetration primer - this will not only increase the adhesion (adhesion) of the glue or foam to the surfaces, but will also strengthen the base of any material.
- It is better to deepen the side ends of the window sill panels by 10 - 20 mm - this will improve the aesthetics of the appearance, eliminate problematic seams and strengthen the structure.
- Some installers of window sills screw them from below or above with self-tapping screws into a metal-plastic profile when placing them under the frame - this is not a very reliable method of fastening; it is better to attach the canvas with brackets (clips) or guides specially produced for this purpose.
- When laying on foam to improve sealing, it is applied in two stages - first, all the cracks are passed and a small amount is released around the perimeter of the profile at the junction with the window sill, then a window sill panel is installed and the free space below is foamed.
- Foaming is carried out at a distance between the base and the window sill of at least 20 mm; if it is smaller, the slab is laid with glue.
Installation diagrams
Video tutorials and life hacks
Life hack - how to make a warm junction when glazing a loggia. This nuance must be observed at the stage of installing the frame, and then properly insulate the window sill area.
There are many uses for the space under the window. To implement them, you need to fulfill the main condition - to properly fix the window sill on the balcony. You can do this either with your own hands or by inviting a professional craftsman. If you decide to install it yourself, pay special attention to maintaining the level and securely fastening the panel to the base. If you are unsure of your own abilities, it is better to entrust the work to specialists. Then the likelihood that the structure will break under load will be reduced to almost zero.
Sources
- https://ciscoexpo.ru/stati/podokonnik-na-balkone-luchshie-varianty-dizajna-i-ustanovki-65-foto
- https://balkonidea.ru/kak-ustanovit-podokonnik-na-balkone/
- https://kachestvolife.club/stroitelstvo/balkon/ustanavlivaem-podokonnik-na-balkone-svoimi-rukami
- https://balkonvdome.ru/mebel-i-oborudovanie/podokonnik-na-balkon.html
- https://MoyBalkon.com/okna/podokonnik
- https://balkon4life.ru/osteklenie/okna/podokonnik-na-balkone/.html
- https://balkonoved.ru/remont-i-otdelka/vidy-i-ustanovka-podokonnika-na-balkone-ili-lodzhii-svoimi-rukami-poshagovaya-instruktsiya
- https://SecretBalkona.ru/remont-otdelka/podokonnik-na-balkone-svoimi-rukami.html
- https://BalkonOff.help/podokonnik-na-balkone/
- https://megadizajn.ru/podokonnik-na-balkone/
Tools for repair work
First of all, it is important to prepare the necessary auxiliary tools that will simplify or speed up the repair process
- Selected material for future construction.
- Construction sealant.
- Polyurethane foam.
- Special plugs (if a plastic structure is installed).
- Jigsaw, screwdriver.
- Water level.
- Roulette.
- Construction square.
- A simple pencil.
- Plastic or wooden blocks.
Having chosen the appropriate material, method of fastening and prepared the necessary tools, you can safely move directly to the question of how to install a window sill on the balcony quickly and efficiently.
Fastening the structure using self-tapping screws
This installation method is the most common and completely simple, it does not require professional skills.
To begin, take measurements and, using them as a guide, prepare a PVC window sill that will fit tightly without forming cracks.
The work plan is as follows:
We remove the old existing window sill (if there is one), clean the working surface from dust or dirt. We fill existing gaps and cracks with construction foam and remove excess. We lay wooden blocks in one or several layers on the prepared base. Using a building level, we check the quality of the surface. We fill the space with polyurethane foam, paying special attention to the outer wall, as well as slopes. We place the edge of the future balcony slab under the frame and fix it with self-tapping screws.
This installation option may not be strong enough, so you should not overload it with heavy decorative elements.
Installation of a window sill with a bracket
If the material you choose for the future window sill is heavy, the most suitable option would be to mount it with a bracket.
- We remove unnecessary elements, clean the surface from dust or dirt.
- If necessary, fill the existing gaps, leveling the area as much as possible.
- We attach the metal bracket using self-tapping screws to the bottom of the window.
- Next, we glue waterproofing tape onto the brackets along the entire length of the surface to prevent moisture from penetrating into the room.
- Carefully insert the previously prepared window sill until it stops.
- We fix the structure using self-tapping screws.
Mounting with brackets
This method is considered labor-intensive and requires a little more time for installation.
The steps for installing a structure using metal brackets are as follows:
- We carefully prepare the work surface, clearing it of dust and unnecessary elements.
- We fill existing cracks and crevices with polyurethane foam and remove excess.
- We attach the auxiliary brackets to the base of the window frame using self-tapping screws and a screwdriver.
- We insert the previously prepared board into the special hole of the bracket, and fill the resulting space with foam.
- We remove the resulting excess material.