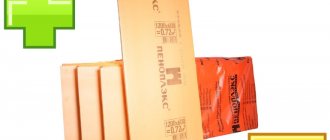
Advantages of using penoplex
In terms of its performance characteristics, penoplex ranks first among similar floor insulation materials. At a fairly reasonable price per square insulation, the manufacturer provides a long warranty on its use (up to 40 years). There are several advantages:
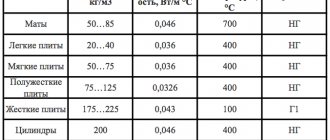
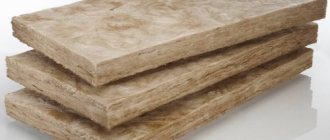
Characteristics of penoplex
- High stability of the coating under intense mechanical loads.
- High moisture resistance.
- Heat resistance (the stove does not ignite).
- The absence of formaldehyde in the production of insulating sheets, which ensures a high environmental class of the material.
- Increased sound insulation properties.
- Laying penoplex does not require additional costs.
Combining the properties of plastic and foam, the material is produced in the form of slabs, with a length of 120 cm, with a standard width of 60 cm. Thanks to the inclusions of air cells formed during pressing of the material, the slab is light, with high surface rigidity. Depending on the assortment, it is used to cover floors (grade 35 “Foundation”), walls, ceilings (grade 31 C “Comfort”). To insulate the floor, the material is most often laid on the following bases:
- priming;
- floor coverings;
- under the system heated floor;
- concrete floor.
Compare with foam plastic
The question is quite reasonable: why buy expensive polystyrene foam, if you can buy cheap polystyrene foam - it is produced in the form of mats of the same thickness and size. But it's not that simple. These two insulation materials have significant differences, and polystyrene foam is inferior to expanded polystyrene in many respects:
- In terms of strength with the same thickness and density, it has been experimentally proven that penoplex is 4 times stronger than polystyrene foam, which is why it is used even in road construction.
- Due to its low density and special structure, foam is susceptible to crumbling.
- The degree of water absorption of polystyrene foam is 10 times higher than that of expanded polystyrene. It follows that penoplex can be used without vapor barrier.
- The density of penoplex is much higher than that of polystyrene foam.
- The thermal conductivity of penoplex is not much, but it is superior to polystyrene foam.
- The flammability of penoplex is lower.
Polystyrene foam is laid on a sand bedding
A special method for producing extruded polystyrene foam makes it possible to obtain a material with closed pores, so this material is definitely better than polystyrene foam.
Polystyrene foam in the body of the screed when pouring stairs
Basic rules for installing penoplex
Before laying penoplex, the required performance characteristics and features of the floor are determined. But there are general rules when laying insulation, compliance with which will allow you to avoid wasting time and money.
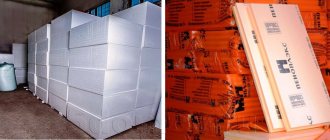
Penoplex insulation options
Correct calculation of the square footage of the insulated floor and selection of the appropriate slab thickness. Penoplex is produced in widths from 2 to 10 cm, with a standard width (60 cm), sheet length from 120 to 240 cm. The material is sold in blocks of four to 20 sheets.
The slab must be laid on a flat surface, regardless of the floor (rough, dirt, concrete).
Insulation technology involves the use of only polyurethane adhesive mixtures; if any other adhesive composition is used, it is important that the adhesive does not contain toluene, acetone or formaldehyde components, since they destroy the cellular structure.
Briefly about the main thing
Penoplex is characterized by two properties. The first is its low thermal conductivity, due to which it has good thermal insulation. Secondly, the slabs are not susceptible to mold and mildew; they create a good soundproofing layer, while rejecting moisture.
Another advantage is that penoplex is universal in use - it can be used regardless of the base flooring. But here it is important to understand what thickness of penoplex to use for the floor under the screed. The further load on the surface (purpose of the room) has a huge impact. If this is, for example, a warehouse or a garage where a car will be stored, it is better to choose denser slabs.
The type of finishing does not matter. It all depends on the preferences of the owner of the premises. You can choose laminate, tile, plywood or parquet.
Another mandatory point is waterproofing. If this layer is skipped or installed incorrectly, spilled water may accumulate under the finish coat. Penoplex does not absorb moisture, and it will be quite difficult to dry it.
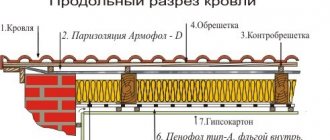
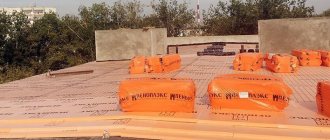
Insulation on the ground base
It is recommended to lay penoplex on a ground base, without main foundation slabs, using the following technology.
The standard insulation scheme assumes the presence of a vapor barrier layer under the foam sheet; in some cases this operation is skipped. The insulation layers are arranged as follows:
- priming;
- crushed stone (or gravel);
- sand;
- foam boards;
- waterproofing;
- reinforcing mesh;
- cement strainer;
- finished floor (laminate, parquet, linoleum, etc.).
The soil base is leveled, compacted and dried. A layer of crushed stone, about 40 cm high, is tightly laid and compacted. Sand is poured onto the crushed stone cushion in a layer of about 10 cm.
Some craftsmen use a modified technology in alternating laying layers:
- priming;
- crushed stone;
- sand.
Granite chips, crushed stone or gravel are poured onto the ground. Then everything is watered generously and compacted. After this, the soil is dried.
It is recommended to use these rules during construction only in the warm season, so that the soil has the opportunity to dry out sufficiently. Then dry sand is poured.
Penoplex is placed on the resulting base; the seams can be glued with tape (or use an adhesive solution). Layers of waterproofing are applied to sheets laid in a checkerboard pattern, onto which a reinforcing mesh is mounted.
Thermal insulation process
For subsequent cement screed, metal cellular reinforcing mesh is used. The height of the mesh should not exceed 25 cm. Fill the floor with cement mortar, checking the level.
If you do the insulation of the floor on the ground floor of a private house yourself, you should pay attention to the fact that it may be necessary to cut holes in the foam slabs for communication pipes. This stage of work should be carried out after laying the sand, during the first measurements.
What is it needed for?
Mats are able to retain heat without causing increased humidity and subsequent mold. The material is lightweight, so even with a poured screed it does not have a significant impact on the entire structure. This point is especially important in apartment buildings.
It has been proven that the use of penoplex, especially in private homes, reduces heat loss several times. Therefore, it is logical to invest once in a good floor repair in order to subsequently save money on electricity and heating.
Most often, mats of this type are placed on reinforced concrete floors or primed foundations. Concrete floors are the easiest to process, especially at the stage of leveling and subsequent pouring of the screed.
Floor insulation on the base - floor slab
When laying building materials on concrete floor slabs, it is recommended to additionally insulate the surface. You should put penoplex on a layer of thermal insulation, using for this:
- cork sawdust;
- expanded polystyrene;
- foil-based insulation;
- liquid insulation.
For high-quality and fast flooring, a certain technology is used.
Concrete floor insulation scheme
- Preparatory work. The floor slabs are puttied, all irregularities are sanded, and checked with a level.
- The surface of the base is primed; two layers of primer can be used if no additional insulation has been carried out.
- In high-rise buildings, for thermal protection, sheets of material can be laid on a concrete base without additional coating primer.
- Penoplex sheets are laid.
- The sheets are laid on the floor, the seams can be treated with polyurethane foam or using tape.
- Installation of the thermal insulation layer.
- A cement screed is poured onto the reinforcing mesh. The order of work often changes; the reinforcing mesh may not be installed.
- The finished floor covering is being laid.
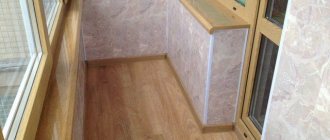
If penoplex is used for thermal protection of a balcony floor, it is recommended to additionally lay the concrete floor using foam plastic or mineral wool as insulation.
The technology of laying the finished floor directly onto the material, bypassing layers of reinforcing mesh and cement screed, is also widely used. This method is used if it is necessary to reduce the weight of the floor (when insulating the interfloor floors of a private house). And also if there is a risk that the load-bearing floors are not designed for the additional weight of the concrete screed or if additional insulation is not required.
Self-installation
The insulation is mounted on foundations made of reinforced concrete, soil and wood. When working, the following rules should be observed:
- strictly follow the installation instructions;
- Carefully adjust the slabs to each other so that there is no free space between them.
- Distortions and rolls are unacceptable.
If the material is laid in two layers, then you need to ensure that the joints of the upper plates do not coincide with the joints of the lower ones. Otherwise, pockets filled with air will appear in the insulating layer. Condensation will accumulate in them. Such defects impair thermal insulation and subsequently lead to delamination of the insulation.
A special compound is used to glue the boards together. It improves the thermal insulation properties of insulation. A “finish floor” is laid on top of the penoplex, for which the following materials are used:
- laminate;
- linoleum;
- parquet;
- polymer coating;
- ceramic tiles;
- boards.
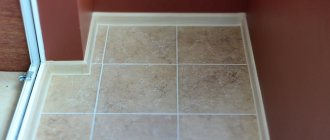
Decorative coating is mounted on foam boards
Penoplex insulation under a “warm floor” system
Warm floor design
When installing a hydraulic or electric heated floor system, the system pipes are laid out on a reinforced mesh (thermal insulation) under a cement screed.
In this case, the material can be used using standard technology, similar to when laying slabs on a concrete floor.
If electric sheet floor heating systems are used, they can be laid either in a cement screed on penoplex, or directly on penoplex slabs, using a thin layer of thermal insulation as a gasket.
For a hydraulic heated floor system, a sand-cement screed is used; the solution is prepared from equal shares of sand and cement, and it is also recommended to add a construction adhesive base to the solution.
Video description
Watch in this video how to mix the solution yourself:
It is also important to remember about the beacons - without them you cannot start the pouring process. Otherwise the surface will be uneven. The filling technique itself involves working from the far corner (here we will work with a level). After leveling the previous layer and before pouring the next one, a reinforcing mesh is placed.
It is important! Before carrying out work, you should consider the further use of the room, since the thickness of the screed depends on this. Thin slabs are suitable for an ordinary living room. For heavy structures, it is better to give preference to dense sheets.
To prevent cracks from appearing in the frozen surface, you need to water it with water for three days. Drying takes several days. Only after all these procedures is the facial finishing performed.
Self-leveling mixtures
To understand what thickness of penoplex to choose for insulating a floor with a screed made from a self-leveling mixture, it is necessary to take into account the type of room. The greater the load on the floor, the thicker the slab should be.
In this case, it is important to take into account the thickness of the layer of the mixture itself under the screed - in this case it is no more than 2 cm Source remstroidomufa.ru
3 advantages of self-leveling mixture:
- does not require manual alignment;
- distributed with a needle roller;
- dries faster than cement.
On a note! The leveling of such a surface is carried out under the influence of gravity. The kneading process itself is described on the packaging of the material. This base polymerizes in just a few hours.
The importance of leveling the underlying base should be kept in mind. If any defects remain, there will be a difference in height, and, as a result, an uneven screed.
Attention ! Waterproofing must be installed as close to the finished floor as possible. Some people put it under penoplex - this is a mistake. If water penetrates into the floor, it will not be possible to dry it. The surface will remain wet for a long time, since the slabs have a water-repellent effect.
The finishing itself can be anything - from ceramic tiles to wooden parquet. If the technology has been followed, the result will be excellent.
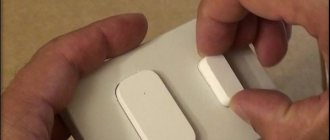
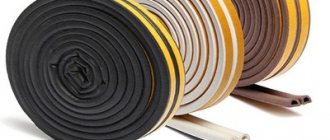
Penoplex trimming
Two types of connecting edges of Penoplex insulation panels
If you need to lay insulation in non-standard rooms, or cut communication holes in sheets, use several methods of cutting the material.
Use any sharp knife. This trimming ensures relatively even edges of the sheet.
Trimming using a jigsaw. The cutting edge is very uneven; construction foam is used to tie sheets cut in this way.
Using hot wire. In this way, you can quickly cut a thick slab; for cutting, a nichrome string is heated with electric current and communication holes are easily cut out.
Being a universal insulation material, the material can also be used as thermal protection on wooden floors and on joists. The technology of laying sheets on a wooden base technically has few differences from covering a concrete base.
As an additional insulation element, mineral wool (as an additional thermal layer), construction foam (to fill possible gaps and for sealing), and mounting nails are used.
Features of the material?
Penoplex is produced in the form of slabs 600 mm wide, 1200 and 2400 mm long
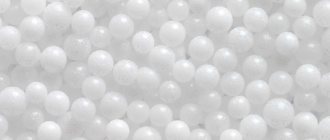
Penoplex is a heat-insulating building material produced by foaming polystyrene and further extrusion (squeezing the material through a molding hole). The result is expanded polystyrene, consisting of granules with micropores. The resulting cells of the product contain voids filled with gas. This structure allows the material to have high levels of thermal insulation and moisture protection, have decent strength with a light weight of the product.
This insulation is produced in the form of slabs 600 mm wide, 1200 and 2400 mm long. Sheet thickness ranges from 20 mm to 100 mm.