Decoration materials
You can close the plumbing lines in the toilet using various construction and finishing materials, as well as special equipment. Read more about each option below.
Drywall
Drywall is considered one of the most affordable and convenient materials used in construction and repair. It is used for a variety of needs, including to sew up pipes in the bathroom. The advantages of drywall are:
- health safety;
- ease of use and operation;
- possibility of quick dismantling;
- relatively low price;
- the ability to install doors and other structural elements;
- availability of various finishing methods.
PVC panels
PVC panels
Plastic panels (it would be more correct to say polyvinyl chloride) solve two problems at the same time: they block the pipes and make the resulting structure more aesthetically pleasing. On sale you can easily find PVC panels that look no less aesthetically pleasing than ceramic tiles. Other advantages of plastic panels include:
- speed and ease of installation;
- low cost;
- the ability to make a structure that can be disassembled if necessary;
- large selection of colors and textures;
- no need for decorative finishing;
- resistance to moisture and temperature changes.
Box
Drywall and PVC panels are used to disguise pipes in the toilet in the same way - they are used to make a box in which communications are hidden. Sheets of plasterboard or plastic panels are mounted on the frame. The frame required for these materials is different, but the principles for installing the box are very similar. It should be possible to access the most important structural elements for repairs and maintenance work.
Plumbing cabinet
Another type of structure that allows you to seal the pipes in the toilet is a plumbing cabinet. It differs from a box in the mandatory presence of large doors and built-in shelves that can be used to store household supplies. You can make a sanitary cabinet yourself from ordinary furniture facades, purchase a ready-made one, or order an individual project from a company that produces furniture for bathrooms.
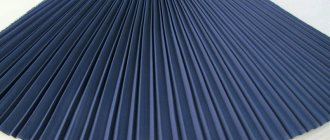
Roller shutters
Plumbing roller shutters have become widespread relatively recently. They are a mobile structure consisting of a base frame and dozens of narrow panels, which, if necessary, are assembled into a roll, allowing access to the pipes. Roller shutters for the toilet are made from materials that are not afraid of moisture. This device can be controlled using buttons or remotely using the remote control.
Blinds
An option for masking pipes in a bathroom, very similar to the previous one, is plumbing blinds. Roller shutters, in essence, are a later, modified type of blinds. The latter are much simpler - the design does not include a frame, and control is only possible mechanically. Blinds are made primarily of plastic, so they are moisture resistant, but not very durable.
Available materials
You can also decorate unsightly-looking plumbing and sewer pipes using improvised means. What materials to use depends only on your imagination. Here are some of the most interesting and easy to implement ideas:
- paint the pipes bright colors or draw patterns on them;
- disguise pipes as trees, turning the toilet into a forest or jungle;
- wrap the pipes with twine or braid;
- use artificial plants for decoration;
- cover the pipes with decorative stones;
- decorate pipes with special stickers and decals for home decor.
Screen shape and requirements for it
You can purchase a bathtub screen ready-made, but the best option is to make it yourself, according to your own idea. In this case, first you need to decide on the form. There are several types of design:
- blank wall;
- screen with recess for feet;
- screen with an inclined angle;
- angular or curved shape.
The first type completely covers the space under the bowl. There are no recesses or niches on it. Only a small door is left, with which you can get to the pipes if necessary. The foot recess allows you to get close to the bathtub without experiencing discomfort. This type is especially convenient when parents bathe children. The inclined version is also very convenient, like the previous one. The latter form is used in the case of covering the space under a corner-type bathtub. There are no such screens on sale. They are made to order or independently.
For a screen of any shape there are certain requirements. Namely:
- The design must provide access to sewerage units and other communications located under the bowl. Therefore, it cannot be performed completely deaf. It is necessary to have technological openings that are closed with a plug or door.
- To prevent moisture from accumulating under the bathtub and, accordingly, such a nuisance as mold cannot appear, the space under the bathtub must be hermetically separated from the floor.
- The screen under the bathtub should be designed so that it is convenient to approach the bowl. This is where a special recess for the legs comes in handy.
- The area under the bathroom is quite large. To use it rationally, you can equip the voids with drawers for storing various small items.
Advice. If space allows, you can make a structure with wide sides. As a result, the bowl will be surrounded by a frame.
DIY library bookcase for home
Here is an example of how to make a closed bookcase for your home library. Despite its rather large dimensions, the bookcase is not a very complex design. The most interesting part is making doors with bars from slats. The cabinet consists of several sections, which allows you to assemble the structure efficiently and quickly, however, you will need more material than when making a solid structure. The process of making parts and assembling the bookcase is shown in detail in step-by-step photos, which you can see below in the gallery.
Home library made of wood
Today, a home library is a rarity. In the age of the Internet, optimization and monetization of everything and everyone, this is simply not necessary. But books are more than just a hobby or living room decoration, they are a passion and, like any other collection accumulated over the years, the books in our homes deserve more than just collecting dust on the shelves. The Internet will go away, some new technologies will be invented, but books will remain as a symbol of the beginning of the path to knowledge. Therefore, a traditional bookcase for storing books will always be a relevant part of the interior. Here is an example of how to make a classic bookcase for your home library, with detailed instructions that you can read on the website and with detailed step-by-step photos.
DIY wooden roller door for a shelf
Hello, dear readers and DIYers! When planning a kitchen and calculating the designs of cabinets and hanging ones, you should always take into account the dimensions of the doors. For example, if a closed cabinet is located directly on the countertop, then to open the door you will have to remove everything from the table.
In this article, John, author of the YouTube channel “John Heisz - I Build It,” will give you recommendations for making a roller door that will cover a shelf in a kitchen cabinet.
This is a very convenient, ergonomic design that allows you to store frequently used items out of reach of dust and, at the same time, in close proximity to their user.
Materials. — Maple board — Cotton fabric — Sandpaper, liquid nails glue, polyurethane varnish.
Manufacturing process. This door will be made of thin wooden slats fastened together, and it will swing down like a typical roller shutter and then slide inside the cabinet.
The product is made from maple wood. John runs one of the wide sides of the boards on a jointer to evaluate the quality of the grain and the wood itself.
Now it won’t be difficult to cut all the boards into thin strips. This procedure is performed on a circular saw with a rip fence. It’s even good if there is a little more material than needed. It happens that parts have to be replaced, and the most advantageous design must be selected.
To safely cut parts, John uses a push rod of his own making, which was described in a recent article.
The processed boards are laid out on the work surface and sorted by appearance and pattern. The author decides which side of each plank it is desirable to turn outward.
After the planks folded together have formed a single plane, he selects an area on it with the most impressive wood pattern. The craftsman has this opportunity because the planks have not yet been cut to length.
Next, you can begin assembling the roller door.
This is usually done like this: take a piece of cotton fabric and glue it to the back of each plank. The fabric actually replaces the hinge joints.
So, a strip of “liquid nails” glue is applied to the inside of each segment.
To reduce the friction of the roller blinds on the guides, apply a layer of wax, paraffin, or ordinary laundry soap to the rubbing areas.
John came up with such a beautiful and functional door.
I thank the author for the recommendations on making beautiful furniture roller blinds.
Good mood, good health, and interesting ideas to everyone!
The author's video can be found here.
Step-by-step instructions for installing an accordion door
- Door Features
- Standard kit (option):
- Stages of installing an accordion
- Recommendations
An integral part of any room is the doorway, and each owner designs it differently. Some people install a standard, decorative, or even a metal door, while others prefer arranging an arch, although the latter option is fraught with certain difficulties. Recently, models called “accordions” have appeared on the market, they are also swing doors, the installation of which we will consider
Door Features
- Significant space savings. Quite often, when arranging furniture, you have to focus on the location of doorways. It is impossible to place a much-needed closet next to them, or for convenience, a sofa, or hang a shelf or a picture. The reason is that it will interfere with the door opening. If we are talking about an “accordion”, then such a problem does not exist.
- Possibility of finishing walls with all materials, without restrictions. A door that opens abruptly often damages the surface lining with its handle: it breaks through (for example, plastic panels) or simply scratches. The design of the folding door eliminates such “troubles” in principle.
- Silence. The “accordion” glides smoothly along the guides, so you can’t hear the familiar creaking of an opening door.
- Safety. In families where children grow up, it is quite common for them to pinch their finger. And not every door can be opened by a child. In this regard, sliding models are ideal.
- Reliability in operation. Opening doors have fairly common disadvantages. For example, “sagging”, “skew”. Over time or under the influence of fluctuations in temperature and humidity, their geometry does not coincide with the opening. Many have encountered a situation where in certain seasons the door is difficult to open and close. “Accordions” are not susceptible to this disease.
- It is also important that such products can be equipped with an opening of any size, even where a standard door will not fit.
Corner bookcase
An example with drawings on how to make a corner bookcase with open shelves with your own hands.
There is even a beautiful drawing included.
If you wish, you can change all the dimensions for your interior, simply maintaining the proportions according to your space needs.
This bookcase goes all the way to the ceiling, so leave room for a crown. It's not necessary, but many people like tall base moldings and a crown. If you plan to use them, add the trim height as well as the width of the face frame.
The diagrams show everything in great detail, just don’t forget to convert inches to centimeters (1 “is 2.54 cm).
And here you can see step-by-step photos of how to assemble a corner bookcase with your own hands using the drawings presented above.
Of course, this is an example for a specific interior, but the idea can be used for any room.
Corner bookcase drawing
Here is a drawing showing how to assemble a simple corner bookcase with your own hands. The diagram shows the design details in letters; here is a list of materials with dimensions.
A - 5 2×2 bars, 35 3/4" (91 cm) long, 2 pcs. - 4 1/2" (12 cm)B - 4 1×2 bars 30" long (76 cm), 2 pcs. — 18 1/4" (46 cm), 2 pcs. - 17 1/2" (45 cm) long frame C - 2 sheets of plywood 11" x32 3/4" (28 x 83 cm) D - 3 sheets of plywood - 31 1/2" x31 1/2" (81 x 81 cm ) E - 2 sheets of plywood - 32 1/4" x32 3/4" (82 x 83 cm) F - 1 piece of 3/4" plywood - 31 1/2" x31 1/2" (81 x 81 cm)
You can see the order of assembling the bookcase in the diagrams in the small photo gallery.
Photo source: howtospecialist.com/finishes/furniture/corner-bookcase-plans/
Wall shelves in the interior - which style to choose? (70 design photos)
Everyone dreams of their own corner. Having a dacha or your own room is already a great achievement.
After they appear, you want to decorate them with something: furniture, rugs or wall shelves.
You can make the shelves yourself, and it’s not at all difficult. For this you only need boards and fasteners. Instead of fasteners, you can use a simple rope.
Thread it through the hole in the shelf itself, tie a large knot and attach it to the hook.
One of the advantages of wall shelves is that they will be appropriate in different interiors. For example:
In the kitchen, shelves can be used to display decorative dishes or, more functionally, it will be more functional if you put various cans of cereals or fruits on them. In the hallway you can line the shelves with various types of cosmetics. In the corridor. The corridor itself is not very lit
Therefore, you can place various lamps on the shelves that will attract special attention. Place wall-mounted bookshelves in the bedroom. In your personal account, you can place literature, a couple of certificates or cups on such shelves. This will help create a work environment. If you have a library, then a very good option would be to fill the wall shelves with books. And in the living room you can dream up
Here on the shelves you can place everything your heart desires.
Related article: Installing a chimney through a wall in a wooden house
Briefly about the main thing
Homemade products made from polypropylene pipes are inexpensive to make and require a minimum of skill and effort. Creative and useful products can be created using waste scraps left over from plumbing or sewer repairs.
Pipes make stylish decorative items, furniture, items for the garden, or items for the playground. They not only look beautiful, but also fulfill their intended purpose. All items made from pipes are durable, resistant to moisture and can be used both indoors and outdoors.
DIY making
Making a shelf is incredibly easy. To do this, you don’t need to have carpentry skills or supernatural imagination. You just need to put in a little patience and effort.
You can decorate it using different techniques. For example, you can use decoupage or an aged effect. However, the easiest way is to just paint it.
You need to have tools for working with wood, fasteners and material. It is best to use wood and chipboard.
How to make a shelf out of wood:
- Decide on the size of the product. To do this, you need to take into account the number and dimensions of the products that you will place on them and the interior of the kitchen.
- Now choose a suitable board that is thick enough. It must be cut according to the dimensions outlined earlier. Make sure all edges are smooth.
- Sand the boards well. To do this, use sandpaper of different grades.
- Select suitable brackets. They must be quite stable.
- Decorate the shelf. It can be painted in a color suitable for the interior. You can also simply varnish it, if desired, pre-coat it with stain. You can also decorate it using the decoupage technique.
- Make marks where you will attach the shelf. You can attach the product to them.
It’s so easy to make furniture for storing things in the kitchen. To do this, you just need to apply a little imagination and effort.
What materials can you use?
For cladding, linings made of natural or artificial materials are used - wood, plastic, MDF, chipboard and PVC plates.
Natural wood
Natural wood paneling is a premium method. Fragments or solids of hard wood are used: beech, ash, oak to decorate iron doors. The advantages of natural panels include aesthetics, but labor costs during processing and extraction explain the high cost.
Advantages of natural wood cladding:
- possibility of additional finishing and painting;
- environmentally friendly, hypoallergenic;
- wide range of textures and patterns;
- frost resistance;
- thermal insulation;
- sound insulation;
- compatibility with other materials;
- the service life of a sheathed door is 30–50 years;
- chemical resistance.
Solid wood and fragments are easily restored. To increase moisture resistance, they are treated with protective coatings. Antiseptic impregnations provide protection against microorganisms. The natural origin of the material means the variability of its characteristics. Weight and density change due to the hygroscopicity of wood, where swelling occurs even in rooms with low humidity.
Fiberboards are produced by pressing wood chips under thermal influence. For protection they are treated with veneer, painted or laminated. Painted boards are used in interior decoration, veneered boards are used in exterior decoration. Laminated products are universal and have decent performance characteristics in the price-quality ratio.
Advantages:
- simple installation;
- environmental friendliness;
- strength;
- thermal insulation;
- sound insulation;
- ease of care.
A wider range of textures and colors in relation to natural wood, but less resistance to chemical treatment. Cleaning with abrasives is unacceptable. Inexpensive panels have low moisture resistance. They are not subject to fragmentary restoration after damage - dismantling is required.
Chipboard, plywood, OSB
When thermally pressing laminated boards, binder resins of non-mineral origin are used. The materials are sanded on both sides and veneered with phenol-formaldehyde glue. Marine plywood is treated with frost-resistant varnish, which makes it suitable for outdoor use. A wide classification of chipboard, OSB and plywood allows you to choose the material for any room and work.
Advantages:
- are not deformed;
- affordable price;
- stable workmanship;
- low weight;
- simple installation;
- resistant to moisture (swelling - up to 10%);
- strength due to the multilayer structure.
The heat and sound insulation properties of chipboard are higher than those of plywood, but the material is less moisture resistant and aesthetically pleasing. OSB, while low in price and environmentally friendly, has lower decorative parameters due to the pressing of large chips. Layered slabs are vapor-tight and resistant to microorganisms.
Plastic covers
Solid composite plastic overlays are used for finishing entrance doors. Due to the absence of a decorative layer, they are resistant to atmospheric phenomena: the coating does not crack or peel.
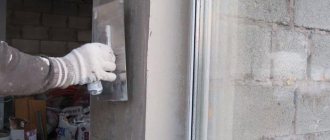
Assembly and installation
Begin installation by installing support bars, guides and internal horizontal partitions. Be sure to use a level to attach all cabinet pieces as level as possible.
You need to drill holes carefully.
When drilling holes in walls, floors and ceilings, try to do it more carefully
It is important that the diameter of the resulting holes is equal to the diameter of the purchased dowels
The shelves need to be attached as evenly as possible.
Also pre-drill holes in wooden blocks, chipboards, MDF with a thin wood or metal drill. This is necessary so that when screwing self-tapping screws into workpieces, the latter do not crack due to expansion and internal pressure. The diameter of the hole must be less than the diameter of the screw. If this condition is not met, the reliability of the connection will be at risk.
If you are installing a plumbing cabinet that hides the piping, heating boiler, water heater, floor heating pipe system or other plumbing fixtures from view, installation will be easier. Here, the need to install internal horizontal shelves is partially or completely eliminated.
It is much easier to make a cabinet that simply hides communications.
How to choose material for shelving
The material determines how long the rack will last under certain conditions and how much load it will withstand. If the product is an interior decoration, the design and beautiful finish are important.
For models for domestic use, it is customary to use two types of material:
Wood is the most popular, easily processed material. There are several options: board, plywood, particle boards. With skillful processing, you will get a beautiful rack that is suitable even for use inside the house. The disadvantage of wood is the fear of dampness. Wood is destroyed by fungus, plywood delaminates, and particle boards turn into a pile of wet sawdust. Grinder beetles love to chew on wood. A wooden structure will last a long time if it is treated with protective impregnations and installed in a dry room.
When choosing wood as a material for making shelving, you need to ensure that there are as few knots as possible in the boards. Boards without knots are much stronger than with them.
Metal is an equally popular material. The structure will be durable and will withstand the load from spare parts in the garage if the frame is made from an angle, profile or round pipe.
When choosing rolled metal products, preference should be given to profile pipes, as they are the most durable.
A decorative option is a rack with a base made of a profile used when installing drywall. The shelves will hold books, indoor flowers, and other light objects. Metal is similarly afraid of dampness and rusts, but compared to a wooden shelving, a steel structure will last longer in a damp room. To protect against corrosion, the product is painted, and it is better to use it when assembling workpieces made of stainless steel or galvanized.
Less common are racks made of plastic pipes, creative designs where glass bottles, ropes suspended from the ceiling and other devices serve as racks.
The choice of material from which the rack will be made depends to some extent on its purpose. If you need to make a rack for the garage, then preference should be given to metal, as the most durable material.
Plastic pipe connections
You can often hear that plastic pipes are construction toys for adults. If you learn how to correctly assemble the parts of this construction set, you can make almost anything!
As already written above, it is generally best to use PVC pipes for crafts. Their price-quality ratio is optimal today.
Plastic pipes can be connected into a detachable or permanent connection, it all depends on your needs. Another option is to heat the pipe in a certain place with a hairdryer and bend it as needed for your design, that is, in fact, do without connections at all.
Stages of work
First of all, you need to measure the width of the balcony and decide how much area the cabinet will occupy. If you plan to build a structure for the ceiling, you need to measure the distance from the floor of the balcony to the top slab (or canopy if the apartment is located on the top floor).
Next, a drawing is developed. It is not necessary to carry it out according to all the canons of engineering: it can take the form of a randomly executed drawing. But it must be detailed enough so that all the necessary blanks can be made from it and - most importantly - then assembled into a single structure without adjustments.
- width – 1.1-1.25 m;
- height – 2.4-2.5 m;
- depth – 0.45-0.6 m.
The cabinet assembly technology is as follows:
- Parts are made: timber is cut into racks, shelves are cut out of plywood, panels are prepared for cladding, etc.
- Mark the installation location of the frame. If you plan to build a cabinet to the full height of the balcony, first marking lines are drawn on the ceiling, and then they are transferred to the floor using a plumb line. The lower and upper contours are connected by vertical lines drawn along the wall.
- Fix the parts of the floor and ceiling frames of the frame.
- The resulting rectangles are connected by vertical posts. The beams adjacent to the wall are secured with self-tapping screws in increments of 35-40 cm.
- Additional horizontal bars are nailed, which will provide rigidity to the frame. At the same time, they will act as supports for the shelves. For fastening, metal corners are used, which are pre-installed on the lower surface of the horizontal parts.
- The frame is sheathed with plastic, and the back wall is installed from the inside of the cabinet, and all the rest are installed from the outside.
- The shelves are laid: they can be screwed with self-tapping screws to the supports or simply placed on them.
- The doors are made: frames are assembled from 12-15 mm boards and covered with sheet plastic. In tall cabinets, the doors can be divided vertically in two. In this case, the user will be able to open the zone that he currently needs.
- Doors are hung using “butterflies” or furniture hinges.
Step by step lesson #3
You will need:
- Wooden boards (choose the sizes yourself to suit your interior)
- Sanding paper
- Dye
- Hand saw or setting machine
- Screwdriver
- Cutter
- Electric drill
- Screws
- Loops (you will need 6 small loops).
Material:
- Calculate the required amount of fabric based on the size of your screen, make a small reserve for ties.
- Boards for the screen frame (in order to avoid tears and tension in the fabric, add a little)
- 16 ties, length 36 cm, width at your discretion. You can use the remaining fabric or purchase special ribbons, laces, and ties.
- Threads of a suitable color, scissors, sewing machine.
Blanks
As a result, you should end up with 8 boards for the frame (8 for vertical supports and 8 for horizontal ones). Measure, mark and cut the required number of parts.
Cut the fabric into 4 pieces of the size you need, turn it wrong side up, iron and finish all edges. If the fabric has to be folded in half (the edges are unraveling), then add the appropriate addition to the measurements.
If you are using leftover fabric for ties, cut 16 strips, iron the edges and stitch.
Assembly!
Start by making "pockets" with a cutter, two at each end of the bottom (four holes total). Once all the holes are done, sand all the recesses, cuts and the rest of the surface. Then apply paint.
After drying, you can assemble the structure. Place the long pieces on the floor (with the connection holes facing up). Make sure the parts are level and screw them on. Secure so that the parts do not move while screwing. Repeat the same on the other side. Collect 4 panels.
Connect the panels with loops. Leave enough space between the edges of the screen so that it closes smoothly. Fasten the loops as follows - the two side parts of the loop open back, and the central part opens forward. Secure the loops by retreating 25 cm from the top and bottom.
Make sure all holes are on the back side.
Final stage! We fix the material.
Secure the ties a short distance from the outer edge. 8 ties at the top and 6 at the bottom.
Measure and pin to all four panels of ties. Sew securely along the edge.
Facade part
The design of the furniture determines the design of the façade. In addition to the doors and the method of attaching them to the body, the following can be designed:
- Visor. Baguette (cornice), built-in lamps, arched structures.
- Base. Interesting base, decorative legs, adjustable thrust bearings.
- Sidewalls. Overlays in the form of carved columns, as well as open corner shelves of various designs.
Hinged doors
In budget options, cabinet fronts are sawn together with the body, made from laminated chipboard and rolled with PVC 2 mm thick. Sometimes furniture design involves a contrasting combination, for example, a dark body and a light facade. Then a separate sheet of chipboard of the desired color is purchased for the facades.
Also, cabinet doors can be made of MDF, lined with PVC film, plastic, veneer, and painted with enamel. Or order from an array.
The hinged façade can be overhead or internal, depending on which furniture hinges are selected. Glass and corner facades also have their own hinges.
Coupe doors
Sliding systems for compartment doors can be supported or suspended. But, as a rule, they consist of:
- Track, top and bottom guide.
- Set of rollers.
- Door leaves.
You can read how to calculate compartment doors yourself here. You can also order already assembled sliding doors to the size of the niche for installation in a closet, complete with upper and lower guides of the required length.
Plastic accordion doors - design features, advantages and disadvantages
Among owners of cramped city apartments, interior sliding doors are especially popular. In the matter of rational distribution of living space, along with parallel sliding systems, accordion doors have become widespread. The presence of a large assortment of them in retail chains suggests that folding structures are no longer a forced compromise in the design of a doorway in small rooms. The variety of style solutions and the materials used in production - wood, MDF or PVC - make it possible to distinguish such doors as a separate design element in the interior of the living space.
Features of PVC doors: advantages and disadvantages
Due to the excessive lightness of the material used, plastic doors, called accordion doors, seem somewhat flimsy. However, the modern PVC slats used in them:
- have reinforced stiffening ribs;
- weakly subject to mechanical deformation;
- have a fairly long service life;
- are considered environmentally friendly;
- do not require special care.
PVC doors are easy to assemble and install yourself. They are most suitable for narrow corridors, as well as rooms with high humidity - bathrooms and kitchens, where similar structures made of MDF or wood are least applicable. Of course, sliding folding doors made of plastic are clearly inferior to them in terms of sound insulation and overall stability, however, the overall weight of a structure made of wood or MDF significantly affects the ease of use and requires the installation of an additional lower guide with a roller support. In this regard, such accordion doors should be more securely fixed in the doorway.
Particular attention must be paid to the fittings used to ensure reliable movement of the blades.
Plastic doors have discredited themselves precisely because of the use of low-quality fittings. The fact is that the design of a door accordion requires the presence of a large number of components (bearings, hinges, etc.) that ensure the mobility of the slats. Therefore, any attempt to save money even on individual parts leads to a significant decrease in the reliability and durability of the product as a whole.
As already noted, accordion doors made of plastic today are more a design element than a forced attempt to save space. They are often used as original partitions in offices and retail spaces. They are installed in cases where it is difficult to select a standard-sized interior door for an opening, and there is simply no space to open the sliding panels. The accordion is considered indispensable in narrow rooms of a small area, dressing rooms, storage rooms, etc., where, due to certain circumstances, the installation and operation of an ordinary door will be difficult.
Design and installation steps
The door leaf of a plastic accordion door is a PVC panel connected by a hinged profile, manufactured in the same or different widths, solid or with glass inserts. The rollers located in the upper part of the canvases are responsible for moving the lamellas assembled into a single whole along a guide fixed on the vertical slope of the doorway or on the ceiling.
The bottom guide is only required if the door opening is large or wide.
Typically, the purchased structure is equipped with all the necessary parts and does not cause difficulties in self-assembly and installation. The only thing that may be needed additionally and must be purchased separately is the platbands and extensions used for cladding the slopes, since there is no box in this product.
Installation of a door made from accordion-assembled PVC panels is carried out according to the instructions supplied with the product and includes several stages.
- Preparing the doorway. Installing the structure inside an existing box reduces the useful width of the passage, so it is better to completely dismantle it, knock down the remaining mortar to the base of the concrete wall or brickwork, and then plaster the ends, giving the entrance opening the correct geometric shape. Such an adjustment is mandatory at the preparatory stage of work. It prevents the possibility of further distortions and loose fit of the sliding sashes to the vertical slopes.
- End cladding. To form a false door frame, use additional pieces cut to the required size and connected with self-tapping screws. The structure installed in the passage is attached to the end of the wall opening with anchors. The correctness of the geometric shape of the opening is checked by diagonal measurements, which must correspond to each other.
- Determining the dimensions of the prepared doorway. Accurate measurements of the passage using a tape measure allow you to calculate the required number of lamellas required, since they most often have a standard width, and also determine their height. In this case, it is necessary to take into account some nuances. Accordion sliding doors do not provide for the presence of a lower threshold in the opening, so only the lower gap between the door leaf and the floor should be subtracted from the height measurement. But the result obtained is technical, since it includes the distance from the top of the lamella to the horizontal surface of the opening lining. It is necessary to accommodate the guide and rollers.
- Assembling the door leaf. The PVC slats included in the door kit are cut in height, taking into account the margin for the upper roller system inserted into the guide, as well as for the lower ventilation gap of 7-10 mm, which is available on almost any interior door. Since folding sliding systems from different manufacturers are structurally different from each other and have their own characteristics of connecting the slats, ensuring their mobility, it is important to strictly follow the assembly instructions included with the door.
- Installation of the structure . Roller runners that hold the door in a vertical plane are inserted into a guide profile, which is mounted on the upper cross member of the door slope of the entrance opening. Along the perimeter, side profiles or special clips are mounted to it, designed to fix the sidewalls of the canvas - its locking and blind parts. After installation, the door is checked for functionality.
To ensure smooth running and prevent jamming of the lamellas when moving along the upper guide, it is recommended to pre-lubricate the roller runners with any technical oil.
- Installation of platbands (if necessary) . After checking the functionality, they begin to install platbands on both sides of the doorway. They are attached to liquid nails or using special furniture nails without a head. Cashing looks beautiful and neat, the cut of which in its upper part is made at an angle of 45 degrees.
Hallway: shoe shelves
The first step when entering any apartment is to take off your shoes, and there must be a designated area for this. Most often this is a set of furniture or shelves.
As for the first option, this needs to be discussed separately. But we will tell you how to make shelves yourself.
In addition, from a large number of shelves, these are the easiest to make. This is justified by the fact that these shelves for shoes are placed on the floor, because no one will mount them on the wall.
But there are still such hangers if you have such a design solution in mind. Floor shelves are made of wood. The simplest one is 2-4 boards connected by crossbars.
Required Tools
After selecting the material, consider the subtleties of its processing. For example, for natural wood panels you will need antiseptic impregnation, varnish or other protective coating. Necessary tools for paneling or slabs:
- a screwdriver if self-tapping screws are used;
- hammer if nails are used;
- screws, nails;
- cross-shaped bits for a screwdriver;
- drill for metal with a diameter of 3.10 mm;
- anti-corrosion primer;
- clamps;
- degreaser (white spirit);
- medium-grain sandpaper;
- tape measure, square;
- brush, roller (for painting);
- marker, construction pencil.
If products are fixed with an adhesive base, then epoxy glue or liquid nails are recommended. If you need to cut parts, you will need scissors or a hacksaw. To dismantle the fittings, you need a screwdriver and pliers.
How to arrange doors
Once you've taken your measurements, start installing the fasteners. The holes for the dowels are made with a regular drill. A manual one will do, but an electric one gives the best effect. It is quite accessible. purchase it once, choosing the appropriate option, and make your own fastenings.
Next you need to make the doors themselves. They are usually quite light.
Finished structures should be conveniently closed.
For information: don't forget about the handles. Perhaps the old structure will already have them, but they will need to be eliminated. this is usually done simply. Other handles may also be needed. Do not forget that they must fit the entire structure. They may need to be reinstalled completely.
Attaching new doors is actually easy. Do not forget that they should be level and that they should not have unnecessary openings. Take measurements carefully, arrange reliable fittings. This is necessary to keep your closet safe and secure. Don't forget to remove the pre-mounts if you used them and remove the marking lines.
Almost bamboo screen
Bamboo stems undoubtedly look very impressive, but they also come at a price. However, there is a simple alternative available to almost everyone. These are long cardboard tubes (bushings, sleeves, spools). From them you can make your own fashionable interior decoration. To implement your plan, you need to prepare:
- cardboard tubes, their number (20-30 or more) depends on the size of the future screen;
- stationery knife;
- pencil, ruler;
- drill (awl);
- a skein of cord, preferably decorative;
- acrylic paint in cans of natural “bamboo-like” color - beige, marsh or light beige, gray-green, yellow-brown, khaki, etc.
The first stage is to give the pseudo-bamboo a natural, natural look and authentic color.
- All tubes are cut: they are made of different lengths to make such a fence look more interesting.
- Each “bamboo” element is painted separately. It is better to purchase several different shades in advance; the colors can be mixed so that all the “stems” are slightly different from each other.
- After the paint has dried, begin connecting the tubes. First, they retreat 150-200 mm from the bottom edge of each, then make through holes.
- Having finished working with the bottom row, they make a second one: this time the distance is set aside from the holes already made in the tubes.
- Thread a cord into both rows of the future fence. They try to connect all the pipes as tightly as possible. The rope is tied in such a way as to protect the screen from falling apart: for example, several knots are made.
Such a product weighs little, rolling it up and removing/moving it to another place is also not difficult, but a “hedge” that appears in a house can decorate almost any interior.
Fiberboard doors for shelves
In the interior of a kitchen, living room, or children's room, it is appropriate to combine open and closed types of shelves. This diversifies the interior and provides ample opportunities for storing necessary things.
Unfortunately, not all items can be stored in a stack. Sometimes closing a shelf with doors is the only way to restore order. And if you want to decorate a room simply and inexpensively, use another simple technique - make curly doors and paint them in colors that harmonize with your interior.
What will be needed for the remodel
Prepare your work area. Choose a flat and clean surface. Working with carpentry tools requires compliance with personal safety rules. Use special glasses, gloves, a respirator and headphones.
Description of work
For wine connoisseurs: how to make the right shelves with your own hands
How to make and install cabinet doors with your own hands
Examples in the interior
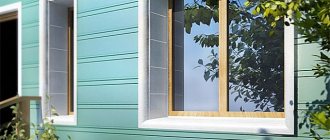
The closet in the restroom can be made in any style, have a variety of shapes, colors, and be decorated with unusual patterns or mosaics.
A wall cabinet above the installation will make the room spacious and comfortable.
Using an original product of an unusual shape or color will make the room more interesting.
The usual color scheme can be diluted with a bright spot by hanging interesting shelves in a niche or along the wall.
A mirrored cabinet will visually enlarge the room. This will eliminate the need to buy a separate mirror.
A tall white cabinet will add freshness to the design and complement the chosen style.
To learn how to make a closet in the toilet with your own hands, see the following video.
Stylish examples in the interior
To evaluate the capacity of a pantry rack, you can pay attention to the examples presented in the photo gallery:
- The U-shaped rack fits well into the allotted space, allowing you to place a maximum of kitchen and household items, including groceries.
- Two linear shelving connects to each other, creating space in the pantry for storing construction tools and work clothes.
- If less than a meter of space is allocated for a pantry, it is enough to install shelves, giving the space a clear organization.
- The original model with a functional angle will appeal to many: due to the use of round-shaped platforms, it allows you to place a lot of small objects on the planes.
- A rack fixed to the wall is convenient: at the bottom there is space for additional drawers and boxes, as well as shoes that are not needed in a given season.
- A rack with shelves mounted on the wall is complemented by a metal structure for light bulky items.
- A rack in the form of roll-out drawers allows you to use a miniature pantry space: each drawer holds a lot of items, arranging them according to their purpose.
- You can clearly delineate the purpose of each wall of the pantry, even using the door: dishes are appropriate on one wall, food on the other. You can complement the design with a metal stool for easy removal of items from the upper shelves.
To learn how to make a rack with your own hands, see the following video.
Stages of assembling guide profiles
To make the opening look aesthetically pleasing and durable, you need to pay special attention to such a moment as fastening the guide. A sufficient number of these elements are included in the set with slats for assembling an accordion door.
- However, the profiles in the kit may not be the exact size for your door frame. Therefore, they need to be cut to the required length.
- Both the working profile, on which the rollers will be installed in the future for unhindered opening of the doors, and the blind part of the guide structure must be accurately measured.
- When the profiles have been given the desired shape, make the required number of holes in the guide profile in order to subsequently screw screws into them.
Drawing for installing door guides
How to make a rack from pipes with your own hands
In this master class, the shelves are “strung” not on ropes, but on pipes. This rack is assembled like a construction set and can withstand heavy loads.
How to do
Sand the surface of the furniture panels with sandpaper.
Using a drill, drill holes in the corners of the furniture panels. Let us remind you that a vacuum cleaner will help you litter less.
Paint shelves and pipes if desired.
Assemble four rack legs from pipes, flanges and connectors.
Assemble the rack: all shelves, except the top one, will rest on pipe connectors.
The top one will be attached to self-tapping screws - screw it through the flanges. If you painted pipes, tint the fasteners with the same composition.
Before using the shelving, allow paint, if any, to dry completely.
What other options are there?
Industrial Style Open Shelving Wall Mounted:
Reliable wall-to-wall shelving:
Video description
The following master class describes in detail all the stages of work that will help you create a very beautiful house made of polypropylene pipes for a child:
Manege
Creating a budget playpen from pipes is quite simple, since it has a simple design. First, the lower contour of the product is formed, periodically installing tees for mounting racks. The vertical sections are placed in increments of 10-15 cm. The fence is fixed at the top with the same rectangle with tees.
Scheme for creating a playpenSource retete-usoare.info
Ready-made playpen made of PVC pipesSource retete-usoare.info
Action No. 3 Manufacturing the supporting structure
Considering the thickness of the boards from which the rack will be made, it is best to cut them using a jigsaw
1
Any carpentry product has a kind of “base” - a structure to which functional or decorative elements are attached. It is the supporting structure that can withstand all the main loads on the entire product.
2
In the case of a rack standing on the floor, the structure will consist of two parallel boards, to which two crossbars are attached. It is these structural elements that must be connected with maximum strength and reliability.
3
Before you begin manufacturing the supporting structure, you need to mark the material.
The top crossbar is screwed to the vertical posts using large diameter self-tapping screws
4
After all the parts of the supporting structure are cut out according to the drawing, they begin to assemble it. To assemble the supporting structure, you must use thick screws (at least 6-8 mm in diameter); tighten the screws using a screwdriver with an appropriate attachment.
Screwing the bottom crossbar to the vertical posts. In this case, reinforced screws are also used
5
Whenever possible, during installation, end connection options should be avoided, or used only in structural elements of one type (for example, in boards located exclusively horizontally).
Fully assembled load-bearing rack structure
6
To give the rack additional strength, you can add an additional vertical board located in the middle to the structure.
How to make flower pots with your own hands: outdoor, for home, hanging | Step-by-step schemes (120+ Original Photo Ideas & Videos)
Installation of a plastic sliding structure
The plastic screen does not require additional finishing. Therefore, it, like the bowl itself, can be used immediately after installation. By looking at the photo you can find out how a similar design looks in the interior. Installation of the plastic screen is carried out in accordance with the following points:
- Under the sides of the bowl, using liquid nails, small wooden blocks are attached at a distance of about 15 cm from each other. Their size should be such that the elements fit freely under the deflection of the side.
- The starting strip for the plastic panels is fixed to the wood with a stapler.
- Degrease the floor surface and attach the lower starting profile to it with liquid nails.
- Using a sharp knife, cut the panels into sections of the required size.
- A hole is cut in advance for the door, through which you can get to the communications.
- Installation of panels begins from the wall. They are inserted one by one into the profile.
- The subsequent panels are installed in the same way.
- After joining, the joint is closed with a corner.
At the end of the work, coat the border with the floor and all joints with sealant. This will prevent water from getting inside the screen.
Advice. To prevent the plastic screen from bending, it is better to strengthen it with an additional profile located in the middle of the structure.
For the sliding screen device, the guides along which the plastic doors will move are made of a special aluminum profile. They are secured at the top and bottom along the entire length. Doors are cut out of a plastic sheet. The parts are installed from the sides in the first groove of the profile. The stationary part is mounted in the center, in the middle groove.
A plastic bath screen is a profitable option, which is characterized by its low price and ease of manufacture. In addition, if necessary, the entire structure can be quickly and easily disassembled.
Roller or ball guides, which one to choose?
From the point of view of calculating drawers, the formulas for roller and ball guides are absolutely the same. You can change one on a chest of drawers, a cabinet or a closet at any time without any changes in the design of the furniture. The only caveat is that there will be holes left from the fasteners, which can be masked somehow, because:
Roller guides are attached along the bottom edge of the box, with a grip on the bottom.
Ball guides are usually mounted in the center of the side of the drawer.
If we talk about which of the above guides is better, then the answer lies in the budget allocated for the manufacture of cabinet furniture.
Roller guides are economical. They are used on production office furniture. As in principle, ordinary roller guides are installed on any drawers of economy-class cabinet furniture, including kitchen ones. Fittings of this type are quite practical and durable. If you don’t heavily load the box (and the bottom made of thin fiberboard won’t allow you to do this), then it will last for decades. The design of the roller guides is such that there is nothing to break there.
Full extension ball guides are in a higher class in terms of cost and performance characteristics. A drawer equipped with them extends completely, without blocking the back part with the top shelf (table top), which is very convenient for viewing everything stored in it. Also, ball guides boast a smooth, pleasant motion. There are options with a built-in closer (they can be identified by a spring built inside the mechanism with a plastic stop).
When choosing retractable mechanisms, you should not chase cheapness. A lot depends on the thickness of the metal and the accuracy of the calibration. Chinese analogues with thin metal fail very quickly - the guides themselves wrinkle and bend, rollers and ball bearings fly out even under non-critical loads. Therefore, be careful when purchasing and give preference to high-quality, popular items from well-known budget brands.