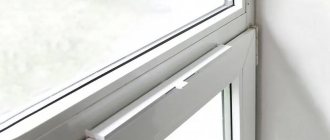
More and more owners, caring about the insulation of their apartments, give preference to plastic windows. However, it is not enough to simply replace old wooden frames; it is important to properly insulate the entire window opening. Therefore, it is important for novice craftsmen and those who want to supervise the work of installers to understand why a stand profile for windows is needed and how to install it correctly.
Kinds
In addition to polyvinyl chloride, aluminum or steel is used in the construction of PVC profiles for windows.
Metal is used in horizontal and vertical elements. The production of profiles is subject to the requirements of GOST 30673-99 in our country and EN 12608 SR in European countries. The main parameters are considered to be the thickness of the external contour walls and the internal partition. These indicators are conventionally divided into 3 types: A, B, C.
The profile of the first group is the best option and is intended for residential buildings. It is characterized by a thickness of the outer walls of about 2.8 mm or more, and the inner walls from 2.5 mm. This variety is more resistant to accidental mechanical damage. The analogue of category “B” has smaller wall thickness.
The inner walls have a thickness of 2 mm, while the outer walls are 1/3 mm thinner. It seems like a little, but that is why such options are less resistant to mechanical loads. They can be used for heated and unheated rooms. The profile marked “C” is characterized by smaller thicknesses of both walls. In the language of specialists, it is called object-based.
In fact, all existing types of plastic profiles for windows can be divided into 3 types:
- economy;
- standard;
- lux.
Plastic window profiles come in main and additional profiles. On store shelves today you can buy the following profile:
- connective;
- stand;
- reinforcing;
- expansion;
- U- and F-shaped.
These are tubular structures with blocks inside that make up the window frame. Chambers come in different shapes and volumes. Some of them are not connected either with each other or with the external environment. They are sealed, while others serve for ventilation. Depending on the size, air content and number of chambers, such profiles have different purposes. Some of them are used for technical premises, others can be used for residential buildings.
The L-shaped appearance is characterized by the reinforcement of the two walls of the profile. The U-shaped type is the reinforcement of three walls. When closed, all parts are reinforced. In this case, the choice of profile depends, among other things, on the number of glasses in the structure. The cameras in the frames directly depend on this.
Varieties differ in the degree of frost resistance. Thus, frost-resistant versions marked “M” are designed for temperatures down to -50 degrees C (control load). Analogs of normal design are suitable for regions with sub-zero temperatures down to -20-40 degrees C. The difference depends on the type of base material used.
Varieties and characteristics
The main differences are in the cross-sectional dimensions, the number of chambers, their filling (or lack thereof), the thickness of the outer walls and internal partitions between sections. In addition, there are differences in compatibility with profile systems from different manufacturers.
Main characteristics of the stand profile:
- The length of the bar, like that of its frame counterparts, is 6-6.5 m.
- The width, depending on the model, ranges from 2 to 10 cm.
- The minimum number of cameras located horizontally is 1; maximum – 5.
- The thickness of the outer wall is not fixed, but cannot be less than 2 mm.
- Internal partitions – about 1 mm.
Double-chamber products are used mainly for arranging cold glazing, which is a relatively rare phenomenon for windows. There are models with vertical chambers (one above the other), the thermal insulation of this profile is minimal. Options with five insulated sections have better energy-saving characteristics, especially if part of the chambers are filled with thermal insulating polymer (usually extruded polystyrene foam).
Tall prefabricated modifications (10 cm or more) have both horizontal and vertical sections, some of which can be reinforced with reinforcing elements. Such systems are provided with special connecting elements for splicing in height, which allows them to be assembled with sealant without additional fasteners.
At the top of the stand rail, in the part that is in contact with the frame, there is space for additional placement of some kind of insulation or sealant (most often this gap is filled with polyurethane foam).
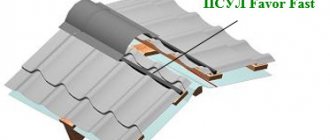
PSUL tape is also often used
The options described above are intended for installation inside the structure and are not visible after finishing. However, there are a number of models that, in addition to performing supporting and reinforcing functions, can completely replace the elements of a metal-plastic window. The Rehau company, for example, produces a stand profile (108 561860), which completely replaces the external drainage system. Its use is possible if the protruding part of the ebb of 56 mm is sufficient.
Dimensions
The profile parameters are determined by its width and thickness. In this regard, manufacturers try to adhere to standard values. A common frame version may have dimensions of 58x63x43 mm. The dimensions of the sash are 58x77x57 mm, the dimensions of the impost are 58x87x47 mm.
When the profile accommodates 6 chambers, its thickness can be 85-90 mm. At 70mm it usually has up to 5 cameras. In the first case, the profile is thick and is not suitable for every window opening. 70mm is considered the best option if up to 5 cameras are needed.
The thickness of the front wall of class “A” is on average 3 mm. For category “B” analogues, this figure is reduced by half a millimeter. The front side of classes “A” and “B” is thinner by 0.5 mm each from the values of the front wall. In category “C”, manufacturers do not indicate data. The installation width of the profile in some varieties can be 104, 110 and 130 mm.
The best manufacturers
Window profile systems from large manufacturers are usually equipped with a stand profile.
Their separate purchase may be required if:
- The complete profile is not suitable or the customer is not satisfied with its characteristics (lack of thermal insulation filler, number of chambers).
- In case of loss (happens quite often with domestic installers) or breakdown;
The most common manufacturers on the modern market:
- Rehau. Popular models: energy-saving five-chamber profile - 561910 and two-chamber with reinforcing filler - 561790;
- KBE. A three-chamber version (article 342) 46 mm wide, 3 cm high and its analogue with a pressure wing (article 343) are often used.
- Veka. The products of this company are represented by models of the Softline line - a two-chamber profile with a pressure wing and Euroline - a three-chamber version without filler.
Also, high-quality products are manufactured by Wintech, Enwin, and domestic Novotex and Brusbox. The products of the latter two are more affordable, but the quality is not always comparable to foreign analogues.
Simplification of fastening of ebb and window sill
There is no need to drill holes directly in the window frame, which, by the way, is prohibited by manufacturers. This can lead not only to water getting inside the frame profile, but also to the appearance of cracks on the frame.
There are other ways to attach these window elements, for example, by placing a window sill under the frame and screwing the ebb to its outer part facing the street. Also, the drainage and window sill can be installed in special grooves, but there are some nuances and difficulties with the placement of the pads when installing the window block, clearing the foam seam, etc. With a stand strip, the process is greatly simplified.
Professionals recommend mounting the external aluminum window sill on a special profile equipped with a “cap”. It will facilitate installation and protect against leaking water.
Installation Features
In order to correctly carry out all the necessary work on installing a window, a specialist must take into account the characteristics of the materials of the building walls, window sills, the window profile itself and much more. So, if there is a layer of heat-insulating material on the walls in the room, only the accuracy of their cutting can ensure complete heat retention in the future. The stand profile in this case acts only as a specific seam.
The entire installation process consists of:
- installation and alignment of the substitution strip in place of the window;
- checking for correctness when installing the window profile itself;
- if necessary, additional adjustment of parts;
- installation of the window itself;
- filling the space between the wall and the profile with polyurethane foam.
If the strip is not included with the profile, specialists can place wooden blocks under the window to raise it to the required level.
Purpose of the part
So, a wildcard profile is needed:
- to protect the main profile during storage, lifting to the installation site and transportation;
- quick and high-quality leveling of the main structure for reliable fastening;
- ensuring the absence of cold bridges under the window sill;
- installation of additional window parts.
It is worth noting that installing a stand profile enhances all of the listed advantages when using polyurethane foam. Together, the strip and foam provide maximum energy savings and reliability of the installed profile.
It is interesting that experienced specialists in big cities do not consider the cost of this element separately. Each custom window already has a price taking into account the cost of this profile. Less experienced companies rarely use the element in question in their work by default, so it is still possible to purchase a window sill profile as a separate element.
Properties, functions and dimensions of the stand profile
The stand or base profile is a special plastic profile that is attached to the lower end of the plastic window. Usually it is made of a darker plastic than plastic for windows and during final finishing, installation of window sills and drainage systems is not visible.
Stand profile, side view
What is it needed for.
First of all, it makes it easier to transport the plastic window. When delivered, the bottom of the frame is often in contact with the ground and it prevents deformation and damage to the window frame. In the entrances of many apartment buildings there are quite long halls and corridors with narrow turns, along which sometimes you have to literally drag the structures. This is especially noticeable in houses where there is no elevator and the products must be lifted up the stairs to a high floor.
The window sill is attached to the stand profile on one side, and the ebb on the other side. This eliminates the need to make additional holes in the frame, which could allow water to get inside and cause warping and even cracks. Know: according to the correct window installation technology, it is strictly forbidden to drill into the plastic frame - this can lead to it simply bursting.
The stand provides additional thermal insulation of the assembly seam. Additional layers of polyurethane foam, which are located under the window sill and drainage system, provide better heat retention.
The profile helps to better align the product, which is simply necessary for the correct operation of the fittings and the processes of opening and closing the sashes. If the structure is crooked, it will not work correctly and the entire expensive replacement process will be in vain.
Dimensions.
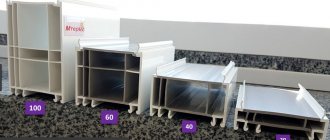
Sizes vary depending on the manufacturer. KBE has one width and height, Rehau has another, and other manufacturers have a third.
The length corresponds to the length of the frame and is 6 meters. The width ranges from 2 to 4 cm depending on the manufacturer, the height is 2-3 cm.
Requirements
- The wall thickness of this product must be at least 2 mm for sufficient thermal insulation.
- It must necessarily be multi-chambered, there must be at least two.
The stand is inserted into a special groove on the bottom of the product, but, in addition, it must be secured to it, either using self-tapping screws or a special clamp. Otherwise, it will simply get lost during transportation (this almost always happens) and it will be difficult to position the plastic structures correctly; in addition, you will have to attach the window sill and ebb to the frame, which is completely unacceptable.
Video on the topic:
Preparatory work
Dismantling
If it is necessary to dismantle the old window, perform the following steps:
- Remove all sashes from their hinges.
- Remove the glazing beads and remove the glass from the fixed sections of the window.
- Detach the trim, drain and sill from the frame.
- Remove the mortar and foam between the frame and the window opening.
- Using a grinder, cut off all frame fastenings.
- Pull the frame out of the opening.
- Remove any remaining foam and mortar from the frame location.
Window preparation
Before installing a plastic window in the opening, it is necessary to carry out a number of preparatory work:
- Remove the window sashes from their hinges by knocking out the awning rods using a hammer and screwdriver.
- Remove the glass panes from the fixed sections of the window. To do this, you need to knock out the glazing beads from the mounting grooves; this can be done using a rubber hammer and a wide chisel or spatula.
- Attach the support profile to the bottom crossbar of the frame. When connecting the profile and frame, use PSUL as a spacer between them.
- Install anchor strips around the perimeter of the window. The tapes are screwed to the frame and stand profile using screws. For ease of installation, lead the ends of the anchor strips indoors. Depending on the size of the window, from 2 to 4 fasteners are installed on each side of the frame.
- Glue the PSUL onto the top and side posts of the frame, so that the tape protects the outer seam after filling it with foam.
- Apply diffusion tape to the support profile on the outside of the window.
- To protect the inside of the seams, apply vapor barrier tape to the frame.
Why use a window sill profile?
Windows are a sensitive area in terms of temperature penetration from outside into rooms. Manufacturers of plastic windows are striving to supply increasingly “warm” systems - in the range of products existing on the domestic market, you can actually find many PVC windows with excellent insulating properties. However, comprehensive protection against the cold of a window opening is not determined only by choosing the right product, but also by its correct installation to ensure that there is no blowing in the areas between the window and the surfaces of the wall structures.
The shape of the vast majority of buildings ensures that the wind flow, hitting the wall, rises upward. The force of its pressure accumulates under the outer sill (low tide) that it encounters along the way. This phenomenon is considered a common cause of violation of the integrity of the façade and a decrease in the level of window tightness. Subsequently, this process leads to the emergence of so-called cold bridges, responsible for heat loss.
Therefore, experts recommend placing special emphasis on the areas located under the window frame - between the outer and inner window sill. Blowing very often occurs in this place when a stream of air is pumped under the external window sill (low tide). To avoid this, you should install plastic windows with special additional profiles.
Advantages and disadvantages
Anchor plates for installing plastic windows are inexpensive and practical fasteners that will save effort and money during installation. If the technology is followed, glass blocks perfectly resist temperature fluctuations, protecting the package from deformation. Reliable parts can withstand operating loads (wind, rain) well and will not become loose from the recoil of opening the doors.
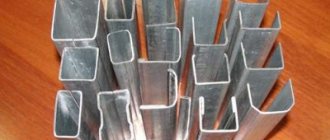
Elements made of galvanized steel Source barnaul.veka.ru
Measuring window openings: general rules for do-it-yourself work
It's no secret that all construction and repair work is subject to general mathematical rules
This statement fully applies to such an important matter as measuring window openings for plastic windows. Existing measurement rules make it possible to quickly and easily install exactly those plastic windows that are ideal for a specific room
So what are they:
- the proposed measurer must have an analytical mind, good spatial thinking, and have personal experience in installing windows;
- measurements must be taken both inside and outside. The inside of a plastic window is always larger than the outside;
- before starting measurements, it is necessary to complete all preparatory work (brick laying, removing old plaster, etc.);
- in many houses (especially panel houses) there is a misalignment of the window opening. In order to avoid through gaps, it is necessary to maintain the minimum standards of plastic window panels: the size of the inner part of the window is 30-40 mm in width and 15-20 mm in height larger than the size of the outer side;
- Before you start installing a window, you must compare its dimensions with the calculations that were made at the initial stage. A mechanical error may be made, which will nullify all the work carried out in the previous stages.
These rules are mandatory for any craftsman involved in taking measurements and installing windows and double-glazed windows in apartments, offices and private homes.
The importance of correct measurements
The manufacturer usually offers the services of its own measurer. This service is free. The product is manufactured on the basis of a measurement sheet, where the measurer indicates all the necessary parameters. If, when installing a window, difficulties arise due to an incorrectly manufactured product, the manufacturer will bear responsibility.
As a rule, window measurements are carried out by the manufacturer
If the customer provides the dimensions himself, then at the stage of signing the contract for the provision of services for the manufacture and installation of plastic windows, he signs the measurement sheet, which is drawn up by the manager based on the provided dimensions.
With his signature, the customer confirms the correctness of the dimensions indicated in the measurement sheet, in his words, which means that if the window does not fit during installation, the customer will bear responsibility and all financial costs for remaking the product will fall on his shoulders
When taking measurements yourself, it is important to approach this matter extremely responsibly
Structure
The PVC profile is a plastic frame for double-glazed windows. Despite its apparent simplicity, this design is not simple. In the cross section of the profile, many air chambers are visible. Due to them, heat preservation is ensured. The more there are, the better the level of thermal protection.
For rigidity and reliability, a metal frame is inserted into the base of the profile. This process in production is called reinforcement. Due to reinforcement, the profile becomes stronger, eliminating the possibility of its deformation and resistance to changes in structure under the influence of negative environmental factors (for example, rain, gusty winds and frost). The profile material is polyvinyl chloride.
Regardless of the type of profile, the metal strips inside it are an important factor that you need to pay attention to when ordering. It is because of them that the profile is called metal-plastic
At the bottom of the structure they are connected to the atmosphere. Due to this, droplets flow onto the street when they appear. The presence of such holes does not in any way affect the heat level in the room: the heat in the room does not decrease. Externally, such elements do not spoil the aesthetic appearance of the windows, since in most cases they are covered with plugs or are simply not visible against the background of the entire structure. The presence of these holes indicates a high-quality window. It will be more durable compared to a modification without them.
Is a stand profile needed?
When installing plastic windows, every little detail is important, since there is nothing superfluous in this design and each detail plays a specific role. Although some of them are completely invisible after finishing, their role is very significant. These components of PVC windows include a stand profile (basic), which is fixed to the bottom of the window in a special groove. To secure the profile, special clamping parts or screws are used.
Is a stand profile really necessary? Let's try to figure it out.
The importance of the stand profile
Let's start with the fact that with such a profile it is easier to transport the window. More precisely, it protects the window structure from dirt and deformation. After all, quite often during delivery the bottom of PVC windows touches the ground. Especially if the apartment is located high and you have to lift the windows manually.
Some installers do not attach much importance to the stand profile, however, in the absence of this invisible element, the performance characteristics of the windows noticeably deteriorate
It is no coincidence that experts recommend paying special attention to the area under the window frame. After all, it is here that, due to insufficient sealing of windows, “cold bridges” arise that are responsible for heat losses
Stand profiles help to avoid this. That is, they provide high-quality thermal insulation of the assembly seam.
Stand profile specification
It happens that installers do not use a stand profile, wanting to save money. However, it should be taken into account that it is to this profile that the ebb is attached from the outside, and from the side of the room - the window sill (using a special latch located on the profile). And if you abandon the profile, you need to drill additional holes in the frame, but this cannot be done - there is a high probability of cracking the frame, which will lead to deformation of the window. Also, as a result of violation of the integrity of the frame, moisture and dampness will penetrate into the room. In this case, the window sill will not be “recessed” under the frame, so when pressure is applied it can break off, along with the slopes.
It is worth noting that the presence of a stand profile increases the accuracy of leveling the window, i.e. it will have the correct geometry. This means that the fittings will work efficiently and correctly. Accordingly, the absence of a profile will worsen the performance of the window and shorten its service life.
So, is a stand profile necessary?
Absolutely yes. After all, he:
- allows you to eliminate freezing and drafts at the bottom of the window; - necessary for reliable fixation of the drainage system and the window sill; - ensures the stability and correct operation of the window structure; - allows you to maintain the tightness between the window sill and the window structure.
However, it is worth considering that the stand profile must meet quality standards. To ensure good thermal insulation, the thickness of the profile walls should be from 2 mm. The profile design must necessarily consist of several chambers - at least two. If these requirements are not met, the window will not be able to fully perform its functions and will last much less.
Types of profiles for plastic windows
GOST 30673-99 specifies the classification of a profile according to its design features.
By class (by wall thickness)
Based on the thickness of the external and internal walls, profiles are divided into the following classes:
- A – the thickness of the outer walls is from 2.8 mm, the inner walls are from 2.5. The best indicators of strength and thermal insulation among all types.
- B – external walls from 2.5, internal walls from 2.0. Compared to class A, they retain heat worse and are more susceptible to deformation.
- C – all profiles that do not fit the parameters of classes A and B. There are no strict requirements for them. It is not advisable to use this type for window frames in apartments.
Width
The profile has different widths:
- 58 mm is the most common, most often installed in apartments and houses.
- 70 mm – profile width for windows in high-rise buildings or buildings located in cold climate zones.
- 90 mm – premium class with the best sound insulation and insulation characteristics. Piece products, which are not in the assortment of most companies that install plastic windows.
By number of cameras
The number of air chambers in it depends on the thickness of the profile:
- The 58mm has a maximum of three cameras.
- In a product 70 mm thick there can be from three to five.
- With a width of 90 mm, the norm is six chambers.
The corporate profile is uniform in structure and color. To ensure its authenticity, look for the manufacturer's markings on the inside. In addition to the company name, there should be numbers indicating the shift number, date of manufacture and other data related to production.
A few words about double-glazed windows
An important aspect is the number of chambers between the glasses in a double-glazed window. They should not be confused with profile cameras.
- For glazing of unheated rooms (balconies, summer terraces) single-chamber double-glazed windows are used.
- For living rooms, a double package is optimal - three glasses separated by two air chambers.
- In cold winter conditions, three-chamber structures are used. They have the best thermal insulation performance, but transmit less sunlight and weigh more. It makes sense to install such windows in the northern regions.
Read about all the intricacies of choosing the elements of a plastic window - profiles, double-glazed windows, seals, fittings - here.
Improved thermal insulation
It is impossible to properly insulate the seam at the junction of the window frame using polyurethane foam alone, so a support strip is needed.
For high-quality thermal insulation, it is recommended to choose a product with at least 2 air chambers and a wall thickness of 2 mm or more. For regions with cold winters, the best option is 3 cameras. A profile that is too narrow and thin will become the weakest point of the entire structure.
Practice shows that the stand itself, even with 3 chambers, does not provide adequate thermal insulation. Additional insulation and sealing are required, which will be discussed below.
What is it and why is it needed?
A stand profile is a plastic product through which it is possible to ensure reliable installation of a window structure.
Plastic is used to make additional profiles. Its color may differ by 1-2 tones from the window opening. Typically, this product is removed after installing the window, but if necessary, the element can be left and finished with plaster.
PVC stand is used for several reasons. Using the element, it is possible to greatly simplify the installation of the frame and reduce the risk of damage to it.
Additional reasons include the following.
- Reliable transportation. The use of a plastic stand prevents damage to the main structure during delivery of windows to the apartment.
- Window sill fastening. Installing an additional element before carrying out the main work significantly simplifies the process and allows it to speed up. In addition, the need for smaller work disappears.
- Sealing the assembly seam. Usually the seam that forms between the window and the wall is blown in with foam. However, the material is not able to eliminate the formation of a cold bridge. The stand profile will help solve this problem by ensuring complete sealing of the seam.
- Fastening the window structure. Thanks to the additional stand, it is possible to fix the position of the window at a level and preserve all the fittings.
The stand ensures reliable fastening of the ebb and also prevents leaks or blowing of slopes. Such an element is very important in the installation of window structures, because without it the work will take a long time and will require additional steps.
Functional purpose of straightening plates
Despite their simplicity, straightening plates perform a number of very important functions:
- Reliable and safe installation of double-glazed windows in the sash.
- Correct distribution of load on the ends of the glass unit and its wedging.
- Leveling dynamic and weight loads.
- Ensuring the nominal dimensions of the gaps between the sash rebate and the edge of the glass itself.
- Elimination of unwanted contact between the frame or sash rebate and the glass unit.
- Prevents the sash from being released in the event of a break-in attempt.
- Compensation for stresses arising from sudden temperature changes.
- The glass unit, wedged with the help of straightening plates, creates a single structure with the frame, eliminating further sagging of the sash.
Installation of straightening plates. Image from Gretsch-Unitas manual
Measuring the opening of a plastic window
First, we will tell you how to correctly measure openings for plastic windows in openings that have a “quarter” (a quarter is a protrusion from the outer sides of the window, half a brick to which the window frame is adjacent), in width.
- Since the window itself extends beyond the quarter by 1.5-2.5 cm from the side, you need to add 3-5 cm to the internal size of the window - this will be the correct size of the window you will buy.
- Explaining the above: the actual size of the window will be slightly wider than the one you measure inside (in contact with the side internal slopes).
- The width of the window will be less than the width of the opening with the window sill.
Now we measure the window height:
- If measured from the outside, then 2 cm is subtracted from the height between the outer upper slope and the base of the opening for the mounting foam.
- Next, 1.5-2.5 cm is added to this size so that the window can fit into the upper quarter.
- If you have a window with a sill and a window sill, then subtract 3 cm from the resulting size, because we need to find out exactly the size of the window.
When using a stand profile, the height and width of the window will be 3-8 cm smaller, which will be spent on mounting foam. Sometimes it happens that a quarter is more than 5 cm. In this case, an additional profile is used so as not to leave much space for the mounting foam.
Remember: the height of the plastic window should be less than the distance from the upper internal slope to the window sill. Together with the stand profile, the height of the window should be less than the distance from the upper internal slope to the lower side of the window sill.
If your opening does not have a quarter, then the correct measurement of a plastic window will be as follows:
- 3-8 cm is subtracted from the width of the opening.
- 5-6 cm is subtracted from the height of the opening, 3 cm of which will go to the stand profile, the rest to the mounting foam.
In conclusion, we draw your attention to the fact that walls often have curvatures that need to be taken into account. Based on this, windows need to be measured along their smallest sides (the widening of the wall can always be covered with foam)
If you do not plan to install plastic windows yourself, we recommend inviting a specialist to take accurate window measurements.
Windows without quarters
When deciding how to measure a window without quarters, you need to do a few simple steps.
The width of the future window is calculated after measuring its upper and lower parts. In this case, for the calculation, a smaller value is taken, from which 4 cm is subtracted for the placement of installation seams on both sides - the result is the width of the future product. It is worth considering that the greater the error when measuring the width in several places, the greater the number of centimeters that will need to be subtracted to determine the final size.
The size of the seams must be subtracted from the width of the window opening.
Calculating the height of a window product occurs according to the same rules as determining the width, only in this case, about 2.5 cm should be subtracted from the resulting value for the installation seam and 3 cm if a stand profile is installed.
Why do you need a stand profile?
A stand or substitution profile is an element that is placed at the bottom of the window product and has a height of 3 cm. An external drainage system made of powder-painted metal is attached to the stand profile. The ebb prevents the accumulation of precipitation and protects the installation seam from it.
A support profile is needed to secure the drainage system
On the inside of the room, a PVC window sill board is attached to the stand profile, which also hides the installation seam and makes the appearance of the window aesthetically pleasing.
A window sill is attached to the substitution profile from the inside
It is important to know that when installing a PVC window sill, its width will be 5 cm greater than a standard wooden one. At the customer’s request, the window sill can be made up to 70 cm wide, but it is necessary to take into account that a heating radiator does not pass under it, since a wide window sill will prevent proper warm air circulation
It is not recommended to install a window sill that is too wide above the battery
When calculating the width of the window sill, take into account its overhang, which cannot be less than 1 cm. The length of the window sill is equal to the width of the opening with access to the wall on both sides, which should not be less than 5 cm.
Features of installing slopes
The starting profile for PVC windows should be used according to the existing algorithm. Preparatory activities are required. During this process, you need to properly prepare the wall surface. Usually, when installing PVC windows, a gap is formed between the frame and the wall, which is sealed with polyurethane foam. Such foam is divided into two categories:
The first option is very easy to use and is equipped with a special nozzle tube for squeezing out the foam.
And the professional foam is equipped with a collet mount for installation on a special gun. The gap must be foamed from bottom to top very slowly. When the foam has hardened, cut off any remaining foam from the frame using a sharp knife.
The listed types of foam differ both in quality and cost. When doing repair work, it is best to use a professional option, despite the fact that it is not cheap.
Profile installation process
When you have foamed the joint between the wall and the window, and the foam has already hardened, you can begin to install the starting profile. The advantage of installing it is that you do not need to remove old finishing materials, primer, putty, etc.
Measure the height and width of the window opening with a tape measure, then measure and cut the profile to the required length. The edges of the profile joints should be cut at an angle of 45 degrees for better joining. You need to start installing them from the top of the opening, then put plastic parts on the sides, and finally - at the bottom of the window.
To make the installation as smooth as possible, draw a strip on the window frame with a building level, and then carry out the installation along it. PVC profiles are attached to the very edge of the window frame using self-tapping screws with a drill or liquid nails.
Self-tapping screws are screwed in every 20 cm along the entire length of the profile, and liquid nails are applied in a thin wavy strip along the entire length, then the structure is pressed firmly against the upper edge of the frame.
If a glue solution protrudes from under the profile, it must be removed immediately with a dry cloth. Once it dries, it will be more difficult to clean the frame. Some experts do not recommend using glue at all to install such structures. The fact is that over time it can peel off from the surface due to dampness or temperature changes, and this may lead to the need to dismantle the entire window.
Each type of design has its own characteristics of installation in the opening. For example, many people attach the F-profile to the outer ends of panels or plasterboard sheets with mounting adhesive, but it is recommended not to do this.
The PVC-based profile will adhere firmly to the slope panels without glue; it can be easily removed and put back if repairs need to be made.
https://youtube.com/watch?v=d3jUehO2JA0
Installation of sheathing
Next, you will need to install a sheathing in the window opening, which will act as a frame for the plastic panel. To do this, they usually take bars with a cross-section of 2 by 4 cm, but you can also take metal profiles. The choice depends on how suitable a particular material is under certain conditions.
So, the bars for installing the frame need to be well dried, otherwise, when drying, they can twist and bend, as a result, the entire structure can be deformed.
The wood will still need to be treated with a special antiseptic composition, since the space under the slopes may be exposed to high levels of dampness. The frame bars are attached along the outer edge of the opening with dowels and nails along the joint, maintaining a pitch of about 30-40 cm.
Installation of facing panels
The last stage of work is the installation of facing panels. It starts from the top of the opening. You need to measure its depth and length, then cut out a PVC panel of the required size. Then install one edge of the panel into the groove formed by the start-profile shelves. And attach the second, outer edge to the sheathing bars with mounting glue or self-tapping screws.
If you use self-tapping screws for fastening, then screw them into the end at an angle of 45 degrees. This way you will hide their caps under the trim. After installing the top panel, install two slopes on the sides in the same way. At the end of the work you need to install decorative trims. For them, you can use an F-profile, which is put on the outer end of the slopes.
Why is it more profitable to install windows with a stand profile?
A window sill profile is a profiled strip designed for fastening internal and external window sills. It is manufactured by extrusion, and is given a specific shape and cross-section. This support profile is an important structural element in the process of “warm” window installation. It is installed under the frame of the window structure, or rather directly under the window sill. Thanks to the specially formed surface of the window sill profile, it becomes possible to strengthen the window sill more reliably.
This type of stand profile can support the window along the entire length of the lower edge of the window frame. The window sill profile is designed to install the internal window sill in such a way that it provides effective support along the entire length of the plastic window and fits tightly to the insulating layer, namely: polyurethane foam, vapor barrier tape on the inside and vapor-permeable tape on the outside.
The modern market offers several options for additional profiles of this type, so the system can be successfully used with all types of window sills. To install external window sills made of steel or aluminum, it is better to use a profile version with a special “cap”. This solution facilitates the installation process and also protects against water flowing in at low tide. This model is especially suitable when using bottom drainage.
Installation
There are 2 ways to install a window sill profile.
Method No. 1
With this option, the window sill strip is installed first, and then the frame.
- A piece of the required size is cut.
- It is placed in the opening and leveled using a building level.
- A preliminary fitting of the window frame is done. If there is a gap between it and the top of the opening, it can be eliminated by raising the support bar. To do this, you can place pieces of timber under it.
- The space between the bar and the opening is filled with polyurethane foam.
Mr. Build recommends that to prevent the “bare” bottom profile from becoming a weak point of the entire structure in terms of freezing, it must be additionally insulated. To do this, extruded polystyrene foam, cross-linked polyethylene or other insulation in the form of a bar is inserted into one of its chambers.
